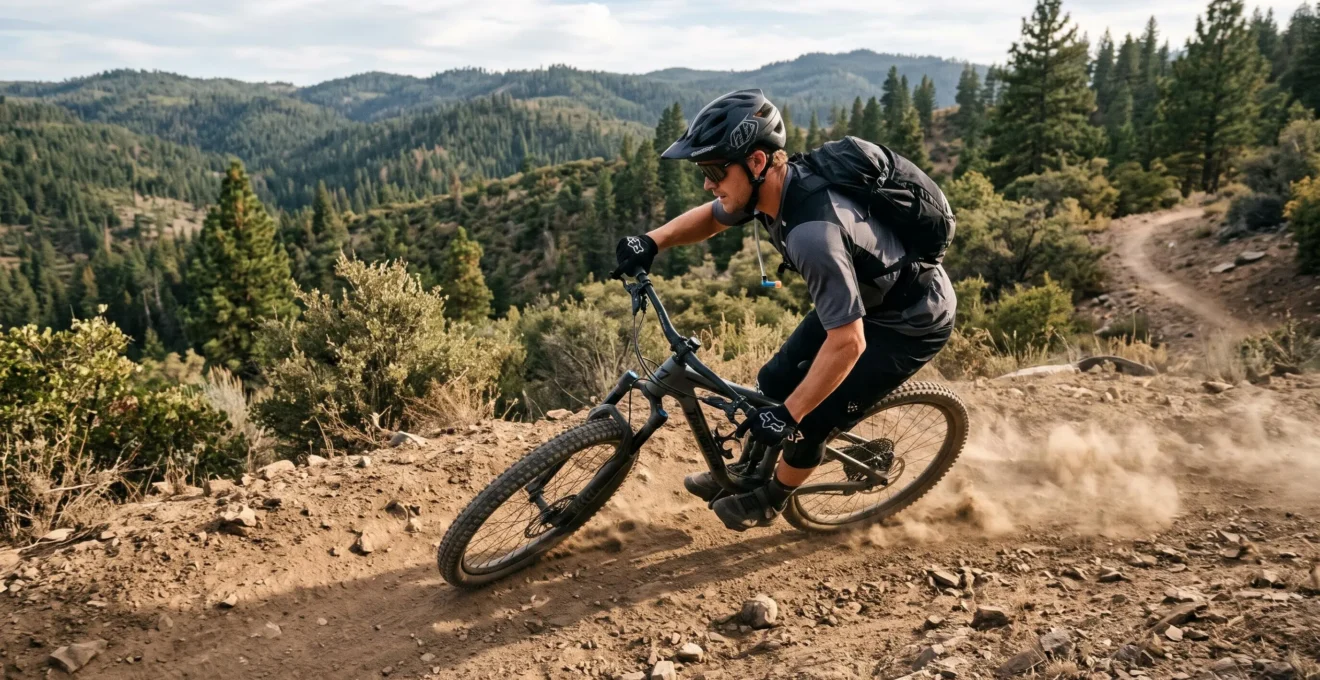
A hydration pack that feels secure on a steady climb can bounce, rub and trap heat when the trail turns rough. The solution is not necessarily to tighten every strap. Stability depends on how the load is positioned, how the harness fits your torso, how much the contents move and whether the back panel allows sweat to escape.
For mountain bikers and gravel riders, the best design is the one that carries the water and equipment required for the route without shifting excessively or making the back uncomfortably wet. A well-fitted hydration backpack offers convenient hands-free drinking and room for tools, while a hip pack reduces the area of direct contact with the back. Frame-mounted bottles can be a better option when the bike has sufficient capacity and refills are available.
There is no universally proven pack design that eliminates bouncing and sweating on every descent. Fit, load distribution, reservoir construction, clothing and weather all influence the result. The practical approach is to identify the source of movement first, choose the appropriate carrying format and test the complete setup with realistic weight before committing to a long ride.
The essentials for a stable, cooler ride
- Choose a pack with a harness and load arrangement that stay secure when the reservoir is full and partially empty; do not rely on strap tension alone.
- Use a hip pack or frame bottles when their lower back contact and carrying capacity suit the route and water-resupply options.
- Manage sweat, hose temperature and reservoir cleanliness separately: ventilation, insulation and drying solve different problems.
- Why Does a Hydration Pack Bounce Even When It’s Tightened?
- How to Adjust Chest and Waist Straps So the Pack Stops Moving Without Crushing Your Ribcage?
- Which Should You Choose: Hydration Backpack or Hip Pack for a 3-Hour Trail Ride?
- The Reservoir Cleaning Shortcut That Makes Water Taste Like Plastic for Weeks
- When Should You Ditch the Hydration Pack and Use Bottles Instead in Hot Weather?
- How to Prep an Insulated Reservoir With Ice Without Blocking the Hose?
- How to Choose Base-Layer Thickness for a 5–15°C Ride Without Overheating?
- How to Keep Water Cool for 3 Hours in 30°C Heat Without Adding More Than 200 g
Why Does a Hydration Pack Bounce Even When It’s Tightened?
A hydration pack can bounce even when its straps feel tight because the movement may come from the water shifting inside the reservoir, the harness moving against the torso or the load settling as the padding compresses. Tightening the straps addresses only some of these possibilities. Identifying the source before adjusting the fit is the more reliable starting point.
First, separate load movement from harness movement. Water is a moving mass, and its distribution changes as a rider accelerates, brakes, corners and rides over uneven ground. A reservoir that can move freely inside its sleeve may contribute to a shifting sensation even when the outer pack stays relatively close to the body. Internal attachment points, a secure reservoir sleeve and reservoir baffles are therefore useful design features to investigate. Their actual effectiveness depends on the pack and reservoir construction.
Second, check the harness itself. Shoulder straps and a waist belt must maintain their position without forcing the rider into a restrictive fit. A pack that is poorly matched to the torso can migrate during repeated body movements, while excess cargo space can let tools, clothing and other contents shift independently of the water.
Third, reassess the fit after riding for a while. Padding and soft materials can settle under load, changing how securely a pack sits. This is a possible fit variable to check rather than a universal explanation for every bouncing pack.
Over-tightening creates another problem: a back panel pressed firmly against the body can reduce the space available for airflow and make the rider feel hotter. Sweat can then accumulate beneath the contact area, increasing discomfort and potentially making the interface between clothing and harness feel less secure. More tension is not automatically more stability.
Before buying, inspect the reservoir attachment, harness adjustment range, hip-belt design and position of the loaded reservoir. A low reservoir is not automatically more stable than a higher one; the useful question is whether the whole load stays controlled during the movements typical of your riding.
A quick home test for pack movement
- Load the pack with the reservoir and equipment you would actually carry; record the approximate load configuration.
- Stand in front of a mirror and gently jump in place; note whether the whole harness moves or the contents shift inside it.
- Rotate your torso slowly in both directions; record any shoulder-strap migration or pressure points.
- Check the reservoir sleeve and internal attachment points; note any obvious freedom for the reservoir to move.
- Change one fit or loading variable at a time and repeat the test; keep a short record of which adjustment reduces movement without restricting breathing.
Once the harness, reservoir and contents have been checked separately, strap adjustment becomes much more targeted. The next step is to establish a fit that supports the load without compressing the ribcage or unnecessarily trapping heat.
How to Adjust Chest and Waist Straps So the Pack Stops Moving Without Crushing Your Ribcage?
The best strap adjustment keeps the loaded pack close to the body while preserving comfortable breathing and natural riding movement. Start with the hip belt and shoulder harness in the order specified by the pack manufacturer, then set the sternum strap without using it to compensate for a loose or poorly positioned load. A tight chest strap cannot correct every fit problem.
Backpack suspension designs do not all use the same adjustment sequence. For compatible Osprey backpacks, Osprey’s backpack fitting instructions recommend positioning and adjusting the hip belt first, followed by the shoulder harness, any applicable load lifters and the sternum strap. Follow the instructions for the specific cycling pack rather than applying a general backpack procedure blindly.
The hip belt helps distribute load toward the pelvis and can limit vertical movement when it fits correctly. Shoulder straps maintain contact with the torso and help control the upper part of the pack. The sternum strap helps manage the spacing of the shoulder straps; it should not be tightened until breathing feels restricted simply to stop a poorly supported pack from moving.
For descending, stability should come from the complete fit rather than a single strap. If the pack is designed to transfer some weight to the hips, make sure the belt remains correctly positioned when you lean forward and move the bike beneath you. Do not assume that tightening the belt further or loosening the chest strap is universally better; make small adjustments and verify that the pack remains controlled without interfering with breathing or movement.
Sweat management also begins with the interface between the pack and the rider. Look for a back panel with ventilation channels or a suspended mesh construction if reducing contact is a priority. These features may improve airflow, but their presence alone does not establish how much cooler a pack will feel. Fit the pack with the base layer you intend to wear and check for pressure, rubbing and trapped fabric.
A useful test is to ride a short, familiar route with the complete setup. Check whether the pack has migrated, whether the sternum strap restricts breathing and whether the back panel creates uncomfortable pressure. A finger-width gap should not be treated as a universal fit specification: the appropriate contact and clearance depend on the design.
Five checks before the next descent
- Load the pack realistically and follow its manufacturer’s fitting sequence; record the order used.
- Position the hip belt as instructed and check whether it stays in place; note any vertical movement.
- Adjust the shoulder harness and sternum strap without restricting breathing; record any pressure or discomfort.
- Inspect the back panel and base layer together; note where heat, rubbing or fabric folds develop.
- Complete a short test ride and recheck the fit afterward; record whether the pack migrated or needed readjustment.
If a correctly adjusted backpack still feels too hot or carries more volume than a short ride requires, changing the carrying format may be more effective than further tightening. A hip pack is one alternative, but its smaller capacity makes route planning essential.
Which Should You Choose: Hydration Backpack or Hip Pack for a 3-Hour Trail Ride?
For a three-hour trail ride, choose a hydration backpack when the route requires more water or space for tools, food and extra layers. Choose a hip pack when its smaller capacity meets the actual carrying requirement and you want to reduce direct contact with your back. Neither format is automatically more stable: the decision depends on fit, total load, bike setup and refill opportunities.
REI‘s hydration pack selection advice distinguishes hydration backpacks from waistpacks and identifies water capacity, storage volume, torso fit and reservoir features as important selection criteria. Mountain biking backpacks generally offer more space for equipment, while waistpacks provide a smaller carrying alternative.
The main trade-offs are practical rather than absolute. A backpack distributes its load across the torso and may accommodate a reservoir and additional gear. A hip pack concentrates the carried load around the waist and usually offers less cargo space. A poorly fitted example of either format can move uncomfortably, and the effect of load position varies with the design and the rider.
| Decision factor | Hydration backpack | Hip pack |
|---|---|---|
| Back contact | More direct contact across the back | Less direct back contact |
| Carrying capacity | Generally more room for water and equipment | Generally less room for water and equipment |
| Load position | Carried on the torso with support from the harness and, where fitted, hip belt | Carried around the waist |
| Cooling priorities | Back-panel ventilation and clothing compatibility matter | Less back coverage, but waist contact can still become uncomfortable |
| Best decision checkpoint | Confirm that the required water and gear fit securely | Confirm capacity and refill opportunities before reducing the load |
Three hours is a ride duration, not a reliable estimate of fluid needs. Actual requirements depend on exertion, temperature, humidity, individual sweat losses and access to water. Before choosing a smaller pack, establish the route’s refill points and whether they are dependable. Do not assume that a hip pack will hold enough water simply because the ride is relatively short.
There are alternatives between a full hydration backpack and a hip pack. Frame-mounted bottles can reduce the need to carry water on the body when the bike has suitable cage mounts. Pocket-mounted bottles can provide accessible water in compatible clothing, while a lighter vest-style system may offer front-pocket access and a closer fit. Each changes the balance between capacity, accessibility, back contact and carrying comfort rather than eliminating every drawback.
For a hot three-hour ride, a mixed setup can be worth considering: carry the main water supply on the frame where practical and reserve a small pack for equipment or additional water. The next question is how to keep any reservoir and hose clean, since persistent unpleasant taste can undermine even a well-fitted system.
The Reservoir Cleaning Shortcut That Makes Water Taste Like Plastic for Weeks
A persistent plastic-like taste after using a hydration reservoir can come from several sources, including drink residue, inadequate cleaning, moisture left during storage or the materials themselves. Rinsing the reservoir alone may not remove all residue, particularly inside the hose and bite valve. Complete cleaning and drying are the practical starting points, although they cannot guarantee that every material-related taste will disappear.
Water is not the only thing that passes through a hydration system. Electrolyte drinks and flavored mixes can leave residue in the reservoir, hose and valve. If the system is rinsed quickly and sealed while damp, the remaining moisture and residue can contribute to persistent odor or taste. This does not prove that every case is caused by biofilm, and it does not rule out a taste originating in the material itself.
The key habit is to dry the entire system thoroughly. CamelBak‘s reservoir cleaning and drying instructions recommend cleaning the reservoir, hose, bite valve and removable components with mild dish soap or an approved cleaning tablet. The reservoir should remain open so air can circulate, while the hose should drain with both ends open. Do not seal or store the system while moisture remains.
For routine maintenance, use warm water and a mild dish soap or a cleaning tablet approved for the reservoir. Circulate the cleaning solution through the hose and bite valve, use a suitable tube brush where appropriate, and clean removable valve components only as permitted by the manufacturer’s instructions. Rinse thoroughly so that the cleaning solution itself does not leave an unwanted taste.
Do not assume that stronger chemicals will produce a better result. Reservoir materials and valve components differ, so follow the manufacturer’s guidance before using bleach, baking soda, a dishwasher or any other treatment. The available maintenance guidance does not establish a universal bleach dilution, a single treatment suitable for every reservoir or proof that particular flavored drinks permanently colonize the lining.
Before buying a replacement, inspect whether the hose disconnects easily and whether the bite valve can be removed for cleaning. Accessible components can make maintenance simpler, but a detachable hose does not itself guarantee cleanliness. If an unpleasant taste persists after thorough cleaning and complete drying, check the product instructions and consider whether the reservoir or its components need replacing.
A clean reservoir makes drinking more pleasant, but it does not solve the heat trapped beneath a backpack. When temperatures rise, the bigger decision may be whether water should be carried on the back at all.
When Should You Ditch the Hydration Pack and Use Bottles Instead in Hot Weather?
Frame-mounted bottles are worth prioritizing in hot weather when the bike can carry enough water for the route and reliable refill points are available. They remove the need for a reservoir against the back and can reduce the amount of equipment worn on the torso. A hydration pack remains useful when hands-free drinking, additional capacity or technical terrain makes it the more practical option.
A pack creates a contact area between the rider’s back, clothing and back panel. That area can feel hot and damp during sustained exertion, particularly when airflow is limited. The physiological reason is straightforward: sweat evaporation helps dissipate body heat, but high temperature and humidity can limit evaporative cooling. The Centers for Disease Control and Prevention discusses these risks in its CDC Yellow Book chapter on heat and cold illness, which includes strenuous outdoor activities such as biking.
That guidance does not directly compare hydration backpacks with bottles, so it cannot establish that bottles always produce better thermal outcomes. However, removing a large back-contact surface is a reasonable equipment choice to test when trapped heat and a soaked jersey are the main complaints. Results depend on the rider, clothing, conditions and carrying arrangement.
Use four checkpoints before switching:
- Refill access: Identify reliable water stops and the distance between them.
- Bike capacity: Check whether the frame can accommodate the required bottles without interfering with riding or other equipment.
- Terrain: Consider whether frequent hands-free drinking is important on technical sections where handling demands are high.
- Duration and conditions: Estimate the actual fluid requirement for the route, effort and weather rather than assuming a fixed amount for every three-hour ride.
A bottle-only setup can fail if the available carrying capacity is smaller than the water requirement. Visible, accessible bottles may also encourage some riders to drink more frequently, while others find a hose easier to use without interrupting their riding rhythm. These are individual behavior differences, not guaranteed effects of either system. The most useful setup is the one that makes drinking practical while keeping the total water supply adequate.
For many rides, a hybrid arrangement offers a workable compromise: carry most water on the frame where space allows, then use a small hip pack or compact bag for tools, food and a reserve. This reduces back coverage without making the ride dependent on bottle capacity alone. In hot conditions, plan for appropriate hydration and avoid forcing excessive fluid intake; individual losses and environmental conditions matter.
Once the carrying format is settled, the remaining challenge is keeping water pleasant to drink in the heat. Cooling a reservoir and preserving water flow through its hose are related but distinct tasks.
How to Prep an Insulated Reservoir With Ice Without Blocking the Hose?
To reduce the chance of an ice-related blockage, protect the hose and its connections from being packed with ice, preserve a clear path for water to reach the outlet and test the setup before a long ride. Add water before ice so the reservoir can be filled and checked, then purge air from the hose according to the system’s normal operation. No ice arrangement guarantees uninterrupted flow in every condition.
The hose and quick-disconnect fittings deserve particular attention because they are narrow parts of the system. Ice placed directly against an outlet or water left in a vulnerable section can interfere with drinking. Large pieces of ice may melt more slowly than small cubes under comparable conditions, but their size also affects how much liquid the reservoir can hold and how easily the remaining contents move.
Choose the ice format around the ride rather than following a universal fill ratio. Large pieces can reduce the amount of initially available liquid; smaller cubes offer a different balance between cooling surface and melting. An ice-and-water mixture may also work, provided the reservoir and drinking system are designed to accommodate the arrangement. Leave enough liquid for the actual route and do not assume that the coldest starting temperature is more important than adequate water capacity.
Before setting off, check that the reservoir outlet and quick-disconnect are properly connected, route the hose so it is not kinked, and confirm that water flows through the bite valve. During the ride, follow the manufacturer’s instructions for clearing the hose. Blowing water back into the reservoir after drinking may help remove water from the hose in some setups, but it should not be treated as a guaranteed anti-freeze method for every system.
Insulated reservoirs and hose sleeves can help manage temperature, but they add bulk and may change how the pack conforms to the back. A less conforming load can feel different during fast turns and descents. Check both water flow and pack stability rather than optimizing cooling in isolation.
Test the arrangement on a short ride before relying on it in remote terrain. Check the flow immediately after filling, again after the pack has been carried for a while and whenever drinking becomes difficult. If the hose blocks, stop and inspect the system safely rather than pulling hard on the valve while riding.
Cold water is only one part of comfort. The layer beneath the pack also determines how sweat feels against the skin, particularly when a warm climb is followed by a cooler descent.
How to Choose Base-Layer Thickness for a 5–15°C Ride Without Overheating?
For rides between 5°C and 15°C, choose a base layer according to exertion, moisture management and the conditions expected on descents, rather than temperature alone. Under a hydration pack, the fabric must work beneath an additional contact layer, so a comfortable jersey without a pack may feel very different when the back panel covers it. Test the complete clothing-and-pack combination before a long ride.
Climbing effort can raise body heat even when the air is cool, while a descent can expose a damp back to colder airflow. This makes the climb-to-descent pattern important. A rider spending most of the outing climbing may prioritize moisture handling and ventilation differently from someone riding exposed, fast descents in cooler conditions.
Base-layer thickness is only one variable. A close-fitting layer with minimal folds can reduce bunching beneath shoulder straps and a back panel. Loose material may rub, form pressure points or hold moisture in contact with the body. Check the fit while wearing the loaded pack, not just while standing in front of a mirror without equipment.
Fabric selection also involves trade-offs. Merino wool, synthetic fabrics and blended materials are all used in technical clothing, but the source evidence available for this article does not establish a universal ranking for their drying speed, odor retention, damp comfort or performance beneath a hydration pack across this temperature range. Those outcomes depend on the garment construction, the rider and the conditions. Avoid choosing a material solely on the assumption that it will eliminate a soaked back.
Instead, compare complete garments under realistic conditions. Consider whether the layer remains comfortable when damp, whether it dries during lower-effort sections and whether the pack straps cause rubbing. If the weather may vary substantially, plan clothing that can be adjusted without compromising pack fit or safe riding.
Do not deliberately pre-wet a base layer as a general solution for sweat or pack stability. The available evidence does not establish that doing so improves fit, reduces bouncing or provides a reliable cooling benefit under a hydration pack. Start with a dry, correctly fitted layer and assess how it performs on the route.
Use a short test ride that includes a sustained effort and a descent. Check the back, shoulders and waist after removing the pack, noting where dampness and discomfort concentrate. The aim is not to guarantee a dry back in every condition; it is to reduce avoidable discomfort without overheating during effort or becoming uncomfortably cold when the pace changes.
Once the pack, hose and clothing are working together, a final cooling decision remains: how to keep water cool for several hours without adding unnecessary weight or sacrificing the amount available to drink.
Key takeaways before choosing a cooling strategy
- Start with chilled water and a reservoir that fits securely; avoid sacrificing required liquid capacity for extra ice.
- Reduce unnecessary heat exposure to the reservoir and hose while preserving a clear drinking path and comfortable pack fit.
- Test the setup in the expected conditions, because water temperature at the bite valve can differ from the temperature inside the reservoir.
How to Keep Water Cool for 3 Hours in 30°C Heat Without Adding More Than 200 g
Keeping water cool for three hours at 30°C without adding more than 200 g of equipment is a design constraint, not a guaranteed performance result. The most useful starting points are the temperature of the water before departure, the reservoir’s exposure to direct sun, how much air remains inside and how intensely the rider is exercising. These factors affect the outcome, and no universal method can guarantee a particular drinking temperature for every pack.
Start by chilling the empty reservoir before filling it, using a method compatible with the manufacturer’s instructions. Cold starting water can also help, while freezing part of the water volume is an option to test when the reservoir and filling method permit it. Frozen water does not add mass beyond the water already being carried, although it reduces the amount immediately available as liquid until it melts.
Protect the reservoir and hose from unnecessary sun exposure. Route the hose beneath a shoulder strap where it remains accessible and is less exposed to direct sunlight, and consider a compatible reflective or insulated sleeve if the additional weight fits the limit. These measures address heat exposure but do not establish how many degrees they will save or whether the water will remain cool for the full three hours.
Reservoir fill level also matters to the practical setup. A large air gap changes the amount of water and air inside the pack, but the evidence available here does not quantify the effect of different fill ratios on warming. Do not overfill with ice at the expense of the fluid needed for the ride, and do not treat maximum ice volume as the objective. The useful goal is an acceptable temperature while retaining sufficient drinkable water.
The hose deserves its own check. Water sitting in an exposed hose can warm even when the reservoir contents remain cooler. Consequently, the first sip at the bite valve may not reflect the temperature of the bulk water. Where the system’s instructions permit it, clearing the hose after drinking may reduce the amount of water left in the exposed section, but it does not guarantee that the next sip will be cold.
Heat safety matters more than achieving a specific water temperature. The CDC guidance discussed earlier identifies strenuous activity in hot conditions as a risk factor for heat-related illness. Individual sweat losses vary considerably, and both dehydration and excessive fluid intake can be dangerous. The 30°C, three-hour scenario should therefore be treated as an equipment-planning example, not as a universal hydration prescription.
Before relying on a cooling method, compare the pack’s starting and end-of-ride performance. Keep the equipment load within the intended limit and note whether the reservoir and hose behave differently. This makes it possible to judge whether a sleeve, pre-chilling or a frozen portion of the water provides a worthwhile benefit in the actual riding conditions.
A repeatable water-cooling test
- Record the forecast temperature, approximate ride duration and the amount of water required for the route.
- Prepare the reservoir using manufacturer-compatible pre-chilling and filling methods; record the starting setup and added equipment weight.
- Route and secure the hose, checking that the bite valve works and that the setup does not interfere with pack fit.
- Repeat the setup on a representative ride and record the reservoir and bite-valve water temperatures separately at the start and finish.
- Compare the result with the required fluid capacity and weight limit; retain only measures that provide a useful benefit without compromising water availability or stability.
For the next ride, begin with a secure fit, a clean and fully dried reservoir, and a realistic plan for water capacity and refills. Test cooling changes before relying on them in hot or remote conditions, and prioritize adequate hydration, comfortable breathing and controlled pack movement over any single equipment feature.
Is a hip pack always more stable than a hydration backpack on technical descents?
No. A hip pack carries its load around the waist and reduces direct back contact, but its stability still depends on fit, load and design. A well-fitted backpack may be the better option when more water or equipment is required. Compare the complete loaded setup on representative terrain rather than assuming one format is universally superior.
How tight should a hydration pack’s sternum strap be?
It should help keep the shoulder straps positioned without restricting comfortable breathing. Follow the manufacturer’s fitting instructions, and do not use the sternum strap as the primary solution for a loose hip belt or shifting load. Recheck the fit with the pack loaded and while moving naturally.
Can an insulated reservoir stop water from warming in hot weather?
Insulation can help manage heat transfer, but it does not guarantee a particular water temperature for a set duration. Starting temperature, sunlight, fill level, hose exposure and riding conditions all matter. The hose may warm independently of the reservoir, so test both under realistic conditions.
Why does my hydration pack still smell or taste strange after rinsing it?
Rinsing alone may leave residue in the reservoir, hose or bite valve, especially after flavored or electrolyte drinks. Clean all compatible components with an approved method, rinse thoroughly and allow the reservoir and hose to dry completely before storage. If the taste persists, consult the manufacturer’s instructions and consider whether the material or a component needs replacing.
Should I use bottles instead of a hydration pack for a three-hour ride in 30°C heat?
Use bottles when the bike can carry the required water and the route offers suitable refill opportunities. A pack may still be more practical when hands-free access or additional capacity matters. Plan around the actual conditions and individual fluid needs rather than relying on ride duration alone, and avoid forcing excessive fluid intake.