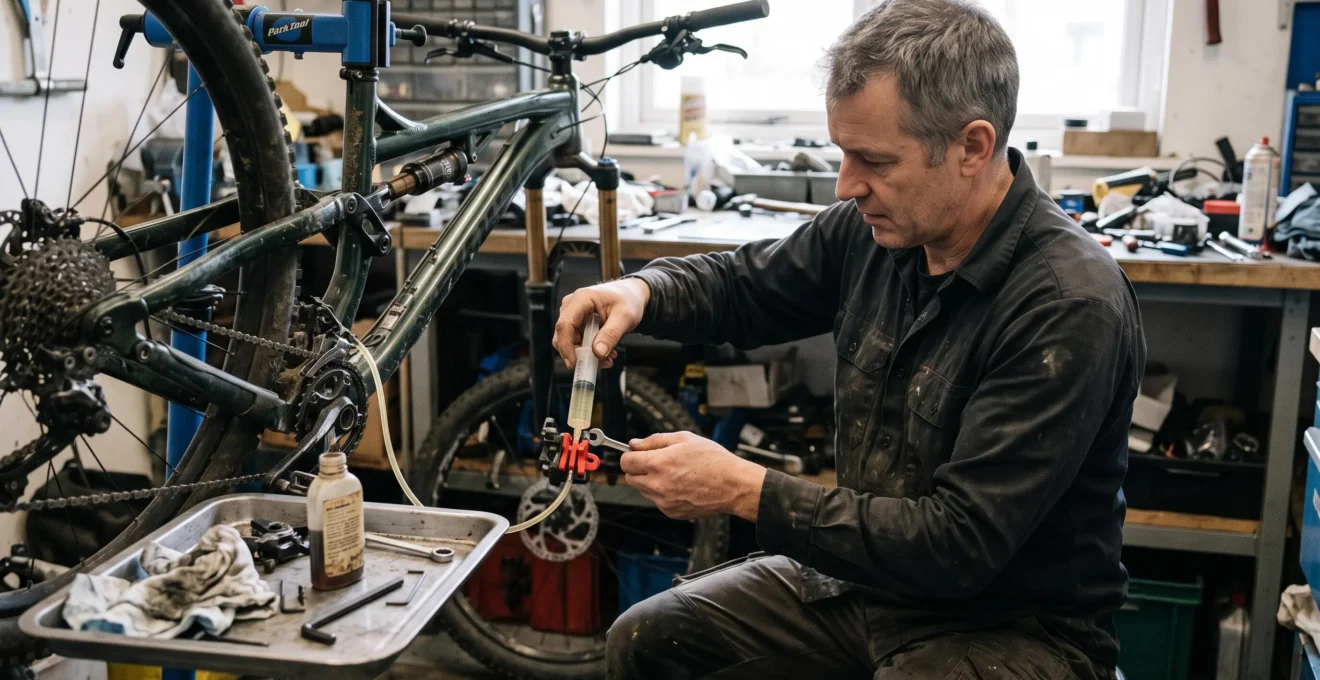
A hydraulic brake lever that feels firm immediately after bleeding but turns spongy again a week later is telling you something important: the original problem may not have been completely resolved. Trapped air, an improperly seated hose connection, inconsistent caliper piston movement or damaged internal seals can all affect lever feel.
Flushing mineral oil brakes correctly means more than replacing old fluid. The work must preserve fluid compatibility, remove trapped air through the manufacturer’s specified bleeding sequence, and protect the friction surfaces from contamination. A clean flush cannot compensate for a leaking hydraulic connection or a failing master cylinder.
For home mechanics working on Shimano, Tektro or other mineral-oil hydraulic disc brakes, the safest approach is to diagnose the symptoms first, follow the exact model-specific service procedure and verify brake function before riding. The same principles also matter when preparing a bike for long mountainous descents, where heat exposes weaknesses that may remain unnoticed on short rides.
Mineral oil brake flushing: the essentials
- Recurring sponginess needs diagnosis. Inspect fittings, seals and caliper piston movement before repeating the same bleed.
- Prevent contamination before opening the circuit. Remove the wheel and pads, install the correct bleed block and use dedicated, compatible equipment.
- Validate the complete brake system. Check for leaks, consistent lever resistance, correct pad condition and reliable stopping performance before returning to demanding terrain.
- Why Does a Brake Lever Feel Spongy Again After a Fresh Bleed?
- How to Flush Mineral Oil Brakes Step by Step Without Getting Oil on Pads?
- Quick Lever Bleed or Full Flush When the Bite Point Wanders?
- The Brake Fluid Mix-Up That Can Destroy Seals and Kill Braking Power
- How Often Should You Flush Mineral Oil Brakes If You Ride Long Descents?
- How to Bed In Disc Brake Pads Properly Without Glazing Them?
- When Should You Replace Disc Pads Before a Multi-Day Trip to Avoid Metal-on-Metal?
- How to Get Consistent Brake Bite on Long Descents Without Lever Pull to the Bar
Why Does a Brake Lever Feel Spongy Again After a Fresh Bleed?
A brake lever can become spongy again after bleeding because air remains trapped, air enters through a compromised hydraulic connection, or a mechanical component is not operating consistently. The time it takes for symptoms to return provides a useful clue, but does not conclusively identify the failed part. Repeated bleeding without checking the brake hardware can leave a dangerous fault unresolved.
Start by separating excessive lever travel from inconsistent braking bite. They can feel similar at the handlebar but have different causes.
- Trapped air: compressible gas in the hydraulic circuit produces a softer, less predictable lever feel. Air may remain in a high hose section, lever chamber or caliper after an incomplete bleed.
- Hydraulic pressure loss: a compromised hose fitting, damaged seal or worn master cylinder can prevent the circuit from maintaining normal pressure.
- Inconsistent piston movement: caliper pistons affected by dirt or restricted movement may advance and retract unevenly, changing the amount of lever movement needed to engage the pads.
The third possibility is often overlooked. SRAM’s disc brake troubleshooting instructions identify dirt and restricted caliper piston movement as causes of uneven pad advancement and retraction. That means another bleed is not necessarily the correct response to a changing bite point.
The timing of the symptom can help organize an inspection:
| Observed symptom | Possible explanation | Next inspection |
|---|---|---|
| Soft immediately after bleeding | Air not completely removed, or bleeding procedure incomplete | Bleed sequence, hose orientation and syringe air removal |
| Initially firm, then soft after several rides | Possible trapped-air migration or hydraulic connection fault | Bleed ports, hose unions and external leakage |
| Lever slowly moves toward the bar under steady pressure | Possible hydraulic pressure loss or internal seal fault | Master cylinder and complete hydraulic circuit |
| Bite point changes mainly when hot | Heat-related hydraulic or mechanical behavior | Pad condition, piston movement, fluid condition and braking technique |
| Weak stopping power with a firm lever | Possible pad contamination, glazing or other friction problem | Pads and rotor rather than bleeding alone |
A sustained lever-pressure test is useful for detecting obvious pressure loss. With the bicycle stationary, apply firm, steady pressure and observe whether the lever continues moving. A noticeable loss of resistance is a reason to stop using the brake and investigate. Passing the test does not prove that the system contains no air or that every seal is sound.
During bleeding, avoid rapid, uncontrolled lever pumping. It can disturb bubbles and make the process harder to assess. Follow the manufacturer’s prescribed sequence of controlled lever movements instead.
Before attempting another flush, examine the hose-to-lever connection, hose-to-caliper connection and bleed-port closures. Look for residue, damage and incorrectly seated components. Do not assume every damp or discolored area proves a leak; clean and inspect according to the service instructions.
If a fresh bleed remains effective only briefly, the correct next step is to establish why pressure or lever consistency has changed. Once the hardware is known to be sound, a controlled full flush can address remaining fluid and trapped-air problems.
How to Flush Mineral Oil Brakes Step by Step Without Getting Oil on Pads?
To flush mineral oil brakes without contaminating the pads, remove the wheel and brake pads before opening the hydraulic circuit, install the specified bleed block and keep the rotor away from exposed fluid. Use only manufacturer-approved mineral oil and follow the model-specific bleeding sequence. Finish by checking for leaks, correct lever resistance and safe braking performance.
The most important preparation takes place before the first bleed fitting is opened. Oil on a rotor can often be removed using an approved cleaning method, but oil absorbed into pad material can compromise braking and require pad replacement.
Prepare a clean work area with the appropriate model-specific bleed kit, approved mineral oil, suitable tools, a collection container, clean lint-free cloths and any required protective equipment. Keep all dedicated brake-fluid equipment free from residues of incompatible liquids.
- Identify the brake and its required fluid. Read the model number and verify the manufacturer’s service manual. Never select fluid based on the brand name alone.
- Position and protect the bicycle. Secure it in a stable stand and set the lever orientation required by the manual. Remove the relevant wheel. Keep the rotor away from the bleed area and protect it from accidental contact.
- Remove the brake pads. Handle the pads by their backing plates and store them in a clean, dry place away from oil and tools.
- Install the correct bleed block. Use the spacer specified for the caliper to maintain the appropriate piston position during bleeding.
- Prepare the hydraulic circuit. Fit the prescribed syringe, funnel, adapter or collection equipment. Remove air from syringes and tubing before connecting them.
- Replace the fluid using the specified flow sequence. Transfer fluid through the brake according to the manufacturer’s procedure, preventing the reservoir or syringe from drawing in air. Continue replacement as directed if expelled oil is discolored.
- Complete the air-removal and closure steps. Perform the required lever and caliper operations, close the bleed ports and apply only the model-specific tightening requirements.
- Clean, reassemble and test. Check for leaks, remove the bleed block, reinstall uncontaminated pads and the wheel, then verify brake operation before riding.
Different systems use different procedures. A caliper-side syringe can move fluid toward the lever, while some systems use other syringe arrangements or lever-mounted funnels. Gravity-based fluid replacement may be suitable for certain designs, but it is not a universally approved substitute for a complete manufacturer-prescribed bleed.
The SRAM mineral-oil disc brake service manual illustrates why these details matter. For the covered brakes, SRAM requires wheel and pad removal, a bleed block, specified mineral oil and a controlled syringe procedure that removes air from the hydraulic system.
SRAM also directs technicians to continue removing discolored old oil and restart with fresh fluid when necessary. Comparing expelled fluid with fresh oil can help identify remaining old fluid, although color alone cannot establish hydraulic performance or fluid chemistry.
Five checks before declaring the flush complete
- Confirm fluid compatibility: record the brake model and exact approved fluid on the service checklist.
- Verify contamination protection: confirm both pads were kept away from oil and inspect the rotor for visible residue.
- Inspect hydraulic connections: check each serviced port and hose fitting for leakage after closure.
- Verify lever behavior: perform a stationary sustained-pressure check and record whether resistance stays consistent.
- Confirm final braking function: with the wheel and pads correctly installed, verify free rotor rotation, pad engagement and controlled stopping in a safe area.
If mineral oil reaches the rotor, clean it using the approved procedure, commonly involving isopropyl alcohol and a clean cloth. If pads become oil-contaminated, replacement is the dependable safety-first choice. Heating or baking contaminated pads is not a manufacturer-supported recovery method in the supplied technical documentation; sanding does not reliably remove absorbed oil either.
A completed flush should leave the hydraulic system properly sealed and the friction surfaces uncontaminated. If the lever still behaves unpredictably, the next decision is whether further air removal is appropriate or the system requires deeper inspection.
Quick Lever Bleed or Full Flush When the Bite Point Wanders?
A quick lever bleed may be appropriate when the manufacturer permits it, the fluid is otherwise serviceable and the problem is limited to a small amount of air near the lever. A full flush is more appropriate when fluid replacement is needed or the prescribed complete bleeding procedure has not been performed. Neither method repairs worn seals or sticking pistons.
The choice depends on the maintenance history, observed symptoms and how the particular hydraulic system is designed.
| Condition | Quick lever bleed | Full flush or further service |
|---|---|---|
| Recently serviced brake, suspected air near the lever | Potentially appropriate if specified by the manufacturer | Not automatically necessary |
| Old or visibly discolored fluid | Does not replace the fluid throughout the system | Full fluid replacement is more appropriate |
| Repeated sponginess after previous bleeding | May temporarily change lever feel | Inspect hydraulic seals, fittings and piston movement first |
| Known air entry or system opened at the caliper | May not remove air throughout the circuit | Follow the manufacturer’s complete bleeding procedure |
| Lever sinks under steady pressure | Not an adequate remedy without diagnosis | Remove from service and investigate pressure loss |
Air does not always remain beside the lever reservoir. Hose routing, component orientation and the geometry of the caliper can allow air to collect in other areas. A lever-only operation may therefore leave the actual pocket of trapped gas untouched.
Some riders try turning a bicycle upside down or tapping the hose to see whether lever feel changes. Such movement can redistribute trapped air, but it is not a validated test of its location. It should not replace a proper bleeding procedure or be used to declare the brake safe.
The repeated-bleed trap is particularly important. If the same brake needs frequent attention for identical symptoms, stop treating each episode as an isolated bubble. Inspect piston retraction, hose fittings, bleed-port seals and master-cylinder behavior.
Hypothetical example: preparing for a mountain trip
A rider notices a slightly softer lever immediately before an ordinary local ride. The brake was recently serviced and has no visible leaks. A model-approved lever bleed might be reasonable after the cause has been assessed and proper function is restored.
The same rider preparing for several days of sustained mountainous descents should not rely on repeated temporary improvements. A complete inspection, appropriate fluid service and controlled test ride provide a more suitable preparation.
A quick bleed is a legitimate maintenance operation, not a substitute for diagnosis. The correct question is whether it addresses the identified fault.
Once the appropriate service method has been selected, the next critical safeguard is choosing the correct fluid. Getting that wrong can damage components that an otherwise flawless bleed cannot restore.
The Brake Fluid Mix-Up That Can Destroy Seals and Kill Braking Power
Mineral oil and DOT hydraulic brake fluids are not interchangeable. Their formulations require compatible seals and hydraulic components, and using the wrong fluid can cause serious internal damage or loss of braking performance. Do not assume every brake made by the same company uses the same liquid. Confirm the exact model and fluid specification before opening a bottle.
Many bicycle hydraulic brakes use either manufacturer-specified mineral oil or a specified DOT brake fluid, such as DOT 4 or DOT 5.1. DOT 4 and DOT 5.1 are glycol-based formulations; their fluid properties and component compatibility differ from mineral-oil systems.
Elastomer seals are selected for the fluid they must contact. An incompatible fluid can damage or alter those materials, compromising the pressure seal and brake operation.
For example, SRAM’s DB brake service manual explicitly prohibits DOT 4 and DOT 5.1 in the documented mineral-oil DB systems. If DOT contamination occurs, SRAM requires replacement of the complete brake system, including the lever and caliper. Simply replacing the fluid or fitting new seals is not the manufacturer’s prescribed remedy for those models.
The mix-up can happen without anyone deliberately pouring from the wrong bottle. Consider three common workshop risks:
- A mineral-oil bottle and a DOT-fluid bottle are stored together without clear identification.
- A syringe or bleed hose used for DOT fluid is subsequently reused for mineral oil.
- A second-hand brake is serviced without checking its exact model and hydraulic fluid requirements.
The safe workshop rule is straightforward: keep dedicated, clearly labeled bleeding equipment for each incompatible fluid type. Do not rely on rinsing an old hose or syringe to remove uncertain residues. SRAM specifically prohibits reusing its mineral-oil bleeding syringes after contact with another fluid.
Brand identification alone is insufficient. SRAM has produced both DOT and mineral-oil brake families. Likewise, Shimano’s documented hydraulic systems may require different specified oil formulations that must not be mixed.
For an unfamiliar or second-hand brake, inspect the reservoir-cap markings, lever body and manufacturer model identification. Check the official documentation for the exact configuration. A missing label is not evidence that a familiar-looking fluid is suitable.
Warning signs after a suspected mix-up can include abnormal lever return, fluid leakage, unusual piston behavior or a sudden deterioration in braking performance. These symptoms are not specific enough to prove chemical contamination, but they warrant immediate attention.
If incompatible fluid may have entered the system, stop riding and obtain the applicable manufacturer repair instructions or qualified service assessment. Once compatibility has been established, future maintenance intervals can be planned around actual riding conditions.
How Often Should You Flush Mineral Oil Brakes If You Ride Long Descents?
Mineral oil brake flushing frequency depends on the brake manufacturer’s recommendations, riding intensity, braking heat and evidence of deteriorating performance. Frequent long descents, heavy loads and demanding terrain can justify more frequent inspections and potentially earlier service. There is no single replacement interval that applies to every mineral-oil brake system, and calendar age alone cannot diagnose fluid condition.
Long descents place sustained demands on brake components. Friction heats the pads and rotor, and some of that energy travels into the caliper and hydraulic fluid. Excessive heating can contribute to unstable braking, especially when combined with trapped air, inappropriate fluid or other mechanical faults.
Mineral oil should not be described as absorbing atmospheric moisture in the same way as glycol-based DOT brake fluid. Water contamination can still be relevant in a mineral-oil hydraulic system, but its behavior is different. Do not assume fluid boiling point declines predictably merely because the oil has been in service for a particular number of months.
Every other year
SRAM’s stated bleeding recommendation for its covered mineral-oil brakes, with more frequent bleeding recommended for frequent riding, aggressive terrain involving heavy braking or sub-freezing conditions. This is not a universal interval for all manufacturers.
Manufacturer guidance: SRAM mineral-oil MTB disc brake manual.
For demanding riding, inspect the system before a fixed deadline becomes the sole decision criterion. Useful observations include:
- Whether the lever engagement point remains consistent from one ride to the next.
- Whether lever travel increases during sustained braking.
- Whether the oil has become visibly discolored compared with fresh approved fluid.
- Whether any hose fittings, reservoir seals or caliper components show leakage.
- Whether the pads and rotor can withstand the planned riding conditions.
Visible darkening or cloudiness can justify further inspection and fluid replacement where appropriate. However, color is not a laboratory fluid-quality measurement, and clear oil does not guarantee freedom from air, moisture or other contamination.
Bikepacking equipment, additional bicycle weight, long steep routes and repeated brake dragging can increase thermal demands. Rain and water crossings also make inspection important, although wet riding does not automatically mean water has entered a properly sealed hydraulic circuit.
Keep a small maintenance log with the service date, brake model, approved fluid, approximate riding conditions and any lever symptoms. Record whether the pads were replaced and whether the brake passed its post-service function check.
For a multi-day mountain trip, leave enough opportunity for maintenance and a controlled test ride before departure. Avoid making an unverified hydraulic repair immediately before a demanding descent.
Fluid maintenance is only one part of descent readiness. Reliable stopping also depends on the friction surfaces, particularly how freshly installed pads interact with the rotor.
How to Bed In Disc Brake Pads Properly Without Glazing Them?
Disc brake bedding establishes an even transfer layer of pad material on the rotor and helps the pads develop consistent braking performance. The process involves repeated controlled decelerations, progressively increasing braking load without locking the wheels or holding the brakes continuously. Follow the pad or brake manufacturer’s instructions, then allow the system to cool before demanding riding.
New brake pads and rotors do not necessarily deliver their final friction characteristics on the first stop. During bedding, contact between the surfaces establishes a more consistent braking interface.
Excessively aggressive braking before the surfaces have bedded can create uneven deposits or undesirable surface conditions. Prolonged brake dragging may also generate unnecessary heat.
For the systems covered by SRAM’s mineral-oil manual, the recommended bedding procedure consists of approximately 20 moderate-speed decelerations followed by 10 decelerations from a higher speed. The rider should slow progressively without locking the wheels and allow the brakes to cool afterward.
A practical sequence is:
- Choose a safe, traffic-free area with sufficient room to accelerate and slow down repeatedly.
- Confirm correct wheel installation, pad retention and lever function before moving.
- Perform progressive moderate-speed decelerations, releasing the brake between repetitions instead of dragging it continuously.
- Continue with the higher-speed decelerations only where conditions allow safe control and the manufacturer specifies them.
- Allow the brakes to cool and evaluate stopping performance before normal riding.
A quiet, open road or suitable controlled area is preferable to a steep descent. A stationary trainer generally cannot reproduce the load, airflow and normal wheel-braking conditions of an actual bedding procedure. Simply squeezing the brakes while the bicycle is stationary does not bed the friction surfaces.
Glazed pads may appear unusually smooth or shiny and can be associated with squealing or reduced friction. Those observations are clues rather than a definitive diagnosis: contamination, rotor deposits and other faults can produce similar symptoms.
Light resurfacing is sometimes discussed as a remedy for glazing, but sanding is not a reliable solution for oil contamination. Any resurfacing should be performed only where the pad manufacturer permits it, with the remaining material and surface condition assessed carefully. Replacement is the safer option when the cause is uncertain or friction performance remains compromised.
If oil reaches the pads during a flush, replace the contaminated pads rather than attempting to rescue them through heating. Clean the rotor using the prescribed method and bed the new components according to their instructions.
After an ordinary fluid flush with unchanged, uncontaminated friction components, complete bedding is not automatically necessary. New pads, a new rotor or significant friction-surface changes are more relevant triggers.
Good bedding improves friction consistency, but it cannot compensate for pads that have already worn close to their service limit. Before an extended ride, measure the material that remains.
When Should You Replace Disc Pads Before a Multi-Day Trip to Avoid Metal-on-Metal?
Replace disc brake pads before a multi-day trip when they have reached the manufacturer’s wear limit, show significant uneven wear, are contaminated or cannot be trusted to last through the planned riding conditions. Inspect both inner and outer pads, measure the relevant thickness and allow a sensible wear margin for long descents. Do not judge pad condition from the outer pad alone.
Disc pads may wear unevenly across the two sides of a caliper or develop a tapered profile. A pad that looks serviceable from outside the bicycle may conceal a much thinner friction surface on the inner side.
Remove the wheel and pads using the specified procedure, then examine the friction material under good lighting. Look for deep grooves, cracks, unusual discoloration, embedded debris and uneven thickness.
Use a suitable measuring tool to assess the exact dimension specified by the brake manufacturer. The measurement standard is important because not all manufacturers quote pad thickness in the same way.
| Manufacturer and documented system | Wear criterion | Measurement interpretation |
|---|---|---|
| Shimano models covered by DM-LADBR02 | 0.5 mm or less | Remaining pad friction material only |
| SRAM mineral-oil models covered by the cited manual | Below 3 mm | Combined backing plate and friction material |
| Shimano rotors covered by DM-LADBR02 | 1.5 mm or less | Rotor thickness |
| SRAM rotor examples in the cited manual | 1.55 mm or 1.7 mm minimum | Depends on the specified rotor model and nominal thickness |
These figures are not interchangeable. Applying SRAM’s combined pad-and-backing-plate criterion to a Shimano pad can produce a misleading conclusion, and the reverse is equally problematic.
The Shimano hydraulic disc brake safety instructions specify the documented pad and rotor limits and warn against riding with leaking hydraulic fluid or contaminated friction components.
Asymmetric wear can indicate restricted or inconsistent caliper piston movement. When one pad is significantly thinner than the other, investigate piston operation and caliper alignment instead of simply replacing pads and assuming the problem is resolved.
For a hypothetical six-day mountain trip, pad condition should be evaluated against the expected descents, bicycle load and opportunities to obtain spare parts. No universal remaining-thickness margin can guarantee completion of a particular route. When wear is approaching the manufacturer’s limit or expected demand is high, replacing pads before departure offers a more sensible margin than trying to use every fraction of remaining material.
Carry a compatible spare pad set where practical, together with the tools required for the manufacturer’s replacement procedure. Replace pads as the correctly matched set required for the caliper. Do not split, improvise or reshape friction material to make an incompatible pad fit.
Metal-on-metal contact occurs when friction material is exhausted and the backing plate contacts the rotor. This can score and damage the rotor, reduce stopping performance and increase heat. Continued riding may turn a straightforward pad replacement into a rotor and caliper inspection or repair.
After confirming adequate pad thickness, correct bedding and sound hydraulic operation, the remaining challenge is controlling heat while the bicycle is moving downhill.
Key takeaways before a long descent
- A stable lever at the trailhead does not eliminate the need to monitor braking behavior as temperatures rise.
- Pad condition, rotor condition and braking technique can be as important as the age of the mineral oil.
- Any lever that unexpectedly approaches the handlebar or loses braking resistance calls for stopping and investigating, not merely turning an adjustment dial.
How to Get Consistent Brake Bite on Long Descents Without Lever Pull to the Bar
Consistent braking on long descents requires a properly functioning hydraulic circuit, adequate pad and rotor capacity, controlled braking technique and attention to heat-related symptoms. A lever moving unexpectedly toward the handlebar can indicate a serious hydraulic or mechanical problem. Do not try to compensate for changing lever behavior solely through reach adjustment; stop safely and identify the cause.
Long descents expose the whole braking system to sustained heat. The rotor and pads generate friction, and rising temperatures can affect hydraulic behavior, component movement and friction performance.
Different symptoms help distinguish which part of the system needs attention.
| Symptom | Possible causes | Safe response |
|---|---|---|
| Stopping power gradually weakens with relatively firm lever feel | Friction fade, overheating or pad surface problems | Stop safely, allow cooling and inspect before continuing |
| Lever suddenly travels much farther than normal | Possible hydraulic heating, gas in the circuit or pressure-related fault | Stop riding and investigate brake safety |
| Pulsation or vibration under braking | Uneven rotor deposits, rotor issues or another mechanical problem | Inspect rotor and friction components |
| Repeated changes in bite point | Possible piston movement, hydraulic or heat-related issue | Inspect system rather than masking the symptom with adjustments |
Use deliberate, controlled braking rather than continuously dragging one brake whenever trail conditions permit. Distribute braking demand appropriately between both brakes while maintaining traction and control. There is no universal rule that alternating front and rear braking is always safer; front-to-rear load transfer, available grip and terrain determine how braking forces should be applied.
When brake temperatures or performance become concerning, find a safe place to stop and allow the system to cool. If the lever loses resistance or braking becomes unpredictable, do not resume simply because the lever feels better after cooling. The underlying cause may still be present.
Brake capacity upgrades may be useful where the manufacturer approves them. Options can include pads designed for sustained heat exposure, compatible larger rotors or approved heat-management components. Rotor diameter changes require confirmation of frame, fork, caliper, adapter and manufacturer compatibility.
Lever reach and bite point are different adjustments. Reach changes the distance between the lever blade and handlebar. Bite-point or free-stroke adjustment, where available, changes aspects of the engagement behavior according to the brake design. Neither adjustment repairs trapped air, leaking hydraulic connections, contaminated pads or damaged seals.
Before descending, confirm that the correct fluid has been used, the hydraulic system shows no leaks, the pads are above their wear limits and the rotor is serviceable. Check that the lever operates consistently, the pads have been bedded where required and the brake provides controlled stopping performance during a safe preliminary test.
On demanding routes, these checks matter more than achieving an unusually short or sharp lever feel in the workshop. A brake should be predictable under repeated use, not merely feel impressive when cold.
Before the next long ride, inspect the brake model and service history, complete any necessary manufacturer-approved maintenance and test the entire system under controlled conditions. When pressure retention, seal integrity or braking behavior remains uncertain, have the brake examined by a qualified bicycle mechanic before returning to steep terrain.
Can mineral oil brakes contain air even when the lever feels firm?
Yes. A firm stationary lever does not prove that every air bubble has been removed. Air can remain in parts of the hydraulic circuit and affect braking when orientation or temperature changes. Follow the complete manufacturer-approved bleeding procedure and verify brake behavior before riding.
Can old mineral oil cause weak braking without making the lever spongy?
Fluid condition can affect hydraulic performance, but weak braking with a firm lever may also result from contaminated pads, uneven rotor deposits, glazing or mechanical problems. Inspect the complete brake system rather than assuming fluid replacement will restore friction performance.
Can the same bleeding syringe be used for mineral oil and DOT brake fluid?
Do not share bleeding equipment between incompatible fluid systems unless the relevant manufacturer explicitly permits it. Residual fluid may contaminate the next brake being serviced. SRAM specifically prohibits using its mineral-oil bleeding syringes after contact with another fluid. Dedicated, clearly identified equipment reduces the risk of an expensive mistake.
Is it safe to test newly bled brakes immediately on a steep hill?
No. Begin with stationary inspections and a controlled braking test in a safe area. Confirm there are no leaks, the pads and wheel are correctly installed, the lever behaves consistently and stopping performance is reliable. Complete any required pad bedding before demanding riding.
Does replacing brake pads require flushing the hydraulic fluid?
Not normally. Pad replacement and hydraulic fluid replacement address different maintenance needs. If the hydraulic circuit remains sealed and the brake functions normally, installing new pads does not automatically require a flush. Follow the manufacturer’s piston-retraction and pad-installation procedures, then bed the pads as specified.