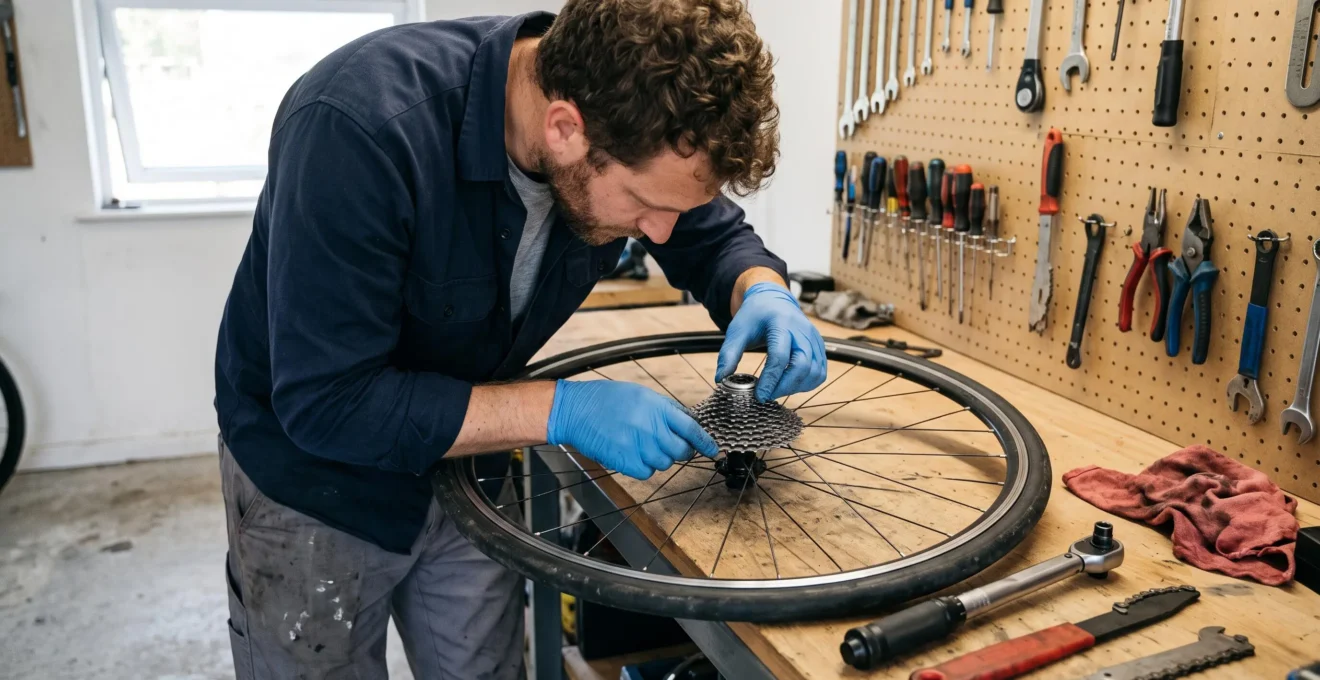
Replacing a bicycle cassette is straightforward only after confirming that the replacement fits the freehub, works with the existing drivetrain and stays within the rear derailleur’s capacity. A cassette advertised as 11-speed or 12-speed is not automatically compatible with every hub or shifter designed for that number of gears.
The expensive mistakes usually happen before the first tool touches the wheel: ordering the wrong driver interface, choosing a largest sprocket the derailleur cannot accommodate, or overlooking a chain worn enough to skip on fresh cassette teeth.
A reliable replacement begins with identifying the components already fitted to the bicycle. After that, the job becomes a controlled sequence: verify the parts, measure wear, remove the existing cassette, check spacer requirements, seat the replacement correctly and tighten it to the appropriate specification. Finish by testing shifting throughout the cassette before riding under load.
The same diagnostic approach also helps when a cassette has already been installed but shifting feels worse than before.
Bike cassette replacement: essential decisions
- Identify the exact freehub interface, cassette speed count, derailleur compatibility and required spacers before ordering.
- Measure chain wear first. A badly worn chain can skip on a new cassette, while worn sprockets can cause a new chain to skip.
- Start threaded components carefully, use the manufacturer’s torque specification and diagnose indexing problems before touching derailleur limit screws.
- Why Does Shifting Get Worse After a New Cassette Install?
- How to Check Cassette Compatibility Before You Order in 5 Checks
- Should You Replace the Chain, the Cassette, or Both If It Skips Under Load?
- The Lockring Mistake That Can Ruin a Freehub Thread in One Install
- When Should You Replace a Cassette Before a Long Ride (160 km) to Avoid Chain Skip?
- How to Diagnose Bad Shifting Without Touching Limit Screws by Mistake
- Is It Cable Tension or a Worn Drivetrain If It Skips Only on One Cog?
- How to Fix Hesitant Shifts in 5 Minutes Using Only the Barrel Adjuster
Why Does Shifting Get Worse After a New Cassette Install?
Shifting can get worse after fitting a new cassette because the replacement sprockets no longer mesh correctly with a worn chain, the cassette is incorrectly spaced or seated, or the cassette uses an incompatible freehub interface. Cable indexing and derailleur alignment can also contribute. Diagnose the symptom before assuming the new cassette is defective.
A worn chain develops increased effective pitch as its internal components wear. Its rollers may no longer engage cleanly with the tooth spacing of fresh sprockets. Under pedalling load, the chain can climb or slip across the teeth, creating an abrupt skip even though the cassette itself is new.
This is different from a slow or noisy shift between neighbouring sprockets. The latter often suggests indexing, cassette positioning or derailleur alignment rather than a chain that cannot maintain engagement under load.
Check the mechanical installation before adjusting the derailleur. Confirm that every cog is seated on the appropriate splines, any required spacer is present, and the lockring or cassette retaining interface is secure according to the manufacturer’s procedure.
Freehub compatibility is especially important because cassette speed count alone does not identify the correct interface. Shimano distinguishes HG, HG L2 and MICRO SPLINE systems, with different spline configurations and cassette compatibility requirements. Its 12-speed freehub compatibility explanation identifies these differences and describes specific spacer applications.
For example, an installation requiring a 1.85 mm spacer may have incorrect axial positioning if that spacer is omitted. Adding a spacer where none is specified can also prevent the cassette from seating or tightening correctly. Neither problem is repaired by changing derailleur limit screws.
| Observed symptom | Likely area to investigate | First verification |
|---|---|---|
| Chain slips under strong pedalling | Chain-to-sprocket engagement or drivetrain wear | Measure chain wear and inspect affected cogs |
| Hesitation across several gear changes | Cable indexing or derailleur alignment | Check indexing and hanger condition |
| Visible cassette movement or looseness | Seating, spacer stack or retaining interface | Stop riding and inspect installation |
| New cassette cannot seat correctly | Incorrect freehub standard or spacer arrangement | Compare exact cassette and hub specifications |
Brand names do not replace model identification. Some Shimano and SRAM cassettes use compatible splined interfaces, while others require distinct drivers. Campagnolo interfaces also require their own model-specific compatibility checks.
If the cassette is seated correctly and compatible, measure the chain before making further adjustments. Replacing the wrong component or compensating for a mechanical mismatch with cable tension can hide the real problem.
How to Check Cassette Compatibility Before You Order in 5 Checks
Check five things before buying a cassette: the freehub standard, the drivetrain’s speed and component generation, the rear derailleur’s supported sprocket range, the exact driver interface, and any required spacers. Confirm each against manufacturer documentation using the model numbers on your existing components. Never rely on speed count or a retailer’s compatibility label alone.
Start with the rear wheel and identify its freehub body. The outer appearance can provide clues, but a photograph and spline count should support identification rather than replace the manufacturer’s compatibility chart.
A familiar example is the difference between Shimano HG and MICRO SPLINE. Shimano describes nine effective spline teeth for the HG interface and 23 for MICRO SPLINE. HG L2 uses another configuration, with 18 effective spline teeth. These numbers help distinguish interfaces, but the cassette model must still be checked.
SRAM provides another important distinction: XD cassettes can fit compatible XD drivers and, with the specified spacer, XDR drivers. XDR cassettes require an XDR driver. An 11-speed or 12-speed label does not establish whether a given product will fit a splined HG body, XD or XDR.
The manufacturer also distinguishes between cassette constructions and their corresponding spacer arrangements. This matters particularly when comparing road and mountain bike drivetrains or changing between different cassette families.
| Check | What to identify | What can go wrong |
|---|---|---|
| 1. Freehub standard | HG, HG L2, MICRO SPLINE, XD, XDR or another exact interface | The cassette cannot engage the driver correctly |
| 2. Speed and generation | Shifter, derailleur, chain and cassette specifications | Incorrect indexing or drivetrain incompatibility |
| 3. Largest sprocket | Maximum supported rear cog and derailleur capacity | Insufficient clearance or range |
| 4. Driver dimensions and design | Exact hub and cassette interface model | Assuming similar-looking drivers are interchangeable |
| 5. Spacers and fitting requirements | Manufacturer-specified spacer configuration | Incorrect cassette position or inadequate retention |
The largest sprocket deserves a separate check. Replacing a narrow-range cassette with a wider-range model may exceed the derailleur’s specified maximum sprocket size or total capacity. A longer chain, different B-gap setting or another derailleur may be required, but none of these changes should be assumed sufficient without confirming compatibility.
Five checks to complete before adding a cassette to your basket
- Remove or inspect the existing cassette and photograph the exposed freehub interface. Save a clear image showing the spline or driver profile.
- Record the cassette model and sprocket count alongside the shifter and rear derailleur model numbers. Produce a short component list.
- Check the proposed largest and smallest sprockets against the derailleur manufacturer’s specifications. Write down the permitted range.
- Compare the replacement cassette’s required driver with the identified hub model using the official compatibility documentation. Save the relevant specification.
- Confirm required spacers, installation tools, torque specifications and any chain-length implications. Keep a verified installation checklist with the order.
The practical objective is not to find a cassette with a similar description. It is to establish a documented compatibility match between the actual wheel, cassette and shifting system.
Once compatibility is established, inspect drivetrain wear. A perfectly compatible new cassette can still shift badly if the chain or other components are already worn.
Should You Replace the Chain, the Cassette, or Both If It Skips Under Load?
Replace the chain when measured wear reaches the applicable replacement threshold. Replace the cassette when its sprockets are worn enough to cause poor engagement or skipping with a suitable chain. Replace both when wear affects both components. Skipping under load is useful diagnostic evidence, but it does not prove that every drivetrain component requires replacement.
Chains wear internally as the pins, rollers and related bearing surfaces accumulate use. This increases their effective pitch, so the chain no longer meshes as intended with the sprockets. Continued use can accelerate sprocket wear and make a later chain replacement less effective.
According to Park Tool’s chain wear measurement tutorial, general replacement guidelines are 0.5% measured wear for chains used on 11-speed or higher cassette systems and 0.75% for cassette or freewheel systems with 10 speeds or fewer. The manufacturer of the drivetrain may specify different thresholds, which take precedence.
These thresholds are maintenance guidelines rather than proof that a cassette is worn out. If the chain has been replaced before excessive wear developed, the existing cassette may remain serviceable.
| Finding | Initial maintenance decision | Further check |
|---|---|---|
| Chain exceeds its specified wear limit; cassette still engages correctly | Replace the chain | Test for skipping under load |
| New compatible chain skips on particular used sprockets | Inspect cassette for replacement | Exclude indexing and hanger faults |
| Chain and cassette both show significant wear | Replace both where required | Check chainrings and derailleur function |
| Hesitation occurs across much of the cassette without load-related slip | Diagnose indexing first | Inspect cable, housing and hanger alignment |
The number of affected sprockets gives another clue. A drivetrain that slips mainly on one heavily used cog may have local sprocket wear. Problems across multiple gears can indicate chain wear or indexing, but the pattern alone is not conclusive.
A bent derailleur hanger can also create local shifting errors. It should be inspected before replacing a cassette that otherwise appears serviceable.
Early chain replacement is usually the more economical maintenance strategy. Allowing chain wear to progress until the cassette teeth are badly affected makes simultaneous replacement more likely. Conversely, fitting a new cassette with an excessively worn chain risks compromising the new sprockets.
Replacing both components is sensible when both are demonstrably worn, not automatically because one has reached its replacement threshold. The correct decision comes from measurements and observed engagement.
The Lockring Mistake That Can Ruin a Freehub Thread in One Install
The most damaging cassette installation mistake is forcing a threaded lockring or cassette interface when it is not correctly aligned. Cross-threading can damage the threads, while excessive tightening can damage components. Start the threaded connection carefully by hand where the design permits, confirm correct engagement and apply the manufacturer’s specified torque with the proper tool.
On a conventional splined cassette with a separate lockring, the lockring secures the sprockets against the freehub’s retaining surface. The lockring must engage the threads squarely, without trapping an incorrectly seated cog or creating an unintended gap in the cassette stack.
Before tightening, ensure the cassette is fully seated and the required spacer arrangement is correct. Use the lockring specified for the cassette and freehub combination rather than assuming similar-looking parts are interchangeable.
Early resistance is a reason to stop, not to increase leverage. Back off the lockring, inspect the threads for debris or damage, realign the component and try again without force. If it still will not engage smoothly, confirm that the parts are compatible.
SRAM’s cassette compatibility and installation instructions explicitly warn that a cassette becoming difficult to rotate after a few turns may be cross-threaded. For the documented XD and XDR procedure, SRAM specifies 40 N·m and instructs installers to grease the driver-body threads.
40 N·m
SRAM’s specified installation torque for the XD and XDR cassette procedure covered by its technical documentation. This is not a universal torque specification for every cassette or lockring.
SRAM, XD, XD SLIM, XDR, and Splined Cassettes installation documentation.
XD and XDR cassette systems have installation arrangements that differ from some conventional splined cassettes. The relevant procedure and tool engagement must therefore be identified before tightening. SRAM also recommends an appropriate guided tool for the documented installation.
Inspect any reused lockring and associated washer for visible damage or deformation. Replace damaged parts with the manufacturer-specified items. Do not add washers or interchange lockrings to compensate for a cassette that does not seat correctly.
If the threads are already stripped, forcing another lockring may make the damage worse. A qualified mechanic should assess whether the affected freehub or driver can be replaced separately. The repair depends on the actual damaged component and hub construction.
After tightening, check for lateral cassette movement and correct sprocket retention. Persistent movement requires diagnosis before riding; it is not something to compensate for by repeatedly increasing torque.
A properly fitted cassette should be secure without relying on excessive force. Correct seating, compatible threaded parts and controlled torque are more important than how tight the tool feels.
When Should You Replace a Cassette Before a Long Ride (160 km) to Avoid Chain Skip?
Replace a cassette before a 160 km ride if inspection and testing show that worn sprockets are causing chain skipping, especially under climbing or acceleration loads. There is no universal cassette replacement interval based on ride distance alone. Check chain wear, inspect engagement and complete a realistic test ride before deciding whether the drivetrain is dependable.
A long ride increases the consequences of a marginal drivetrain. Mechanical problems that are manageable near home can become difficult to resolve when the bicycle is far from workshop support, particularly on steep climbs or while carrying additional luggage.
Repeated chain skipping under load can abruptly interrupt power transmission and compromise control. It may also lead to further drivetrain problems. The prudent response is to resolve unexplained skipping before committing to an extended route.
Start with a chain wear measurement. Next, inspect sprockets for noticeably asymmetric, hooked or damaged teeth, while remembering that some modern shift-ramp profiles are intentionally irregular. Tooth shape alone is not a definitive wear test.
Then check every sprocket during a short local ride. A bike that shifts correctly on a repair stand may behave differently under pedalling load. Test moderate climbing effort and ordinary acceleration without deliberately provoking repeated hard skips.
Do not treat a fresh cassette as a last-minute repair without testing it. A compatible replacement can expose chain wear or require a manufacturer-prescribed chain-length and derailleur setup check, particularly if the cassette range has changed.
| Inspection result | Recommended decision |
|---|---|
| No skipping, acceptable chain wear and correct shifting | Ride after normal maintenance and inspection |
| Cosmetic marks but no evidence of functional wear | Monitor condition rather than replacing automatically |
| Chain at or beyond its specified wear threshold | Replace the chain and test cassette engagement |
| Repeated skipping under load | Resolve the cause before the long ride |
| New cassette fitted but compatibility or installation uncertain | Verify fitment and complete testing before departure |
A spare chain is useful only if it matches the drivetrain specification and can be installed correctly. It will not solve a worn cassette, incompatible driver, incorrect spacing or misaligned derailleur.
For a planned 160 km ride, allow enough opportunity to inspect and test any replacement components before departure. The relevant decision is the condition of the drivetrain, not the distance printed on the route.
When the drivetrain passes its inspection and loaded test, replacement may be unnecessary. When it skips unpredictably, postponing repair simply transfers the problem to a less convenient location.
How to Diagnose Bad Shifting Without Touching Limit Screws by Mistake
Diagnose poor shifting by checking the affected gears, cable indexing, cassette installation and derailleur alignment before adjusting limit screws. The H and L screws control the derailleur’s outermost travel, not the spacing between indexed shifts. Turning them to correct middle-cassette hesitation can create a more serious problem without addressing the original fault.
On a conventional rear derailleur, the H-limit controls outward travel toward the smallest sprocket, while the L-limit controls inward travel toward the largest sprocket. These stops help prevent the chain from moving beyond the intended sprocket range.
The barrel adjuster performs a different job. It changes effective cable tension and therefore the derailleur’s indexed position relative to the cassette.
A new cassette that shifts poorly in the middle of the range is rarely a reason, by itself, to change either travel limit.
Begin by observing the pattern of failure. Shift through the cassette one gear at a time while pedalling gently and note whether hesitation occurs toward larger sprockets, smaller sprockets or both.
- Hesitation in one shift direction across several cogs: investigate cable indexing and cable movement.
- Difficulty near the largest sprocket: check indexing and the manufacturer’s prescribed upper-pulley clearance or B-gap setup.
- One persistent problem in the middle of the range: inspect that sprocket and derailleur hanger alignment.
- Chain attempting to travel beyond the smallest or largest sprocket: stop and verify the applicable limit setting before continued use.
The B-gap or derailleur-to-sprocket clearance matters because a cassette with a larger maximum sprocket may need a different setup. The exact adjustment depends on the derailleur design and manufacturer instructions.
Limit screws and barrel adjusters are not identified reliably by physical location alone. Look for H and L markings and consult the derailleur’s documentation if the controls are unclear. Avoid turning unidentified screws.
For conventional cable-actuated rear derailleurs, Park Tool’s rear derailleur adjustment instructions distinguish travel-limit settings from indexing adjustments and describe checking individual gear positions.
Do not use limit screws to compensate for a cassette compatibility problem. Incorrect limit settings can permit dangerous chain overshift toward the spokes or frame. If existing settings are sound and the cassette has not changed the derailleur’s required travel, leave the limits alone during ordinary indexing diagnosis.
Once the cassette and derailleur geometry are confirmed, a small barrel-adjuster correction may be all that is needed. Persistent problems concentrated on one sprocket require a closer inspection.
Is It Cable Tension or a Worn Drivetrain If It Skips Only on One Cog?
Skipping on one cog can result from local sprocket wear, incorrect indexing or a misaligned derailleur hanger. If small barrel-adjuster corrections improve shifting into that gear, indexing may be involved. If the chain physically slips under load while staying on the selected sprocket, investigate tooth engagement and chain wear before buying parts.
The word « skip » can describe two different mechanical behaviours. In one, the chain hesitates or jumps between neighbouring sprockets during a shift. In the other, the chain momentarily loses engagement with the teeth while the selected gear remains unchanged.
The distinction matters because the repairs are different. Indexing corrections change derailleur position, whereas a worn tooth profile cannot be restored through cable adjustment.
To investigate, first identify whether the symptom occurs during shifting or during steady pedalling on a single sprocket. Note the affected gear and the direction of the preceding shift.
On a conventional cable-actuated system, try a small barrel-adjuster correction appropriate to the hesitation direction. A quarter-turn provides a controlled starting increment. Retest the affected gear and adjacent sprockets without making large successive adjustments.
If indexing improves across the cassette, the adjustment was relevant. That result does not necessarily exclude additional wear or alignment faults.
When the same sprocket repeatedly slips under load despite otherwise correct indexing, inspect its teeth and measure chain wear. Frequently used sprockets may develop more wear than neighbouring cogs. However, modern shift features and tooth shaping mean appearance must be interpreted carefully.
A third possibility is derailleur hanger misalignment. A bent hanger can produce uneven pulley alignment across the cassette and imitate local indexing or wear problems. A proper alignment gauge provides a more dependable assessment than a visual check alone.
| Behaviour | Likely investigation | Next action |
|---|---|---|
| Hesitation improves after indexing adjustment | Cable tension or cable movement | Check all gears and inspect cable condition |
| Chain slips under load on the same sprocket | Local sprocket wear and chain engagement | Measure chain wear and inspect cassette |
| Uneven shifting persists despite reasonable indexing | Hanger alignment or derailleur geometry | Measure hanger alignment |
| Problem begins immediately after cassette replacement | Fitment, spacing, indexing or chain compatibility | Recheck installation and component specifications |
Repeatedly turning the barrel adjuster until the problem disappears in one gear may simply transfer poor indexing to another. Evaluate the full cassette after every correction.
If the cassette is mechanically sound and the hanger is aligned, the next step is a controlled indexing adjustment rather than speculative replacement of drivetrain components.
Key takeaways before adjusting cable tension
- Identify whether the chain hesitates between gears or physically slips on a selected sprocket; the symptoms require different repairs.
- Confirm cassette fitment and derailleur alignment before using cable adjustment to compensate for a newly installed component.
- Make small, reversible adjustments and test neighbouring gears. Improvement in one position is not enough to confirm a complete repair.
How to Fix Hesitant Shifts in 5 Minutes Using Only the Barrel Adjuster
On a conventional cable-actuated rear derailleur, hesitant shifts can sometimes be corrected in five minutes using the barrel adjuster. Turning it counterclockwise generally increases effective cable tension and helps shifts toward larger rear sprockets; clockwise adjustment reduces tension and can help shifts toward smaller sprockets. Work in quarter-turn increments and test each change.
This procedure assumes the cassette is correctly installed, compatible with the drivetrain and securely retained. It also assumes that the derailleur hanger is reasonably aligned and the existing limit settings are safe.
A barrel adjuster moves the indexed derailleur positions by changing effective cable tension. It does not correct damaged sprocket teeth, incorrect spacers, a bent hanger or an incompatible cassette.
For ordinary mechanical rear derailleurs, the adjustment sequence is:
- Place the bicycle securely so the rear wheel can turn freely. Shift to the smallest rear sprocket and locate the cable barrel adjuster.
- Pedal steadily and command one shift toward the next larger sprocket. Observe whether the chain moves promptly into the selected gear.
- If the chain hesitates moving toward larger sprockets, turn the barrel adjuster counterclockwise approximately one quarter-turn, then repeat the shift.
- If the chain hesitates returning toward smaller sprockets, turn the barrel adjuster clockwise approximately one quarter-turn and retest.
- Continue through the cassette one shift at a time, checking both directions. Stop if reasonable adjustments do not produce consistent indexing.
The directional rule is a useful way to avoid random adjustments: more effective cable tension generally moves the derailleur toward larger rear sprockets on the conventional systems covered here; less tension allows movement toward smaller sprockets.
Five minutes is a practical target for a minor indexing correction, not a guaranteed repair time. The procedure is not applicable to electronic shifting systems, and unusual derailleur designs may require different instructions.
Do not continue turning the adjuster beyond its usable range. If the adjustment cannot correct the hesitation, investigate other causes instead of attempting to force more cable movement.
Recurring changes in cable tension may indicate contaminated housing, deteriorating cable movement or frayed components. Inspect and replace defective cable or housing rather than repeatedly compensating for unreliable movement.
After the adjustment, check every gear again under controlled riding conditions. Smooth operation on a work stand is useful, but the final assessment should include normal pedalling load in a safe location.
The most useful next action is to verify the current drivetrain’s exact component models, measure chain wear and perform a complete shifting test. Only buy a replacement cassette once the evidence shows that the existing component is worn or incompatible.
Can I replace a bicycle cassette without replacing the chain?
Yes, provided the existing chain remains within its manufacturer’s wear limits, is compatible with the new cassette and engages correctly. Measure chain wear before installation and test under normal pedalling load afterward. A badly worn chain can skip on new sprockets and accelerate their wear.
Can I install a cassette with a larger biggest cog?
Only when the replacement is compatible with the freehub, drivetrain and rear derailleur’s specified maximum sprocket size and capacity. A wider range may also require a chain-length assessment and manufacturer-prescribed derailleur setup. The original cassette’s speed count does not establish that a larger sprocket is supported.
Do all 11-speed cassettes fit the same freehub?
No. Cassette and freehub compatibility depends on the exact interface and model, not only the number of sprockets. Some 11-speed systems use different driver bodies, while certain cassette and freehub combinations require specific spacers. Check manufacturer documentation before ordering.
What should I do if my new cassette has side-to-side movement?
Stop using the bicycle until the cause is identified. Check that the cassette is fully seated, the correct spacer arrangement is installed and the retaining interface is tightened to the specified torque. If movement remains, seek qualified mechanical inspection rather than applying additional uncontrolled force.
Can I reuse the existing cassette lockring?
Reuse depends on the cassette manufacturer’s instructions and the condition and compatibility of the lockring. Do not reuse a visibly damaged or deformed retaining component. Confirm the correct model, thread engagement and specified tightening procedure before installation.