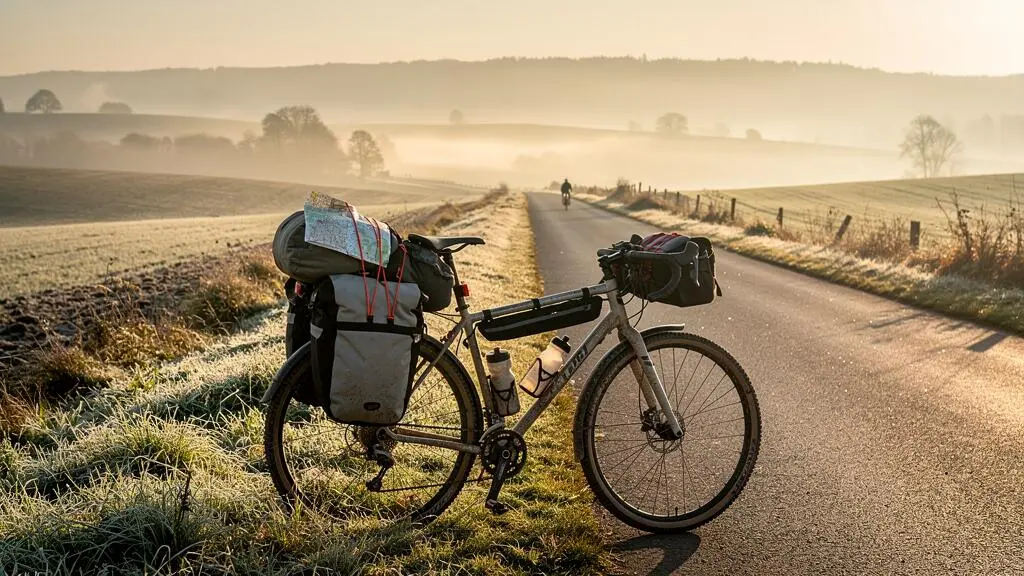
A seven-day cycling tour covering approximately 80 km per day requires more than seven routes that add up to the right distance. Each day must also be realistic with luggage, climbing, changing weather, limited services and the possibility of an unexpected stop.
The most reliable approach is to plan backwards from confirmed overnight accommodation, audit the roads and surfaces between stops, calculate your water-carrying requirements and identify an exit if you cannot finish. A route should remain workable when a shop is closed, a trail is blocked or a climb takes longer than expected.
For intermediate cyclists planning their first multi-day ride in the UK, Ireland, the US, Canada, Australia or New Zealand, that means treating 80 km as a planning target rather than an obligation. Seven 80 km stages total 560 km, but a shorter stage through difficult terrain can demand more than a longer day on smooth roads.
The objective is not to remove every uncertainty. It is to make sure predictable problems have practical solutions before departure.
Planning a reliable seven-day cycling route
- Check elevation, road conditions and overnight stops before accepting an 80 km daily target.
- Verify water, food and transport independently; a mapped facility is not necessarily open or operational.
- Build shorter alternatives and usable bailout options into every day, especially across isolated sections.
- Why Do “Popular” Long-Distance Routes Still Leave You Without Water for 40 km?
- How to Build a Day-by-Day Route Plan With Elevation Checks in 20 Minutes?
- Which Should You Choose: Rail-Trails or Back Roads for a 300 km Week?
- The Navigation Mistake That Adds 2 Hours and Pushes You Into Rush-Hour Traffic
- Fix a Route That Looks Perfect on Maps but Has No Bailout Options
- How to Spec Gearing and Tyre Clearance for a 10% Climb With Full Panniers?
- How to Spot the Hardest 10 Minutes of a Route From the Elevation Profile Alone?
- Which Type of Cycling Tour Fits You if You Want 60–100 km Days Without Stress
Why Do “Popular” Long-Distance Routes Still Leave You Without Water for 40 km?
Popular cycling routes can contain long stretches without dependable drinking water because route popularity measures interest, not service availability. A scenic itinerary may cross farmland, bypass villages or follow a remote trail with few exits. Shops can close seasonally, public taps may be unavailable, and older ride reports rarely confirm whether facilities still operate.
A recommendation from another cyclist is a useful starting point, but it does not establish that a water point will be available on your travel date. The difference matters most when a route takes you far from alternative roads or settlements.
Audit services separately from the cycling route. The cycle.travel bicycle route planner displays mapped facilities such as water taps, food stores, cafés, restaurants and accommodation. It also provides surface information and GPX export. However, its mapped amenities are not independently verified operational services, and its OpenStreetMap-derived surface information can be incomplete.
Use the route planner to identify potential stops, then cross-check essential facilities against current information from local authorities, trail managers, business websites or direct contact. Komoot highlights and cycling community reports can provide additional clues. Warmshowers hosts may offer accommodation or local knowledge when arrangements have been made, but should never be assumed available.
Look particularly closely at long stretches of farmland, low-density rural roads and trails running beside railway lines or major roads. Nearby buildings do not guarantee public access, and a route beside a motorway may have no usable exit. Sundays, public holidays and off-season travel introduce further uncertainty.
For water planning, measure your own consumption during a representative training ride. Record how much you drink, the riding duration, temperature and effort. Repeat under different conditions where practical, then compare your measured needs with the time required to reach the next verified refill. Include a contingency rather than assuming every planned stop will work.
The CDC guidance on exercise in hot weather highlights the increased risk of dehydration and heat illness, and recommends adjusting activity and hydration in hot conditions. It does not prescribe one universal drinking volume for cyclists.
A 40 km gap is not automatically unacceptable, but it becomes a planning problem when your available water, expected travel time or health needs make the next verified stop uncertain. Once services are established, the next question is whether the daily effort itself is realistic.
How to Build a Day-by-Day Route Plan With Elevation Checks in 20 Minutes?
Build each daily route by drawing a cycling corridor, checking its elevation profile, identifying the hardest section and confirming where the day will end. A familiar rider can use a 20-minute screening routine, but that is only an initial planning pass. Verifying accommodation, closures, water and transport may require substantially more time.
The key is to make every stage independently workable rather than dividing a total distance into seven equal parts. Start with the places where you can actually sleep, then connect them using roads and trails appropriate for a loaded bicycle.
- Minutes 0–4: Draw the route corridor in cycle.travel or Google My Maps. Mark the intended start, finish and major settlements.
- Minutes 4–8: Open the route’s elevation profile in a cycling planner or compatible profiling tool.
- Minutes 8–12: Record total climbing, long gradients and the steepest sustained section.
- Minutes 12–16: Check how surface changes, headwinds or difficult climbs could affect your arrival time.
- Minutes 16–20: Identify potential accommodation, food stops and a shorter finishing option. Flag anything requiring direct verification.
These time allocations are a suggested workflow, not a measured industry standard. They work best once the tools are familiar and should not become a deadline for approving an unsafe route.
Distance and effort are not interchangeable. An 80 km day on smooth, gently rolling roads is different from 80 km with loaded climbing and loose gravel. For a personal comparison, keep an effort log from training rides and estimate how much additional riding time similar elevation or surface conditions require.
You can express that extra time as personal equivalent kilometres by multiplying it by your usual moving speed on an easier route. This is an individual planning heuristic, not a universal conversion formula.
Build the schedule backwards from the last dependable meal, accommodation check-in or public transport departure. If a rural shop closes before your expected arrival, leaving earlier may help, but carrying food or changing the stop is more reliable than relying on a tight schedule.
Five checks before approving each cycling day
- Save the final daily GPX route and record its distance, climbing and expected riding time.
- Mark at least one verified water refill and record the longest unsupported stretch.
- Confirm the overnight stop and save its address, contact details and latest arrival conditions.
- Record a realistic bailout, a mobile-coverage limitation note and an offline transport reference.
- Check the expected weather window and document a shorter or delayed-day alternative.
Once every stage has a credible finish and contingency, compare possible road and trail types. A route with slightly more distance may be easier overall if it provides a better surface, simpler navigation and more dependable resupply.
Which Should You Choose: Rail-Trails or Back Roads for a 300 km Week?
Choose rail-trails when gentle gradients and separation from motor traffic matter most, provided the surface, access points and services match your bicycle and supplies. Choose back roads when you need frequent village stops, flexible exits or dependable paved riding. For a 300 km week, a combination often works better than committing exclusively to either type.
Rail-trails frequently follow former railway alignments, making gradual climbing an advantage. However, their condition varies considerably. Some are paved and suitable for road-oriented touring bicycles; others use compacted stone, loose gravel or surfaces that deteriorate after rain.
Back roads can offer more direct access to shops and accommodation, but their suitability depends on traffic speeds, road widths, sightlines and the availability of safer alternatives.
| Planning factor | Rail-trails | Back roads |
|---|---|---|
| Gradient | Often gradual on former railway alignments; approaches and diversions may be steeper | Variable, including short steep climbs |
| Surface | Paved, compacted or loose, depending on the trail | Often paved, but condition and road quality vary |
| Resupply | May bypass shops and settlements | Can pass through towns and villages |
| Exit options | Dependent on trail access points | More junctions may exist, but they are not necessarily safe exits |
| Navigation | Often straightforward between access points | Requires attention at intersections and road changes |
| Weather sensitivity | Unpaved sections may become slower or unsuitable after rain | Paved surfaces may remain rideable, although traffic and weather hazards persist |
In the United States, Rails to Trails Conservancy’s TrailLink platform provides trail information including surface type, access points, amenities and closure notices. Its information is useful for screening a route, but current conditions should still be checked with the relevant trail manager.
For UK routes, the National Cycle Network and local authority information can help establish which segments are suitable. In Ireland, Canada, Australia and New Zealand, identify the actual managing organisation for each greenway, rail trail or shared-use path rather than applying another country’s route assumptions.
There is no evidence-based percentage of rail-trail kilometres that automatically makes a seven-day tour safer. A practical allocation depends on the rider’s equipment and ability to remain self-sufficient between exits.
For example, a hypothetical rider using tyres suited to mixed surfaces and carrying adequate supplies might favour rail-trails on climbing-intensive days. A rider with narrow tyres and limited luggage capacity might favour paved back roads near services. The split should be revised when conditions or trail restrictions change.
Whichever mix you choose, examine the connections between segments carefully. A route can contain excellent cycling infrastructure yet still lead into an unsuitable junction or an avoidable urban traffic problem.
The Navigation Mistake That Adds 2 Hours and Pushes You Into Rush-Hour Traffic
The navigation mistake is accepting a route generated for cars, or an unverified cycling route, without inspecting its difficult junctions and city approaches. A motorway interchange, unsuitable main road, inaccessible crossing or restricted path can force a lengthy detour. That delay may push the final kilometres into busy commuter traffic, making a manageable day unnecessarily hazardous.
Google Maps and general mapping tools can help identify destinations and facilities, but the selected travel mode matters. Default driving directions are not cycling instructions. Even bicycle-specific routing can contain outdated access information or questionable crossings.
A hypothetical example illustrates the timing problem. A rider expecting to reach a city at 14:30 discovers a problematic crossing and spends two additional hours on a detour. The new approach time is 16:30, potentially overlapping with afternoon commuter traffic. The two-hour delay is illustrative, not a documented average.
Build urban approaches deliberately. Where local conditions permit, schedule arrivals for mid-morning or mid-afternoon rather than assuming the shortest road into a city is suitable. Check cycle lanes, protected crossings, bridges and any restrictions affecting access.
Stress-test the GPX file before departure:
- Inspect the first 5 km of each day using available street-level imagery, maps and current route information.
- Examine major junctions, road classification changes, motorway-style roundabouts and the final city approach.
- Verify bridges, ferries and other crossings, including their operating schedules where relevant.
- Mark decision points where an unsuitable turn can still be avoided safely.
- Save the selected cycling route and an independent offline map for navigation if mobile data becomes unavailable.
Street View and similar imagery can be outdated or absent, so use it to raise questions rather than confirm current infrastructure. Check official notices for closures or restrictions affecting critical segments.
A useful two-app practice is to navigate with a cycling-specific application while retaining a general mapping application for location checks and nearby services. When the two disagree about a crossing or route, investigate before departure rather than improvising beside a busy road.
Even a thoroughly inspected route cannot guarantee an uninterrupted journey. Mechanical failures, extreme weather and unexpected closures require an entirely different layer of planning: a credible way to stop riding.
Fix a Route That Looks Perfect on Maps but Has No Bailout Options
A route without usable bailout options should be changed before departure. Identify where you could stop, reach transport, obtain shelter or shorten the day if cycling becomes impossible. A railway station only counts as an exit when the relevant train accepts your bicycle, at a suitable time, from a station you can realistically reach.
Start with a bailout audit for each day. As a planning target, identify three possible alternatives where geography allows: a train connection, a bus or suitable vehicle service, and a road-based exit to a settlement. They are candidates until their operating conditions have been checked.
For rail transport, bicycle policies can differ between operators, services and stations. In the United States, Amtrak’s official bicycle carriage rules distinguish between carry-on, trainside and checked bicycle arrangements. Reservation requirements, equipment restrictions and service availability vary. A train marked on a map is therefore not proof of a workable evacuation.
Apply the same operator-specific checks to UK regional services and railway networks elsewhere. Some buses may not carry standard, non-folding bicycles. A taxi may need a suitable vehicle and advance agreement, particularly for a fully loaded touring bike.
When the audit exposes an isolated segment, use one of three repairs:
- Shorten the stage: Finish at the last suitable town or transport junction. This reduces exposure but may require rearranging accommodation.
- Insert a hub or rest day: Stay in a town with multiple transport and service options. This creates flexibility but changes the schedule and potentially the budget.
- Replace the isolated segment: Consider a verified paved alternative with suitable cycling conditions. A main road with a hard shoulder is not automatically safe; assess traffic, shoulder continuity, junctions and local restrictions.
Then run the stranded-scenario test. Imagine a mechanical failure or storm at the midpoint of the stage. Where is the nearest accessible shelter? Can you reach a settlement without riding? Is there somewhere genuinely available for an unplanned overnight stay?
If the answer depends on walking a long distance with a loaded bicycle, receiving mobile data in an unverified coverage area or finding an unknown vehicle willing to carry the bike, the bailout is not yet dependable.
Save the relevant train station names or codes, local transport contacts, accommodation addresses and emergency information offline. Mark known mobile-coverage gaps, while recognising that coverage maps cannot guarantee reception.
A credible exit strategy makes difficult terrain less consequential, but it does not eliminate the need to match the bicycle to the route. The next decision concerns loaded climbing and the surfaces your tyres can handle.
How to Spec Gearing and Tyre Clearance for a 10% Climb With Full Panniers?
For a loaded climb at 10%, prioritise a sufficiently low climbing gear and tyres suited to the intended surfaces. Compare the smallest front chainring with the largest rear cassette sprocket, then assess the result during a loaded test ride. Tyre clearance must also accommodate the required tyre width without compromising safe space around the frame and fork.
Loaded touring changes climbing demands because the rider must move the bicycle, luggage and body weight uphill. A gearing setup that feels comfortable on an unloaded road ride may require excessive force on the pedals with full panniers.
The simplest gearing comparison uses this ratio:
Lowest gear ratio = smallest front chainring teeth ÷ largest rear sprocket teeth.
Consider two hypothetical setups:
- A 34-tooth smallest chainring paired with a 34-tooth largest sprocket gives a ratio of 1.00.
- A 30-tooth smallest chainring paired with a 40-tooth largest sprocket gives a ratio of 0.75.
The second arrangement provides a lower gear ratio, allowing the rider to maintain a given pedal cadence at a lower road speed, assuming comparable wheel dimensions. It does not guarantee that every rider can climb a particular gradient.
Compact or sub-compact chainsets and wider-range cassettes may provide appropriate low gearing, but compatibility must be checked before making changes. Derailleur capacity, chain length, shifting components and frame specifications can limit possible configurations.
Tyre clearance is a route constraint. A rough rail-trail may require tyres with more volume and suitable tread than a smooth paved road. The actual tyre width can differ from its nominal label depending on rim dimensions and construction, so verify installed clearance according to the bicycle and component manufacturers’ requirements.
Do not assume that a touring bicycle or rental bike automatically accepts the desired tyre size. Confirm the frame and fork limits, mudguard space where applicable, wheel compatibility and the condition of the planned surfaces.
Before finalising the itinerary, load the bicycle with a realistic amount of luggage and test its lowest gear on a representative climb. Check how it handles braking, slow climbing and rough sections. If the bicycle cannot comfortably handle the terrain, revise the route rather than treating the equipment specification as an inconvenience to overcome.
The remaining question is where the hardest effort actually occurs. An elevation profile can help locate it, but only when the graph is interpreted correctly.
How to Spot the Hardest 10 Minutes of a Route From the Elevation Profile Alone?
Find the steepest sustained rise by comparing elevation gained with the horizontal distance covered, not by looking for the highest summit or the most dramatic-looking line. Then consider where that climb appears within the day’s route. An elevation profile identifies likely difficult sections, but it cannot establish the exact hardest ten minutes without assumptions about riding speed and conditions.
Profiles are particularly useful for distinguishing three different climbing patterns: a long gradual ascent, a sustained moderate gradient and a short steep pitch. Their impact changes with gearing, load, fatigue and surface conditions.
Start by reading the chart’s axes. Two mapping applications can display the same climb with very different apparent steepness because their horizontal and vertical scales differ.
Calculate average gradient for a selected segment using:
Average gradient (%) = elevation gain ÷ horizontal distance × 100.
For a hypothetical segment that gains 100 metres over 1,000 metres of horizontal distance, the average gradient is 10%. This describes the average across that segment, not every metre of the climb. Shorter ramps could be substantially steeper.
To identify a likely ten-minute effort, examine a range of possible climbing speeds based on your recent loaded riding. Locate the amount of route distance you would likely cover in that period, then compare the sustained gradients across candidate segments. The resulting estimate is only as reliable as the elevation and speed assumptions.
Watch for mapping limitations too. Elevation samples may smooth out short ramps, misrepresent tunnels or bridges, and omit surface conditions. Where a steep section could change the route decision, investigate it using additional mapping information.
Climb placement matters as much as steepness. A 10% gradient at kilometre 5 may be manageable with fresh legs, while the same gradient at kilometre 70 could be much harder after several hours of loaded riding and a headwind.
Reduce the risk by moving a break before the climb, shortening the stage, selecting accommodation nearer the base of a major ascent or identifying a suitable alternative road. When possible, schedule strenuous sections outside the hottest part of the day.
Walking a climb is a legitimate route-management option, provided the road, verge and traffic conditions allow it safely. Select a manageable gear before stopping, dismount in a safe location and control the loaded bicycle carefully. Walking is not automatically safer on a narrow, busy road without a shoulder.
Once the hardest sections, equipment limitations and exit options are understood, the final planning decision is the type of tour itself. That choice determines how many variables must be managed every day.
Key takeaways before choosing your tour format
- The easiest-to-manage itinerary is not necessarily the shortest: reliable stops and predictable surfaces reduce daily uncertainty.
- Your bike, luggage and recent loaded-riding experience should determine the route’s difficulty, not a fixed kilometre target.
- Choose a tour format that leaves enough capacity to handle delays, fatigue and an occasional shortened day.
Which Type of Cycling Tour Fits You if You Want 60–100 km Days Without Stress
For 60–100 km days with fewer logistical pressures, choose a tour format that matches your recent riding fitness and tolerance for daily decisions. Hub-and-spoke riding simplifies accommodation and luggage; supported touring reduces transport and equipment responsibilities; point-to-point touring offers continuous progress but requires more planning. Self-supported touring demands the greatest logistical independence.
No format guarantees a stress-free week. The right choice is the one that leaves enough physical and mental capacity to cope when the day does not follow the plan.
| Tour format | Best suited to | Main planning trade-off |
|---|---|---|
| Point-to-point touring | Riders wanting a continuous journey between overnight stops | Each day’s finish and accommodation depend on completing the planned transfer |
| Hub-and-spoke touring | Riders wanting challenging day rides with a fixed base | Repeated start location reduces luggage needs but limits geographic progression |
| Supported touring | Riders preferring organised logistics or luggage assistance | Support varies by provider, itinerary and service agreement |
| Credit-card touring | Riders travelling light and paying for accommodation and meals | Greater dependence on open businesses and confirmed reservations |
| Self-supported touring | Riders comfortable carrying equipment and managing contingencies | More luggage, equipment decisions and responsibility for resupply |
These categories can overlap. A point-to-point tour can be credit-card based or fully self-supported, while a supported trip may still require independent navigation. Compare the actual services and responsibilities rather than relying on the label.
For realistic daily distance planning, start with your most recent representative ride, preferably completed with the bicycle and load you expect to use. Record moving time, climbing, surface, recovery and how you felt the following day.
Do not assume that completing a single 100 km ride makes seven consecutive 100 km stages realistic. Fatigue can accumulate during a multi-day tour, and days four and five may feel different from the first. A conservative plan includes scope to shorten later stages, recover or rearrange accommodation.
Riders aiming for approximately 80 km per day can also reduce their workload by reducing daily decisions. Confirm overnight stays, avoid unnecessarily complicated surfaces and establish resupply points before departure. Improving fitness is useful, but it is not a substitute for logistical preparation.
Before committing, bring the complete plan together: every stage should have a usable GPX file, appropriate gearing and tyres, a verified overnight stop, adequate water capacity for the longest unsupported stretch, understood climbing demands and a credible bailout option.
Check current trail closures, weather, accommodation arrangements and transport requirements again shortly before each relevant stage. The objective is a plan that remains adaptable rather than a schedule that only works under ideal conditions.
Choose the format that fits your tested ability, then finalise day one with its actual road conditions, water stops, climbing profile and exit options. Extend that standard to the remaining six days before departure. A dependable seven-day cycling tour is built from seven workable days, not from a perfect-looking line on a map.
Should every day of a seven-day cycling tour cover exactly 80 km?
No. Treat 80 km as an indicative daily target. Shorten stages with difficult climbs, rough surfaces, limited accommodation or poor exit options. A 560 km week can be divided unevenly if the resulting stages better match your ability and available services.
How far in advance should rural accommodation and water stops be checked?
Verify essential facilities while planning, then check them again near the intended travel date. Accommodation availability, seasonal opening hours, public water facilities and trail access can change. Reconfirm anything that would leave you without a practical alternative if unavailable.
Can a smartphone replace a dedicated cycling GPS on a week-long tour?
A smartphone can be used for navigation when the application, offline maps, battery capacity and weather protection meet your needs. A dedicated cycling GPS is another option, but neither removes the need for a checked route, reliable charging arrangements and an independent fallback if the primary device fails.
What should you do when bad weather makes a planned stage unsafe?
Use the pre-planned shorter stage, delay departure or take an appropriate transport exit. Do not rely on completing the original distance if weather, visibility, road conditions or exposure make riding unsafe. Check warnings and any relevant closures before making the decision.
Is a train station enough to count as an emergency bailout?
Not by itself. Confirm that you can reach the station, that a suitable service operates when needed and that bicycles are accepted under the relevant operator’s rules. Booking conditions, equipment restrictions and bicycle-space availability can make an apparently convenient station unusable.