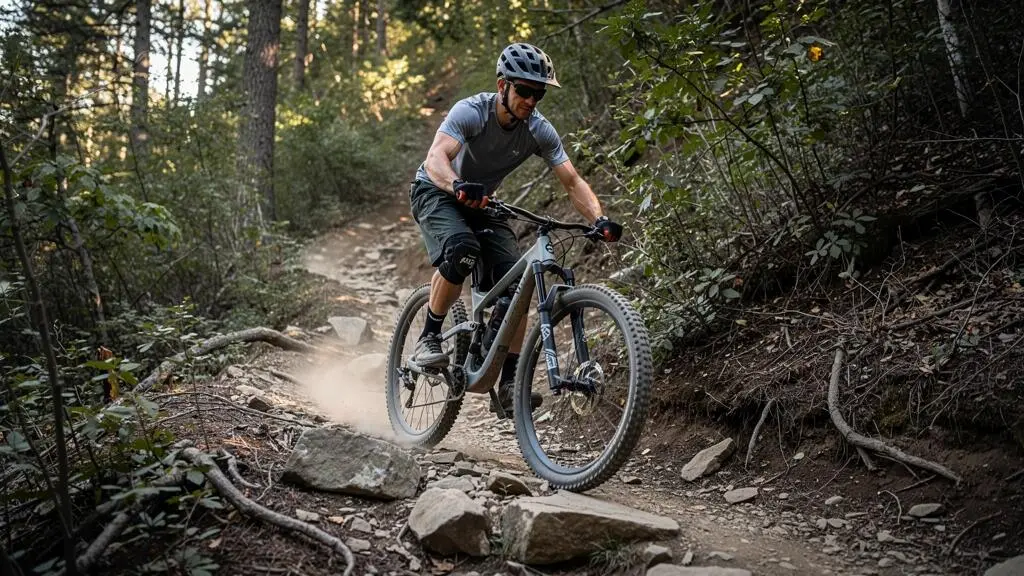
A 150 mm full-suspension mountain bike can climb efficiently and remain composed through rocky descents, but travel alone cannot deliver that balance. Rear suspension kinematics, shock sag, rebound damping, tyre construction and pedalling technique all influence how much energy the bike appears to waste.
For riders moving from a hardtail, the additional suspension movement can feel unfamiliar. Some movement is useful: it allows the rear tyre to follow uneven ground and maintain traction. The objective is not to eliminate suspension activity but to control unnecessary oscillation without sacrificing grip.
A sensible starting point is a 140–150 mm trail or all-mountain bike with geometry suited to local terrain, correctly measured sag and independently tested rebound settings. A heavier enduro build or firmer shock is not automatically more efficient.
Before buying another bike, replacing the shock or adding pressure to stop movement, establish whether the actual problem comes from suspension setup, frame behaviour, tyre pressure or rider input.
The essentials of an efficient 150 mm suspension setup
- Choose suspension travel for your usual terrain, then evaluate geometry, weight, shock performance and climbing behaviour together.
- Set sag before rebound, test one adjustment at a time and treat lockout as a tool rather than a permanent solution.
- Match tyre pressure, casing, braking performance and riding technique to the conditions instead of relying on suspension firmness alone.
- Why Does Your Full-Suspension Bike Feel Slow on Climbs Even With Lockout?
- How to Set Sag and Rebound in 15 Minutes With Only a Shock Pump?
- Which Should You Choose: 130 mm Trail Bike or 160 mm Enduro for Weekend Riding?
- The Maintenance Oversight That Eats Suspension Bearings in 6 Months
- Fix Front-End Washouts by Pairing Tyre Pressure With Rebound Settings
- How to Choose Tread and Casing if You Ride 70% Hardpack and 30% Mud?
- Which Should You Choose: Resin or Metallic Pads if You Ride Wet Trails?
- How to Ride Rocky Descents With More Control Without Death-Gripping the Bars
Why Does Your Full-Suspension Bike Feel Slow on Climbs Even With Lockout?
A full-suspension bike can feel slow uphill despite engaging lockout because the climb switch only changes part of the suspension’s behaviour. Excessive sag, inefficient pedalling, tyre deformation, climbing position and frame kinematics can all contribute. On rough climbs, restricting shock movement too much may actually reduce traction and make forward progress harder.
Most modern air shocks use compression damping to control how quickly the suspension compresses. A climb switch typically increases compression resistance, creating a firmer pedalling platform. It does not necessarily make the shock completely rigid or prevent movement throughout the rear suspension system.
Furthermore, visible shock movement is not automatically wasted energy. Some movement comes from the wheel following irregular terrain, which helps the tyre maintain contact with the ground. The relevant distinction is between unnecessary pedalling-induced oscillation and suspension movement that improves traction.
Separate suspension bob from climbing resistance
Start by checking the bike in its normal riding configuration rather than immediately activating the firmest compression setting.
- Measure rear sag. Confirm that the shock is not sitting excessively deep into its travel under the rider’s weight. Compare the result with the bike or shock manufacturer’s recommendation.
- Inspect the shock. Look for unusual oil accumulation, visible damage or other signs of malfunction. A light residual lubricant film alone does not establish a failed seal.
- Compare surfaces. Ride the same comfortable gear and cadence on smooth pavement, then on a familiar uneven climb. Observe when oscillation becomes noticeable.
- Change your position. Compare a balanced seated position with standing efforts, keeping the route and effort as consistent as practical.
- Test the climb switch. Repeat the climb with the shock open and with its supported climbing setting. Note changes in traction, comfort and perceived effort.
The comparison helps identify whether the problem follows suspension movement, rider input or terrain. It is a field diagnostic rather than a laboratory measurement of power loss.
Why suspension linkage design matters
Frame anti-squat describes how drivetrain forces interact with suspension compression. Its behaviour changes with suspension position, gearing and linkage design. Some frames provide substantial pedalling support with the shock open, while others benefit more noticeably from increased compression damping.
This explains why two bikes with identical advertised rear travel can climb differently. A 150 mm frame with appropriate anti-squat characteristics may feel calmer under power than a shorter-travel bike with a different suspension layout.
Pedalling technique also matters. Abrupt force application and large changes in body position can increase visible chassis movement. A smoother cadence is worth testing before purchasing an upgraded shock, although it will not correct inappropriate suspension settings.
A useful suspension setup allows the rear wheel to react to rough ground while keeping rider-induced movement manageable. That balance begins with measured sag and controlled rebound.
How to Set Sag and Rebound in 15 Minutes With Only a Shock Pump?
Set suspension sag with the rider wearing normal riding equipment, then adjust rebound after the air pressure is established. A shock pump and the suspension’s existing sag indicator can make a basic setup possible in roughly 15 minutes, although accurate measurements may require a ruler, an assistant and additional trail testing. Manufacturer settings remain the starting reference.
Sag is the amount of suspension compression produced by the rider’s weight in a normal riding position. It places the fork and shock within their usable travel so the wheels can move both upward over impacts and downward into depressions.
For an air shock, sag should be calculated using the shock’s shaft stroke, not automatically the bicycle’s advertised rear-wheel travel. These measurements describe different parts of the suspension system.
Set sag before touching rebound
- Put on your regular riding equipment, including shoes, helmet, hydration pack and any tools normally carried.
- Open the suspension’s supported compression or climb adjustment and set the starting pressure according to the manufacturer’s instructions.
- Use a wall or an assistant for balance. Carefully settle into a representative riding position without deliberately bouncing the suspension.
- Slide the existing sag indicator against the shock seal, then dismount carefully without adding unnecessary compression.
- Measure the exposed shaft movement and compare it with the manufacturer’s recommended sag range. Adjust air pressure and repeat as required.
For example, a hypothetical shock with 60 mm of shaft stroke and 18 mm of measured compression would show 30% sag. This calculation illustrates the measurement method; it is not a universal target for every trail bike.
Use rebound to control recovery between impacts
Rebound damping controls how quickly the suspension returns after compression. With the bike stationary, compress the fork or shock and observe its return. This provides an initial indication, but repeated bumps on a familiar trail are more informative.
Too little rebound damping can make the suspension extend abruptly and feel springy. Too much can prevent full recovery between successive impacts, leaving the suspension riding progressively deeper in its travel.
According to the RockShox suspension fine-tuning instructions, air-spring pressure should be addressed before rebound. Its guidance describes small pressure adjustments and adding rebound damping in increments of one or two clicks when extension is excessively fast.
Those increments are manufacturer guidance, not universal settings. Always verify the direction of adjustment on the actual fork or shock.
Increasing spring pressure can also increase extension force, so rebound should be checked again after a meaningful pressure change.
Avoid misleading shock-pump readings
Disconnecting a correctly fitted shock pump usually releases air from the hose rather than removing an equivalent amount from the shock. On reconnection, the shock fills the hose, which can produce a lower gauge reading.
That reading change should not automatically be interpreted as a suspension leak. Avoid repeated unnecessary connections, do not overtighten the pump head and follow the pump manufacturer’s valve procedure.
The amount of pressure difference depends on the shock chamber, hose volume and pump design; treating a fixed loss of 10–15 psi as inevitable would be misleading.
Your five-step suspension baseline checklist
- Record the equipment. Write down the bike, fork, shock and normal riding load, creating a repeatable setup reference.
- Measure sag. Record front and rear sag using the relevant manufacturer procedures, including the actual rear shock shaft measurement.
- Document pressure. Note both air-pressure settings and the pump used, creating a baseline for future checks.
- Record rebound. Count adjustment clicks from the manufacturer’s specified reference position and write down both settings.
- Validate on the trail. Complete a short, familiar test loop, recording excessive bouncing, harsh impacts or packing down before changing one setting.
Once suspension behaviour is predictable, it becomes easier to judge whether the bike’s travel and geometry match the terrain you actually ride.
Which Should You Choose: 130 mm Trail Bike or 160 mm Enduro for Weekend Riding?
Choose a 130 mm trail bike when climbing efficiency, moderate terrain and long-distance versatility dominate your weekends. Consider a 160 mm enduro bike when steep, sustained, technical descents and frequent bike-park riding are priorities. For mixed riding, a properly configured 140–150 mm bike often provides a useful compromise, provided its geometry and components suit the rider.
The difference is not simply how far the rear wheel can move. Head angle, wheelbase, suspension progression, component weight, tyre construction and shock damping can all make a shorter-travel bike feel more capable or a longer-travel bike feel more responsive.
A 150 mm bike sits in the overlap between trail and enduro categories. Its character depends heavily on the complete build.
Compare riding priorities, not travel labels
The following decision grid describes common design tendencies, not guarantees about every model.
| Riding priority | 130 mm trail bike | 160 mm enduro bike |
|---|---|---|
| Long climbs and rolling routes | Often favours efficiency and lower build weight | May require more effort with heavier tyres and components |
| Steep, rocky descents | Capable within its design and rider limits | Typically prioritises composure and impact management |
| Frequent bike-park laps | Best judged against the particular trails and bike rating | Generally better aligned with repeated demanding descents |
| Mixed weekend trails | Strong choice when technical demands are moderate | Useful if descending performance takes priority |
| Pedalling feel | Influenced by suspension design and build | Influenced by suspension design and build |
Consider the ratio of climbing to descending on a typical ride. A rider who spends most weekends pedalling long approaches may value reduced weight and faster-rolling tyres more than additional suspension travel.
Conversely, someone who repeatedly rides rocky, steep descents may benefit from a stronger wheel and tyre package, a more capable damper and geometry designed around high-speed stability.
The hidden cost of choosing the wrong category
An enduro-oriented bike can carry additional weight through tyres, brakes, suspension components and frame construction. That weight may become noticeable during long climbs, regardless of whether the rear suspension pedals efficiently.
A trail bike pushed beyond its intended use can create the opposite compromise. Riders sometimes increase spring pressure or compression damping excessively to resist bottoming out, then lose compliance and traction on rough sections.
Neither problem is solved automatically by choosing 150 mm instead.
A practical middle ground is a 140–150 mm bike with suitable progression, effective damping, appropriate tyres and geometry that fits the rider’s terrain. A stronger tyre casing may provide a meaningful improvement when impacts and punctures are the main limitation, without requiring a move to a heavier enduro platform.
Before purchasing, compare complete-bike weight, suspension specifications, component compatibility and a representative test ride whenever possible.
Choosing appropriate travel protects both riding enjoyment and budget, but the bike also needs regular maintenance to preserve the performance it was designed to deliver.
The Maintenance Oversight That Eats Suspension Bearings in 6 Months
Neglecting cleaning and inspection around suspension pivots can allow contamination, corrosion and developing play to go unnoticed. High-pressure washing directed at bearing seals is a particularly avoidable risk. There is no established universal six-month failure interval: bearing life depends on exposure, sealing, riding conditions, maintenance and the specific linkage design.
A full-suspension frame relies on pivot bearings or bushings to let its rear triangle move accurately through the intended suspension path. When these interfaces become contaminated or damaged, friction and unwanted movement can interfere with suspension performance.
The most defensible maintenance priority is controlling water and dirt exposure rather than assuming that a particular sag setting directly determines bearing lifespan.
Why washing technique matters
Directing high-pressure water at pivot seals can compromise the protection around sensitive components. Water and grit may enter bearing areas, while lubricant contamination or loss can contribute to premature wear.
The Park Tool bicycle washing and cleaning instructions recommend a low-pressure, wide spray and caution against directing compressed air at bearings.
For a muddy full-suspension bike, remove loose dirt gently, use an appropriate brush around the linkage and dry the frame after rinsing. Follow the frame manufacturer’s lubrication and service instructions rather than applying lubricant indiscriminately around sealed pivots.
Detect play before it becomes a larger repair
With the bike stable and unloaded, inspect the rear triangle and pivot areas for unusual movement, damaged seals and signs of corrosion. Carefully move the rear wheel laterally while observing the linkage. A second person can make it easier to identify where movement originates.
Bear in mind that apparent rear-end movement may also come from wheel bearings, axle hardware or other connections. Holding a brake and rocking the bike can help locate some looseness, but brake-pad movement can create misleading clicks.
Visible pivot movement or binding deserves investigation before further demanding riding. A linkage that does not move freely can also make a functioning shock feel abnormally harsh or reluctant to use travel.
For a more complete assessment, a qualified mechanic can disconnect the shock according to the frame manufacturer’s procedure and check whether the linkage moves smoothly through its travel. This is not an appropriate casual inspection for riders unfamiliar with suspension hardware, torque requirements or frame-specific precautions.
Replacing damaged bearings promptly can avoid continued use of a compromised linkage. However, bearing replacement cost and the risk of secondary damage depend on the frame and the extent of wear; a universal cost-saving figure cannot be justified.
DIY replacement also requires correctly sized extraction and pressing tools. Where the tools, torque specifications or mechanical experience are unavailable, a professional workshop is generally preferable to improvised bearing removal.
Once the linkage moves freely and the suspension is functioning normally, front-wheel traction becomes the next priority, particularly through rough corners.
Fix Front-End Washouts by Pairing Tyre Pressure With Rebound Settings
Front-end washouts can result from insufficient tyre traction, unstable weight distribution, unsuitable pressure or a fork that fails to recover predictably between impacts. Rebound adjustment and tyre pressure should be tested separately, not changed simultaneously. The goal is consistent front-wheel contact and steering support, rather than the softest tyre or fastest fork return.
A front tyre can only generate useful cornering grip while its contact with the trail remains sufficiently stable. On rough ground, both the tyre casing and fork help absorb small impacts before those forces reach the rider.
If rebound is too fast, the fork may extend abruptly following compression and contribute to an unsettled front end. If rebound is too slow, repeated bumps can leave the fork compressed, altering its available travel and steering behaviour.
Neither condition proves that rebound caused a particular crash. Line choice, braking, surface contamination, tread and rider position must also be considered.
Test fork recovery before changing tyre pressure
Choose a familiar corner with a predictable surface, clear visibility and a safe escape area. Begin at a controlled speed.
- Record your existing front tyre pressure and fork settings.
- Ride the section consistently, focusing on whether the front wheel skips, feels unsettled or becomes harsh over repeated impacts.
- Adjust rebound by a small amount within the manufacturer’s permitted range, keeping tyre pressure unchanged.
- Repeat the test under similar conditions and record the difference.
- Once fork behaviour is acceptable, return to the documented rebound baseline if needed and assess tyre pressure separately.
Small adjustments and consistent testing are more useful than making several changes after a single unexpected slide.
Understand tyre compliance and casing support
Reducing pressure can allow a tyre to conform more easily to trail irregularities. However, excessive reduction can increase sidewall deformation, cause an unstable feeling in corners or create rim-strike and tyre-retention risks.
Casing construction changes this response. A lightweight casing may feel flexible at modest loads but become less supportive under aggressive cornering. A reinforced casing can offer additional protection and stability, depending on its construction, but there is no universal rule that tougher casings always need higher inflation pressure.
Test pressure within the limits of the tyre and rim system. Also consider the amount of weight carried, tyre width and whether the setup uses inner tubes or tubeless construction.
Even a correctly tuned fork cannot create traction on a surface with very limited friction. Deep mud, slick roots and abrupt braking while leaned over can exceed available grip regardless of suspension adjustments.
Where tuning cannot supply the required grip, selecting an appropriate tread pattern and casing becomes more important than further suspension experimentation.
How to Choose Tread and Casing if You Ride 70% Hardpack and 30% Mud?
For a riding mix of 70% hardpack and 30% mud, start with a versatile, well-supported front tyre and a rear tread that balances braking, traction and rolling efficiency. If the muddy portion involves deep, sticky ground rather than wet hardpack, more open tread becomes valuable. Choose casing strength separately according to rider load, speed and impact exposure.
The percentage split alone cannot identify the ideal tyre. The type of mud matters just as much as its frequency.
Wet hardpack often retains a relatively firm underlying surface. Deep mud requires knobs that can penetrate soft ground and release accumulated material. A tyre designed primarily for firm surfaces may struggle when its tread fills with sticky soil.
Prioritise predictable front grip
The front tyre has a central role in steering and maintaining directional control. A rear-wheel slide can sometimes be corrected, whereas sudden front-wheel traction loss is generally harder to recover.
For that reason, an aggressive or versatile front tread may be worthwhile even when most rides occur on firm ground. The rear tyre can often use a faster-rolling pattern, provided it still offers appropriate climbing and braking traction.
The compromise becomes more difficult when the occasional muddy terrain is extremely slippery. A highly open, mud-oriented front tread may deliver useful penetration and clearing in those conditions while feeling slower or less settled on dry, compact surfaces.
Match casing strength to riding load and impacts
Tyre casing selection should account for the actual stresses placed on the wheel.
- Riders seeking low weight on relatively smooth trails may prioritise a lighter casing.
- Faster riders encountering embedded rocks and sharp edges may benefit from additional protection.
- Heavier combined rider and equipment loads can increase the need for casing support and careful pressure selection.
- Repeated rim impacts, sidewall damage or cornering instability indicate that the existing pressure-and-casing combination deserves reassessment.
The Schwalbe tire-pressure technical FAQ explains that rider load, tyre dimensions and pressure interact with comfort and grip. It also emphasises that no single inflation value suits every bicycle and tyre.
That makes a generic pressure recommendation inappropriate without knowing the tyre dimensions, rim compatibility, casing construction, combined load and riding conditions.
Use the bump-feel test
Begin within the manufacturer’s permitted pressure range and ride a short, familiar section containing small bumps and manageable corners. Note whether the tyres deflect sharply, maintain a controlled shape or feel unstable under load.
Change pressure in small, measured increments while leaving suspension settings unchanged. Repeat the same route and assess comfort, steering consistency and signs of rim contact.
Remember that the tyre is the first compliant interface between the ground and the suspended bike. Changes in tyre pressure can alter how much vibration and impact energy reaches the fork and shock.
With traction and impact protection addressed, reliable braking becomes the next consideration, particularly when wet trails combine repeated descents and contaminated surfaces.
Which Should You Choose: Resin or Metallic Pads if You Ride Wet Trails?
Metallic brake pads are often worth considering for frequent wet, abrasive riding and long descents because of their durability and heat-management characteristics. Resin pads may provide quieter operation and a different initial braking feel. Neither material is universally superior in rain: braking performance also depends on pad formulation, rotor compatibility, bedding-in and trail conditions.
Resin pads use an organic friction mixture, while metallic or sintered pads contain metal-based friction material. Their behaviour varies among manufacturers, so material labels alone cannot predict exact stopping distance, noise or wet-weather bite.
For short rides on moderately wet trails, compatible resin pads may perform adequately. Repeated steep descents, gritty water and heavier braking loads can make the durability characteristics of suitable metallic pads attractive.
Check rotor compatibility before buying pads
Changing pad compounds is not simply a matter of fitting a replacement with the correct shape. The exact brake caliper and rotor must support the selected compound.
Shimano‘s disc-brake compatibility chart distinguishes components that accept metal or resin pads from rotors designated for resin pads only.
For example, Shimano identifies certain rotor models, including SM-RT56 and SM-RT54, as having resin-pad-only restrictions. Using metallic pads on an incompatible rotor can cause damage.
The important rule is model-specific compatibility, not the blanket assumption that every steel rotor accepts metallic pads or that every compatible rotor must be replaced when changing compounds.
Why bedding-in matters
New pads and compatible rotors require the manufacturer’s specified bedding-in procedure to establish consistent braking behaviour.
This generally involves controlled braking cycles in a safe location, but the correct sequence and conditions depend on the brake manufacturer. Follow those instructions rather than applying an arbitrary number of stops to every system.
Inconsistent bite, unusual noise or a glazed-looking friction surface can indicate a braking problem, but these observations are not sufficient on their own to identify the cause. Contamination, overheating, incorrect installation and worn components also need consideration.
If braking remains unreliable, stop using the bicycle until the system has been inspected.
Can you switch pad compounds seasonally?
Seasonal switching may make sense when riding conditions change substantially, but it adds maintenance complexity.
Both compounds must be compatible with the brake and rotor, and the replacement setup needs appropriate bedding-in. Inspect the rotor surface and follow manufacturer guidance for cleaning, minimum thickness and whether a rotor can be reused with a different compound.
It would be too restrictive to state that switching compounds on an existing compatible rotor is universally prohibited. Equally, it would be unsafe to assume that every previously used rotor can be reused without inspection or preparation.
Confident descending requires predictable braking as well as traction. With the equipment working correctly, rider technique determines how effectively those capabilities translate into control.
Key takeaways before your next rocky descent
- A stable bike is not necessarily a rigid one: correctly recovering suspension and compliant tyres help the wheels follow rough ground.
- Check the actual causes of instability before stiffening suspension, reducing tyre pressure or replacing components.
- Use repeatable, low-risk practice runs to develop relaxed hands, balanced foot pressure and consistent line choice.
How to Ride Rocky Descents With More Control Without Death-Gripping the Bars
Ride rocky descents with your weight supported primarily through the pedals, elbows and knees flexed, and hands relaxed enough to let the bike move beneath you. Look ahead to identify a manageable line rather than staring at the front tyre. Correct suspension setup helps reduce unexpected impacts, but confidence comes from progressive practice and controlled speed.
Death-gripping the handlebars is often a reaction to uncertainty or repeated deflections rather than a deliberate technique. When the upper body becomes rigid, the arms cannot absorb movement effectively, and small steering disturbances can feel disproportionately large.
The solution is not to release the bars or hold them carelessly. Maintain enough grip for secure steering and braking while avoiding unnecessary tension through the wrists, shoulders and forearms.
Build a stable position before increasing speed
On an appropriate practice descent, stand with the pedals level where terrain permits, keep the knees and elbows comfortably bent and let the bicycle move underneath you.
Think heavy feet, light hands. This cue encourages the rider to support body weight through the legs rather than leaning heavily on the handlebars. It does not mean deliberately removing useful front-wheel load when cornering or braking.
Keep your gaze ahead toward the next manageable section of trail. Looking approximately two or three metres forward may suit a slow technical exercise, but the appropriate distance increases with speed, visibility and terrain complexity.
Rather than focusing on each rock individually, scan for a connected route through the obstacles. Choose lines that avoid abrupt steering corrections where possible and allow the tyres to maintain useful contact with the ground.
Let the body complement the suspension
The fork and shock absorb wheel movement, while the rider’s arms and legs provide additional compliance between the bicycle and the body.
If the fork is excessively harsh or the rear shock repeatedly packs down, maintaining a relaxed posture becomes more difficult. Similarly, poorly supported tyres can make steering unpredictable even when the suspension is correctly adjusted.
This is why suspension setup and technique should be considered together. Equipment tuning can reduce unnecessary disturbances, but it cannot replace balance, appropriate braking or line selection.
A rider transitioning from a hardtail may need practice trusting the rear wheel to move independently over rocks rather than lifting body weight dramatically over every obstacle.
Practise on a short, repeatable loop
Find a low-consequence rocky section with good visibility, a safe stopping area and no features beyond your current skill level.
- Walk the section first and identify a clear route through the obstacles.
- Ride at a comfortable pace while concentrating on level pedals where appropriate, bent elbows and balanced body position.
- Repeat the same line and assess whether your hands or shoulders become tense.
- Experiment with a slightly different, safe line that reduces abrupt impacts without requiring an increase in speed.
- Only increase pace gradually when steering, braking and body position remain predictable.
A wider line can sometimes preserve momentum and reduce the severity of an obstacle, but it is not automatically safer. Stay within the marked trail, avoid blind exits and respect other users.
Do not use unfamiliar jumps, drops or high-consequence rock gardens to evaluate a new suspension adjustment. Mechanical setup should first be validated on manageable terrain.
For your next ride, document the current suspension and tyre settings, choose one familiar technical section and complete several controlled repetitions. Keep the setup that delivers predictable wheel contact and confident handling, not simply the firmest or fastest-feeling response.
Is 150 mm of travel enough for technical mountain biking?
A well-designed 150 mm bike can be suitable for demanding trail and all-mountain riding, depending on frame geometry, component specifications, rider ability and the severity of the terrain. Travel alone does not determine whether a bike is appropriate for repeated high-impact use. Check the manufacturer’s intended-use classification and frame limitations.
Should a 150 mm mountain bike use identical front and rear sag percentages?
Not necessarily. Fork and rear shock designs have different leverage characteristics, spring behaviour and manufacturer recommendations. Set each component according to its applicable procedure, then assess front-to-rear balance during controlled trail testing. Matching numerical percentages is not automatically the correct objective.
Does pedal bob always mean the rear shock needs more air?
No. Shock pressure is only one possible factor. Pedalling forces, suspension kinematics, body movement and compression damping can all influence oscillation. First measure sag and evaluate climbing behaviour. Adding excessive pressure may reduce useful compliance without addressing the underlying cause.
Can volume spacers reduce bottoming out without making the suspension excessively firm?
On compatible air-suspension systems, changing approved air-volume spacers can alter spring progression, potentially increasing resistance near the end of travel without relying solely on higher initial air pressure. Compatibility, installation limits and the resulting spring behaviour are product-specific. Consult the fork or shock manufacturer’s instructions before modifying the air spring.
When should a suspension problem be checked by a professional mechanic?
Arrange an inspection if the fork or shock develops significant oil leakage, unusual knocking, inconsistent damping, visible structural damage or movement that remains abnormal after normal setup checks. Pivot binding, bearing play and unreliable braking also deserve attention. Stop riding when a fault could compromise control or structural integrity.