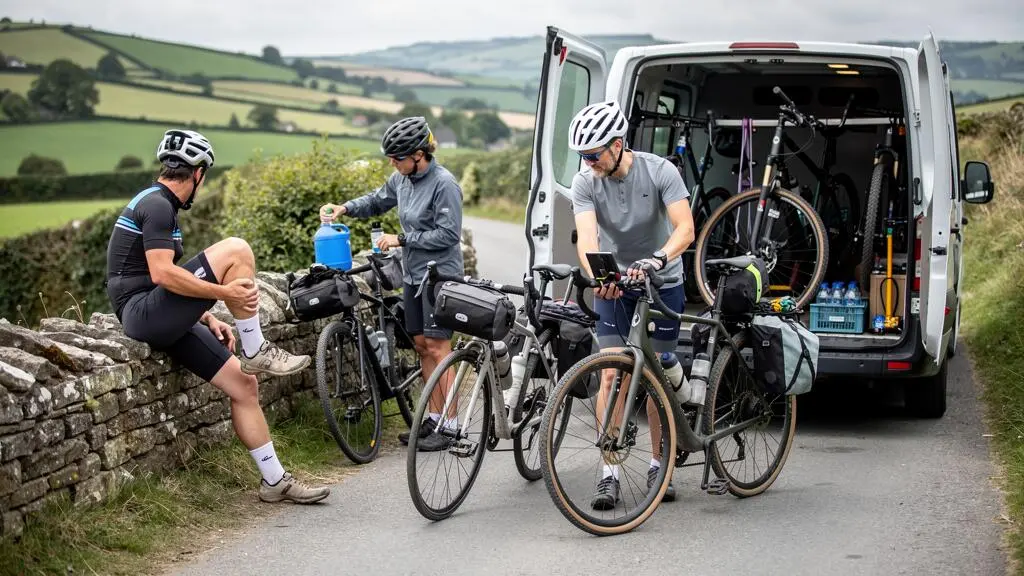
Riding 60–100 km a day can make for a rewarding cycling holiday. The challenge is rarely the distance alone. It is knowing what happens when the hills are steeper than expected, your legs feel heavy on day three, a tyre goes flat or the next hotel is still 30 km away.
Choosing between a supported cycling tour, a self-guided package and a fully DIY trip comes down to three practical questions: how much uncertainty can you tolerate, how independently can you solve problems and what are you willing to pay to reduce logistical responsibility?
A supported tour is often the better fit if roadside assistance and the option to shorten a difficult day matter most. A self-guided package suits confident riders who want freedom without organising every hotel and luggage transfer. DIY touring offers the greatest control, but makes you responsible for the route, bookings and contingencies.
The right choice is not necessarily the most expensive or most independent. It is the one that allows you to enjoy consecutive riding days without constantly managing what could go wrong.
Choosing your cycling tour at a glance
- Choose supported if you want organised logistics, clearly defined assistance and a practical way to deal with a day you cannot finish.
- Choose self-guided if you are comfortable navigating and handling minor problems but prefer accommodation and transfers to be arranged.
- Choose DIY if you enjoy planning, can assess routes and have a realistic response to mechanical failures, fatigue and unexpected disruptions.
- Why Do Riders Quit on Day 3 Even When They’re Fit Enough?
- How to Vet a Cycling Tour Itinerary for Unrealistic Elevation Days Before You Pay?
- Supported or Self-Guided: Which Fits You If You Hate Fixing Flats?
- The Booking Detail That Cost You an Extra £150 in Bike Fees
- Where Should You Put a Rest Day in a 6-Day Tour to Avoid Dead Legs?
- Professional Shuttle Service or DIY Support Car for 5 Riders?
- How to Set Up a GPS Route With Turn Alerts and a Backup Plan in 15 Minutes?
- How to Plan a 7-Day Long-Distance Cycling Route With 80 km Days Without Route Surprises
Why Do Riders Quit on Day 3 Even When They’re Fit Enough?
Fit cyclists can struggle on day three because single-day fitness does not guarantee recovery between consecutive long rides. Repeated hours in the saddle, unfamiliar climbing, uncomfortable bike contact points and an enthusiastic early pace all accumulate. A rider capable of 80 km on Saturday may still find a third consecutive 80 km stage unexpectedly demanding.
The distinction is between being fit enough for one ride and being prepared to repeat it. Someone cycling 60 km once a week has demonstrated a useful endurance base, but not necessarily their ability to tolerate several days of sustained saddle pressure, descending, climbing and recovery between stages.
The Leicestershire Partnership NHS Trust explains in its NHS physiotherapy advice on delayed-onset muscle soreness that soreness commonly develops 24–72 hours after unfamiliar or intensified activity. This does not establish a universal day-three failure point for cycle tourists. It does explain why discomfort may emerge after an apparently successful opening day.
Three problems frequently make consecutive touring days harder than the rider expected:
- Underestimated elevation: an advertised 80 km ride may involve substantially more climbing than the rider normally encounters.
- Bike contact-point discomfort: saddle pressure, hand numbness or knee discomfort can become limiting after repeated hours on an unfamiliar or poorly adjusted bike.
- Uncontrolled early pacing: keeping up with faster companions, attacking every hill or skipping breaks can leave less energy for subsequent stages.
Before booking, assess your experience rather than relying exclusively on fitness labels. Have you completed two or three substantial rides on consecutive days? When does saddle discomfort usually begin? Have you ridden a loaded touring bike or spent several hours on a rental bike? Which symptoms have previously forced you to shorten a ride?
These answers reveal whether your main risk is physical preparation, equipment familiarity or an itinerary that offers too little flexibility.
A supported tour can reduce the consequences of a difficult day. Adventure Cycling Association describes vehicle support for health and mechanical emergencies, along with luggage transport and professional mechanical assistance, in Adventure Cycling Association’s fully supported tour information.
However, its arrangements are operator-specific. Do not assume every tour vehicle can collect riders anywhere or transport them directly to the next hotel.
A difficult third day need not mean abandoning the holiday. What matters is whether the itinerary and support arrangements offer a safe, workable alternative when your body needs a shorter stage.
How to Vet a Cycling Tour Itinerary for Unrealistic Elevation Days Before You Pay?
Check every stage’s elevation gain, not just its distance or advertised difficulty rating. Compare the operator’s figures with a cycling-specific route planner, examine where the climbing occurs and ask what happens if the conditions make a stage harder than expected. An attractive 90 km itinerary is only realistic when its terrain matches your actual riding experience.
Consider two hypothetical 90 km stages. The first follows gentle terrain with few sustained climbs. The second accumulates 1,500 m of ascent through steep roads. The daily distance is identical, but the required effort, pacing and recovery can be substantially different.
Marketing terms such as “moderate”, “active” or “suitable for regular cyclists” cannot replace an elevation profile. Difficulty classifications vary by operator, and some omit important road conditions.
For example, Adventure Cycling Association states that traffic volume, road shoulder width and road conditions are not incorporated into its published tour difficulty ratings. A physical difficulty grade is therefore not necessarily a complete assessment of riding conditions.
A practical pre-payment review should follow this sequence:
- Record each day’s distance and total climbing. Compare those figures with rides you have completed comfortably, preferably on consecutive days.
- Inspect the route profile. Identify sustained climbs, repeated steep sections and ascents placed late in the stage.
- Cross-check the route. Use a second mapping tool with elevation information, recognising that different elevation datasets may produce different totals.
- Investigate exposure. Consider prevailing winds, heat, available shade and the places where food or water can be obtained.
- Request the fallback arrangements. Ask whether there is a shorter alternative, transport assistance or a practical way to reach the next overnight stop.
Ask the operator where the hardest climbing begins, whether the ascent consists of one long climb or repeated steep ramps, and what changes if strong wind or high temperatures make the planned schedule unsuitable.
Also request clarity about the itinerary’s intended rider. A group pace designed around experienced cyclists can create pressure even when the published distances appear manageable.
Build your own margin into the route rather than assuming ideal weather, uninterrupted riding and consistent energy every day. An 80 km stage that already matches your personal limit leaves little flexibility for an unexpected diversion.
No support package can make a fundamentally unsuitable route easy. Vehicle assistance may help you abandon an individual stage safely, but it does not turn inappropriate terrain into a comfortable cycling experience.
Once the route itself passes that test, the next decision becomes operational: how much assistance do you want when something goes wrong on an otherwise suitable day?
Supported or Self-Guided: Which Fits You If You Hate Fixing Flats?
Choose a supported tour if you are uncomfortable with roadside repairs and equally uncomfortable organising help in an unfamiliar location. Choose self-guided if you can resolve basic problems or confidently arrange assistance. Disliking puncture repairs alone does not justify paying for full support: the deciding factors are mechanical confidence, problem-solving tolerance and the actual assistance included.
Imagine a puncture at kilometre 40 on a quiet road. What happens next depends less on the words “supported” or “self-guided” than on the operator’s specific service agreement.
On some supported tours, a vehicle travels near the group and can provide mechanical assistance or transport. Others operate with a guide carrying basic tools and access to bike shops along the route. A self-guided package may provide a telephone helpline, partner repair shops or emergency transfer options, sometimes involving extra charges.
The useful booking question is precise: “If I get a flat tyre 40 km into the stage, who helps me, where, and at what cost?”
That answer matters more than the headline tour category.
There are also intermediate options. A self-guided holiday along a well-serviced cycling route may offer relatively easy access to repair shops. An e-bike fitted with puncture-resistant tyres can reduce certain hassles, although it adds battery management and may introduce more complex mechanical problems.
Learning to replace an inner tube, deal with a dropped chain and recognise a brake problem can make self-guided touring more practical. A brake issue that cannot be corrected safely should mean stopping and seeking qualified help, not continuing regardless.
The comparison is therefore between expected inconvenience and additional tour cost, not between adventurous and cautious personalities.
This table summarises the trade-offs to confirm with individual operators:
| Decision factor | Supported tour | Self-guided tour | DIY tour |
|---|---|---|---|
| Daily navigation | Usually organised; guide availability varies | Rider follows supplied route | Rider designs and follows route |
| Mechanical problems | Assistance may be available under defined conditions | Often hotline or local repair arrangements | Rider arranges repairs independently |
| Luggage | Often transported | May be transported as part of package | Carried or independently transferred |
| Flexibility | Linked to group schedule and operator rules | Flexible daily pace within booked itinerary | Greatest freedom to change plans |
| Cost structure | More services included in the package | Planning and transfers may be bundled | Individual costs and contingencies managed separately |
For riders who value independent pacing but dread mechanical interruptions, a self-guided package with explicitly documented recovery assistance may offer a useful compromise. A supported tour becomes more attractive when a breakdown would otherwise create serious stress or disrupt the entire holiday.
Support should remove the problems you genuinely want to avoid. There is little benefit in purchasing an expensive package whose emergency assistance still leaves you responsible for finding transport and repairs.
The Booking Detail That Cost You an Extra £150 in Bike Fees
An unexpected £150 in bicycle transport fees is a plausible budgeting scenario, not a verified universal airline charge. The booking mistake is comparing cycling holiday prices before checking the complete cost of transporting your own bike. Airline baggage allowances, advance notification, rail reservations and destination transfers can all change whether flying with your bike is worthwhile.
Bike transport rules differ significantly between airlines and fares. Some carriers treat bicycles as checked baggage within an allowance, while others apply separate sports-equipment charges or require pre-booking.
Under British Airways’ sports equipment baggage policy, an eligible non-electric bicycle can count as one piece of checked luggage. A passenger without a sufficient checked-baggage allowance must pay for additional baggage. The airline also specifies packaging restrictions and recommends advance notification.
That example illustrates why the same bicycle can have different transport costs depending on the ticket purchased. It does not mean every airline follows the same rules or charges £150.
Before committing to a tour, compare three complete transport scenarios:
- Bring your own bike: include outbound and return airline charges, packaging, airport transfers, any necessary rail reservations and the effort of disassembly and reassembly.
- Rent at the destination: include the rental period, appropriate bicycle size and type, accessories, insurance conditions and any collection or delivery fees.
- Book a tour with bike rental included: confirm the exact model category, what happens if the supplied bike does not fit and whether helmets, lights and repair equipment are included.
Do not assume the cheapest advertised flight remains the cheapest once sports-equipment terms are included. Some carriers require online pre-payment or advance booking of bicycle transport; others apply fare-based baggage rules. Check the actual carrier operating each flight, especially when the itinerary involves partner airlines.
Consider a hypothetical example: a rider budgets for a flight and cycling package but discovers that the selected fare does not cover the bicycle, resulting in £150 of additional transport-related expenses. The figure illustrates the potential budget impact; it is not a documented incident or a published airline tariff.
Transport risk also matters. A bike delayed in transit or damaged during handling can threaten the first stage, particularly on a self-guided itinerary with fixed accommodation and no replacement bicycle arrangements.
A rental bike may reduce this risk, provided the operator can confirm appropriate fit, gearing and availability. Conversely, a familiar personal bike may be preferable for riders with specific fit requirements or discomfort histories.
A slightly higher package price can represent better overall value when bicycle provision and collection logistics are included. Compare the complete journey rather than the tour price in isolation.
Where Should You Put a Rest Day in a 6-Day Tour to Avoid Dead Legs?
Place a rest day according to the hardest stage and your recovery needs, rather than automatically choosing the itinerary’s midpoint. On a six-day cycling holiday, an off-bike day after a demanding climbing stage may protect subsequent riding days. But if the major climb comes later, resting beforehand may be more useful, particularly when the route is flexible.
Repeated cycling places demands on muscles and contact points even when each individual ride is manageable. Delayed-onset muscle soreness can emerge 24–72 hours after unusual exertion, according to the NHS physiotherapy guidance discussed earlier.
That timeframe should not be interpreted as proof that cycling fatigue always peaks 48–72 hours after the hardest stage. Recovery depends on training, sleep, pacing, nutrition, terrain and individual circumstances.
The better planning approach is to identify where fatigue is most likely to interfere with the rest of the holiday.
Consider a hypothetical six-stage itinerary:
| Day | Planned distance | Planning purpose |
|---|---|---|
| 1 | 65 km | Settle into the bike and pacing |
| 2 | 80 km | Steady endurance stage |
| 3 | 75 km | Most demanding climbing stage |
| 4 | Rest | Recovery and local sightseeing |
| 5 | 85 km | Return to sustained riding |
| 6 | 60 km | Shorter final stage |
This arrangement is an illustration, not a universal optimum. The rest day follows the hardest climb, while the final ride is deliberately shorter. A rider who responds better to an easier stage rather than a full day off could modify the schedule accordingly.
A rest day also has logistical value. It can create time for sightseeing, laundry, equipment adjustments and recovery without requiring another hotel transfer. In some route designs, it may be preferable to combine two awkward short riding stages into one comfortable longer ride and a separate off-bike day.
The tour style affects how easily this can be arranged. Supported groups operate to published schedules, although some operators may allow riders to miss a stage and rejoin. On self-guided point-to-point tours, a rest day usually needs to align with existing hotel reservations and luggage transport.
DIY riders can adjust their calendar more freely, but they must handle every booking change and transport consequence themselves.
Ask whether an unplanned recovery day is possible before booking, not just whether a scheduled rest day exists. The distinction matters when tiredness appears earlier than expected.
A successful rest-day strategy is one that preserves the quality of the remaining rides, rather than simply reducing the number of kilometres completed.
Professional Shuttle Service or DIY Support Car for 5 Riders?
For five riders, a professional shuttle is usually the simpler option when the route is point-to-point, abilities differ or everyone wants to cycle every stage. A DIY support car can work better on accessible routes when one participant genuinely wants to drive. Compare total trip costs and responsibilities, not just the daily vehicle price.
The most easily overlooked constraint is that a five-person riding group with one dedicated driver becomes four cyclists on the road. If the group expects all five participants to complete every stage, a self-operated support car does not solve the problem without additional driving arrangements.
A professional shuttle may be booked for luggage transport, prearranged transfers or selected rider collections. However, the ability to collect tired riders at arbitrary locations should never be assumed. Providers have operating areas, vehicle-access restrictions, pickup conditions and scheduling limitations.
A DIY vehicle provides more direct control over snacks, water, spare equipment and luggage. It also introduces rental conditions, fuel costs, parking, insurance, vehicle access and driver responsibilities.
Before comparing prices, establish which services are actually needed:
| Factor | Professional shuttle | DIY support car |
|---|---|---|
| Who cycles? | All five may ride if transport is separately staffed | A group member must drive unless another driver is provided |
| Cost drivers | Transfer frequency, distance, service scope and pickup arrangements | Vehicle rental, fuel, insurance, parking and driver time |
| Route access | Depends on provider coverage and safe pickup points | Depends on road access, parking and coordination |
| Equipment carriage | Limited by booked service and capacity | Controlled by the group within vehicle capacity |
| Unexpected fatigue | Recovery service must be confirmed | Driver can assist where stopping and access are safe |
| Daily administration | Provider coordination | Driving, parking, vehicle care and route coordination |
For a meaningful cost comparison, calculate the total professional service quotation over the full trip. Then compare it with the complete vehicle cost, including insurance, parking, fuel and any accommodation implications, while explicitly accounting for the lost riding time of the driver.
It may be helpful to model two hypothetical trip structures: a route with just two scheduled transfers, and a longer tour requiring daily vehicle movements. The cost crossover can change significantly, but no universal threshold can be established without actual local quotations.
Route design matters equally. A car cannot necessarily follow cycle paths, restricted tracks or quiet infrastructure intended only for bicycles. A group relying on roadside support must identify legal, safe meeting locations.
If ability levels vary considerably, professional transport arrangements may reduce interpersonal pressure, provided the company explicitly offers flexible recovery services. If the group rides manageable loops and one participant prefers a mixture of driving and riding, DIY support can be attractive.
A support vehicle should make the holiday more enjoyable for the whole group, not quietly transfer the logistical burden to one participant.
How to Set Up a GPS Route With Turn Alerts and a Backup Plan in 15 Minutes?
Allow 15 minutes for a focused navigation check: load the correct route, confirm its direction and destination, enable compatible turn alerts, test the first instructions and prepare an offline fallback. This is a practical target rather than a guaranteed setup time. Device compatibility, imported route quality and map availability can all affect the process.
GPS navigation is particularly important for self-guided and DIY riders, who may not have a guide available to resolve navigation problems. But even on supported tours, a reliable route display is valuable when riders become separated or take permitted detours.
Turn notifications are not infallible. Garmin‘s technical guidance describes how compatible devices can provide turn prompts while following courses and explains that settings vary by model. Certain shallow turns and imported third-party routes may not generate the expected prompts.
The manufacturer’s Garmin turn guidance support documentation is useful for checking model-specific settings, although it does not guarantee accurate instructions for every imported GPX file.
A short setup routine should catch the most obvious errors before departure.
Your five-step GPS departure checklist
- Import the daily route files. Load the operator’s GPX courses or routes exported from your planner. Deliverable: one clearly named file for each riding day.
- Verify the itinerary match. Check each route’s start, destination and direction against the booked overnight stops. Deliverable: a confirmed route list with no missing stages.
- Configure course navigation. Enable available turn guidance, inspect off-course or recalculation settings and review battery-saving options. Deliverable: navigation settings confirmed for your specific device.
- Test a short section. Follow the opening part of the course in a safe location where practical, checking prompts and map visibility. Deliverable: successful route-following test or a documented issue to resolve.
- Save an independent backup. Download usable offline maps or print a cue sheet, and record hotel addresses and emergency contacts. Deliverable: route information accessible without the primary GPS.
The 15-minute target works best when routes are already prepared and the device is familiar. If maps need updating or the imported file behaves unexpectedly, resolve the issue before the tour rather than forcing the setup into a fixed time limit.
Also inspect automatic recalculation. Depending on the device and configuration, a newly calculated route may send a rider onto an unsuitable road or away from the intended cycling corridor. Treat suggested changes as proposals requiring judgement, not proof of safe or lawful access.
Battery management deserves similar attention. Screen brightness, navigation settings and device condition affect power consumption. Prepare an appropriate charging arrangement and avoid relying on an untested battery estimate.
The final backup is organisational. Everyone in the group should know where to stop if separated, how to contact the operator or other riders, and what to do when mobile coverage is unavailable.
Reliable navigation does not eliminate route hazards. It reduces the chance that an ordinary missed turn becomes a stressful, time-consuming problem far from the next accommodation.
Key takeaways before choosing your route
- Verify the effort of every stage, including climbing and road conditions, before treating daily distance as a reliable measure of difficulty.
- Assess support arrangements by what happens during a real disruption, not by the tour’s marketing category.
- Build the itinerary around recovery opportunities, navigation backups and a realistic way to reach the next overnight stop.
How to Plan a 7-Day Long-Distance Cycling Route With 80 km Days Without Route Surprises
Plan a seven-day cycling route by checking the climbing, surfaces, traffic exposure, services and fallback options for every stage. An 80 km daily target is useful for estimating distance, but it cannot guarantee a comfortable journey. Avoid consecutive maximum-effort stages, protect recovery time and design each day around the conditions you can realistically manage.
A seven-day itinerary of roughly 80 km stages should begin with route feasibility, not a simple multiplication of days and distance. The experience of riding those kilometres changes with wind direction, surface conditions, gradient, temperature, road access and cumulative fatigue.
Start by fixing the overnight destinations. Then examine whether the roads and paths connecting them offer appropriate cycling conditions. A route that appears convenient on a general map may include high-traffic sections, unsuitable surfaces or crossings with limited operating times.
Each stage needs its own risk assessment, particularly where alternative roads or transport options are limited.
A hypothetical seven-day profile might look like this:
| Day | Target distance | Route-planning priority |
|---|---|---|
| 1 | 70 km | Familiarisation and comfortable pacing |
| 2 | 80 km | Steady riding with reliable services |
| 3 | 85 km | Main climbing stage, subject to suitable preparation |
| 4 | 65 km | Easier recovery-oriented stage |
| 5 | 80 km | Mixed terrain with identified alternatives |
| 6 | 85 km | Longer stage without excessive additional climbing |
| 7 | 60 km | Shorter finish with schedule flexibility |
These distances are illustrative, not a tested route or an optimal training prescription. The purpose is to avoid stacking the most demanding climbing and distance requirements without recovery opportunities. A rider who needs a full off-bike day should schedule one rather than treating a shorter stage as equivalent rest.
For each day, verify the route against cycling-specific mapping layers and recent reports relevant to your destination and season. Prioritise surface quality, traffic exposure, cycle infrastructure, likely weather patterns and the reliability of food, water and accommodation access.
Identify two or three critical points where a disruption could affect the entire stage. Possibilities include a gravel section unsuitable for your tyres, a mountain road affected by seasonal restrictions, a ferry connection or a long stretch without services.
For each vulnerable point, write down a usable alternative. That might be a verified parallel route, a scheduled transport connection or an agreed place where a support provider can collect you.
Do not label a route “verified” merely because it exists on a navigation app. Mapping data may be incomplete or outdated, and a GPS track cannot confirm current legal access or safe conditions.
The total planning workload is also a useful way to decide between supported, self-guided and DIY touring. Riders who enjoy investigating surfaces, transport connections, overnight logistics and contingencies are more likely to appreciate DIY freedom. Those who find the process burdensome may prefer professionally prepared routes or a supported itinerary.
Self-guided touring sits between those options: much of the accommodation and route design may be supplied, but the rider still needs to inspect the daily difficulty, understand the emergency arrangements and navigate independently.
To make your decision, shortlist one supported, one self-guided and one DIY itinerary for the same destination. Compare their verified daily climbing, total travel costs, mechanical assistance and recovery options. Choose the arrangement that leaves you confident about both the planned rides and the days that do not go to plan.
Do you need to be an experienced cyclist to ride 80 km a day on holiday?
Not necessarily, but a single comfortable 80 km ride is not sufficient evidence that repeated 80 km stages will be enjoyable. Relevant preparation includes consecutive riding days, terrain comparable to the planned itinerary, suitable bike fit and a realistic understanding of recovery needs. A supported tour may reduce logistical consequences when a stage becomes difficult, but it does not replace physical preparation.
Can you join a supported cycling tour and still ride at your own pace?
It depends on the operator and group format. Some tours accommodate different paces or offer independent route-following, while others expect riders to stay with a guide or follow scheduled regrouping points. Ask about pace expectations, regrouping arrangements, vehicle support and whether independent riding is permitted before booking.
Is a self-guided cycling holiday safer than planning everything yourself?
Not automatically. A self-guided package can reduce uncertainty by providing prepared routes, accommodation arrangements and access to assistance. However, the quality of those services varies. Safety still depends on route suitability, traffic, weather, rider preparation and the availability of realistic emergency options. A carefully planned DIY trip can also be appropriate for experienced, well-prepared riders.
Should you take your own bicycle or rent one for a week-long cycling tour?
Compare the complete cost and practical risks of both options. Bringing your own bike provides familiar fit and handling but introduces transport, packaging and potential flight-disruption concerns. Renting removes most airline bicycle transport logistics but requires confidence in the rental bike’s condition, geometry, gearing and availability. Confirm every cost and the applicable airline baggage rules before purchasing travel.
What should you do if bad weather makes a scheduled cycling stage unsafe?
Do not continue simply to preserve the planned distance. Assess local warnings and conditions, find a safe place to stop and contact the operator or appropriate transport provider when necessary. Supported riders should confirm the collection procedure, while self-guided and DIY riders need alternative transport or accommodation arrangements. Checking these contingencies before departure is part of responsible route planning.