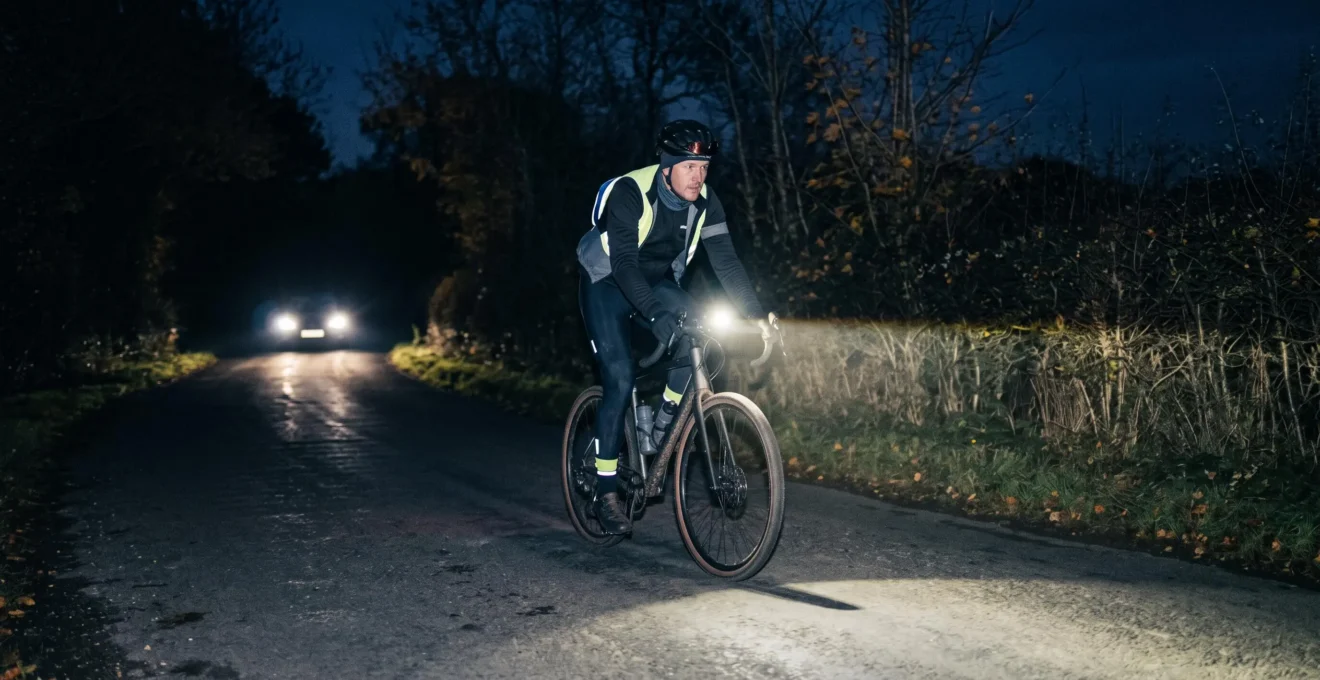
A bicycle light advertised as visible from 150 metres is not necessarily a light that allows drivers to recognise a cyclist at that distance. Nor does a powerful front beam automatically make an unlit road safer. The effectiveness of a night-riding setup depends on beam distribution, mounting position, aiming, operating mode and the reflective equipment accompanying the lights.
For most road commuters, a sensible starting point is a properly aimed, preferably cutoff-equipped white front light, a clearly visible red rear light and reflective elements that help drivers recognise the movement and shape of a cyclist. On unlit roads, the front lamp must also illuminate potential hazards far enough ahead for the rider to react and brake.
There is no universal lumen rating that guarantees recognition at 150 metres. Local lighting regulations matter too: some jurisdictions specify visibility distances, while others prescribe approved equipment or particular reflector arrangements. A suitable setup must therefore satisfy both practical riding needs and the rules applicable to the journey.
Night cycling visibility: the essential decisions
- Choose beam quality before maximum lumens. A controlled beam with useful forward reach can outperform a brighter lamp that scatters light or dazzles traffic.
- Separate being seen from seeing hazards. A light detectable from 150 metres does not necessarily illuminate the road effectively at that distance.
- Combine active and passive visibility. Use appropriate front and rear lighting, aim carefully, add reflective moving elements and verify local requirements.
- Why Can a 1000-Lumen Light Still Feel Useless on Unlit Roads?
- How to Aim Your Front Light So You Can See the Road Without Dazzling Oncoming Traffic?
- Which Should You Choose: Helmet Light or Bar Light for Night Trails?
- The Runtime Rating Mistake That Leaves You in the Dark After 45 Minutes
- When Should You Use Steady vs Flashing Modes to Maximise Being Seen?
- How to Match Lumens to Your Speed in 3 Rules Without Overbuying?
- Which Should You Choose: Reflective Ankle Bands or Reflective Tyres for Night Commutes?
- How Many Lumens Do You Really Need for 25 km/h Riding on Unlit Roads?
Why Can a 1000-Lumen Light Still Feel Useless on Unlit Roads?
A 1000-lumen bicycle light can feel ineffective on an unlit road because lumens describe total emitted light, not how effectively that light reaches useful parts of the road. A poorly controlled flood beam may illuminate the front wheel brightly while leaving distant hazards obscure. A lower-output lamp with focused road optics can provide more useful forward visibility.
Imagine two lights: one produces a broad, intense circle immediately ahead of the bicycle, while the other distributes its output across the lane with a controlled concentration farther forward. The first may appear brighter when looking down; the second may make it easier to identify a pothole before reaching it.
This is the difference between total luminous output and usable illumination. Beam reach, width, distribution and unwanted upward spill matter alongside the advertised lumen figure.
Contrast is another problem. On a dark road, the rider’s eyes adapt to low illumination. An excessively bright foreground can make the darker section beyond the beam relatively difficult to distinguish. The solution is not necessarily to dim the entire road surface, but to avoid concentrating an unnecessary amount of light directly in front of the tyre.
As a practical reference, Cycling UK‘s advice on choosing bicycle lights suggests that a focused road-specific front lamp producing approximately 300–500 lumens may be sufficient for unlit roads, provided the beam reaches beyond the rider’s stopping distance. This is practical guidance, not a guaranteed performance threshold.
A simple garage-door test can help reveal why a light is disappointing:
- Position the bicycle upright several metres from a wall or closed garage door.
- Switch on the steady mode normally used for riding.
- Examine where the brightest area falls and whether light spreads excessively above the intended road-illumination zone.
- Compare the pattern at different output settings without changing the mounting angle.
- Check the result on a safe, familiar stretch of road before relying on it at speed.
Look for a useful central area, controlled spill and enough lateral coverage to identify the road edges. A compact hotspot with gradual falloff may be useful for distance, but it should not come at the expense of seeing nearby hazards or corners. A properly designed cutoff beam may look different from a conventional round-beam light.
A wall test diagnoses beam shape; it does not establish actual road illumination distance, compliance or driver recognition. Those questions require examining the light under realistic conditions.
If the beam provides enough road coverage but points too high, correcting its angle may improve visibility without buying another light. Proper aiming is the next essential step.
How to Aim Your Front Light So You Can See the Road Without Dazzling Oncoming Traffic?
Aim your bicycle’s front light so its useful beam illuminates the road ahead without projecting intense light into approaching people’s eyes. A lamp with a defined horizontal cutoff makes this easier than a conventional round-beam model. Use a wall to establish the initial angle, then check road coverage and glare in realistic riding conditions.
Start with the light mounted securely in its normal riding position, ideally with the bicycle carrying its usual bags and accessories. The rider’s weight and luggage can change the bicycle’s orientation slightly, so final adjustment should reflect the actual setup.
For a cutoff-equipped lamp, use the manufacturer’s aiming instructions whenever available. As a practical initial check, position the bicycle several metres from a wall on level ground and observe the upper boundary of the main beam.
- Measure or note the front lamp’s mounting height above the ground.
- Position the bicycle upright, facing a wall on level ground.
- Switch on the steady riding mode and locate the upper edge of the main beam.
- Adjust the lamp so that this boundary falls below its mounting height on the wall, creating a downward aim.
- Test the result on the road, making small adjustments until the useful illumination and glare control are satisfactory.
Do not treat the wall position as a universal regulatory specification. Different beam geometries require different adjustment methods, and an excessively downward angle may leave hazards outside the useful beam.
A cutoff is more than a lower brightness setting. It controls the upward distribution of light, allowing useful road illumination without sending the strongest part of the beam towards oncoming eyes. A conventional round-beam light lacks that optical boundary, so tilting it down generally becomes more important.
Helmet-mounted lights require additional care. Their direction changes with every movement of the rider’s head. Looking towards an approaching driver can briefly direct a powerful beam at eye level, even if it normally points towards the road.
When meeting traffic, lower the helmet beam’s intensity where appropriate and avoid shining it directly at other road users. For ordinary road riding, a fixed, correctly aimed handlebar light provides a more consistent primary beam.
The common mistake is tilting a weak-feeling lamp upwards to make it reach farther. That may illuminate distant signs or trees, but it can also increase glare while doing little to improve the illumination of the road surface.
Five checks before your next night ride
- Inspect the mount: confirm that the lamp cannot rotate under gentle hand pressure; record any looseness that needs fixing.
- Check beam alignment: project the steady beam onto a wall and mark or photograph its upper boundary.
- Verify road coverage: confirm on a safe route that the useful beam reaches beyond the distance needed to react and stop.
- Check potential glare: examine the beam from an approaching eye-level position without staring directly into the LED; adjust if the intense beam is directed towards approaching traffic.
- Confirm the final setup: repeat the alignment check after fitting bags, repositioning accessories or changing the mounting bracket, and save the resulting position as a reference.
A stable front beam solves much of the glare problem on roads, but off-road riding introduces corners, obstacles and changing terrain that may justify a second light.
Which Should You Choose: Helmet Light or Bar Light for Night Trails?
For technical night trails, a handlebar light and a lightweight helmet light usually perform complementary tasks. The bar-mounted unit provides consistent illumination and terrain-defining shadows, while the helmet light follows the rider’s gaze through corners. For ordinary commuting, a correctly aimed handlebar light is generally the more practical primary choice.
A handlebar light points in the direction of the bicycle. Its relatively low mounting position helps reveal uneven surfaces through the shadows cast by rocks, roots and ruts. These visual cues can make changes in terrain easier to interpret.
Its main limitation appears when the rider looks into a tight bend before turning the handlebars. The front wheel may still point straight ahead, leaving the intended route insufficiently illuminated.
A helmet light addresses this by following head movement. It can illuminate a corner before the bicycle turns and supplement the main beam when the trail changes direction abruptly.
However, using a helmet light alone can flatten terrain detail because illumination originates close to the rider’s line of sight. The reduced visibility of some shadows may make surface texture harder to interpret.
For night trails, Cycling UK’s guidance suggests a main light of at least 800 lumens and describes the value of a broad main beam with a more focused secondary helmet light. This is a practical starting point rather than a universal requirement for every trail.
The differences become clearer when compared directly.
| Consideration | Handlebar light | Helmet light |
|---|---|---|
| Primary advantage | Consistent forward illumination and terrain shadows | Illuminates the direction the rider looks |
| Main limitation | Cannot independently look around corners | Can flatten shadows when used alone |
| Glare management | Relatively easy with fixed mounting and controlled optics | Requires attention to head direction |
| Comfort | Weight carried by the bicycle | Additional weight carried by the helmet |
| Typical use | Primary road or trail illumination | Supplementary lighting for technical trails |
The distinction becomes especially important on shared roads near trailheads. A stable handlebar beam provides a consistent visible light source, while a helmet lamp can sweep across a driver’s eyes as the cyclist checks traffic. Neither mounting position guarantees that a driver will recognise the cyclist at 150 metres.
Comfort also matters. A heavy helmet-mounted battery and lamp add mass that the rider must move with every head turn. This may become tiring on longer rides. A powerful bar light supplemented by a smaller helmet unit is often a reasonable compromise.
Check that the helmet mount is compatible with the helmet and does not interfere with its intended protective function.
Once the beam arrangement is chosen, the next question is whether the batteries can support the intended output for the entire journey.
The Runtime Rating Mistake That Leaves You in the Dark After 45 Minutes
The runtime mistake is treating a manufacturer’s headline battery-life figure as the duration available at maximum steady brightness. A light advertised with a long runtime may achieve that figure only in a lower-output or flashing mode. If high output is needed on an unlit road, the relevant figure is the runtime for that exact setting.
A hypothetical example shows the problem. Imagine a product advertised as lasting six hours, with a separate specification showing only 45 minutes of operation in its highest steady mode. A rider relying on the headline figure could encounter reduced output much earlier than expected.
This scenario illustrates how mode-specific ratings can differ; it is not a performance claim about a particular manufacturer or product.
Read the full runtime table and, when available, examine whether brightness remains reasonably stable throughout the stated period. A long operating duration at drastically reduced output may not provide useful illumination for an unlit journey.
Thermal throttling is a second limitation. Powerful LEDs produce heat, and some lights automatically reduce output to manage temperature. A lamp may therefore become noticeably dimmer even when battery charge remains.
Temperature, airflow, housing design and operating mode can influence this behaviour. A stationary test may not reproduce the cooling conditions of a moving bicycle, so the manufacturer’s output specifications and realistic riding observations both matter.
Battery ageing adds another variable. Rechargeable cells gradually lose useful capacity, while cold conditions may temporarily reduce available performance. A lamp that completed a journey comfortably when new may provide less margin after repeated charging cycles.
To estimate the battery capacity needed for a mixed route, divide the journey into segments and use the manufacturer’s runtime for each intended mode.
For example, suppose a hypothetical commute includes 30 minutes on unlit roads and 20 minutes on illuminated streets. The rider should estimate how much battery capacity those segments consume at their respective settings, rather than assuming the lamp can operate at maximum output for the duration advertised in a lower mode.
Where runtime data supports a simplified estimate, the portion of battery capacity consumed by each segment can be approximated by dividing that segment’s duration by its mode-specific runtime, then adding the portions together. This assumes the ratings are reasonably comparable and does not model every battery-management behaviour.
Allowing at least 25–30 % additional runtime margin is a conservative planning approach for uncertain conditions, not a manufacturer-certified safety standard. Severe cold or substantially degraded batteries may justify even more margin.
Before a long night ride, test the planned brightness settings on a shorter, familiar route. Check when the output first steps down and whether any remaining battery indicator accurately reflects usable illumination.
Battery endurance also depends on whether the light operates continuously or flashes, but the mode should be chosen for visibility and riding conditions rather than runtime alone.
When Should You Use Steady vs Flashing Modes to Maximise Being Seen?
Use a steady front beam when riding on unlit roads because it provides continuous illumination and a stable reference for approaching traffic. Flashing lights can attract attention in daylight or brighter urban environments, but they are not automatically better at night. Rear-light choices should balance conspicuity, position recognition and local legal requirements.
A flashing light introduces sudden changes in brightness, which can help it stand out against other visual information. That makes it a potentially useful conspicuity feature in daylight or twilight.
At night, however, a flashing-only light may provide less continuous information about a cyclist’s position and movement. A steady light gives other road users a persistent visual reference, although the real-world benefit depends on traffic conditions and the light’s characteristics.
For a front lamp, the choice is particularly straightforward on an unlit route: an intermittent beam leaves the rider’s own road illumination intermittent too. A steady setting avoids that problem.
At the rear, a steady red lamp can provide continuous positional information, while a supplementary flashing light may increase attention. Cycling UK’s practical guidance favours avoiding reliance on a flashing rear light alone on unlit roads.
Bright, rapid strobing should not be assumed to be safer. It may distract or irritate other road users, especially when the lamp is powerful or positioned near eye level.
Legal requirements vary between jurisdictions, including the permitted flashing configurations and the required visibility or approval of lamps.
In the United Kingdom, the UK Highway Code rules for cyclists require white front and red rear lights at night, along with prescribed reflectors. Rule 60 permits flashing lights but recommends a steady front lamp where there is no street lighting.
Queensland, Australia, provides a useful example of why the legal context matters. The Queensland Government bicycle road rules specify white front and red rear lights that can be clearly seen from at least 200 metres, with steady or flashing operation permitted.
200 metres
Queensland’s minimum stated visibility distance for front and rear bicycle lights in applicable conditions. It is a jurisdiction-specific legal requirement, not a guarantee that every driver will recognise a cyclist at that range.
Queensland Government bicycle road rules.
These examples do not establish a single rule for all English-speaking countries. The United States, Canada and Australia have jurisdiction-specific requirements, while equipment approval and reflector rules may also differ.
A practical mode strategy is to use steady illumination where road-surface visibility is essential, consider conspicuity-oriented modes in brighter conditions where permitted, and avoid disruptive mode changes while negotiating hazards.
The appropriate setting is only one part of choosing a light. Its output should also match riding speed and the type of road rather than simply the largest lumen figure available.
How to Match Lumens to Your Speed in 3 Rules Without Overbuying?
Match bicycle-light output to speed by applying three rules: separate visibility to drivers from illumination for the rider, select useful beam reach according to the distance needed to react and stop, and account for street lighting and road complexity. Lumens provide a starting point, but beam design and usable illumination determine whether the choice works.
Rule 1: Separate seeing from being seen. On well-lit urban streets, a cyclist may primarily need an approved lamp that makes their presence apparent to others. On an unlit road, the lamp must also reveal potholes, road edges and other hazards.
Those functions do not require identical lighting characteristics. A modest front light may provide adequate conspicuity in one environment while offering insufficient forward illumination in another.
Rule 2: Match useful beam reach to speed. Higher speeds increase the distance travelled while identifying and responding to a hazard. The rider therefore needs to see potentially dangerous obstacles early enough to assess them and stop or avoid them safely.
The relevant distance is not fixed by speed alone. It also depends on reaction time, braking performance, surface grip, gradient, weather and the particular hazard.
Rather than buying a light based solely on its lumen rating, examine whether its beam allows hazards to be identified at the distance needed for the actual route. A claimed maximum throw distance may describe a faintly illuminated target rather than the distance at which a pothole can be recognised reliably.
Rule 3: Match the light to the road environment. The following comparison provides practical shopping categories, not certified minimum requirements.
| Road environment | Typical riding need | Practical lighting choice |
|---|---|---|
| Well-lit urban roads, moderate speed | Be recognised by other road users while retaining adequate near-road visibility | Modest-output, compliant front light with controlled glare |
| Mixed suburban roads, variable speed | Illuminate occasional dark sections, kerbs and surface defects | Adjustable mid-output road light with balanced beam width and reach |
| Fully unlit roads, approximately 25 km/h | Identify hazards beyond the distance needed to react and brake | Focused road-specific lamp; approximately 300–500 lumens may be a starting point, subject to testing |
| Technical off-road trails, variable speed | Read uneven surfaces, bends, obstacles and peripheral terrain | Broader, higher-output trail lighting; 800 lumens or more is a practical starting category |
These categories describe different needs rather than universally safe speeds or legally sufficient outputs. A wet road, steep descent or poor beam pattern can change the result substantially.
Overbuying can impose real costs: more expensive equipment, larger batteries, additional weight and potentially greater glare when the light is poorly aimed. A high-output model may still be useful if it has excellent optics and appropriate lower-power settings, but maximum lumens should not become the deciding specification.
Once forward illumination is adequate, the next improvement may come from helping drivers recognise the cyclist’s shape and movement rather than increasing front-light output further.
Which Should You Choose: Reflective Ankle Bands or Reflective Tyres for Night Commutes?
If choosing one supplementary reflective accessory, ankle bands are a useful option because their movement can help drivers recognise a pedalling cyclist. Reflective tyre sidewalls add a different benefit by outlining the wheels, especially in side-on views. Neither replaces the required bicycle lights or reflectors, and there is insufficient direct evidence to declare one universally superior.
The distinctive feature of an ankle band is its position on a moving body part. As the rider pedals, the reflective area repeatedly moves up and down. Under vehicle headlights, this motion can provide a recognisable cue that the object ahead is a cyclist rather than an unrelated roadside light.
Research supports the value of reflective markings on moving joints. In a controlled nighttime experiment involving 24 drivers, cyclists wearing a reflective vest supplemented with ankle and knee reflectors were recognised at greater distances than cyclists wearing a vest alone or black clothing.
Nighttime cyclist recognition: evidence from a controlled study
A 2012 study published in Accident Analysis & Prevention tested nighttime recognition using 12 younger and 12 older drivers on a closed-road circuit. Participants encountered a bicyclist wearing different combinations of reflective clothing and bicycle lighting.
Adding ankle and knee reflectors to a reflective vest significantly increased recognition distance compared with the other tested clothing configurations. The research supports moving reflective markings as supplementary equipment, but it did not directly compare ankle bands alone with reflective tyres. See the 2012 study on reflective clothing and nighttime cyclist recognition.
Reflective tyre sidewalls work differently. They use retroreflective material to send incident light back towards its source. When vehicle headlights illuminate the sidewalls, they can make the circular wheel outlines more apparent.
This can be particularly useful for lateral visibility at junctions and intersections. From directly behind, however, the amount and geometry of visible reflective sidewall material may be limited. Tyre reflectivity should not be treated as a substitute for a visible rear lamp.
Both accessories are passive. They depend on external illumination and cannot make a cyclist consistently visible from every angle or in every lighting condition.
The choice is therefore contextual:
- Choose ankle bands when the priority is adding moving reflective cues that may help approaching drivers identify a cyclist.
- Choose reflective tyres when additional side-on wheel visibility is desirable, especially on routes with frequent intersections.
- Combine them where practical to add both movement cues and wheel outlines without relying on either as the primary visibility system.
Check legal requirements separately. For example, UK Highway Code Rule 60 specifies a rear reflector and amber pedal reflectors for bicycles manufactured after 1 October 1985. Additional reflective ankle bands should not automatically be assumed to replace legally required pedal reflectors.
No reflective arrangement guarantees that a driver will recognise a cyclist at 150 metres. Detection depends on headlight illumination, approach angle, weather, background contrast and the driver.
With front and rear lights, beam aim and reflective equipment considered together, the remaining decision is how much usable front illumination is needed for a specific riding speed.
Key takeaways before choosing your final setup
- Start with the route: a fully unlit road at 25 km/h places greater demands on forward illumination than a well-lit urban commute.
- Separate measurable claims: luminous output, usable hazard-detection distance and visibility to drivers describe different characteristics.
- Verify the complete system: controlled beam direction, appropriate rear lighting, legal compliance, reflective equipment and dependable runtime all matter.
How Many Lumens Do You Really Need for 25 km/h Riding on Unlit Roads?
For approximately 25 km/h riding on unlit roads, a focused road-specific front light in the 300–500-lumen range is a reasonable starting point, based on Cycling UK’s practical guidance. The correct choice depends on whether its beam reveals hazards sufficiently far ahead, how well it controls glare and whether its usable output lasts for the journey.
At 25 km/h, the bicycle travels approximately 6.9 metres every second. That makes early hazard identification important: even a short delay in recognising an obstacle consumes valuable distance before braking begins.
Actual stopping distance also depends on the rider’s response, braking performance, tyre grip and road conditions. It cannot be derived from a lumen rating.
Consider a hypothetical rider travelling at 25 km/h on a narrow, unlit rural road. The route includes rough patches, occasional gravel and bends where the road edge is difficult to distinguish.
A light with a narrow, intense hotspot may illuminate a distant central point but fail to reveal gravel near the edge of the lane. A very wide flood beam might show nearby surroundings yet provide inadequate forward reach. The preferable option balances useful distance, lateral coverage and glare control.
The key question is not simply how far the light can be seen. It is how far ahead the rider can identify a relevant hazard well enough to respond safely.
A claimed 150-metre visibility distance refers to a different function: whether the lamp is visible to an observer at that separation under particular conditions. It does not establish that the cyclist can see road defects 150 metres ahead, or that a driver will correctly identify the light as a bicycle.
Similarly, being visible at 150 metres is not a universal legal standard. Queensland’s stated 200-metre front and rear lighting requirement illustrates how a jurisdiction can set a higher distance. Other countries and regions use different requirements.
For this speed and road type, a sensible complete setup includes:
- A road-specific white front lamp with useful forward reach, preferably with a well-controlled upper cutoff.
- A securely mounted bar light adjusted to illuminate the road without directing the strongest beam into approaching eyes.
- A steady front-light mode for continuous illumination on unlit roads.
- A red rear lamp meeting the local rules, with a steady component or supplementary lighting strategy where appropriate.
- Required reflectors plus optional moving reflective markings and side visibility aids.
- Sufficient battery capacity for the actual operating modes, including a conservative reserve.
Before committing to a light, test it on a familiar unlit stretch under controlled, low-risk conditions. Check whether the beam reveals the road edges, surface defects and bends early enough for the speed being ridden. If not, improve the beam, reduce speed or select a more suitable lamp.
Also assess the view from the direction of approaching traffic, without exposing anyone to an intense beam at close range. Correct aiming helps limit glare, but it cannot guarantee that every approaching driver will remain unaffected by it.
A useful setup should satisfy these separate questions: Can the rider see hazards in time? Can approaching drivers detect and recognise the cyclist? Is glare adequately controlled? Does the equipment meet local requirements? Will it maintain useful output for the entire ride?
For the next night ride, choose a suitable steady mode, check the lamp’s aim and battery reserve, verify the rear light and reflectors, then test forward visibility at a conservative speed. Treat 150 metres as a visibility claim to evaluate—not a safety guarantee or a substitute for a complete lighting system.
Does a bike light visible from 150 metres guarantee that a driver will notice me?
No. A manufacturer’s visibility claim does not guarantee that every driver will notice or correctly recognise the cyclist at that distance. Recognition depends on background lighting, weather, viewing angle, beam characteristics and the driver’s attention. Active lighting and reflective markings can improve conspicuity, but neither eliminates collision risk.
Are bicycle lights with a horizontal cutoff legally required everywhere?
No universal requirement applies across English-speaking countries. Some jurisdictions regulate equipment approval, installation and light characteristics, while others specify visible colours or distances. A defined cutoff can help control glare, but compliance depends on the applicable local rules, not simply the manufacturer’s description of the beam.
Can a helmet-mounted light replace the required front bicycle light?
That depends on the jurisdiction. Queensland allows required lights to be displayed on the bicycle or rider, while other locations may impose different mounting or equipment conditions. Even where a helmet-mounted lamp is permitted, its moving beam can make glare control more difficult than with a fixed handlebar lamp.
Should I carry a backup bicycle light for long night rides?
A compact backup is a prudent addition when an unexpected light failure would leave a rider on an unlit road. It should be charged, securely mountable and suitable for the conditions in which it may be needed. Carrying a backup does not replace checking the main lamp’s battery, runtime and compliance before departure.
Do reflective accessories still help if the bicycle already has powerful lights?
Yes, reflective accessories can provide additional visual information when illuminated by vehicle headlights. Moving ankle and knee reflectors have been associated with improved nighttime cyclist recognition in controlled research. Their usefulness varies with illumination and viewing conditions, so they should complement rather than replace working front and rear lights.