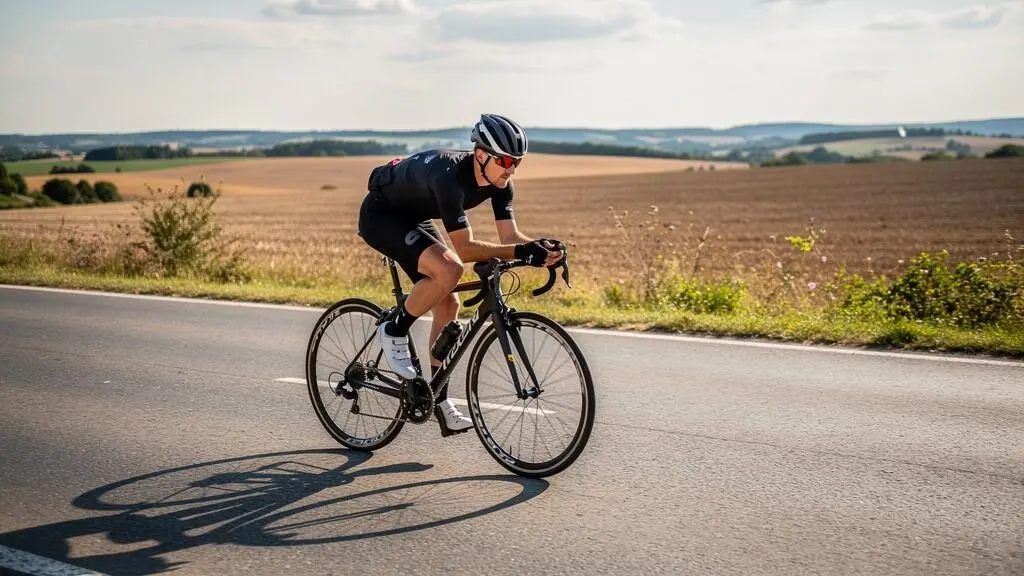
Want to ride faster without training more hours or buying expensive deep-section wheels? Start with the resistance your body and bike already create. A sustainable riding position, close-fitting clothing and well-matched tyres can reduce the effort needed to maintain speed. None requires a complete bike upgrade.
Gaining 1–2 km/h in average speed is a useful target, but not a guaranteed result. The improvement depends on your starting position, current tyres, road surfaces, wind, terrain and ability to sustain the same power. Riders with loose clothing, an upright posture or poorly chosen tyre pressures may have more room to improve than cyclists whose setups are already efficient.
The practical approach is to change one variable at a time, measure performance on familiar roads and keep only improvements that remain comfortable and controllable. For solo riders with limited training time, that is more useful than chasing laboratory savings that may not translate into everyday cycling.
Three principles for faster, more efficient road cycling
- Improve your sustainable body position and clothing fit before investing in aerodynamic equipment.
- Match aero decisions to your real riding speed, terrain and wind exposure rather than treating 32 km/h as a universal threshold.
- Choose tyre pressure and tyre construction for your roads, then validate improvements through repeated, comparable rides.
- Why Does Your New Aero Helmet Feel Useless Below 32 km/h?
- How to Lower Your Front End Safely Without Triggering Neck Pain?
- Which Should You Choose First: Skinsuit, Aero Helmet, or Deep Wheels for a 40 km Ride?
- The Aero Habit That Makes Crosswinds Feel 2x More Dangerous
- When Should You Prioritise Aero Over Power on Rolling Terrain to Save Your Legs?
- How to Find Your Starting Tyre Pressure Using Weight and Tyre Width in 2 Steps?
- Why Do Fast-Rated Tyres Still Feel Slow on Your Local Roads?
- How to Reduce Rolling Resistance Enough to Save 10 Minutes Over 100 km
Why Does Your New Aero Helmet Feel Useless Below 32 km/h?
An aero helmet can reduce aerodynamic drag below 32 km/h, but its speed benefit may be too small to distinguish from normal changes in wind, position and effort. The relevant variables are your airspeed, the helmet’s interaction with your head position and how much of the ride you spend moving quickly. There is no universal speed at which aero helmets suddenly begin working.
Aerodynamic drag force increases approximately with the square of relative airspeed. The power required to overcome that drag rises approximately with the cube of airspeed in still air, assuming the rider’s aerodynamic characteristics remain unchanged. This is why even modest speed increases can make aerodynamic efficiency increasingly important.
However, the same principles apply below 30 km/h. A headwind can make aerodynamic resistance substantial even when your ground speed is modest. Conversely, a tailwind can reduce relative airspeed while your bike computer displays a higher speed.
Scientific research illustrates why helmet performance cannot be reduced to a single speed threshold. A computational study of time-trial helmets and head position compared three helmet designs and two head positions at a simulated speed of 54 km/h.
6.4%
Approximately the maximum aerodynamic performance difference between the two head positions in the computational study. Differences between helmet shapes at a fixed head position were below 1.5%. These figures concern the studied aerodynamic configurations, not whole-ride speed gains or performance below 32 km/h.
Beaumont and colleagues, Journal of Biomechanics, 2018.
The practical lesson is that the helmet and head position operate as a system. An aerodynamic helmet may offer limited benefit if the rider maintains a raised head, widely separated arms or an inefficient torso position. That does not mean every rider should force their chin towards the handlebars: visibility, ventilation and neck comfort remain essential.
To evaluate your helmet, use a familiar 20–30-minute section of road. Compare separate rides with the aero helmet and your usual helmet under similar wind conditions. Keep the route, clothing, tyre pressure and riding posture as consistent as possible.
A power meter makes the comparison more informative because perceived effort alone cannot establish equal output. Alternate the helmet order across several tests rather than drawing conclusions from one ride. Record average power, speed, wind conditions and perceived comfort.
Use this simple decision framework before spending more money:
| Usual riding conditions | Practical priority |
|---|---|
| Mostly low-speed climbs | Comfort, sustainable power and rolling efficiency |
| Mixed terrain with frequent headwinds | Position consistency and helmet testing |
| Fast solo efforts on open roads | Aerodynamic position and equipment interaction |
| Hot weather and long endurance rides | Ventilation alongside any aerodynamic improvement |
The most useful outcome is not proving that a helmet is fast in isolation. It is discovering whether it improves your repeatable performance without compromising how you ride. That leads directly to the larger aerodynamic variable: your position on the bike.
How to Lower Your Front End Safely Without Triggering Neck Pain?
Lower your road bike’s front end gradually, starting with small fit changes rather than the lowest possible handlebar position. A 5 mm spacer can provide a convenient adjustment increment when the headset and stem design allow it. Test whether you can see the road comfortably, steer confidently and sustain your power before making another change. Pain or numbness means the new setup needs reassessment.
A lower torso can reduce frontal area, but the benefit depends on how your body accommodates the position. Reaching further down and forward may increase demands on hip mobility, trunk control, shoulder comfort and cervical extension.
If your torso becomes flatter while your head must tilt sharply upwards to see the road, the aerodynamic benefit may come with neck strain. Excessive reach or pressure on the hands can also make the position difficult to sustain.
The trade-off is supported by a Journal of Biomechanics study on optimal cycling position involving 19 time-trial cyclists.
Researchers investigated torso angles between 0 and 24 degrees and modelled aerodynamic, power-output and metabolic considerations. Their models indicated that a more upright time-trial position could be advantageous below 30 km/h, while aerodynamic losses became more influential above 46 km/h. These were model-dependent findings for time-trial positions, not universal road-bike fit thresholds.
Lower is not automatically faster. A position that reduces drag but reduces sustainable power, visibility or control can be counterproductive.
Before adjusting the stem, inspect your existing fit. Saddle height and fore-aft position influence pelvic stability and how far you must reach. Hip mobility also affects whether you can rotate forward comfortably. Avoid changing saddle and handlebar settings simultaneously, because doing so makes the effect of each adjustment harder to isolate.
If the stem and steerer arrangement supports spacer changes, use the manufacturer’s assembly requirements and specified torque. Spacer placement, steerer support and headset preload are safety-critical. A qualified mechanic should handle any configuration whose compatibility or correct assembly is uncertain.
For an at-home comfort check, adopt the proposed lower riding posture while the bicycle is securely supported. Look towards a point representing the road ahead. Notice whether your neck remains relaxed, whether your shoulders tense and whether excessive pressure develops through the hands.
Then assess the position on a quiet, familiar road. Build up riding time gradually before trying faster or more technical terrain.
Watch for:
- Neck discomfort that persists or increases while looking ahead.
- Tingling or numbness in the fingers or hands.
- Difficulty braking, steering or maintaining a stable grip.
- A pronounced reduction in comfortable pedalling power.
Return to the previous comfortable fit if these symptoms appear. Persistent pain or neurological symptoms warrant professional assessment.
Be cautious about compensating for a lower front end with a different stem length. A longer or shorter stem changes reach, weight distribution and steering feel. It should not be treated as an interchangeable aerodynamic adjustment.
The target is a position you can sustain for the ride, not a dramatic photograph of a low handlebar. Once that position is established, equipment choices become easier to evaluate against a stable baseline.
Which Should You Choose First: Skinsuit, Aero Helmet, or Deep Wheels for a 40 km Ride?
For most solo road cyclists seeking better value over 40 km, improve position and clothing fit before buying deep wheels. A fitted skinsuit can be useful for dedicated fast rides, while an aero helmet may be a more versatile purchase. Deep-section wheels usually require the largest financial commitment and introduce handling considerations. The best first purchase depends on how often you can actually use it.
Aerodynamic efficiency is not simply the sum of individual product claims. A skinsuit, helmet and wheelset interact with the cyclist’s body, posture and surrounding airflow. Their independently advertised drag savings should not be added together as though every test used the same configuration.
Frequency of use matters just as much as theoretical benefit. A rider who trains alone twice a week in normal road kit may benefit more from consistently fitted clothing than a specialised skinsuit used only once or twice a year.
Consider the trade-offs before choosing.
| Option | Main attraction | Main compromise | Most suitable use |
|---|---|---|---|
| Close-fitting existing kit | Little or no additional spending | Fit and comfort must be suitable | Everyday solo training |
| Skinsuit | Reduces loose clothing and exposed fabric | Storage, ventilation and convenience | Focused fast rides or time trials |
| Aero helmet | Potential drag reduction without changing wheels | Ventilation and head-position dependence | Regular solo efforts |
| Deep-section wheels | Potential aerodynamic improvement at the wheel | Cost, crosswind handling and possible weight differences | Frequent fast riding where conditions suit them |
There is no reliable universal euro-per-watt or pound-per-watt ranking here because real prices, tested equipment, rider positions and usage patterns differ. A fair comparison requires the actual purchase cost and a relevant measured aerodynamic benefit.
For a rider spending most of a 40 km effort alone on relatively flat roads, a comfortable aero position and suitable helmet deserve attention. A time-trial-focused cyclist may also find a skinsuit worthwhile, provided it does not cause overheating or make nutrition difficult.
On rolling routes or social rides, the picture changes. Aerodynamic equipment can still help, but the return may be less noticeable if much of the ride involves lower speeds, climbing or sitting in another rider’s slipstream. Comfortable tyres and practical clothing can provide value across more situations.
A useful buying sequence is:
- Establish a sustainable riding position.
- Remove avoidable clothing flapping and poor kit fit.
- Test a compatible aero helmet if your rides justify it.
- Consider a skinsuit when its intended use is frequent and specific.
- Assess deep wheels only when their additional benefits outweigh cost and handling compromises.
The order between helmet and skinsuit is conditional, not fixed. A skinsuit may be a better dedicated racing investment, while a helmet may be easier to incorporate into normal training.
Once you have removed the cheapest sources of drag, the next question becomes whether a more aggressive setup remains controllable in real weather. Crosswinds can change that calculation quickly.
The Aero Habit That Makes Crosswinds Feel 2x More Dangerous
The risky habit is holding an excessively narrow, low or rigid position when wind gusts demand steering corrections. There is no evidence that this makes crosswinds exactly twice as dangerous, but reduced steering freedom and unexpected lateral forces can make a bicycle harder to control. In exposed conditions, prioritise a secure grip, predictable handling and an upright position when necessary.
Aerodynamic drag and crosswind stability are related but distinct concerns. A low torso may reduce frontal drag, while deep wheel rims and the orientation of the entire bike-rider system affect aerodynamic forces during crosswinds.
Wind direction matters because the apparent wind does not always arrive from directly ahead. Its angle relative to the bicycle changes the distribution of aerodynamic forces.
Experimental research published in Experiments in Fluids on cycling crosswinds investigated a full-scale cycling mannequin under controlled crosswind conditions.
Researchers found that crosswind angle and leg position affected measured forces. Under one tested condition, the difference in axial force between certain leg positions reached 12% at a 20-degree yaw angle.
That finding is about aerodynamic force, not crash risk. The experiment did not establish how much more difficult a road bicycle becomes to steer in gusts, nor did it evaluate human handling responses.
For practical riding, distinguish two situations:
- Steady crosswind: the rider can often adapt to the continuing lateral force while maintaining a stable line.
- Sudden gust: an abrupt change in force may demand an immediate steering correction, particularly when leaving sheltered ground.
Avoid responding by locking your elbows or gripping the bars so tightly that steering becomes jerky. Maintain a secure but not rigid hold, keep your hands in a position that provides immediate brake access and allow enough control to make smooth corrections.
Do not maintain an extreme aerodynamic posture if it restricts your handling. Sitting up and widening your normal hand position may be the better response in difficult conditions.
Before an exposed section, scan for clues such as moving trees, roadside vegetation or flags. Pay particular attention to bridges, open ridges, gaps between buildings, tunnel exits and changes in roadside shelter. These places can introduce abrupt wind changes.
Give other cyclists additional space in strong crosswinds rather than relying on close drafting. A sudden movement by the rider ahead can leave insufficient room to react.
Deep-section wheels deserve a separate assessment. If you use them, begin with familiar routes in manageable conditions and learn how they respond before considering more exposed rides. When steering becomes difficult, reduce speed, choose a safer route or stop. Less-deep rims may be a more suitable long-term choice for some riders.
There is no universal rim-depth or wind-speed threshold that guarantees safe handling. Rider mass, bicycle geometry, wheel construction, gust characteristics and experience all affect the result.
Aerodynamic efficiency is valuable only when you can use it safely. That principle becomes especially important on rolling terrain, where the fastest posture is not necessarily the best posture for every corner, descent or climb.
When Should You Prioritise Aero Over Power on Rolling Terrain to Save Your Legs?
Prioritise aerodynamics on faster, non-technical sections where you can hold a stable position without compromising control. During slower climbs, gravity becomes relatively more important, and maintaining sustainable power usually matters more than forcing an extreme tuck. On suitable descents and rolling transitions, reducing drag can help preserve momentum and reduce the effort needed to maintain speed.
Rolling terrain rewards deliberate changes in posture rather than one fixed aerodynamic position throughout the ride.
On a climb, gravitational resistance increases with gradient and total mass. At lower speeds, aerodynamic drag generally accounts for a smaller proportion of total resistance than it does on faster flat or downhill terrain.
That does not eliminate the value of aerodynamics uphill, particularly in headwinds or on shallow gradients. It changes the balance between drag reduction, physiological efficiency and control.
On a fast, gentle descent with clear visibility and predictable road conditions, a comfortable low position on conventional road-bike controls can reduce resistance while allowing the bicycle to maintain momentum.
However, an aggressive tuck is inappropriate when it interferes with braking, steering or observing hazards. Do not adopt unconventional positions that remove your hands from effective control of the bicycle.
The central mistake is treating every rise as a short sprint. Accelerating aggressively over one hill may create unnecessary fatigue when a more measured effort would leave enough capacity for later sections.
Try the following pacing strategy:
- Approach each rise without an unnecessary acceleration.
- Use a controlled, sustainable effort on the climb.
- Return to a comfortable aerodynamic position on safe, open faster sections.
- Continue pedalling when useful rather than assuming coasting is always faster.
- Adjust posture early before technical descents, junctions or uncertain road surfaces.
A simplified hypothetical example illustrates the decision. Imagine a rolling route with a short steep climb followed by a long, unobstructed false flat. During the climb, a comfortable posture that supports steady power may be preferable. On the faster false flat, bringing your torso slightly lower and keeping your arms comfortably tucked can reduce the power required to maintain momentum.
This is a pacing principle, not a promise of a particular time saving. The outcome depends on the route and how much the rider’s position changes aerodynamic drag and sustainable output.
A useful practical cue is whether the faster segment lasts long enough to settle into a stable position. For a clear, straight section lasting several tens of seconds, a lower position may be worthwhile. For a blind bend, steep technical descent or short transition, remain ready to steer and brake.
Efficient pacing preserves energy on variable terrain. But when speeds fall, tyres and road-surface losses deserve more attention too. That makes pressure selection the next useful improvement.
How to Find Your Starting Tyre Pressure Using Weight and Tyre Width in 2 Steps?
Find your starting tyre pressure by identifying your actual mounted tyre width, then adjusting an appropriate manufacturer-compatible starting recommendation for total riding weight. Wider tyres generally need less pressure for the same load and intended tyre deflection, while heavier systems generally need more. Treat the result as a starting point, not a universal optimum, and validate it on your normal road surfaces.
The traditional assumption that harder tyres always roll faster overlooks what happens when the road is imperfect. An excessively firm tyre transfers more vibration through the bicycle and rider, potentially increasing total energy losses and reducing comfort or grip.
A tyre with appropriately chosen pressure can deform around small surface irregularities instead of transferring every disturbance into the rider. Conversely, insufficient pressure can increase tyre deformation losses and create risks such as rim strikes, tyre squirm or instability.
The goal is an efficient balance rather than the highest pressure permitted on the sidewall.
Step 1: Establish the tyre’s actual width. Check the nominal tyre size, then account for the fact that mounted width may differ according to rim design. Confirm tyre and rim compatibility, including any tubeless or hookless requirements, and use an appropriate manufacturer pressure chart or calculator as your initial reference.
Step 2: Adjust for total riding load. Consider the combined mass of the rider, bicycle, carried equipment and water. Greater weight generally calls for greater supporting pressure when tyre width and other conditions remain constant.
Load is rarely distributed equally between both wheels. A road bicycle commonly carries more weight at the rear, making a somewhat lower front pressure a reasonable starting principle when supported by the manufacturer’s recommendations.
A thumb press can reveal an obviously soft tyre, but it cannot measure pressure reliably or establish optimal rolling efficiency. Use a suitable pressure gauge for repeatable adjustment. Observing how the tyre behaves under load can complement that measurement, provided the tyre does not approach rim contact or exhibit unstable handling.
Next, try neighbouring pressures on a familiar road. Make small changes within the approved operating range and record the measured pressures. Compare vibration, comfort, cornering confidence and performance at similar efforts.
Be cautious about interpreting speed alone. Wind, traffic and small power changes can mask the effect of pressure. If a lower setting improves comfort without introducing handling problems, it may deserve further testing even when a single ride shows no obvious speed change.
Five checks to establish a repeatable tyre-pressure baseline
- Record the mounted tyre size and rim specification, producing a written compatibility reference.
- Record the total riding load, including the bicycle and carried equipment, producing a baseline weight figure.
- Obtain front and rear starting pressures from a compatible manufacturer’s guidance, producing two recorded gauge readings.
- Ride a familiar route and note comfort, vibration and handling, producing an initial comparison log.
- Repeat the route with a neighbouring, permitted pressure setting and document the preferred configuration for future testing.
Pressure adjustments should always remain within the applicable tyre and rim limits. An apparently faster setup is not an improvement if it increases puncture risk, compromises grip or makes the bicycle difficult to control.
Once pressure is reasonably calibrated, tyre construction and road texture become easier to compare. Those factors explain why highly rated tyres do not necessarily feel quick on every local route.
Why Do Fast-Rated Tyres Still Feel Slow on Your Local Roads?
A fast-rated road tyre may feel slow because laboratory rolling-resistance results do not capture every loss experienced on rough roads. Cracks, coarse asphalt and vibration affect how energy passes through the tyre, bicycle and rider. Tyre construction, mounted width and inflation pressure interact with surface texture, so a tyre that performs well under one test condition may deliver a smaller advantage on your usual roads.
Laboratory testing is useful because controlled conditions make it easier to compare tyre designs. However, the measured rolling resistance depends on the testing method, load, pressure, speed and surface.
Road conditions add further mechanisms. Irregular asphalt can force the tyre, bicycle and rider to move vertically, creating losses that cannot always be represented by a simple smooth-surface rolling-resistance figure.
Research published in Vehicle System Dynamics examined roughness resistance and vibration in cycling. The model distinguished conventional tyre deformation losses from additional effects arising from road-surface irregularities, including energy dissipated through the rider.
This distinction matters when interpreting product rankings. A tyre that performs efficiently on a controlled test surface is not guaranteed to preserve exactly the same performance advantage on cracked or coarse roads.
It also helps explain why pressure choice matters. Increasing pressure may reduce some tyre deformation losses while increasing the vibration transmitted through the bicycle on rough surfaces. The overall outcome depends on the interaction between the tyre and road.
To diagnose your local riding conditions, classify the surfaces you encounter most often:
| Surface | What to investigate | Practical consideration |
|---|---|---|
| Smooth, maintained asphalt | Controlled rolling-resistance comparisons | Aerodynamic and tyre efficiency may both be relevant |
| Coarse or granular asphalt | Vibration, casing compliance and pressure | Excessive firmness may increase overall losses |
| Cracked or patched roads | Tyre volume, comfort, grip and durability | A suitable wider tyre may offer advantages |
| Mixed road conditions | Performance across several representative surfaces | Choose a balanced configuration, not a single-test winner |
Independent rolling-resistance measurements remain valuable, particularly when testing conditions and tyre specifications are disclosed. Where comparative rough-surface data exist, they can provide additional context. Avoid assuming that a manufacturer ranking fully describes your own road conditions.
Tyre width adds another variable. A wider tyre can permit lower pressure and may better accommodate uneven surfaces, depending on casing, construction and compatibility. That does not establish that wider tyres are universally faster.
Likewise, casing flexibility and rubber compound matter, but their relative importance cannot be ranked reliably without specifying the tyres and test conditions. A tyre’s puncture protection, durability and wet grip may also influence whether it is a sensible everyday choice.
For a meaningful comparison, change only the tyre or pressure variable you intend to evaluate. Keep the bicycle, route and riding setup consistent and repeat tests where practical.
Instead of chasing the lightest or fastest-labelled tyre, look for a configuration that works efficiently on the surfaces you actually ride. The final step is combining pressure, tyre selection and maintenance into a measurable rolling-resistance improvement.
Key takeaways before calculating your rolling-resistance gains
- Choose tyres for your dominant road surfaces and practical reliability requirements, not a single headline test result.
- Evaluate pressure and tyre construction together because their interaction can change performance on rough roads.
- Measure time savings against a repeatable baseline before treating an ambitious target as achievable.
How to Reduce Rolling Resistance Enough to Save 10 Minutes Over 100 km
Reducing rolling resistance can save time over 100 km, but a ten-minute improvement is not guaranteed. Start with suitable tyre construction, compatible pressure and road-appropriate width, then maintain the setup consistently. The time saved depends on the reduction in resistance, rider mass, speed, terrain and power output. Measure your own results rather than applying a universal saving to every ride.
Rolling resistance matters throughout a ride, but its relative contribution changes with speed and terrain. On slower sections and climbs, aerodynamic drag often becomes a smaller proportion of total resistive force, making rolling efficiency comparatively more important.
The first priority is choosing a tyre suited to the riding conditions. A supple, efficient casing can reduce deformation losses, but its practical value must be weighed against puncture protection, durability and appropriate grip.
The second priority is inflation pressure. Too much pressure may increase vibration losses on rough surfaces, while too little can increase casing deformation and create handling or rim-impact problems.
Width comes next as a compatibility and performance consideration. A tyre with greater air volume can allow a lower operating pressure, but its real advantage depends on construction, rider load, road conditions and available frame and rim clearance.
Finally, maintain the configuration. A well-selected tyre cannot perform consistently if pressure changes substantially between rides or if damage goes unnoticed.
Before each ride, inspect the tyres and measure pressure where practical. Check for embedded debris, cuts, exposed casing material, uneven wear and other damage. Replace tyres according to their condition and the manufacturer’s recommendations rather than assuming that age or wear produces a predictable rolling-resistance penalty.
Inspect inner-tube compatibility too. Tube type and construction can influence rolling resistance, while incorrect sizing or installation can increase the risk of damage. Do not assume that a heavier tube is necessarily slower by a fixed amount without relevant comparative testing.
To understand what a ten-minute saving would mean, consider a purely hypothetical calculation.
Hypothetical 100 km time-saving calculation
Suppose a cyclist completes 100 km at an average speed of 25 km/h, taking four hours. Finishing the same distance ten minutes sooner would require a new average speed of approximately 26.09 km/h, assuming uninterrupted riding and comparable conditions.
That is an increase of roughly 1.09 km/h in average speed. The calculation describes the required change in speed, not the rolling-resistance reduction needed to produce it. Establishing the required watt saving would demand additional information about rider mass, aerodynamic drag, road conditions and existing tyre performance.
This example shows why the target must be treated carefully. A ten-minute saving cannot be inferred simply from switching tyres or changing pressure. It requires the resulting reduction in resistive power to be sufficient to improve average speed under comparable conditions.
A meaningful personal test begins with a baseline ride. Record distance, elapsed moving time, average power if available, tyre model, tyre width, pressure and conditions.
Then test the revised setup over the same route, ideally across several comparable rides. An alternating sequence of configurations can help reduce the influence of improving fitness or gradually changing weather. Keep clothing, luggage, position and other factors as consistent as possible.
Compare performance at similar average power, not merely the fastest recorded ride. If you do not have a power meter, use comparable perceived effort and recognise the greater uncertainty.
For time-crunched cyclists, it is worth separating the two types of improvement:
- Aerodynamic gains: usually become increasingly valuable as relative airspeed rises, particularly on fast open roads.
- Rolling-efficiency gains: can reduce resistance across a wider range of speeds and may be particularly relevant on slower sections where aerodynamic drag is proportionally less dominant.
These improvements work together, but their contributions to average speed are not simple fixed additions. If lower rolling resistance makes you faster at the same power, the additional speed also changes the aerodynamic power required.
Consistency therefore matters more than collecting optimistic equipment claims. A stable riding position, appropriately fitted clothing, correctly selected tyres and sensible pressure can create a more efficient overall setup without deep wheels.
For your next solo ride, establish a baseline with your existing equipment, then choose one realistic improvement to test. Keep the change only if repeated rides show a useful benefit without sacrificing comfort, grip or control. A reliable, measurable gain is more valuable than an unsupported promise of ten minutes saved.
Can you gain 1–2 km/h without buying any new equipment?
It may be possible if your existing position and clothing create substantial avoidable drag, but the improvement is not guaranteed. Start by reducing clothing flapping and developing a comfortable, sustainable riding position. Compare similar solo rides at comparable effort or power to establish whether the changes actually improve your average speed.
Should you test aerodynamic changes on the same route or different routes?
Use a familiar route for initial comparisons because it reduces variability from terrain and navigation. Repeat tests under similar weather and traffic conditions. Once an improvement appears consistent, verify whether it remains useful on your normal mix of climbs, descents and road surfaces.
Does riding faster always mean you have become more aerodynamic?
No. Faster rides can reflect increased power, favourable wind, reduced rolling resistance or other changes. Evidence of improved aerodynamic efficiency requires a comparison that controls relevant variables, particularly power output, environmental conditions, tyre setup and riding position.
Can lower tyre pressure improve both comfort and speed?
It can in certain road conditions, particularly when an excessively firm tyre transmits substantial vibration. However, lower is not always better. Pressure must remain appropriate for load, tyre and rim compatibility, road conditions and safe handling. Compare neighbouring permitted settings using a reliable gauge.
How can you tell whether an aero upgrade is worth keeping?
Look for repeatable improvements under comparable riding conditions, then consider whether the change remains comfortable and practical across typical rides. If the benefit is smaller than normal testing variability, treat it as uncertain rather than proven. Safety, fit, ventilation and ease of use should remain part of the decision.