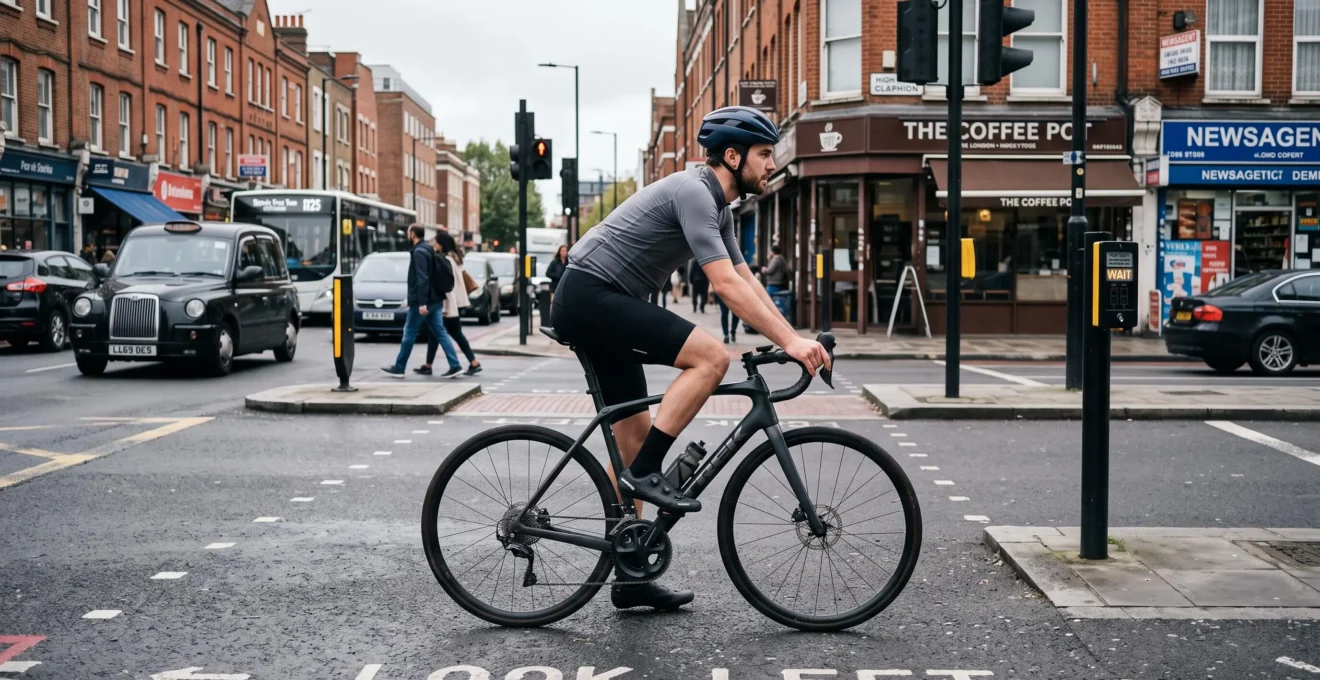
The hardest part of switching to clipless pedals is rarely pedaling. It is remembering that your foot is attached to the bicycle when you slow down, reach a traffic light, or suddenly need to stop.
Clipless pedals connect a cycling shoe to the pedal through a mechanical cleat. They can provide a secure connection and consistent foot placement, but beginners must learn a new movement: twisting the heel to release the shoe before putting a foot down.
The safest learning strategy is to practise releasing early, start with manageable retention tension, and check that your cleats allow a comfortable foot position. You do not need to prove your confidence in traffic. Your first seven stops can be planned practice stops in a quiet, traffic-free area, with both feet trained before you progress to busier roads.
This guide combines stopping drills, pedal selection, release-tension adjustments, and knee-conscious cleat setup. The aim is to make disengaging deliberate and predictable, rather than something you remember only after the bicycle begins to lean.
Clipless pedals: the essential beginner rules
- Unclip the foot you intend to put down before the bicycle reaches a complete stop, and choose a safe place to dismount.
- Practise with stable support, then rehearse controlled rolling stops with both feet before entering traffic.
- Choose a pedal system suited to your stopping and walking needs, and adjust cleat alignment and release tension before longer rides.
- Why Do Most Clipless Falls Happen at 0 km/h Instead of During Riding?
- How to Practise Clipless Emergency Unclips in 10 Minutes Without Leaving Your Street?
- Which Should You Choose: SPD or Road Clipless if You Stop Often in Town?
- The Cleat Setup Mistake That Triggers Knee Pain Within 2 Weeks
- When Should You Increase Release Tension After Switching to Clipless?
- How to Set Cleats Using a Marker Pen and a 15-Minute Test Ride?
- How to Diagnose Bad Shifting Without Touching Limit Screws by Mistake?
- How to Set Cleat Float to Stop Inner-Knee Pain Without Losing Pedal Stability
Why Do Most Clipless Falls Happen at 0 km/h Instead of During Riding?
Beginner clipless falls commonly happen during stopping because the rider slows down, loses balance, and tries to put a foot straight onto the ground without first releasing the cleat. The issue is usually delayed disengagement rather than difficulty pedaling. Although zero-speed falls are familiar to cycling instructors, reliable evidence does not establish that most clipless falls occur at exactly 0 km/h.
While moving steadily, the bicycle is easier to balance through steering corrections. As speed decreases, those corrections become less effective, and the rider must prepare to support the bicycle with a foot. A beginner concentrating on traffic, braking, or steering may overlook the additional action required to disengage.
This creates the track stand trap: trying to remain balanced at almost no speed while both feet are still clipped in. An experienced rider may deliberately balance while stationary, but beginners should not rely on this skill during their first stops.
When balance disappears unexpectedly, placing a foot directly downward is a natural response. However, conventional clipless systems require a specific release movement before that foot can move freely. Neither single-release nor multi-release Shimano cleats should be expected to disengage automatically during a fall.
Three stopping situations deserve particular attention:
- Approaching a red light: Choose your stopping position early, reduce speed smoothly, and release your preferred foot while the bicycle is still stable. Unclipping approximately 5–10 metres before a predictable stop can be a useful practice cue, but the appropriate distance depends on speed and conditions.
- Restarting after a stop: Keep one foot free and available for balance until the bicycle is moving steadily. Do not rush to reconnect both feet before you have stable forward momentum.
- Coasting toward a kerb: Identify a level, clear place to stop, release the foot on the safe landing side, and avoid drifting into the kerb while trying to disengage.
The embarrassment of falling in public can create an additional problem. A rider who becomes anxious about stopping may hesitate, continue into an unsuitable position, or attempt to balance on an awkward slope.
A better stopping routine begins with deciding where the foot will land. In countries where traffic keeps left, as in the United Kingdom or Australia, the kerbside foot is commonly the left; where traffic keeps right, the opposite may apply. Actual road layout, surface condition, and traffic always determine the safest side.
The underlying advice is consistent with the Shimano CLICK’R pedal safety and adjustment manual, which instructs riders to release their cleats in advance when slowing or when a stop may become necessary. Its guidance is specific to the compatible Shimano pedals and cleats covered by that manual.
Your first goal is not to stop faster. It is to recognise an approaching stop early enough that unclipping becomes an ordinary part of slowing down. The next step is to rehearse that movement somewhere predictable.
How to Practise Clipless Emergency Unclips in 10 Minutes Without Leaving Your Street?
A useful ten-minute clipless practice session begins with stationary heel-twist repetitions while securely supported, followed by controlled starts and stops in a traffic-free space. Practise both feet independently, and advance only when releasing feels smooth and repeatable. The ten-minute schedule is a practical training structure, not a scientifically validated guarantee of readiness for traffic.
Start beside a solid wall or doorway where you can hold the bicycle upright without losing your balance. Use a level, dry surface and check that the pedal retention mechanism operates normally. Keep the bicycle stationary for the first exercises.
Stage 1 — Stationary release, approximately three minutes. With one foot safely on the ground, engage the other cleat and release it by making the movement specified for your pedal system. For conventional heel-out release, rotate the heel outward without trying to pull the shoe straight upward. Repeat on each side until the movement requires little conscious effort.
Stage 2 — Supported stopping position, approximately two minutes. Sit on the bicycle with secure support, release the foot you intend to put down, and practise leaning gently toward that side while maintaining control. The purpose is to associate the release movement with a planned landing position.
Stage 3 — Rolling starts and stops, approximately three minutes. Only when stationary repetitions feel natural, move to a quiet, flat, traffic-free area. Start with one foot clipped in, establish balance, engage the second foot, then release your landing foot well before stopping. Repeat at a comfortable low speed without rushing.
Stage 4 — Unexpected-stop rehearsal, approximately two minutes. In the same controlled space, ride at a moderate, manageable speed and choose a clear stopping point. Release your landing foot, hold it clear of the pedal, brake progressively, and stop in control. This trains the transition from a moving bicycle to a supported stop.
Never deliberately create an uncontrolled emergency or attempt a sudden panic stop in traffic. The objective is to rehearse the release sequence, not to test whether a cleat will disengage during a fall.
Cycling UK‘s practical guide to clipless pedals and cleats recommends practising against a wall, then progressing through controlled riding exercises, and unclipping before coming to a stop.
Your five-point clipless readiness checklist
- Check your equipment: Confirm that both cleats engage and release according to the manufacturer’s instructions. Result: two functioning release mechanisms.
- Practise both sides: Perform controlled heel-release repetitions with each foot while supported. Result: both feet can disengage without pulling upward or forcing the shoe.
- Select a landing side: Identify a clear, stable place for the supporting foot. Result: a predictable stopping position.
- Complete controlled rolling stops: Release before stopping and place the free foot down smoothly. Result: several stable stops without hesitation.
- Check your response: Notice any wobble, delayed release, or moment of uncertainty. Result: a clear decision to repeat the previous stage or progress safely.
The progression rule is simple: if a repetition requires conscious searching for the release movement or produces an uncontrolled wobble, return to the preceding stage. Practise both sides, even if you expect to put down the same foot at most junctions. Road conditions may eventually require the other foot.
Controlled practice cannot remove every risk, but it helps prevent your first unexpected stop from becoming your first attempt at releasing under pressure. Once the movement is comfortable, consider whether your pedal system suits the places you normally ride.
Which Should You Choose: SPD or Road Clipless if You Stop Often in Town?
For cyclists who stop frequently, walk between destinations, or ride in busy towns, two-bolt SPD-style pedals are generally the more practical starting point. Their recessed cleats work with walkable cycling shoes. Three-bolt road clipless systems offer a broad pedal interface but are often less convenient for frequent dismounting and walking. Pedal choice should follow how you ride, not simply the type of bicycle you own.
A gravel rider who rarely stops may be comfortable with a wide range of systems. A road rider commuting through several busy junctions may value easy walking and predictable clipping in more than a road-specific pedal platform.
Three everyday factors matter: how often you stop, how far you walk when off the bicycle, and how much attention your surroundings demand.
| Decision factor | Two-bolt SPD-style | Three-bolt road clipless |
|---|---|---|
| Frequent traffic stops | Often convenient, especially with suitable double-sided pedals | Can work well, but may take more practice to re-engage |
| Walking between stops | Recessed cleats generally improve walking practicality | Protruding cleats can make walking awkward |
| Contact platform | Depends on shoe and pedal design | Typically a broad shoe-to-pedal interface |
| Release characteristics | Depend on pedal and cleat model, including optional multi-release designs | Depend on the specific manufacturer and cleat |
| Ordinary shoes | Possible with flat/clipless combination pedals | Normally requires compatible cycling shoes |
| Best practical fit | Commuting, mixed-surface riding, frequent dismounting | Road-focused riding where walking convenience matters less |
It is important not to confuse SPD with automatic multi-directional release. Shimano’s SM-SH51 single-release cleat and SM-SH56 multi-release cleat operate differently. The SM-SH56 permits additional release movements, but the manufacturer warns that unintended disengagement can occur and that neither design guarantees release during a loss of balance.
Road clipless systems also vary in release angle, retention adjustment, and allowable foot rotation. Their larger contact areas should not be treated as proof of a measurable power-transfer advantage for every recreational rider.
Compatibility deserves attention before buying. Two-bolt SPD-compatible shoes and three-bolt road shoes use different mounting configurations. Pedals, cleats, and shoes must be checked as a complete system, and cleats from different road brands are generally not interchangeable.
For commuting, a flat/clipless combination pedal can be especially useful. One side accepts a compatible cycling cleat, while the other provides a flat platform for ordinary shoes. This allows casual journeys without requiring clipless footwear every time.
If your everyday riding involves short urban trips, ordinary flat pedals may remain the most convenient choice. Switching to clipless is optional, and the best setup is the one you can operate comfortably and consistently.
The Cleat Setup Mistake That Triggers Knee Pain Within 2 Weeks
One important cleat setup mistake is forcing your feet into an unnatural rotational position. Repeated pedaling in that position can place unwanted stress on the knee, ankle, and hip. Discomfort may appear during the first rides, but there is no established rule that rotational errors cause knee pain within two weeks, nor that rotation is always the main cause.
Cleats do more than keep your shoes attached. They influence where your foot sits relative to the pedal axle, the crank, and the rest of your leg during every pedal stroke.
When you pedal, your feet naturally adopt individual angles. Some riders point their toes slightly outward, while others ride closer to a straight-ahead orientation. The two feet may not be symmetrical.
If a cleat forces your foot away from its comfortable orientation, the leg may compensate throughout the pedal stroke. Small alignment differences can become noticeable during repeated cycling, although pain alone cannot establish the underlying cause.
Begin with your natural foot angle. Sit on a chair or raised surface with your lower legs relaxed and your feet free to hang. Observe the general direction of each foot without deliberately turning the toes inward or outward. Use this observation as a starting reference, then check your pedaling position on the bicycle.
Remember that rotating the cleat on the sole changes the resulting orientation of the shoe when it is engaged. Make small adjustments, check the actual foot position, and confirm that the heel has adequate clearance from the crank.
The three cleat positioning dimensions should be considered separately:
- Rotation: Influences the angle at which the foot sits on the pedal and may affect how comfortably the leg tracks.
- Fore-aft position: Determines where the pedal axle sits beneath the foot and can influence pressure distribution and pedaling mechanics.
- Lateral position: Changes how far the shoe sits toward or away from the crank and may help resolve clearance problems.
Park Tool‘s technical instructions for cleat positioning explain these adjustment dimensions and how unsuitable foot orientation can stress the joints. The guidance provides a mechanical starting point, not a clinical diagnosis.
If discomfort develops, use symptom location as information to report, not as a definitive diagnosis. Inner- or outer-knee pain may prompt a review of rotational alignment and available float. Pain at the front of the knee can also warrant checking saddle height, riding load, and other fit variables.
Do not assume that changing cleat rotation will resolve every knee symptom. Joint discomfort can reflect workload, pre-existing conditions, footwear, or several interacting fit factors.
The first two weeks after switching are a useful period for paying close attention to new discomfort, but do not continue painful riding simply to complete an adjustment window. Stop if pain develops, reassess the setup, and seek appropriate professional bike-fitting or healthcare advice when symptoms persist, worsen, or interfere with normal activity.
Comfortable alignment should be established before increasing riding intensity or making retention harder to release. Once your feet sit naturally, the next adjustment concerns how firmly the pedals hold them.
When Should You Increase Release Tension After Switching to Clipless?
Increase release tension only when the current setting allows reliable deliberate release but does not retain the shoe adequately during normal riding. Beginners generally benefit from a relatively light, manufacturer-approved starting setting, provided it does not cause accidental disengagement. There is no universal need to increase tension after a particular number of rides or weeks.
Release tension controls how strongly the pedal mechanism retains the cleat. On adjustable systems, increasing tension generally requires more force to disengage, while reducing it makes release easier.
A new rider may assume that tighter means safer. However, excessive tension can make an already unfamiliar release movement harder, particularly during an unexpected stop.
At the other extreme, tension that is too low can allow the shoe to disengage unintentionally. This matters during hard pedaling, uneven surfaces, and movements that place unusual forces on the cleat.
Begin with a low setting permitted by the pedal manufacturer’s instructions, then confirm that you can both release deliberately and pedal without unintended disengagement.
Signs that your setup deserves reassessment include:
- The shoe repeatedly comes out of the pedal without an intended release movement.
- The foot feels insecure during ordinary pedaling despite correct engagement.
- Release requires excessive force or an awkward movement.
- The left and right pedals feel noticeably different when they should be adjusted similarly.
Before tightening the pedal, check for another explanation. Inspect whether the cleat is compatible with the pedal, properly secured, and free from excessive wear. Check that dirt is not obstructing engagement and that the shoe is entering the mechanism correctly.
On the compatible Shimano mechanism documented in its CLICK’R manual, one adjustment click corresponds to one tension step, with four clicks per full screw rotation. This increment is specific to the documented mechanism and should not be assumed for other pedal models.
When adjustment is necessary, make a small change according to the manufacturer’s directions. Recheck engagement and release on both sides in a controlled setting before returning to normal riding.
Cleat wear is another important variable. Worn cleats can change retention and release characteristics. After replacing them, reassess the release setting rather than assuming that the previous adjustment will feel identical.
Tension should not be used to compensate for knee pain, poor cleat alignment, or a damaged retention mechanism. Those problems require their own checks.
The objective is controlled retention, not maximum retention. With predictable release established, a repeatable cleat-positioning method can help make longer rides more comfortable.
How to Set Cleats Using a Marker Pen and a 15-Minute Test Ride?
Use a marker to record the ball-of-foot reference and your initial cleat position, then adjust the cleat so the pedal axle sits beneath or slightly behind the ball of the foot as a starting point. Set a comfortable neutral rotation, secure the hardware correctly, and perform a short controlled test ride. Change one positioning variable at a time and document every adjustment.
A marker-pen method turns cleat fitting into a repeatable process rather than a series of unrecorded guesses. It is particularly helpful when installing new cleats or trying to reproduce a previously comfortable setup.
Begin by putting on your cycling shoes and locating the first metatarsal joint near the ball of each foot. Mark its approximate position on the outside of the shoe with a removable marking method. The mark provides an anatomical reference while the shoe is off your foot.
Place the cleat according to the shoe and pedal manufacturer’s installation instructions. Use the ball-of-foot reference to establish a reasonable initial fore-aft position, allowing for the specific cleat’s engagement geometry.
Then set rotation so the engaged shoe can accommodate your natural foot orientation. Check lateral clearance, especially whether the heel approaches the crank during the pedal stroke.
Before making further changes, photograph the cleat position and record its location relative to fixed points on the shoe. For recessed cleats, simple measurements may be more reliable than tracing around a cleat that sits below the outsole.
A short test ride should be treated as a fitting check, not a workout. The following fifteen-minute structure is a practical diagnostic exercise rather than a clinically validated fitting protocol.
- Minutes 0–5: Pedal at an easy effort on a safe, level route. Observe whether either foot feels forced inward or outward, whether the heels contact the cranks, and whether the shoes feel comfortably supported.
- Minutes 5–10: Perform several planned low-speed stops in a traffic-free area. Check that each shoe releases predictably and that the release movement does not require an uncomfortable leg position.
- Minutes 10–15: Continue easy pedaling while checking for unusual pressure, numbness, hot spots, or joint discomfort. Stop immediately if painful symptoms develop rather than continuing to complete the test.
Use your observations to identify which variable might deserve further investigation. A heel touching the crank can call for lateral clearance checks. An unnatural toe angle suggests reviewing rotation. Localised pressure under the foot may justify checking fore-aft position, shoe fit, or insole support.
Make only one small change before repeating the relevant test. If you simultaneously alter rotation, fore-aft position, and lateral placement, it becomes difficult to understand which change affected comfort.
Use the manufacturer’s specified tightening procedure for cleat hardware. Loose bolts can allow movement that undermines both positioning and reliable disengagement.
DIY fitting can establish a useful starting position, but it cannot identify every biomechanical or medical issue. Persistent hot spots, numbness, or knee symptoms may require professional assessment of footwear, insoles, cleats, and overall bicycle fit.
A recorded baseline makes future changes easier to evaluate. It also prevents an unrelated mechanical problem from being mistaken for a cleat problem, which matters when you are checking the bicycle after a fall or awkward stop.
How to Diagnose Bad Shifting Without Touching Limit Screws by Mistake?
When a mechanically shifted bicycle hesitates between rear sprockets, inspect the chain, cables, and derailleur alignment before changing limit screws. Many indexing problems involve cable adjustment, whereas limit screws primarily restrict how far the derailleur can travel at either end of the cassette. If the chain risks entering the spokes or falling beyond the cassette, stop riding until the problem is corrected.
Shifting problems can become especially distracting when you are learning clipless pedals. A noisy or hesitant drivetrain adds another task at the exact moment you should be concentrating on balance, braking, and early disengagement.
Before turning any adjustment, distinguish between two different functions.
| Observation | Likely area to investigate | Appropriate first response |
|---|---|---|
| Hesitation shifting to a larger rear sprocket | Insufficient effective cable tension or another indexing issue | Inspect the drivetrain and check indexing |
| Hesitation shifting to a smaller rear sprocket | Excessive effective cable tension, friction, or another indexing issue | Check cable movement and indexing |
| Chain attempts to move beyond cassette ends | Limit settings, alignment, or other mechanical faults | Stop and inspect before riding |
| Problems after a fall or impact | Possible bent hanger or damaged derailleur | Check alignment and seek repair if needed |
Begin with a visual inspection. Look for a damaged or bent derailleur hanger, a dirty or poorly maintained chain, unusual cable or housing condition, and obvious signs of impact. A bent hanger can prevent correct indexing regardless of cable tension.
On conventional cable-operated rear derailleurs, the barrel adjuster changes effective cable tension. With the bicycle securely supported and the drivetrain operating safely, indexing checks commonly begin at the smallest rear sprocket.
If the derailleur hesitates when moving toward a larger rear sprocket, insufficient cable tension may be involved. On the conventional configuration described by Park Tool, turning the barrel adjuster counterclockwise increases effective cable tension.
If the derailleur hesitates when returning toward smaller sprockets, excessive cable tension may be involved. Turning the adjuster clockwise reduces effective cable tension on that configuration.
Use small quarter-turn corrections, then check the result across the cassette rather than making several large adjustments at once. If shifting does not improve, stop adjusting and investigate the underlying mechanical condition.
The high-limit screw restricts travel toward the smallest rear sprocket. The low-limit screw restricts travel toward the largest rear sprocket. Their purpose is not to fine-tune the spacing of every indexed shift.
Limit adjustment can genuinely be necessary after derailleur replacement, drivetrain changes, servicing, or damage. However, randomly turning these screws to cure mid-cassette hesitation may create a more serious chain-retention problem.
Electronic shifting systems and proprietary derailleur designs require their own manufacturer-specific procedures. Do not apply conventional cable-tension instructions to a system that lacks the corresponding mechanical adjuster.
Reliable shifting reduces distractions while you learn clipless technique. Once the drivetrain and stopping routine are predictable, the final comfort adjustment is understanding how much rotational movement your feet should have while clipped in.
Key takeaways before adjusting cleat float
- Establish a comfortable cleat rotation first; additional float should not compensate for a clearly incorrect fixed foot position.
- Different pedal and cleat combinations offer different float ranges, so check the compatibility and adjustment options of your specific system.
- Evaluate comfort and control together: a setup that feels comfortable but releases unpredictably still requires attention.
How to Set Cleat Float to Stop Inner-Knee Pain Without Losing Pedal Stability
Cleat float is the amount of rotational movement your foot can make while remaining engaged in a clipless pedal. Appropriate float can accommodate natural changes in foot orientation during pedaling, but it is not a guaranteed treatment for inner-knee pain. Start with comfortable cleat alignment, choose a compatible float range, and assess both joint comfort and secure retention.
Unlike complete disengagement, float allows the shoe to rotate within a limited range without leaving the pedal. Depending on the system, this freedom is determined by cleat design, pedal construction, and sometimes an adjustable mechanism.
Float and release are not the same thing. Float describes movement while engaged. Release occurs when the cleat reaches the required release movement or mechanism threshold and separates from the pedal.
Some systems offer cleats with different float characteristics, while others provide limited options or require changing components. There is no universal adjustment screw that increases or decreases float on every clipless pedal.
### Why cleat rotation comes first
Imagine a hypothetical rider whose natural foot orientation is slightly toe-out, but whose cleat positions the foot closer to straight ahead. A small amount of float may permit more comfortable movement, but the rider might still spend much of the pedal stroke near one end of the available range.
Correcting the initial cleat rotation may provide a more natural central position. Float can then accommodate modest movement around it instead of being used to work around a poorly aligned setup.
This distinction matters because adding float does not automatically solve a foot-angle problem, and decreasing float does not automatically improve pedal control.
### Interpret discomfort and instability carefully
Inner-knee discomfort can justify reviewing cleat rotation, available float, saddle position, and other fitting variables. However, pain location alone cannot demonstrate that float is insufficient or that the knee is tracking inward.
If the foot regularly reaches the end of its permitted rotation and feels constrained, check whether your cleat orientation is comfortable and whether a compatible cleat offers a more suitable float range.
If the pedal feels vague or imprecise, first establish whether you are noticing normal rotational float, unintended shoe movement, loose cleat hardware, or an actual release problem.
Excessive movement may feel unfamiliar, but it should not automatically be attributed to too much float. Similarly, unexpected release requires checking cleat compatibility, wear, retention settings, and release technique.
### Test stability without sacrificing comfort
After making an appropriate adjustment, repeat the controlled test-ride approach described earlier. Start with easy pedaling, then practise deliberate releases and planned stops.
Check whether the foot can maintain its natural position without repeatedly pressing against the end of the available float. Confirm that both shoes remain securely engaged during ordinary riding and release smoothly when intended.
Only after those basic checks are satisfactory should you gradually return to normal riding effort. Do not use hard accelerations or rough surfaces to test a retention system that already feels unreliable.
If the foot feels excessively mobile, review the manufacturer’s float options, the cleat’s rotational alignment, and its physical security before selecting a different cleat. A lower-float option may be appropriate for some riders, but it is not automatically the safest option for someone experiencing knee discomfort.
Persistent or worsening knee pain calls for more than repeated cleat adjustments. Stop painful riding and consider a qualified bike fitter or healthcare professional, particularly if discomfort continues off the bicycle or affects normal movement.
For your next ride, choose a short and familiar route with predictable stopping places. Confirm that each foot releases easily, your cleats feel naturally aligned, and you can stop without hesitation. Build distance and traffic complexity only when those basics feel consistent.
Can you learn clipless pedals without falling at all?
Yes, it is possible to learn without falling, but no training method can guarantee it. Practising with stable support, releasing before stopping, choosing a safe landing position, and progressing gradually can reduce avoidable mistakes. Do not treat an early fall as a necessary part of learning.
Should beginners practise with only one foot clipped in?
Supported exercises and initial starts can be practised with one foot clipped in while the other remains available for balance. However, both feet need independent release practice. Once riding with both feet engaged, release the intended landing foot well before each planned stop.
Are multi-release SPD cleats safer for beginners?
Compatible multi-release cleats can disengage through additional movements, which some beginners may find helpful. However, they may also release unintentionally under certain forces. They do not guarantee automatic disengagement during a fall. Follow the pedal manufacturer’s compatibility and safety instructions rather than assuming multi-release always means safer.
Can you use clipless pedals with ordinary trainers?
Ordinary trainers cannot engage a clipless mechanism without compatible cleat hardware. However, a flat/clipless combination pedal offers a conventional platform for ordinary shoes on one side and a cleat-binding mechanism on the other. This can be convenient for commuting and occasional recreational rides.
Should you keep riding if new clipless pedals cause knee pain?
Do not ride through knee pain while hoping to become accustomed to the setup. Stop the painful activity and check cleat alignment, shoe comfort, available float, and overall bicycle fit. If pain persists, worsens, or affects everyday movement, obtain an appropriate professional assessment rather than continuing to experiment with adjustments.