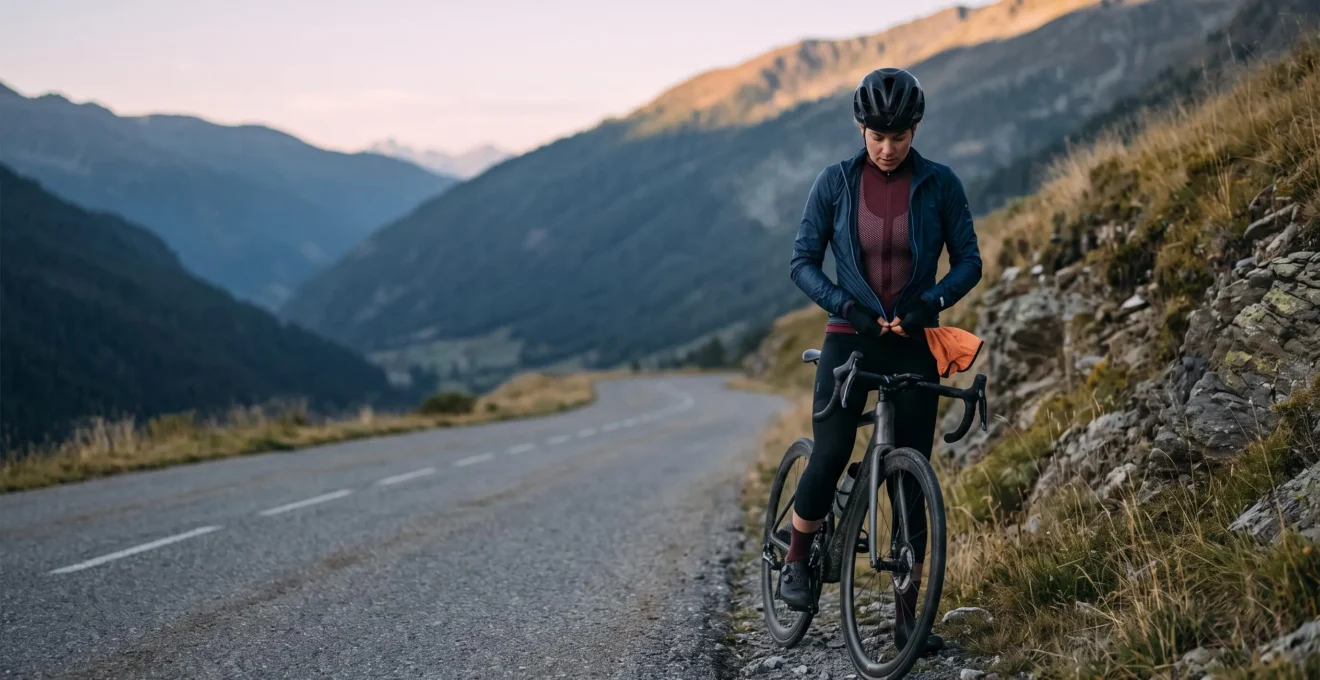
A ride that begins at 5°C and finishes at 15°C presents a clothing problem that a winter jacket alone cannot solve. You need enough protection for cold morning air and fast descents, but not so much insulation that the first sustained climb leaves your base layer soaked.
The most practical approach is to keep the layer against your skin relatively light and make your wind protection adjustable. For many riders, a moisture-wicking base layer, a suitable cycling jersey, and a compact gilet or shell provide a more adaptable combination than a thick base layer under a heavily insulated jacket.
The right configuration depends on wind, rain, riding intensity, route profile, and individual cold tolerance. A steady commute through sheltered streets calls for different adjustments than a weekend ride involving exposed climbs and long descents.
The objective is not to feel perfectly warm every second. It is to keep perspiration manageable, protect yourself when airflow increases, and make quick clothing adjustments without carrying a bulky bag.
5°C-to-15°C cycling layers: the essentials
- Choose a breathable base layer for the warmer, harder-working parts of the ride. Add removable insulation or wind protection for the cold start.
- Ventilate before you start sweating heavily, then close your outer layer before descents or exposed sections.
- Carry only the protection your route and forecast justify: a packable gilet for wind, a softshell for sustained cold exposure, or a rain shell when precipitation is credible.
- Why Do You Feel Freezing on Descents Even When You Started Warm?
- How to Choose Base, Mid, and Shell Layers for Windy Rides Without Overheating?
- Which Should You Choose: Gilet, Softshell, or Rain Jacket for Changeable Weather?
- The Layering Mistake That Causes Chafing After 2 Hours in Drizzle
- When Should You Add or Remove a Layer to Avoid Sweat Spikes on Rolling Hills?
- Which Should You Choose: Wet Lube, Dry Lube, or Wax if You Ride in Mixed Weather?
- How to Choose Base-Layer Thickness for a 5–15°C Ride Without Overheating?
- Which Moisture-Wicking Base Layer Works When You Sweat Heavily on Climbs?
Why Do You Feel Freezing on Descents Even When You Started Warm?
You feel freezing on descents because fast-moving air removes heat from your body while sweat-damp clothing makes it harder to stay comfortable. The warmth generated during a climb disappears as your effort drops. A layer that felt adequate uphill may offer little protection at descending speeds, especially when your jersey is damp.
During a climb, working muscles generate substantial heat. You may feel comfortable at 10°C or even 15°C with an open jersey and little wind protection. Once the road turns downhill, your heat production falls while airflow around your body increases.
Moving air disrupts the warm layer of air next to your clothing and accelerates convective heat loss. Exposed skin can feel much colder than the thermometer suggests. This effect is particularly noticeable on the chest, shoulders, hands, and neck.
A fast descent at approximately 50 km/h can therefore feel surprisingly cold even when the air temperature is relatively mild. However, assigning an exact equivalent temperature would be misleading: perceived cooling depends on clothing, moisture, wind direction, speed, and exposure.
The second problem is accumulated perspiration. A damp base layer may continue to lose heat through evaporation as you descend. When your effort decreases, your body may no longer generate enough heat to compensate.
Warm but damp is a poor starting condition for a long descent. This explains why riders who felt excessively warm on the climb sometimes become the coldest riders afterward.
A practical pre-descent routine can reduce that discomfort:
- Ease your effort near the summit where traffic and terrain make it safe.
- Allow excess heat to dissipate before closing your jacket.
- Zip up your gilet or wind shell before speed increases, stopping safely if adjustment requires both hands.
- During the initial descent, check for clammy skin, excessive cooling, or shivering.
Shivering is a signal to seek additional warmth, not simply something to tolerate. If it persists, stop safely, reduce exposure, and reassess whether continuing is appropriate.
The real skill is managing three changing conditions: climbing heat, cold airflow, and the transition between them.
The next step is to assign a clear purpose to each garment so you can adjust protection without wearing excessive insulation throughout the ride.
How to Choose Base, Mid, and Shell Layers for Windy Rides Without Overheating?
Choose cycling layers according to three separate functions: your base layer manages moisture, your mid layer provides insulation, and your outer shell limits exposure to wind and rain. For a ride warming from 5°C to 15°C, start with breathable clothing and use removable protection to handle changing conditions rather than relying on thick insulation throughout.
This approach follows the general principles described in REI’s explanation of the three-layer clothing system. Each layer contributes something different, although individual garments can combine functions.
The base layer sits next to your skin. Its main role is to transport perspiration away from the skin-facing surface. A close but comfortable fit usually makes moisture transfer more effective than loose material that barely contacts the body.
The mid layer retains warmth. Depending on conditions, this may be a long-sleeved cycling jersey, a lightly insulated jersey, or an additional breathable garment. It should provide enough warmth without becoming an unventilated barrier.
The shell protects against external conditions. A wind-resistant gilet, breathable softshell, or packable rain jacket can reduce cooling, but these garments differ significantly in ventilation and coverage.
For a hypothetical dry ride with temperatures gradually increasing from 5°C to 15°C, the following starting combinations illustrate how route conditions affect clothing choices.
| Riding conditions | Practical starting configuration | Main adjustment |
|---|---|---|
| Calm weather, steady commuting pace | Light base layer, cycling jersey, packable wind protection | Open or remove wind protection as the ride warms |
| Rolling hills with repeated hard efforts | Thin base layer, breathable jersey, compact gilet | Ventilate before climbs; close protection for descents |
| Exposed roads with sustained cold wind | Base layer, appropriate insulating jersey, breathable wind-resistant outer layer | Adjust zips and ventilation according to effort |
| Unsettled weather with possible showers | Wicking base, suitable jersey, accessible packable rain shell | Put on the rain shell when needed and vent during exertion |
These are starting points, not universal prescriptions. Riders with a low cold tolerance may need more insulation, while high-intensity cyclists may need less. Gloves, suitable socks, and protection for exposed extremities can also improve cold-weather comfort without adding excessive torso insulation.
Breathability and wind protection exist on a spectrum. A highly protective shell may reduce cooling effectively but also limit the escape of moisture and heat. Look for adjustable front zips, ventilation openings, or breathable fabric panels where appropriate.
Do not build the entire outfit around the coldest few minutes. If the first sheltered climb rapidly makes a thick jacket unbearable, you have probably insulated for the start rather than for the full ride.
Once these functions are clear, choosing the right outer garment becomes simpler because you can match its protection and packability to your route.
Which Should You Choose: Gilet, Softshell, or Rain Jacket for Changeable Weather?
Choose a gilet when wind protection and minimal packing volume matter most, a softshell when cold and wind are sustained, and a rain jacket when meaningful precipitation is likely. For many dry 5°C-to-15°C rides, a compact gilet is the most flexible starting option, but exposed routes and wet forecasts can justify fuller protection.
A gilet, also called a cycling vest, protects the torso while leaving the arms comparatively exposed. This makes it useful when you need to reduce wind cooling without retaining as much heat as a full-sleeved jacket.
Many cycling gilets compress into a rear jersey pocket. They can be particularly convenient for rolling terrain, where repeatedly removing a full jacket would become tedious.
A softshell provides broader coverage and often combines some insulation with wind resistance and limited protection against light precipitation. It can work well during a long, cold commute or a ride where the temperature remains low and wind exposure is consistent.
However, a softshell that feels comfortable at 5°C may become too warm during sustained climbing at 15°C. Its usefulness depends on fabric breathability, fit, ventilation, and whether you have somewhere practical to carry it when removed.
A rain jacket prioritises precipitation protection. A well-designed cycling rain shell can be essential when showers are expected, but even breathable waterproof materials have limits during hard efforts. Wearing one unnecessarily through every climb can create excessive moisture inside.
The comparison below focuses on what matters while riding: protection, ventilation, and whether the garment can actually be carried.
| Criterion | Gilet | Softshell | Rain jacket |
|---|---|---|---|
| Core wind protection | Generally good when wind-resistant | Often good, depending on fabric | Generally strong when fully closed |
| Arm coverage | None | Full | Full |
| Rain protection | Limited unless specifically designed otherwise | Usually suited to light precipitation, depending on construction | Designed for rain protection when genuinely waterproof |
| Heat management | Open arms help release heat | Depends on breathability and ventilation | Can become uncomfortable during hard efforts |
| Packability | Often excellent | Frequently bulkier | Varies widely between models |
| Best general use | Variable dry weather | Sustained cold or wind | Showers or prolonged rain |
Before buying or selecting an outer layer, fold it and check whether it fits into the carrying space you actually use. A jacket that needs a large bag may be inconvenient for a short commute or minimalist weekend ride.
For an unsettled forecast, a thin gilet combined with an exceptionally packable rain shell may offer more flexibility than one heavy jacket, provided both fit comfortably in your available pockets.
These garment differences are also discussed in Cycling UK’s cold-weather cycling clothing advice, which emphasises adapting clothing to both external conditions and changing exertion.
A rain shell should not automatically stay on because rain might arrive later. Carrying protection and wearing protection are different decisions.
Once rain enters the picture, moisture management becomes important for more than temperature control: damp clothing and repeated friction can also make longer rides uncomfortable.
The Layering Mistake That Causes Chafing After 2 Hours in Drizzle
The layering mistake that often contributes to chafing during prolonged drizzle is allowing damp clothing to rub repeatedly against the same areas of skin. Wet shorts, poorly positioned seams, tight cuffs, or a rubbing zipper can all cause irritation. Moisture increases the problem, but clothing fit, saddle contact, and friction patterns must also be considered.
Chafing is fundamentally a friction problem. During cycling, repeated pedalling movements create contact between clothing, skin, and equipment. Wet conditions can aggravate that contact, particularly when dirt, sweat residue, or fabric folds remain trapped against the body.
The two main friction patterns worth distinguishing are saddle-area irritation and upper-body clothing irritation.
Saddle-area discomfort may arise where cycling shorts, skin, and the saddle repeatedly interact. Damp fabric, poor short fit, an unsuitable chamois, saddle position, or prolonged pressure can all contribute.
Upper-body irritation is different. A collar may rub against the neck, a zipper may contact the chest, or sleeve cuffs may repeatedly move against the wrists. Multiple seams positioned directly over one another can also create uncomfortable pressure points.
For example, consider a hypothetical cyclist who begins a two-hour ride wearing a close-fitting base layer beneath a rain jacket. As perspiration builds, the base layer becomes damp, and the jacket collar repeatedly rubs the same patch of skin. The irritation might initially be mistaken for general discomfort from the rain, even though a small adjustment to the collar or garment fit could reduce the friction.
Prevention begins before the ride:
- Use cycling shorts that fit securely without bunching or excessive movement.
- Inspect base-layer collars, cuffs, and seams for rubbing points.
- Avoid stacking raised seams in areas that experience repetitive motion.
- Choose clothing that moves moisture effectively and does not trap unnecessary sweat.
- Apply an appropriate anti-chafing product to susceptible areas when needed.
The MedlinePlus medical encyclopedia entry on chafing identifies friction, clothing, and contamination among the relevant factors and describes preventive measures including appropriate athletic clothing and petroleum jelly.
However, there is no sound basis for claiming that chafing appearing after exactly two hours is necessarily caused by layering rather than saddle fit. The location, severity, and recurrence of irritation matter.
Do not ignore early skin irritation. Continuing to rub already damaged skin can worsen discomfort and interfere with subsequent rides.
After a wet ride, change out of damp clothing, gently clean affected skin, and allow irritated areas to recover. Seek professional medical advice for persistent, worsening, infected, or unusual skin lesions.
Preventing irritation also means preventing unnecessary sweat accumulation, which is why the timing of layer adjustments is especially important on rolling terrain.
When Should You Add or Remove a Layer to Avoid Sweat Spikes on Rolling Hills?
Remove or ventilate a layer as soon as you notice moisture building at your collar, chest, or lower back, rather than waiting until you feel overheated. On rolling hills, adjust protection ahead of sustained effort and restore it before exposed descents. Early, small changes are usually easier than recovering from a thoroughly soaked base layer.
Rolling terrain creates a different challenge from a continuous climb. Your effort repeatedly increases uphill and decreases downhill, sometimes within a few minutes.
Trying to achieve identical comfort throughout every rise and descent can lead to constant changes. Instead, aim for an acceptable range of comfort: slightly cool at the beginning of a climb, adequately ventilated during effort, and protected before wind exposure increases.
At the start of an ascent, open the front zip of your outer layer while conditions and safe handling permit. If you expect a longer effort, remove the shell at a safe stopping point before perspiration becomes excessive.
Where your clothing combination permits it, the shell is often the first removable garment. Keeping the underlying jersey in place avoids exposing the base layer unnecessarily.
When temperatures are rising, a gilet may be removed entirely and packed into a jersey pocket. On shorter hills, opening its zip may be sufficient.
However, do not deliberately remain underdressed for a long, cold descent. Restore wind protection before cooling becomes excessive, especially if you are already damp.
Use a practical routine whenever you stop to adjust clothing. Move completely out of traffic, secure the bicycle, remove or add the required garment, and pack it where you can retrieve it without unpacking everything.
A dedicated rear pocket is useful because it keeps the garment accessible. Compress the shell loosely enough to avoid damaging delicate fabrics, but tightly enough that it does not interfere with pedalling.
Five checks before a variable-weather ride
- Check the forecast and route. Record the starting temperature, expected maximum, wind exposure, and probability of rain in a short ride note.
- Build your starting outfit. Lay out your base, jersey, and removable outer layer; confirm that each garment serves a distinct purpose.
- Test your storage. Pack the removable layer into your intended jersey pocket or compact bag and confirm that it fits securely.
- Identify adjustment points. Mark a safe location before a major climb or descent where you can change clothing without disrupting traffic.
- Review moisture after the ride. Record whether your base layer remained reasonably comfortable or became excessively damp, then identify one change for next time.
These checks create a useful record of what works for your riding intensity and clothing. Over several rides, you can identify patterns rather than guessing based only on the temperature shown in the forecast.
The cost of overheating is not limited to the current hill. Once a base layer is heavily saturated, it may remain damp for a substantial part of the ride, depending on fabric, humidity, ventilation, and intensity.
Unsettled conditions also affect the bicycle itself, so a sensible variable-weather routine includes maintaining the drivetrain without creating unnecessary work.
Which Should You Choose: Wet Lube, Dry Lube, or Wax if You Ride in Mixed Weather?
Choose chain lubricant according to how often you encounter rain, road contamination, and dry conditions, as well as the maintenance routine you can realistically maintain. Wet lubes can tolerate moisture but may retain grit; traditional dry lubes may require more frequent reapplication after rain; and suitable wax systems can provide strong contamination resistance when correctly prepared.
Mixed-weather cycling creates an awkward maintenance problem. A commuter might ride through drizzle in the morning, dry roads at lunchtime, and damp grit on the journey home.
Wet chain lubricants remain oily after application. This can help maintain lubrication in wet conditions, depending on the formulation. However, oil can also hold road dust, sand, and other contaminants against drivetrain components.
When abrasive particles mix with lubricant, they can contribute to chain, cassette, and chainring wear. Adding more oil without cleaning away accumulated contamination may not solve the problem.
Traditional dry lubes are often selected for cleaner, drier riding because they can attract less dirt than some wet oils. Their durability in rain varies significantly by product, so their suitability for wet commutes should not be assumed from the label alone.
Wax-based lubrication works differently. Drip wax generally dries to leave a lubricating coating, while immersion waxing involves treating the chain in heated wax using appropriate equipment and safety precautions.
Proper preparation is important: residual oil and contamination can compromise wax adhesion and performance.
Wax is not necessarily a compromise between wet and dry lubricants. High-performing formulations can achieve strong results in challenging conditions, while poorly chosen or improperly maintained products may perform less effectively.
This distinction is discussed in CYCLINGABOUT’s comparison of laboratory-tested bicycle chain lubricants, which draws on independent testing by Zero Friction Cycling.
For practical decision-making, consider three maintenance profiles:
- Frequent wet commuting: prioritise demonstrated wet-condition durability and clean the drivetrain after contaminated rides.
- Mostly dry riding with occasional showers: consider a product with good contamination resistance and a reapplication schedule suited to occasional wet exposure.
- Regular maintenance and interest in cleaner drivetrains: investigate a properly prepared wax system, including its cleaning and reapplication requirements.
A simple maintenance loop is to clean visible contamination, allow the chain to dry appropriately, apply the lubricant according to the manufacturer’s instructions, and periodically inspect the chain for wear and lubrication condition.
Unusual chain noise can prompt an inspection, but silence does not guarantee adequate lubrication, and squeaking alone does not reliably measure lubricant failure.
Wax conversion also requires initial cleaning and planning for subsequent wet rides. A rider with limited maintenance time may prefer a simpler system that is consistently maintained rather than a theoretically superior method used incorrectly.
The same practical principle applies to clothing: consistent adjustments that suit your riding habits usually matter more than selecting the most technical equipment available.
How to Choose Base-Layer Thickness for a 5–15°C Ride Without Overheating?
Choose base-layer thickness primarily for the warmer and more demanding parts of your ride, then use removable garments to handle the colder periods. A lightweight or moderately thin base layer is often more adaptable across 5°C to 15°C than a heavy winter base, especially when climbing generates substantial heat.
The base layer is the least convenient garment to change during a ride. It sits underneath other clothing and usually requires removing several items before it can be replaced.
That makes its thickness particularly important. If you choose a very warm base layer solely because the ride starts at 5°C, it may become uncomfortable when temperatures increase and you begin working harder.
A lighter base layer offers a different strategy. It handles skin-level moisture while a jersey, gilet, or shell supplies adjustable warmth and protection.
The starting outfit must still be warm enough for safe riding. Choosing thinner underwear does not mean ignoring freezing wind, unusually cold hands, or a route with prolonged low-intensity exposure.
Fabric composition matters alongside thickness.
Merino wool can provide comfortable insulation and useful odour management. Depending on weight, knit, and construction, it may retain significant moisture and take longer to dry than some lightweight synthetic alternatives.
Polyester and other synthetic fibres can be engineered to move moisture efficiently and dry relatively quickly. However, drying performance varies between garments, and heavily saturated synthetic material can still leave a rider cold.
Blended fabrics offer another option, combining characteristics of wool and synthetics in proportions that vary by product.
For a hypothetical weekend ride that starts with a chilly valley section before several sustained climbs, a thin synthetic base beneath a long-sleeved jersey and removable wind shell may provide better adjustability than a heavy thermal base under the same clothing.
For a slower commuter spending much of the journey exposed to cold wind, a warmer base may be appropriate.
A useful personal test is to wear the candidate base layer during a short training session or familiar loop that resembles your expected climbing effort. Around 20 minutes can provide an initial indication of comfort and moisture accumulation, although this is a practical trial rather than a scientifically validated testing protocol.
Check whether the material feels persistently saturated, whether the collar and lower back become clammy, and whether you can restore comfort by adjusting outer clothing.
If the base stays uncomfortably damp while your outer layers are already well ventilated, a thinner or different material may help. Repeated discomfort could also reflect intensity, humidity, garment fit, or excessive insulation elsewhere.
Summer-weight base layers are not exclusively for summer riding. When combined with appropriate adjustable protection, they can be useful across a broad range of temperatures.
Choose the base for the effort you expect, not just the temperature at departure.
Thickness is only half the decision. Riders who sweat heavily also need to understand how different fabrics move, retain, and release moisture.
Key takeaways before choosing your base-layer fabric
- A thick base layer can solve an initial cold sensation but create a moisture problem later; use removable garments for temperature changes whenever practical.
- Fabric composition, garment construction, fit, and riding intensity all influence how dry your skin feels.
- Prioritise predictable comfort and moisture recovery during climbs rather than relying on marketing labels such as thermal or ultra-breathable.
Which Moisture-Wicking Base Layer Works When You Sweat Heavily on Climbs?
For riders who sweat heavily on climbs, a thin, close-fitting synthetic base layer is often a useful starting choice because suitable synthetic constructions can transport moisture and dry efficiently. Merino can offer comfort and odour control, while blends provide alternatives. The best choice depends on sweat volume, garment construction, weather exposure, and the length of your ride.
Moisture wicking describes the movement of liquid perspiration through a fabric, generally away from the skin-facing surface and toward areas where it can spread and evaporate.
This is different from simply absorbing sweat. A fabric may take up moisture without redistributing or releasing it quickly enough to maintain comfort during demanding efforts.
Effective moisture transport depends on fibre properties, knit structure, garment thickness, fit, airflow, and humidity. The term moisture-wicking alone does not guarantee that a particular garment will keep every cyclist dry.
For heavy sweaters, lightweight synthetic fabrics are worth testing first. They can move moisture efficiently while providing relatively little insulation, making them useful when hard climbs are followed by warmer conditions.
The main compromise is often odour management, although this differs across fibres, fabric treatments, washing practices, and garment construction.
Merino wool can feel comfortable over extended rides and is valued by many cyclists for its odour-related properties. However, heavier merino garments may retain more moisture and feel damp for longer during repeated hard efforts.
A lightweight merino garment should not be assumed to perform identically to a thick winter-weight version. Likewise, not every synthetic layer dries at the same speed.
Blended fabrics may offer an appealing balance, but the exact composition and knit matter more than a generic category label.
The practical selection process is to compare how candidate garments behave during the riding conditions that most often cause discomfort.
| Fabric type | Potential advantage | Point to assess |
|---|---|---|
| Lightweight synthetic | Efficient moisture movement and potentially rapid drying | Odour, fit, and moisture accumulation during intense effort |
| Lightweight merino | Comfort and odour-management characteristics | Drying behaviour during prolonged sweating |
| Merino-synthetic blend | Combination of fibre characteristics | Actual knit, weight, and drying performance |
No base layer can eliminate perspiration production. During a sustained climb, your body produces sweat to regulate temperature, and even an effective fabric can become saturated if moisture accumulates faster than it escapes.
That is why ventilation remains essential. Open outer layers before overheating, reduce unnecessary insulation, and consider easing sustained effort near the end of a climb when conditions allow.
After a demanding ride, inspect the garment rather than relying only on how it felt while warm. Note whether the skin-facing surface remained comfortable, whether the material dried during lower-intensity sections, and whether you experienced uncomfortable cooling on descents.
Repeat that comparison across similar routes before concluding that one fabric is unsuitable. Humidity, wind, and workload can substantially change the result.
The final principle is straightforward: your base layer is the fixed foundation of a flexible clothing system. Its job is to support moisture management, while the removable layers above it adapt to wind, precipitation, and changing effort.
For your next 5°C-to-15°C ride, start with the base layer that best matches your sweat profile, add suitable removable wind protection, and make a note of when you first become damp or chilled. Use that observation to refine one clothing choice at a time instead of adding more garments to your bag.
Should you feel slightly cold when starting a ride at 5°C?
Feeling slightly cool before exertion can be normal, especially if your clothing is designed for sustained cycling rather than standing still. However, you should not start a ride shivering or experiencing significant numbness. Adjust your protection according to wind, expected effort, and how quickly you can warm up safely.
Can you complete a 5°C-to-15°C ride without a backpack?
Often, yes. A packable gilet or lightweight shell, compact accessories, and standard ride essentials may fit into cycling jersey pockets or another small carrying solution. This depends on the actual volume of your clothing and the equipment required for your route. Do not sacrifice necessary rain or cold protection simply to avoid carrying a bag.
Are arm warmers useful when the temperature rises during a ride?
Arm warmers can be particularly useful with a short-sleeved jersey because they add removable coverage without requiring an additional full jacket. They can usually be stored in a jersey pocket once conditions warm. Their suitability depends on fit, insulation, and how much wind protection your torso already has.
What should you do if your base layer is already soaked before a descent?
Before descending, reduce unnecessary exertion and manage ventilation so excess heat can escape. Then close or add appropriate wind protection before speed increases. If you are already very cold, stop safely and consider whether dry clothing, shelter, or a change of plans is necessary. A wind shell limits further exposure but does not instantly dry saturated clothing.
Do you need a waterproof jacket when the forecast shows only occasional drizzle?
It depends on ride duration, exposure, expected precipitation, and the consequences of getting wet. A short sheltered commute in light drizzle may call for different protection than a remote ride with long descents. When rain could become sustained or being wet would create substantial cold exposure, carrying a packable waterproof shell is a sensible precaution.