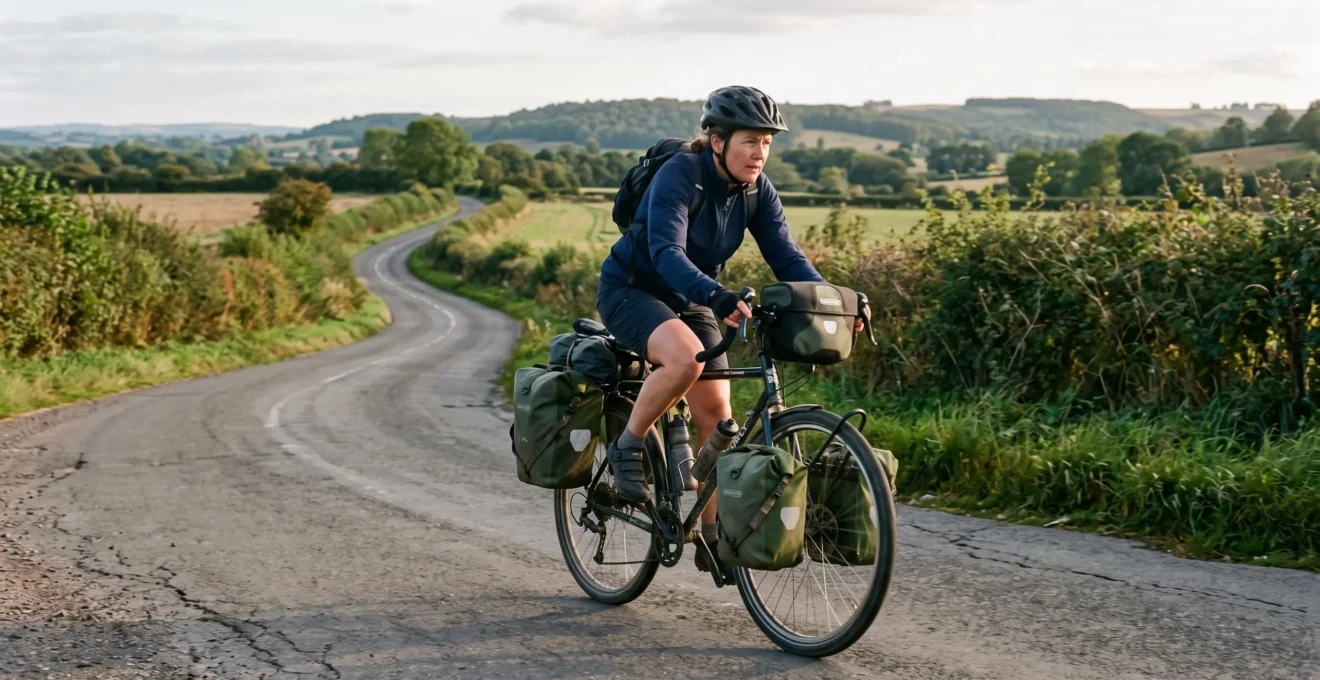
Carrying 20 kg of luggage at 35 km/h requires more than a strong frame and a pair of sturdy panniers. The bicycle needs a geometry that behaves predictably under load, a compatible rack system, suitable gearing, adequate tyre clearance and components that can be serviced away from major cycling shops. A bike that feels perfectly manageable on a short unloaded ride can behave very differently after several hours with camping equipment aboard.
For most riders moving from a road or gravel bike into touring, the safest starting point is a purpose-built touring frame with sufficiently long chainstays, reliable rack mounts and a drivetrain offering genuinely low climbing gears. A gravel bike can also work, provided its frame, wheels and mounting points are suitable for the intended luggage. Neither material nor total weight alone guarantees stability.
The important distinction is between a bicycle that can physically carry 20 kg and one that remains predictable when braking, climbing, descending and riding over uneven surfaces. The setup must be assessed as a complete system, including the rider, luggage distribution, tyres and maintenance requirements.
The Touring Setup at a Glance
- Choose a frame with touring-oriented geometry, compatible rack mounts and enough heel clearance for fully loaded panniers.
- Distribute luggage deliberately between front and rear racks rather than concentrating everything behind the saddle.
- Check low gearing, tyre clearance, brake condition and component compatibility before departure.
- Why Does a Loaded Bike Feel Stable at 20 km/h but Scary at 40 km/h?
- How to Spec Gearing and Tyre Clearance for a 10% Climb With Full Panniers?
- Which Should You Choose: Steel Touring Bike or Gravel Bike for 1,000 km of Mixed Roads?
- The Rack and Heel-Clearance Mistake That Ruins Your First Touring Day
- Fix Hand Numbness After 3 Hours Without Changing Your Handlebar
- When Should You Replace Disc Pads Before a 6-Day Trip to Avoid Metal-on-Metal?
- How to Build a Repair Kit for Your Exact Bike in 10 Minutes Using a Failure Checklist?
- How to Pack a Sub-6 kg Camping Kit That Still Sleeps Warm at 5°C?
Why Does a Loaded Bike Feel Stable at 20 km/h but Scary at 40 km/h?
A loaded bicycle can feel stable at 20 km/h and develop an alarming shimmy at higher speeds because its steering and frame have natural vibration modes. Changes in speed alter how those oscillations interact with the rider’s steering corrections, tyre contact and frame flexibility. The result can be a speed-dependent instability rather than a general problem with the bicycle’s handling.
Shimmy is not simply the sensation of steering a heavy bicycle. It is a dynamic oscillation involving the front and rear structures of the bicycle. Once the system begins oscillating, small movements can reinforce one another instead of settling naturally. A particular speed range may therefore feel significantly worse than speeds immediately below or above it.
An experimental investigation of a real bicycle shimmy examined the movement of the front and rear frames and reconstructed their respective motions. This provides useful evidence that the phenomenon involves the dynamic behaviour of the bicycle as a whole. However, the experiment concerned a racing bicycle, not a touring bicycle carrying 20 kg of panniers. It does not establish a universal speed threshold for loaded touring.
For a practical diagnosis, distinguish two sensations:
- Speed wobble: rapid, repetitive steering or frame oscillation that can become more pronounced within a particular speed range.
- Slow-speed ponderousness: sluggish steering caused by the mass and distribution of the luggage, particularly during tight turns or climbing.
These problems require different responses. Lower tyre pressure or easier gearing will not reliably correct a mechanical shimmy. Start by checking headset adjustment, wheel condition, tyre seating, rack security, frame condition and luggage distribution. Also inspect the bicycle for damaged or loose components before another fast descent.
Front luggage deserves particular attention. A heavily loaded front end changes steering inertia and the way the bicycle responds to rider input. That does not mean front panniers automatically cause shimmy, or that rear loading is always safer. The correct arrangement depends on frame geometry, rack position, load distribution and the behaviour of the complete bicycle.
A useful preliminary workshop check is to mount the luggage, lift the bicycle by the saddle and observe how the front end moves when released carefully. Note whether it swings freely or settles. This is only a qualitative comparison, not a validated shimmy test or proof that a bicycle is safe at 35 km/h. A proper loaded road test at controlled speed remains necessary.
If oscillation develops while riding, avoid trying to overpower the handlebars with abrupt steering corrections. Experienced riders commonly recommend reducing speed smoothly, relaxing excessive upper-body tension and using the knees against the frame to help damp movement. A change in head position may also alter the rider’s contribution to the system, but none of these responses replaces a mechanical inspection. If the wobble persists, stop and investigate rather than continuing at speed.
The practical lesson is to assess the bicycle’s handling under its intended load before departure, not to assume that a comfortable unloaded test ride predicts loaded behaviour.
Once the steering system behaves consistently, the next priority is ensuring that the drivetrain and tyres can cope with the same luggage on sustained climbs and rougher roads.
How to Spec Gearing and Tyre Clearance for a 10% Climb With Full Panniers?
For a sustained 10% climb with full panniers, choose gearing by calculating the lowest usable ratio for the combined weight of the rider, bicycle and luggage. Do not select a cassette simply because its largest sprocket looks generous. The required gear depends on climbing speed, preferred cadence, wheel size and the rider’s ability to sustain the necessary effort.
The basic relationship is straightforward: a lower gear moves the bicycle a shorter distance with each crank revolution, reducing the force required at the pedals for a given climbing effort. A touring bicycle should provide a low enough ratio to keep the rider turning the cranks comfortably rather than grinding a large gear until progress stops.
Before buying, identify three inputs:
- Total system mass: rider, bicycle, water, food, tools and all luggage.
- Target climbing cadence: the cadence the rider can maintain under sustained effort.
- Lowest expected speed: a realistic climbing speed on the steepest loaded sections.
Use these values to assess the required development, meaning the distance travelled for one complete crank revolution. Compare the resulting requirement with the chainring and cassette combinations listed on the bicycle’s specification sheet. For a given wheel circumference, a smaller chainring combined with a larger rear sprocket produces a lower gear.
For example, a hypothetical 2x drivetrain with a 30-tooth inner chainring and a 42-tooth largest sprocket has a lowest ratio of approximately 0.71. A hypothetical 1x setup with a 32-tooth chainring and a 50-tooth sprocket has a ratio of 0.64. These examples illustrate the comparison method; neither ratio guarantees that a particular rider can climb a 10% gradient with 20 kg of luggage.
Check the manufacturer’s approved cassette range, derailleur capacity, chain length and crank compatibility. A larger cassette may require a different derailleur or other drivetrain changes. These details matter when replacement parts must be sourced in smaller towns.
Tyre clearance is equally important. The frame and fork must accommodate the actual tyre width, including the additional clearance needed for mud, debris and wheel movement. Wider tyres can allow lower operating pressures, improving comfort and grip on mixed surfaces, provided the tyre, rim and bicycle manufacturer’s pressure limits are respected.
Do not confuse the tyre’s nominal printed width with its installed width. Rim internal width influences the final profile, and clearance must be checked with the actual wheel and tyre combination. Inspect the fork crown, chainstays, seatstays and mudguard space where applicable.
There is also a repairability trade-off. An unusually wide cassette, proprietary derailleur system or uncommon wheel standard can complicate replacement in rural areas. The ideal touring specification balances climbing ability and tyre volume with parts that can realistically be sourced and serviced during the journey.
Once the mechanical specification is understood, the larger purchasing decision becomes easier: whether a dedicated steel touring bicycle or a gravel platform is the better foundation for the route.
Which Should You Choose: Steel Touring Bike or Gravel Bike for 1,000 km of Mixed Roads?
For a 1,000 km trip dominated by paved roads, with occasional maintained gravel sections and 20 kg of luggage, a purpose-built touring bicycle is generally the more straightforward choice. A gravel bike can be suitable when its rack compatibility, frame capacity, gearing and heel clearance have been verified. The deciding factors are not simply steel versus aluminium or carbon, but load-carrying design, serviceability and route conditions.
A touring frame is designed around sustained luggage carrying. Its longer wheelbase, typically longer chainstays and appropriate mounting points can make it easier to fit conventional panniers without compromising the rider’s position. Adventure Cycling Association’s guide to touring bicycle geometry explains how geometry influences handling, luggage placement and stability.
The following comparison focuses on the three purchasing criteria that matter most for a loaded journey.
| Criterion | Steel Touring Bike | Gravel Bike |
|---|---|---|
| Load carrying | Often designed for front and rear racks, panniers and touring accessories. | Depends on frame design, approved mounting points and manufacturer load limits. |
| Repairability | Common steel tubing can be repairable by a suitable welding workshop, subject to damage and frame construction. | Varies with frame material, construction, drivetrain and proprietary components. |
| Mixed-road suitability | Comfortable for sustained road touring and compatible gravel when appropriately equipped. | Often well suited to paved roads and gravel, with handling and tyre clearance varying by model. |
| Rear luggage clearance | Longer chainstays commonly provide more room between heels and panniers. | Shorter chainstays on some models can create heel-strike problems. |
| Mounting flexibility | Dedicated rack and accessory eyelets are common on touring-oriented models. | Must be checked individually; some frames have limited or no conventional rack mounts. |
Steel has a practical advantage when a frame requires welding and a suitable workshop is available. Common steel tubing may be more accessible to local repairers than a damaged carbon structure. However, this does not mean every steel frame can be repaired safely in every town. Heat treatment, tubing specification, location of the damage and structural alignment all matter. A repaired frame also requires appropriate inspection before being ridden again.
Gravel bikes are not inherently unsuitable for touring. A model with proper rack mounts, sufficiently long chainstays, a compatible drivetrain and a manufacturer-approved load capacity can be an effective mixed-road platform. The problem arises when a lightweight gravel design is expected to carry touring panniers without checking its intended use.
Route profile provides a useful tiebreaker. A mostly paved 1,000 km route with limited luggage and regular access to shops makes a rack-compatible gravel bike a reasonable option. A remote itinerary with extensive gravel, heavier panniers and longer distances between repair facilities makes a dedicated touring frame more attractive.
Before buying, examine the geometry chart rather than relying on labels such as endurance, adventure or touring. Chainstay length, wheelbase, fork geometry and rack attachment points provide more useful information than marketing descriptions.
Whichever frame wins, the next inspection should focus on the rear rack. Poor pannier positioning can compromise an otherwise well-chosen bicycle before the first full day of riding.
The Rack and Heel-Clearance Mistake That Ruins Your First Touring Day
The most common rack-related mistake on a gravel-to-touring conversion is assuming that a pannier will clear the rider’s heels simply because it fits on the rack. Short chainstays place the rear wheel and panniers closer to the pedal stroke, creating a potential collision between the shoe and the bag. The interference often becomes obvious only when pedalling hard, climbing or riding out of the saddle.
A static inspection in a bicycle shop is not enough. A pannier can appear perfectly positioned while the crank is stationary, then move directly into the heel’s path when the rider pedals through a full rotation. A loaded bag may also change shape as its contents settle or shift.
Longer chainstays provide more space between the rider’s feet and rear panniers. Adventure Cycling Association identifies this relationship in its touring geometry guidance. However, actual heel clearance also depends on shoe size, cleat position, crank length, pannier design and rack adjustment.
Check the setup with the actual shoes and panniers intended for the trip. Load each bag as it will be carried, attach it securely and pedal through several complete crank rotations. Repeat the check with the bicycle stationary and while applying realistic pedalling movements in a safe, open area.
If the heel touches the bag, try repositioning the pannier rearwards using the rack’s adjustment slots, provided the mounting remains secure and within the rack manufacturer’s instructions. A rack with a longer rear platform may offer more adjustment. Heel clips or changes to the rider’s footwear position can sometimes help, but they should not be used to compensate for fundamentally incompatible geometry.
The second failure mode is structural. A rack may physically fit the frame while its attachment points are unsuitable for the intended load. Some lightweight frames use eyelets with specific load limitations, and carbon frames require particular care around mounting interfaces and dropouts. Never assume that a conventional rack can be attached safely to any available bolt hole.
Check the rack manufacturer’s rated capacity, the bicycle manufacturer’s permitted luggage load, bolt size and thread engagement, mounting instructions and the condition of every attachment point. Where the frame manufacturer does not approve a particular rack arrangement, obtain confirmation before using it.
Load distribution between front and rear racks also changes the handling. Concentrating most of the weight at the rear can make steering feel light, while excessive front loading can increase steering inertia. A balanced arrangement is preferable, but the correct distribution depends on the bicycle’s geometry and the rack system.
After installation, inspect the rack bolts and mounting points periodically, particularly after rough roads or heavy impacts. Any visible movement, cracking or deformation is a reason to stop and investigate.
With the luggage securely positioned, attention can move to rider contact points. Three hours of loaded riding can reveal pressure problems that were invisible during a short test ride.
Fix Hand Numbness After 3 Hours Without Changing Your Handlebar
Hand numbness after several hours on a loaded touring bicycle does not automatically mean the handlebars need replacing. Excessive pressure through the hands, an unsuitable saddle position, excessive reach and a stiff riding posture can all contribute. Before buying new handlebars, correct the bicycle’s fit and examine how the luggage affects the rider’s weight distribution.
Start by checking the saddle. A saddle that tilts too far forward can cause the rider to slide towards the handlebars and support more body weight through the hands. An excessively high saddle can also encourage the pelvis to rock, making a stable upper-body position difficult to maintain.
Adjust one variable at a time and record the original position. This makes it easier to identify which change improves comfort rather than making several adjustments without understanding their effects.
Use the following diagnostic order:
- Saddle tilt: Check whether the saddle is approximately level or positioned according to its manufacturer’s fit recommendations. Avoid extreme downward tilt.
- Saddle height: Confirm that the legs can pedal without excessive pelvic movement or overextension.
- Handlebar height and reach: Check whether the rider is stretching too far or supporting excessive weight through the arms.
- Gloves and bar tape: Inspect worn gloves, compressed padding and uneven pressure points.
- Hand position: Change positions regularly and avoid holding the same grip tightly for extended periods.
Luggage placement can influence comfort because it changes the bicycle’s balance and may alter the rider’s position when the steering feels different under load. However, hand numbness should not be attributed automatically to front or rear weight distribution. Bike fit, body position and nerve compression need to be considered independently.
During the ride, keep the elbows slightly flexed rather than locked. Periodically release unnecessary grip pressure, change hand positions and move the shoulders naturally. Small adjustments can reduce sustained pressure without requiring a new handlebar.
Bar tape and gloves can improve comfort, but thicker padding is not a universal solution. Excessive padding can change grip shape and may not address the underlying pressure point.
There is an important warning threshold. If numbness persists after the ride, becomes recurrent, or is accompanied by weakness, pain or loss of coordination, stop riding and seek an appropriate medical assessment. Do not attempt to complete a multi-day tour by repeatedly ignoring neurological symptoms.
Comfort is only one part of a reliable touring build. The next priority is ensuring that the braking system has enough wear margin for repeated loaded descents.
When Should You Replace Disc Pads Before a 6-Day Trip to Avoid Metal-on-Metal?
Replace disc brake pads before a six-day touring trip when their remaining material is close to the manufacturer’s minimum, when wear is uneven or uncertain, or when the expected braking demands leave insufficient margin. Do not plan a trip around the assumption that nearly worn pads will survive another six days. Replacement is generally less disruptive than damaging a rotor and searching for compatible parts in a remote area.
Start with a visual inspection of both brake calipers. Where possible, remove the pads according to the manufacturer’s procedure and measure the remaining friction material separately from the backing plate. If inspection through the caliper is sufficient for a clear assessment, avoid unnecessary disassembly.
Pad life cannot be predicted reliably from a universal kilometres-per-millimetre formula. Wear varies with rider and luggage mass, gradient, weather, riding technique, brake type, pad compound and the amount of braking required. Use your own observed wear rate from comparable conditions only as an estimate, and retain a substantial margin for mountainous stages.
SRAM‘s official brake maintenance documentation recommends monthly pad inspections, with more frequent checks in very wet or muddy conditions. For the SRAM systems covered by its guide, the manufacturer recommends replacement when the combined thickness of backing plate and pad material reaches 3 mm or less.
3 mm
SRAM’s replacement threshold for the combined pad material and backing plate on the systems covered by its maintenance guide. This is not a universal threshold for every brake manufacturer or pad design.
SRAM, Brake Maintenance Guide.
Rotor inspection is equally important. Look for scoring, unusual surface damage, uneven wear and signs of contamination. Check the rotor’s minimum-thickness marking or the exact manufacturer specification for that model. SRAM, for example, documents different minimum thicknesses for particular rotor families, so the measurement must not be transferred indiscriminately to other products.
Also examine the relationship between front and rear pad wear. The front brake may experience different demands from the rear depending on braking technique, road gradient and load transfer. Uneven wear can reveal that one brake needs attention sooner.
Contamination is another reason not to rely on thickness alone. Oil or unsuitable cleaning products can compromise braking performance. A contaminated pad may need replacement even when its friction material appears substantial. Follow the brake manufacturer’s cleaning and replacement instructions rather than attempting improvised treatments.
Before departure, install any replacement pads using the correct procedure and complete the manufacturer’s bedding-in process. Carrying a compatible spare set can be sensible when the route is remote, but the exact pad shape and compound must match the brake model. There is no universal requirement to carry one spare set per brake on every tour.
Metallic grinding, a sudden change in lever feel, reduced braking performance or unusual noises under light braking require immediate investigation. Do not continue riding on a brake that has reached metal-on-metal contact.
Once the braking system is ready, the final preparation is to identify which mechanical failures can be repaired roadside and which require access to a workshop.
How to Build a Repair Kit for Your Exact Bike in 10 Minutes Using a Failure Checklist?
A useful touring repair kit is built around the actual bicycle, not a generic list of tools. Walk through the drivetrain, brakes, wheels, cockpit and luggage attachments, identify failures that could stop the journey, and carry the tools or spare parts needed to address realistic roadside problems. A component-specific kit is more useful than a large collection of tools that cannot service the bicycle.
The simplest prioritisation method combines three questions:
- Likelihood: Is the failure plausible given the bicycle, mileage and route conditions?
- Field repairability: Can it realistically be fixed with tools carried on the bicycle?
- Part specificity: Does the repair require a component that must match an exact model or dimension?
A broken chain is a good example of a field-repairable failure. A compatible chain tool and suitable quick link can restore the drivetrain if the remaining chain and components are in acceptable condition. A cracked frame is different: a portable tool kit is unlikely to provide a safe structural repair. The appropriate preparation is a recovery plan, not an unrealistic attempt to weld the frame roadside.
Begin with the drivetrain. Identify the chain type, quick-link compatibility, derailleur model and cassette range. Confirm that the chain tool can handle the chain used on the bicycle.
Next, check the braking system. Record the exact pad shape, brake model and whether the system uses mineral oil or DOT fluid. The repair kit should reflect the actual brake system rather than assumptions based on appearance.
For the wheels, note the valve type, tyre size, rim compatibility and spoke dimensions. A spare spoke must match the wheel and the relevant spoke length. A generic spare is not automatically useful. Also identify whether the wheel uses tubeless tyres, inner tubes or a combination that requires both plugs and patches.
The cockpit and luggage attachments deserve their own inspection. Record the principal bolt sizes, rack mounting hardware and any proprietary fasteners. A loose rack bolt can be as disruptive as a minor drivetrain fault when the panniers carry essential camping equipment.
The touring equipment checklist from Adventure Cycling Association includes spare spokes sized for the bicycle’s wheels, chain tools, replacement brake components, cables and additional rack fasteners. It is a useful reference for building a kit, but it is not a substitute for checking the exact components fitted to an individual bicycle.
For a practical ten-minute inventory, use the following five actions and keep the results with the bike’s maintenance records.
Five Steps to Build a Bike-Specific Touring Repair Kit
- Inspect the drivetrain and identify the chain type, quick-link specification and compatible chain tool. Deliverable: a written drivetrain compatibility record.
- Inspect both brakes and record the exact pad shape, brake model and required service fluid where applicable. Deliverable: a brake spare-parts list.
- Inspect both wheels and record tyre dimensions, valve type and spare spoke lengths. Deliverable: a wheel and tyre specification sheet.
- Check the cockpit, racks and luggage fasteners, noting the bolt sizes and any proprietary attachment hardware. Deliverable: a compact fastener and tool inventory.
- Match each identified failure to a tool, spare part or recovery option. Deliverable: a completed roadside repair and evacuation plan.
A practical kit may include tyre levers, patches, a compatible inner tube, a pump, tubeless plugs where relevant, a chain tool, quick links, a multitool, spare rack bolts, brake pads and wheel-specific spokes. The final selection depends on the bike and route. Adventure Cycling Association’s checklist also includes cables and other touring spares, which may be relevant to older or mechanically different bicycles.
Not every failure belongs in the roadside repair category. A damaged frame, badly bent wheel, failed bearing or brake-system problem requiring specialist bleeding may need a workshop. Before departure, identify towns and service centres along the route and determine what transport options are available if the bicycle becomes unsafe to ride.
A tyre plug, patch, spare tube, taxi contact or bus connection can be part of a recovery strategy. Their value is not that they prevent every breakdown, but that they provide a realistic way to continue or exit when repair is impossible.
With the mechanical side prepared, the remaining challenge is fitting the camping equipment into the luggage without creating a poorly balanced load or sacrificing sleep comfort.
Key Decisions Before Packing
- Separate the weight of the sleeping system from shelter, cooking equipment and clothing so that the actual camping mass is measurable.
- Prioritise a sleeping bag’s comfort rating and a properly insulated sleeping pad rather than relying on a low advertised bag limit.
- Place camping equipment according to the bicycle’s tested load distribution, not simply wherever an item fits inside a pannier.
How to Pack a Sub-6 kg Camping Kit That Still Sleeps Warm at 5°C?
A camping kit weighing less than 6 kg can provide a practical overnight setup at 5°C, but only when the shelter, sleeping bag, sleeping pad, clothing and cooking equipment are considered together. The critical specification is the sleeping bag’s comfort rating, not its lower limit or extreme rating. Equally important is the sleeping pad’s insulation, because a warm sleeping bag cannot compensate for excessive heat loss into cold ground.
Start by dividing the camping equipment into functional categories. This prevents the common mistake of reducing individual item weights without checking whether the complete system still works in the expected conditions.
| Category | Equipment to include | Main decision |
|---|---|---|
| Sleep system | Sleeping bag, sleeping pad and sleeping accessories. | Prioritise insulation and a suitable comfort rating. |
| Shelter | Tent, tarp, poles, pegs and ground protection. | Balance weather protection, durability and packed mass. |
| Clothing | Sleeping layers and additional insulation. | Choose garments that also work during camp stops. |
| Cooking | Stove, pot, utensils and ignition equipment. | Share equipment where travelling with another rider. |
| Water accessories | Water storage and treatment equipment where required. | Carry according to refill availability and route conditions. |
The sleep system deserves the largest share of attention. Sleeping bag temperature ratings must be interpreted correctly. The comfort rating describes the temperature at which the average user is expected to sleep comfortably under the test conditions. The lower limit and extreme rating describe different conditions and should not be used as equivalent comfort promises.
For a planned night at 5°C, select a bag whose comfort rating provides an appropriate margin for the expected weather and the sleeper’s individual needs. A forecast minimum of 5°C does not guarantee that the campsite, ground temperature or perceived conditions will match that figure.
The sleeping pad is equally important. Its thermal resistance determines how effectively it limits heat transfer to the ground. Check the pad’s insulation rating and the manufacturer’s stated testing method. A lightweight pad with insufficient insulation can leave a rider cold even when the sleeping bag appears appropriately rated.
Weight savings should come from system efficiency rather than removing essential insulation. Sharing a tent and stove between two riders can reduce duplicated equipment. Clothing layers can serve both as riding insulation and as additional warmth at camp, provided they remain dry and appropriate for sleeping.
Bike touring also changes the weight calculation compared with backpacking. A bicycle carries bulky equipment relatively cheaply, so a slightly heavier but more durable shelter or a roomier sleeping system may be preferable to an extremely compressed setup that compromises comfort.
The 6 kg target should therefore be treated as a planning objective, not a reason to sacrifice safe shelter or adequate sleep insulation. Weigh each category separately and include accessories that are often forgotten, such as pegs, ground protection, repair sleeves and cooking fuel containers where applicable.
Finally, distribute the camping equipment between the panniers according to the stability principles established earlier. Heavy items should be positioned securely and symmetrically where possible, while bulky lightweight items can occupy less critical spaces. Keep the centre of mass low and avoid allowing equipment to move inside the bags.
Before departure, weigh the complete camping setup, test the loaded bicycle on representative roads and confirm that the sleeping system works for the expected overnight conditions. A successful touring setup is one that remains predictable on the road, repairable when something fails and comfortable enough to use for the entire journey.
Is 20 kg of luggage too much for a gravel bike?
Not necessarily. Some gravel bikes can carry 20 kg of luggage, but the permitted load depends on the frame, fork, wheels, racks and manufacturer specifications. Check the bicycle’s maximum system weight and approved mounting arrangements before fitting panniers. Also verify rear heel clearance and conduct a loaded handling test. A gravel bike without suitable rack mounts or sufficient load approval is not an appropriate platform simply because it can accept a seat pack.
Should touring panniers be heavier at the front or rear?
There is no universal front-to-rear weight ratio that guarantees stable handling on every bicycle. Excessive rear loading can make the steering feel light, while excessive front loading can increase steering inertia. Follow the bicycle and rack manufacturers’ load limits, distribute the luggage securely and test the actual configuration at progressively increasing speeds in a safe environment.
Can a touring bicycle safely travel at 35 km/h with 20 kg of luggage?
It can be possible, but no speed can be declared safe from luggage weight alone. Frame geometry, wheel condition, tyre suitability, rack security, load distribution, braking performance, road surface and rider experience all matter. A bicycle that develops shimmy or abnormal steering behaviour must be inspected before further fast riding. The rider should also respect road conditions, visibility and local speed regulations.
Are steel touring bicycles always more reliable than aluminium or carbon gravel bikes?
No. Steel can offer practical repair options when suitable welding facilities are available, but reliability depends on the complete frame design, construction, component quality and maintenance. Aluminium and carbon frames also have specific advantages and limitations. For remote touring, assess the availability of replacement parts, rack compatibility, wheel standards and the feasibility of repairing or replacing damaged components rather than relying on frame material alone.
How much spare equipment should be carried for a six-day bicycle tour?
The repair kit should reflect the bicycle’s exact components, route remoteness and access to workshops. At minimum, consider puncture repair equipment, a compatible tube or tubeless repair solution, a pump, multitool, chain tool and suitable quick links. Add wheel-specific spokes, compatible brake pads and rack fasteners when appropriate. Record component specifications before departure and prepare a recovery plan for failures that cannot be repaired safely roadside.