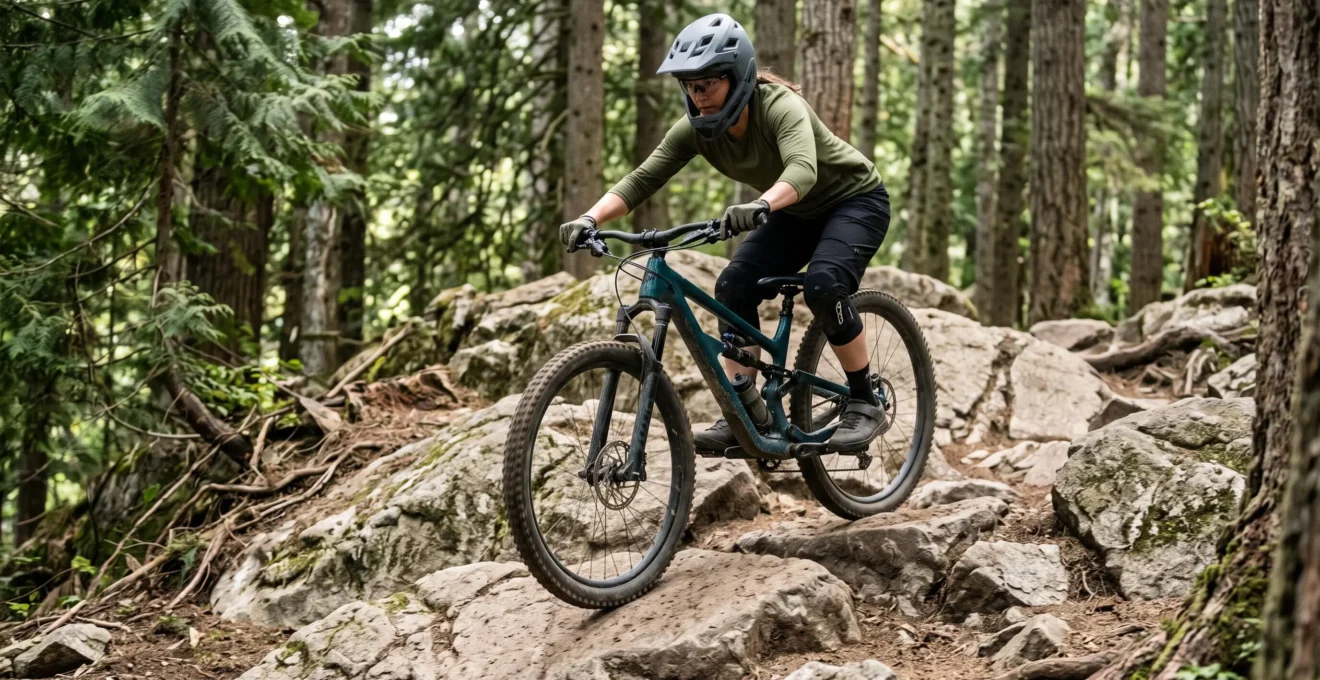
Rocky descents become difficult when the bike reacts to obstacles faster than the rider can interpret what is happening. A front wheel deflects, the rear tire strikes a square edge, and suddenly the handlebars feel unpredictable. Gripping harder and locking the elbows might seem like a way to regain control, but it often makes the problem worse by restricting the movements needed to absorb impacts.
Better descending control comes from combining a mobile body position, deliberate line selection, balanced braking and a suspension setup that allows the wheels to track the ground. The objective is not to eliminate every movement of the bicycle or simply reduce speed. It is to distinguish normal movement over uneven terrain from genuine loss of traction and make adjustments before a small disturbance becomes a crash.
For intermediate mountain bikers who freeze in rock gardens or worry about going over the handlebars (OTB), the most useful approach is progressive: improve one riding skill or setup variable at a time, practise on manageable terrain and increase difficulty only when braking and steering remain predictable.
Rocky Descent Control: The Essentials
- Keep your shoulders relaxed, elbows and knees flexed, and weight supported through your feet so the bike can move independently underneath you.
- Look toward the exit and choose a predictable corridor before entering a rock garden instead of staring at individual obstacles.
- Set up braking, lever ergonomics and suspension before difficult descents, then practise progressively without compromising reliable control.
- Why Do Rocky Descents Make You Feel Like the Bike Has a Mind of Its Own?
- How to Pick a Line Through a Rock Garden Without Staring at Every Rock?
- Which Should You Choose: Stay Standing or Sit Lightly on Loose Rocky Chutes?
- The Braking Habit That Causes Front-Wheel Washouts on Wet Rock
- Fix Hand Fatigue on Descents by Adjusting Brake Levers by 5 mm
- How to Bed In Disc Brake Pads Properly in 10 Minutes Without Glazing Them?
- How to Brake on a Steep Descent Without Skidding or Overheating Rotors?
- Which Full-Suspension Setup Works Best for 150 mm Travel Without Pedal Bob?
Why Do Rocky Descents Make You Feel Like the Bike Has a Mind of Its Own?
Rocky descents feel unpredictable because the front and rear wheels encounter obstacles at different moments, changing direction and contact pressure rapidly. The handlebars can move even when the bike is following a reasonable trajectory. This movement is normal to an extent: the goal is to maintain control of the overall direction and available traction, not to prevent every wheel deflection.
Square-edged impacts are particularly noticeable. When the front tire strikes an embedded rock, the wheel can be pushed upward or sideways. The rear wheel then encounters the same obstacle, sometimes with a different angle or available clearance. These repeated impacts create feedback through the handlebar, pedals and saddle.
The rider’s reaction can amplify that feedback. Fear encourages tighter grip pressure and straighter arms. Locked elbows transmit more impact into the shoulders and torso, reducing the ability to let the bicycle move beneath the upper body. A small deflection can consequently feel like a major steering error.
REI Co-op recommends keeping the knees and elbows bent to maintain mobility on the bike. Its guide REI on mountain bike descending techniques also advises looking toward the trail ahead rather than fixing attention on an immediate obstacle. These are practical riding principles, not quantified guarantees against crashes.
Distinguish normal movement from actual instability. A wheel briefly changing direction while remaining in contact with the ground is different from a tire sliding without recovering grip. If steering becomes uncontrollable, traction disappears or you cannot maintain a reliable braking position, stop practising that section and reassess it.
Mechanical instability deserves equal attention. Compare the bike on smooth ground, isolated rocks and repeated impacts. Problems appearing everywhere may indicate cockpit positioning or loose components; instability over repeated obstacles may point toward tire pressure or rebound settings. Inspect the wheels, axles, headset, cockpit and suspension before blaming technique alone.
Start with a short, low-consequence rocky section. Keep secure contact with the grips, relax the shoulders, bend the elbows and allow the bike to move while maintaining a relatively stable torso. Repeat only while steering and braking remain predictable.
The key is to become comfortable with controlled movement, not to eliminate movement altogether. Once the upper body can remain mobile, the next challenge is choosing a route that reduces unnecessary steering corrections.
How to Pick a Line Through a Rock Garden Without Staring at Every Rock?
The best line through a rock garden is usually the one that provides the most predictable combination of entry, traction, wheel clearance and exit. It does not necessarily follow the shortest route or avoid every obstacle. Intermediate riders should identify the overall corridor first, then check immediate hazards without allowing their attention to become fixed on the front tire.
Use a three-stage visual scanning sequence:
- Find the exit: Identify where the trail becomes manageable again and where a controlled recovery would be possible.
- Choose a corridor: Look for a continuous route connecting relatively stable surfaces, avoiding awkward gaps and loose clusters where possible.
- Check immediate hazards: Briefly inspect the next important wheel-placement feature, then return your attention farther down the trail.
This alternation between near-field precision and forward planning is more useful than staring at every rock. REI Co-op offers a general visual reference of approximately 10 to 15 feet ahead in its descending guidance. Treat this as an indicative coaching reference, not a universal distance: the appropriate visual focus changes with speed, terrain and obstacle density.
Consider three possible routes. A direct line may be shorter but contain loose stones and an awkward wheel-trapping gap. A smooth-looking line may cross an off-camber surface with uncertain grip. A slightly longer corridor connecting larger embedded rocks may require fewer abrupt steering changes and provide a more manageable passage.
The third option can be preferable even if it is not visually the smoothest. Evaluate the entire wheel path, not just the front-wheel entry. A rock that the front wheel clears easily may create a rear-wheel strike or reduce pedal clearance as the bicycle pitches over it.
Before entering, establish a commitment point: the place beyond which changing direction becomes difficult or unsafe. Complete major steering and speed adjustments before reaching it. Last-second corrections can introduce lateral tire loads precisely when the wheels are already negotiating unstable surfaces.
If the garden has no continuous smooth line, look for successive stable contact zones rather than expecting a perfect corridor. Check that the rear wheel has room to follow and that the crank and pedals can clear the larger obstacles. Walk the feature first if the consequences of an error are high or the route is unfamiliar.
Five steps to prepare a predictable rock garden line
- Inspect the entrance and exit on foot or from a safe stopping point. Deliverable: a clearly identified entry and recovery area.
- Compare the direct route with alternative corridors. Deliverable: one preferred line based on traction and wheel clearance.
- Identify the main front-wheel hazards and rear-wheel follow-through problems. Deliverable: a short list of critical obstacles.
- Choose a commitment point and determine where major braking and steering adjustments must be completed. Deliverable: a defined entry strategy.
- Practise the line at a manageable level of difficulty, stopping if control deteriorates. Deliverable: a repeatable passage with predictable steering and braking.
Line choice reduces the number of corrections required, but body position determines how effectively the rider absorbs the impacts that remain. That makes the decision to stand or sit lightly especially important on loose, steep terrain.
Which Should You Choose: Stay Standing or Sit Lightly on Loose Rocky Chutes?
Standing in an athletic ready position is generally the better choice for repeated rocky impacts because it gives the legs and arms room to absorb movement. Light saddle contact can work on smoother, less technical sections where major weight shifts are unnecessary. On loose rocky chutes, the decision should depend on gradient, roughness, saddle clearance and the need to move the bike beneath the body.
Three positions are worth distinguishing:
- Standing tall: Provides clearance above the saddle but can leave the rider too upright and reduce the ability to respond to rapid impacts.
- Hovering low: Keeps the knees and elbows flexed, the hips mobile and the centre of mass relatively centered while allowing the bicycle to pitch and move.
- Excessively rearward: Moves the rider’s weight too far behind the rear wheel, potentially reducing front-tire traction and steering precision.
A useful descending position is neither rigidly upright nor dramatically behind the saddle. Keep support through the feet, maintain bent knees and elbows, and allow the bicycle to change pitch without pushing the upper body abruptly toward the handlebars.
Light saddle contact may be appropriate on a less demanding section, but transition to standing before a technical chute. If the bike has a dropper post, lower it to create sufficient clearance. Establish stable pedal support and move into the ready position before the first major obstacle.
Do not attempt a sudden standing transition during a large impact. Moving the body while the bike is being deflected can disrupt balance and steering. The transition should be completed while the terrain still allows predictable control.
Steep chutes create an additional challenge: braking forces can pull the rider forward even when the hips move rearward. Resist the temptation to support the entire body through locked arms. The feet and legs should provide a stable platform, with the hands maintaining secure contact and access to the brakes.
On loose terrain, excessive rearward positioning can unload the front tire and reduce its ability to steer or contribute to braking. A centered, mobile stance is generally more useful than trying to keep all body weight behind the rear axle.
Practise transitions on a manageable slope. Begin with light saddle contact, establish a stable pedal position, lower the saddle if necessary and stand before the roughest section. Progress only while both wheels maintain predictable contact and the rider can operate the brakes reliably.
Once body position is established, braking becomes the next priority. On wet rock in particular, even a technically sound line can become unstable if brake pressure is applied abruptly while the front tire is turning.
The Braking Habit That Causes Front-Wheel Washouts on Wet Rock
One hazardous braking habit is suddenly increasing front-brake pressure while the front tire is already turning, deflecting or crossing a slippery rock at an angle. A tire has limited available traction, and simultaneous braking and cornering can exceed that limit. The solution is to plan deceleration before the most slippery contact zone whenever conditions allow, rather than relying on abrupt brake inputs during the manoeuvre.
Not all wet rock behaves the same way. Polished bedrock, loose stones resting on wet surfaces and rough textured rock can offer very different levels of grip. Water, surface contamination, algae and the actual tire contact area further complicate traction assessment.
Visual appearance alone cannot reliably establish how much grip is available. A rough-looking rock may be slippery, while another wet surface may offer more usable texture. Assess unfamiliar surfaces conservatively in a controlled location rather than assuming that all wet rock behaves identically.
A practical braking sequence has four stages:
- Identify the slippery section and choose a manageable entry speed.
- Reduce speed on the most predictable available approach surface.
- Maintain balanced support through the feet and legs as the wheels enter the difficult contact zone.
- Ease excessive brake pressure where necessary to preserve steering traction, while retaining enough control to maintain a safe speed.
This does not mean abandoning braking on steep terrain. Both brakes remain important, and the appropriate pressure depends on gradient, tire grip, speed and the shape of the obstacle. The objective is to avoid abrupt inputs that overwhelm the available traction.
If the front tire begins sliding, avoid responding with a sudden steering correction or stronger brake squeeze. Where feasible, ease excessive front-brake pressure, minimize abrupt changes in lean angle and allow the tire an opportunity to recover contact. Recovery is not guaranteed, especially on polished or contaminated surfaces.
Sometimes the safest choice is to stop before the feature and reassess the line. If the approach does not offer a reliable braking position, or the wet rock is beyond the rider’s current ability, walking the section is a sound decision rather than a failure of technique.
Remember that braking and traction are interconnected. A front tire that is already close to its grip limit has less capacity to accommodate additional braking force while turning. Smooth inputs and early speed management help preserve that limited traction.
Good braking technique also depends on ergonomics. If the rider must stretch the index finger or squeeze the lever excessively, consistent pressure becomes harder to maintain over a long descent.
Fix Hand Fatigue on Descents by Adjusting Brake Levers by 5 mm
A small brake-lever adjustment can improve finger reach and wrist alignment, but moving a lever by 5 mm is an experiment rather than a universal solution to hand fatigue. The correct adjustment depends on hand size, handlebar geometry, brake design and riding position. It is important to distinguish moving the entire lever assembly along the handlebar from changing lever reach or rotational angle.
Moving the assembly inward changes where the hand encounters the brake control relative to the grip. Adjusting reach changes the distance between the lever blade and the handlebar. Rotating the assembly changes the angle at which the rider approaches the lever. Each adjustment can influence finger placement and wrist alignment differently.
Begin with the position used during actual descending, not simply a comfortable standing position beside the bike. Your wrist should remain close to neutral, with the index finger reaching the effective braking area without excessive stretching.
REI Co-op explains how to adjust lever positioning and reach in its guide REI to ergonomic mountain bike setup. The guide emphasizes keeping the wrists straight when the levers are correctly positioned. Its indicative lever-angle guidance should not be interpreted as a mandatory setting for every rider.
Use a controlled fitting procedure:
- Assume your normal descending stance and place your hands naturally on the grips.
- Check wrist alignment and identify whether the index finger reaches the effective braking area comfortably.
- Make one small adjustment at a time, rather than changing clamp position, reach and angle simultaneously.
- Check that the lever operates firmly without contacting the remaining fingers or handlebar grip.
- Secure the clamp using the component manufacturer’s specified torque and verify control clearance before riding.
Not all hand fatigue originates from poor lever fit. Excessive squeezing, repeated impact loading, inadequate braking power and poor suspension performance can also contribute. Finger stretching and wrist bending suggest an ergonomic issue, while discomfort that develops even on smooth ground may indicate a different problem from fatigue that appears mainly after repeated rocky impacts.
Compare the original and adjusted positions on the same familiar, manageable descent. Keep tire pressure, braking equipment and riding conditions unchanged. Record finger reach, perceived effort, braking consistency and any unintended lever activation. Accept the adjustment only if it improves control without introducing new problems.
Persistent numbness, weakness or unusual pain should not be treated as a lever-position problem alone. Stop and seek appropriate assessment rather than continuing to ride through these symptoms.
Once the controls fit correctly, the braking system itself needs to perform consistently. That is particularly important with new pads and rotors, which require an appropriate bedding procedure before demanding technical descents.
How to Bed In Disc Brake Pads Properly in 10 Minutes Without Glazing Them?
New disc brake pads and rotors need a controlled bedding-in process to establish consistent friction and predictable braking. A ten-minute session may be sufficient for some systems and conditions, but it is not a universal guarantee. The correct procedure depends on the brake manufacturer, pad compound, rotor condition and the instructions supplied for the installed components.
During bedding, repeated controlled braking helps establish the intended friction characteristics between the pads and rotor. Inadequate bedding can contribute to inconsistent performance, but weak braking can also result from contamination, mechanical misalignment, unsuitable components or other faults. Repeating the same stopping routine will not necessarily solve these problems.
For SRAM mineral-oil MTB disc brakes covered by the relevant documentation, the manufacturer describes a two-stage bedding process. It includes approximately 20 decelerations from a moderate speed to walking speed, followed by approximately 10 stronger decelerations from a higher speed.
20 + 10
Approximate controlled decelerations in the two stages of the SRAM bedding procedure. These figures apply to the relevant SRAM instructions and are not a universal prescription for every disc brake.
SRAM manufacturer documentation: technical SRAM manual for MTB disc brake installation and bedding.
Perform the process in a safe, traffic-free area with enough room to accelerate and decelerate predictably. Follow the specific instructions for the brake system installed on the bike. If unfamiliar with the procedure or the braking system, have a qualified mechanic carry it out.
Avoid dragging the brakes continuously for prolonged periods or performing repeated uncontrolled hard stops. These practices can create undesirable heat conditions. Also avoid holding the brakes stationary against very hot rotors after a stopping sequence unless the manufacturer specifically instructs otherwise.
Glazing and contamination should not be confused. Glazing is associated with undesirable friction-surface conditions, whereas contamination involves unwanted substances affecting pads or rotors. Neither problem should automatically be treated by repeating a bedding session. Inspection and manufacturer-approved corrective action may be necessary.
After bedding, verify that the brakes deliver a repeatable bite point and predictable lever response. Check for abnormal noise, vibration and inconsistent stopping performance. A brake that remains weak or unusually noisy needs inspection before the bike is taken onto a technical descent.
Remember that successful bedding is not proof that the entire braking system is mechanically sound. Rotor condition, pad installation, caliper alignment and hydraulic performance still matter.
With reliable pads and rotors in place, the next challenge is managing sustained braking on steep descents without creating unnecessary heat or losing traction.
How to Brake on a Steep Descent Without Skidding or Overheating Rotors?
Braking on a steep descent requires managing speed without forcing either tire beyond its available traction. Using both brakes in a controlled and balanced way is generally more effective than relying exclusively on rear-wheel skidding or continuously squeezing the front lever. The exact pressure depends on gradient, surface conditions, tire grip and the braking opportunities available along the trail.
Before entering a difficult section, identify predictable traction zones where the bike can decelerate without excessive steering demands. Reduce speed before the most technical features when possible. This creates more options for managing obstacles without needing abrupt braking inputs on unstable surfaces.
Where the terrain permits, avoid unnecessary continuous brake dragging. Controlled release can reduce prolonged friction and allow components to dissipate heat. However, releasing the brakes is only appropriate when the rider can maintain a safe speed and trajectory. It is never an instruction to accelerate blindly through difficult terrain.
Prolonged braking can create substantial heat in the pads and rotors. Rider and equipment load, pad compound, rotor construction, gradient and cooling conditions all influence thermal behaviour. Repeated strong braking can contribute to brake fade, where braking performance deteriorates under demanding thermal conditions.
Shimano‘s documentation on Shimano brake heat-dissipation technology explains how its ICE TECHNOLOGIES components are designed to manage heat. Shimano reports a temperature reduction of up to 100°C in its own comparison under specified test conditions. This is a manufacturer-specific result, not a guaranteed reduction on every bicycle or braking system.
Traction-related skidding and heat-related brake fade require different responses. A rear wheel that slides on loose gravel may be responding to excessive braking force relative to available grip. A brake system that produces less deceleration despite sustained input may be experiencing a thermal or mechanical problem.
Watch for warning signs during a long descent:
- Stopping distances unexpectedly increase.
- Lever feel changes significantly or becomes inconsistent.
- Abnormal noise develops during braking.
- Deceleration decreases despite sustained input.
If braking performance deteriorates, find a safe place to stop. Allow the components to cool naturally and inspect the system before continuing. Do not touch hot rotors or use improvised cooling methods that may damage components or create additional hazards.
If the problem recurs, a mechanic should inspect the brake system and assess whether the components, maintenance condition or braking strategy are appropriate for the rider and terrain. Repeatedly squeezing harder is not a reliable solution to deteriorating braking performance.
For long, steep descents, planning matters as much as lever technique. Recognize where the bike can decelerate predictably, avoid unnecessary heat buildup and maintain enough control to respond to changing traction.
Braking performance is only one part of descending stability. Suspension settings also determine how consistently the wheels follow the terrain, especially when a 150 mm full-suspension bike encounters repeated square-edged impacts.
Key Decisions Before Adjusting Your Suspension
- Start with the fork and shock manufacturer’s recommended sag settings for your actual riding weight and equipment.
- Prioritize wheel tracking, repeated-impact recovery and predictable handling over eliminating every trace of pedal bob.
- Evaluate climbing efficiency and descending performance separately before deciding whether a suspension adjustment is beneficial.
Which Full-Suspension Setup Works Best for 150 mm Travel Without Pedal Bob?
There is no single ideal suspension setup for every 150 mm full-suspension mountain bike. Frame kinematics, rider weight, spring rate, sag, rebound and compression damping all influence how the bike pedals and descends. The best configuration balances climbing efficiency with controlled wheel movement and reliable traction rather than attempting to eliminate all suspension activity.
Start with the manufacturer’s recommended sag for the actual fork and rear shock. Measure it while wearing normal riding equipment, including the clothing, helmet and hydration or pack normally used on the trail. Use the specified procedure for the suspension system rather than applying a generic pressure or percentage without checking compatibility.
Sag establishes a useful baseline, but it does not determine the entire setup. Rebound controls how quickly suspension extends after compression, while compression damping influences how the suspension responds as it is compressed.
Excessive rebound damping can prevent the suspension from recovering quickly enough between repeated impacts. This can cause packing, reducing available travel over a sequence of rocks. Conversely, insufficient rebound damping can produce an uncontrolled or overly rapid return that makes the bike feel unsettled.
Compression settings require similar care. Excessive compression damping can reduce sensitivity and transmit more impacts into the rider’s hands and feet. A firmer setting may reduce some pedal-induced movement, but it can also compromise traction and comfort on rough terrain.
Where the suspension provides open, trail and firm modes, evaluate their purpose rather than selecting the firmest option automatically. A firmer mode may be useful for smoother seated climbs, while an open or more active setting can be preferable for technical rocky descents where wheel tracking matters.
Pedal bob is not necessarily a fault. Suspension movement during pedaling depends on the frame’s kinematics, chain forces, rider position and terrain. Eliminating all movement can introduce undesirable compromises in sensitivity and descending performance.
A practical validation method uses two different terrain types. First, test a repeatable climb to assess unwanted pedal-induced movement. Then ride a manageable rocky descent and evaluate how the wheels track the ground, recover between repeated impacts and use available travel.
Change only one setting at a time. Record the baseline, the adjustment and the result. This makes it easier to distinguish a real improvement from changes caused by riding speed, terrain or fatigue.
A useful suspension assessment should consider:
- Whether the bike maintains predictable traction through repeated rocks.
- Whether the suspension recovers sufficiently between impacts.
- Whether available travel is being used appropriately for the terrain.
- Whether the rider remains stable without excessive impact transmission through the handlebars.
- Whether climbing movement is acceptable without compromising downhill performance.
Do not confuse an attractive sag measurement with a fully validated setup. A bike can meet a baseline recommendation and still require careful damping adjustment for the rider’s weight, riding style and terrain.
The most useful setup is the one that allows the tires to maintain predictable contact, the suspension to recover over repeated obstacles and the rider to remain mobile and confident. Once those elements work together, rocky descents become easier to manage without relying on excessive grip pressure or unnecessary braking.
Should you lean back when descending steep rocky trails?
Not excessively. A centered, mobile position with bent knees and elbows generally provides better control than hanging far behind the rear wheel. An overly rearward position can reduce front-tire traction and make steering less predictable. Maintain support through your feet and adjust your body position to the gradient without locking your arms.
Should you use the front brake on a rocky descent?
Yes. Both brakes contribute to speed management, but the amount of pressure depends on traction, gradient and terrain. Avoid abrupt front-brake inputs while the tire is turning or crossing slippery rock. Whenever possible, complete stronger braking on predictable surfaces before entering particularly slippery sections.
What tire pressure should you use for rocky mountain bike trails?
There is no universal pressure for rocky descents. The appropriate setting depends on rider weight, tire width, casing construction, rim compatibility, tubeless setup and terrain. Use the tire and rim manufacturers’ pressure limits as boundaries, then make small controlled adjustments while checking for excessive tire deformation, rim strikes and inadequate grip.
Why do my hands hurt even when I use a relaxed grip?
Hand discomfort can result from poor lever reach, wrist positioning, excessive braking effort, repeated impacts or suspension settings that transmit too much vibration. Check the cockpit while standing in your descending position and assess the bike’s mechanical condition. Persistent numbness, weakness or pain warrants further assessment rather than repeated ergonomic adjustments alone.
Is it better to walk a rock garden if you are afraid of going over the handlebars?
Yes, when the feature exceeds your current ability or you cannot identify a predictable line and braking strategy. Walking a difficult section lets you inspect the entry, exit, wheel clearance and traction hazards without exposing yourself to unnecessary risk. Return to it progressively as your technique, equipment familiarity and confidence improve.