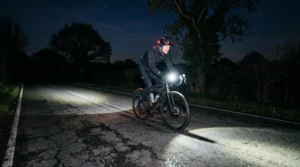
At 25 km/h on an unlit road, the right bike light is not necessarily the one with the highest lumen rating. It is the one that illuminates obstacles far enough ahead for you to recognise them, react and brake, while maintaining that useful illumination throughout your ride.
An 800-lumen light with well-controlled optics may reveal distant road hazards more effectively than a poorly focused 1,500-lumen model. The larger number tells you how much visible light the lamp produces, not where that light lands or how long its maximum output lasts.
The distinction matters when shopping online. Budget lights often advertise impressive peak brightness without showing beam distribution, sustained output or runtime at the setting you will actually use.
To choose intelligently, start with the distance you need to see at 25 km/h. Then evaluate beam shape, glare control, battery performance and visibility to other road users. These factors tell you considerably more than a headline lumen figure alone.
Bike light essentials for riding at 25 km/h after dark
- Choose useful beam distance over headline lumens. A focused, controlled beam can outperform a brighter but poorly distributed one.
- Use stopping distance as your starting point. A documented calculation gives approximately 15.2 m at 25 km/h under specific assumptions, but practical visibility needs additional margin.
- Check sustained brightness and glare. A light must keep illuminating the road without dazzling approaching drivers, even as its battery discharges.
- Why More Lumens Don’t Always Mean You See Further at Night
- How to Match Lumens to Your Speed in 3 Rules Without Overbuying
- High-Lumen Beam or Daytime Running Light: Which Do You Actually Need for Road Riding?
- The Light Beam Mistake That Gets You Flashed by Drivers and Creates Risk
- When 4+ Hours of Runtime Beats a Lighter Light — and When It Doesn’t
- How to Aim Your Front Light So You See the Road Without Blinding Oncoming Traffic
- Reflective Ankle Bands or Reflective Tyres for Night Commutes: Which Actually Works Where?
- Which Bike Lighting Setup Lets Drivers See You From 150 m Without Blinding Them
Why More Lumens Don’t Always Mean You See Further at Night
More lumens do not automatically mean greater seeing distance because lumens measure total visible light output, not how effectively that light reaches the road ahead. Beam concentration, illumination at a given distance, optical control and unwanted spill determine whether obstacles become visible early enough. A well-designed lower-output light can therefore be more useful than a brighter, poorly focused model.
Three measurements and characteristics explain the difference:
- Lumens (lm) describe the total visible light emitted by the lamp.
- Lux (lx) describes the illumination reaching a surface, such as the road at a particular position.
- Beam distribution describes how the available light is spread between the central hotspot, surrounding area and unwanted upward spill.
Imagine two hypothetical lights. Light A produces 800 lumens and directs a substantial portion onto the road ahead. Light B produces 1,500 lumens but distributes much of its output into a broad, poorly controlled halo. Despite the higher rating, Light B could make a distant pothole harder to distinguish.
This is not merely a theoretical concern. ADAC‘s 2025 independent bicycle-light test assessed 21 products and found important differences between advertised specifications and actual lighting performance. It also demonstrated why light distribution, measured illumination and glare need to be considered separately.
At 25 km/h, you travel approximately 6.94 metres every second. Light concentrated too close to your front wheel may make the immediate road look bright while leaving insufficient time to recognise a hazard farther ahead.
There is another complication: advertised maximum output is not necessarily sustained output. A manufacturer may quote brightness at the highest setting under favourable initial conditions, while heat management or battery state subsequently reduces performance.
110 → 66 lux
In ADAC’s 2025 testing, one bicycle light’s measured illumination fell from 110 to 66 lux because of temperature-related problems. This is a specific product result, not a typical percentage reduction for all lights.
ADAC, comparative bicycle-light testing, 2025.
When comparing online listings, look for beam photographs taken at comparable exposures, independently measured illumination and output-versus-runtime information. A lumen rating without these details is an incomplete buying specification.
The next question is how far that useful light needs to reach when your riding speed is 25 km/h.
How to Match Lumens to Your Speed in 3 Rules Without Overbuying
To match bike-light output to your speed, first estimate the distance needed to react and stop, then account for the road environment and the brightness your lamp can sustain. At 25 km/h, beam reach matters more than purchasing the highest lumen rating. These three rules help identify a suitable light without paying for unusable output.
Rule 1: Start with stopping distance, not a lumen target
Your minimum relevant distance includes the ground covered while recognising and reacting to a hazard, plus the distance required to brake.
Calculate reaction distance using:
Reaction distance = speed in metres per second × reaction time in seconds.
Convert 25 km/h into approximately 6.94 m/s. With an assumed reaction time of 1.2 seconds, that gives around 8.3 metres before braking begins.
A UNECE technical calculation of cyclist stopping distance combines that reaction distance with a braking distance of approximately 6.9 metres, assuming deceleration of 3.5 m/s².
15.2 m
Calculated stopping distance at 25 km/h: approximately 8.3 m of reaction travel plus 6.9 m of braking. Assumptions: 1.2-second reaction time and 3.5 m/s² deceleration. Wet roads, poor grip and other conditions can change the result.
UNECE, informal technical document GRSG-118-08, 2020.
The result is a calculation, not a guarantee that seeing an obstacle 15.2 metres away is sufficient. You still need to recognise what the obstacle is, identify an appropriate response and account for variable conditions. Choose a beam that makes hazards distinguishable comfortably beyond your estimated stopping distance.
Rule 2: Match the beam to the road surface
A smooth, dark country road with little reflected ambient light demands more useful forward illumination than a street with illuminated buildings, reflective signs and other light sources.
On dark asphalt, prioritise a clearly defined forward hotspot with enough surrounding illumination to identify road edges, curves and debris. On brighter or more reflective routes, a lower output setting may provide adequate contrast.
Higher output can help in some conditions, but increasing brightness does not guarantee better hazard recognition if the optics simply scatter additional light outside the useful viewing area.
Rule 3: Buy for continuous output, not a brief boost
Compare how long each light operates at the setting needed for your route. A powerful boost mode is less useful if it rapidly drains the battery or triggers thermal reduction.
Look for independent nighttime beam comparisons and a runtime specification tied to a clearly identified operating mode. If a cheaper light cannot document either, its attractive peak lumen figure deserves less weight.
A practical buying decision follows this order: can the beam reveal hazards at an appropriate distance, can it sustain that illumination, and can it do both without producing unnecessary glare?
A wall test helps reveal beam shape and spill, although it cannot establish real-world stopping visibility by itself. A final test on an appropriate dark road is needed to judge actual useful reach.
Once you know how much illumination your route requires, decide whether your primary purpose is seeing the road or making yourself noticeable to other people.
High-Lumen Beam or Daytime Running Light: Which Do You Actually Need for Road Riding?
Choose a forward-illuminating headlight for riding at 25 km/h on unlit roads, because you need to identify hazards ahead. Choose a daytime running light when your main objective is helping other road users notice you in daylight. For rides crossing both conditions, a light with separate visibility and road-illumination modes is usually the more practical choice.
The distinction is between seeing and being seen. Both are important, but they require different beam characteristics.
A road-illumination light directs useful output towards the ground ahead. A daytime running light prioritises conspicuity: helping another road user notice a cyclist against a potentially distracting background.
A daytime light that appears conspicuous to an observer may still provide inadequate illumination on a dark road. Conversely, a powerful nighttime headlight is not necessarily an efficient daytime visibility light.
The best choice depends on where and when you actually ride.
| Riding conditions | Primary lighting requirement | Practical choice |
|---|---|---|
| Daylight urban commute | Being noticed by other road users | Daytime visibility mode or dedicated daytime running light |
| Illuminated streets after dark | Visibility plus sufficient road illumination | Controlled, appropriately aimed steady headlight |
| Unlit roads at 25 km/h | Recognising hazards and maintaining forward visibility | Sustained road-illumination beam with suitable reach and spill control |
| Commute beginning in daylight and ending after dark | Efficient visibility followed by usable nighttime illumination | Light with separate daytime and nighttime modes, or independently controlled beams |
Running a high-output headlight at maximum brightness throughout a daylight commute may consume battery capacity that would be more valuable after sunset. A separate low-power visibility mode can preserve that reserve.
For a mixed journey, a well-designed dual-mode light avoids the need to select one permanent compromise. The rider can use an appropriate daytime setting and change to a steady, road-focused beam as ambient light falls.
This does not mean that two separate lamps are always inferior. Separate devices may be useful when their mounting, control or backup functions serve a specific purpose. The important feature is independent control over visibility and illumination.
For nighttime road riding, official guidance also helps distinguish these uses. The UK Highway Code rules for cyclists require a lit white front light and a lit red rear light at night, and advise using a steady front lamp in areas without street lighting. These are UK-specific requirements and recommendations, not universal laws for every English-speaking country.
For 25 km/h riding on unlit roads, road illumination remains the deciding requirement. The next challenge is directing that illumination without creating danger for approaching traffic.
The Light Beam Mistake That Gets You Flashed by Drivers and Creates Risk
The common mistake is aiming a powerful front light too high, allowing its hotspot or uncontrolled upward spill to shine towards approaching drivers’ eyes. This can create uncomfortable glare and interfere with their view of the road. A properly aimed, optically controlled beam illuminates your path while limiting unnecessary light above the useful road area.
A light can be very conspicuous yet poorly suited to sharing a road. High output alone is not the problem; where the light goes determines whether that output is useful or intrusive.
When the main hotspot is raised towards eye level, approaching road users may experience glare instead of simply recognising the bicycle. A driver who struggles to see around a bright source may divert attention or change speed unexpectedly, creating an additional hazard.
Independent ADAC testing illustrates that this is not simply a matter of purchasing a lower-powered lamp. Some tested 30-lux lights created more stray light and glare than certain 100-lux models. The optical design and beam direction were critical differences.
A practical check is to position an observer safely at approximately the eye height of a seated driver, facing the bicycle from ahead. If the main hotspot points towards that position rather than the roadway, adjust the lamp downward. Avoid looking directly into an intense beam during the check.
On an isolated unlit road, a longer-reaching beam may be useful for identifying distant bends or obstacles. However, the absence of nearby vehicles at one moment does not remove the need to control glare when another road user appears.
If your light offers a separate high-beam function, use it only where appropriate and reduce or redirect it before it affects approaching traffic. A road-focused beam with an effective cut-off is particularly useful on shared routes.
Do not solve glare merely by aiming the entire beam sharply downward. That can shorten your useful seeing distance and create a bright foreground while leaving the road ahead dark.
Beam control protects both your ability to see and other road users’ ability to see you. But even an excellent beam loses its value if the battery cannot sustain it.
When 4+ Hours of Runtime Beats a Lighter Light — and When It Doesn’t
A bike light offering four or more hours of useful runtime is worth choosing when your nighttime trips are long, charging opportunities are uncertain or delays could leave you riding in darkness. A lighter model can be appropriate for shorter rides with reliable charging. The decisive specification is runtime at your required illumination level, not the longest runtime printed on the package.
Start by estimating how long the light must actually operate. Include the complete journey, any expected riding after sunset, and a reserve for detours, delays or slower conditions.
For example, consider a hypothetical rider who plans a two-hour nighttime journey and allows another hour for unexpected delays. That rider should look for at least three hours of suitable operating output, rather than assuming a light advertised with four hours of runtime will necessarily be sufficient.
Why? A manufacturer’s runtime claim may refer to a low-output mode that does not illuminate an unlit road adequately at 25 km/h. Runtime figures therefore need to be matched to the relevant brightness setting.
The distinction between maximum runtime and usable runtime becomes particularly important when comparing lightweight models against larger battery-equipped lights.
What happens when the battery runs low?
Some battery-powered lights reduce their output as battery charge declines. Others use programmed low-battery modes or thermal regulation that changes output under particular conditions.
That means a light can remain switched on while offering less road illumination than it did earlier. A gradual reduction may be less obvious than a sudden shutdown, particularly when your eyes adapt to the changing brightness.
Look for independently documented brightness curves, clear low-battery indicators and runtime information for the operating mode you intend to use.
When does extra battery weight make sense?
Battery capacity and total weight are relevant, but a gram figure alone does not tell you whether the trade-off is worthwhile. Depending on the products compared, the difference may be on the order of hundreds of grams, although there is no universal weight penalty associated with a four-hour runtime.
A commuter who only charges occasionally may value reserve capacity far more than a small reduction in equipment weight. A sport-focused cyclist who reliably recharges after each short ride may reasonably make the opposite decision.
| Rider profile | Longer-runtime light | Lighter light |
|---|---|---|
| Long nighttime commute with uncertain charging | Higher priority, provided suitable illumination is sustained | Less important than adequate battery reserve |
| Short, predictable training ride | Useful but not automatically necessary | Reasonable if runtime includes sufficient margin |
| Extended rural ride with possible delays | Strong practical advantage | Appropriate only with verified runtime or a backup solution |
| Daily commuter who rarely recharges | Helps reduce the risk of insufficient charge | Requires more disciplined charging |
Four hours is therefore not a universal requirement. It is useful only when it provides the right combination of route coverage, sustained visibility and reserve capacity.
Once you have enough dependable operating time, correct mounting and orientation determine how effectively that stored energy reaches the road.
How to Aim Your Front Light So You See the Road Without Blinding Oncoming Traffic
Aim your front bicycle light by setting its beam against a wall, checking that its brightest area and any cut-off remain appropriately below approaching eye level, then confirming useful road illumination during a controlled nighttime test. The correct angle depends on beam design and mounting height. Recheck it regularly because vibration and transport can shift the lamp.
Begin with the bicycle on level ground, in its normal riding configuration. Secure the front light in the position you intend to use, with the mount tightened according to the manufacturer’s instructions.
Face a plain wall and switch on the mode you expect to use at night. A nearby wall can reveal whether the beam has a distinct upper boundary, a concentrated hotspot and significant stray light above its intended coverage area.
A basic wall check is useful for alignment, but it does not prove that an obstacle will be visible at a particular distance. The beam also needs to be assessed on the actual road.
Why mounting height changes the result
A handlebar or stem-mounted light generally provides a consistent forward reference. Its illumination moves with the steering direction, but remains tied to the bicycle rather than the direction of the rider’s gaze.
A helmet-mounted light follows head movements. This can help illuminate areas away from the bicycle’s immediate direction, but it also means looking towards approaching road users may direct light towards their eyes.
Helmet lighting can therefore complement a fixed front light without necessarily replacing a well-controlled, correctly aimed road beam.
On a dark test route, check that the road surface is illuminated far enough ahead to identify hazards with margin beyond your estimated stopping distance. Also confirm that the immediate foreground is not so dominant that the more distant section becomes difficult to interpret.
Five checks before riding at 25 km/h after dark
- Secure the mounting position. Check that the light cannot rotate easily and confirm the mount remains fixed when the handlebars move.
- Inspect the beam on a wall. Identify the hotspot and any upper cut-off, and note whether substantial light spills above the intended road coverage.
- Check from approaching eye level. Have a second person assess the beam from a safe position, or inspect it yourself while the bicycle is stationary, and adjust any upward-pointing hotspot.
- Verify useful road reach. Test on a safe, suitable dark stretch and identify whether road edges and visible obstacles can be recognised with adequate stopping margin.
- Confirm the final setting. Record or mark the mount’s alignment where practical and recheck it before the next nighttime journey.
The final check matters because a correct setting is not necessarily permanent. Transporting the bicycle, moving accessories or riding over rough surfaces can change the lamp’s position.
Correct aiming improves the performance of the light you already own. The remaining visibility challenge is being recognisable from directions your forward beam does not cover.
Reflective Ankle Bands or Reflective Tyres for Night Commutes: Which Actually Works Where?
Reflective ankle bands are useful for making pedalling motion noticeable to approaching drivers, while reflective tyre sidewalls help create a visible outline of the wheels from the side. Neither option universally replaces the other. The better choice depends on traffic approach angles, whether the reflective surface receives headlight illumination, and how much side visibility your commute requires.
Both accessories are retroreflective: they return incident light towards its source. Unlike active bicycle lights, they do not generate their own illumination.
Reflective ankle bands have a distinctive advantage when pedalling. Their movement can help an observer recognise the characteristic motion of a cyclist rather than merely noticing an isolated bright spot.
This has experimental support. Research on reflective ankle markings and nighttime cyclist conspicuity, published in 2022 by Joanne M. Wood, Alex A. Black and Richard A. Tyrrell, investigated how bicycle lights and reflective clothing affected cyclist recognition by approaching drivers.
In the closed-road study involving 15 participants, reflective markings on the lower legs improved conspicuity compared with the tested vest configurations. The researchers also reported greater benefits for leg-mounted markings when the bicycle light was helmet-mounted rather than handlebar-mounted.
Those findings support the value of reflective leg markings, but they do not establish that ankle bands outperform reflective tyres in every situation. The experiment did not directly compare those two products.
Reflective tyre sidewalls serve a different purpose. Their circular outlines can help define the bicycle’s profile when vehicle headlights illuminate the wheel surfaces from an appropriate angle.
That makes them particularly relevant where traffic approaches from the side, such as intersections, junctions and crossing points.
For an urban route with frequent junctions, reflective tyre sidewalls can be a valuable addition to front and rear lighting because they make the bicycle’s side profile more recognisable under suitable illumination.
For a rural commute on relatively straight roads where vehicles mainly approach from ahead or behind, moving ankle reflectors provide a different recognition cue. Their effect still depends on the geometry and intensity of the light reaching them.
| Criterion | Reflective ankle bands | Reflective tyre sidewalls |
|---|---|---|
| Primary visual feature | Movement associated with pedalling | Wheel outlines and bicycle side profile |
| Useful traffic context | Approaching drivers who can see the rider’s leg movement | Side-approaching traffic at junctions and crossings |
| When stopped | Reflective surface remains, but pedalling-motion cue disappears | Wheel-outline effect remains when illuminated |
| Main limitation | Depends on illumination, visibility and leg position | Depends on illumination angle and sidewall visibility |
The options are complementary rather than mutually exclusive. However, adding more reflective material does not remove the need for operational front and rear lights.
On unlit roads with little traffic, retroreflective equipment may receive little or no external illumination. Its passive nature makes it an additional detection aid rather than a substitute for an active headlight.
A complete nighttime lighting setup therefore needs to combine forward road illumination, active visibility to other road users and complementary reflection from useful directions.
Key takeaways before choosing a complete setup
- Evaluate whether the front light reveals hazards with adequate stopping margin at 25 km/h, not simply whether it has a large lumen rating.
- Choose controlled, sustained illumination and check that neither the front nor rear light creates unnecessary glare.
- Consider the directions from which vehicles approach: active front and rear lighting remains essential, while reflective accessories can improve recognition from additional angles.
Which Bike Lighting Setup Lets Drivers See You From 150 m Without Blinding Them
No bicycle lighting setup can guarantee that every driver will detect you from 150 metres. Detection depends on ambient light, weather, vehicle headlights, road geometry and background contrast. The practical goal is a coordinated system: an appropriately aimed front headlight, a visible rear light and supplementary reflective equipment, all selected to improve recognition without excessive glare.
The 150-metre figure is a useful hypothetical assessment distance, but it is not a universal performance standard established by the evidence discussed here.
A driver approaching on a clear, dark road may encounter very different visibility conditions from someone driving through rain, opposing headlights or visually cluttered urban traffic.
Even if a bicycle lamp appears visible at a particular distance during one test, that does not demonstrate reliable detection under every environmental condition.
Build a coordinated lighting setup
Front light: Use a headlight that provides enough useful road illumination for the speed and surface. Prefer controlled optics, with the beam aimed to minimise upward spill towards approaching traffic.
For riding at 25 km/h, assess whether hazards become recognisable with meaningful margin beyond your estimated stopping distance. A bright patch immediately in front of the wheel is not sufficient evidence of useful forward illumination.
Rear light: Use a red rear light that is clearly visible from behind without creating unnecessary discomfort for following drivers.
A steady rear mode can provide a continuous visual reference for judging the bicycle’s position. Flashing modes may attract attention in some circumstances, but their effectiveness and suitability vary with conditions and local regulations. The evidence supplied here does not establish that flashing is always inferior to steady lighting.
On an unlit road, a steady rear setting is a reasonable practical preference when it provides adequate visibility and complies with local rules.
Side visibility: Add reflective tyre sidewalls, ankle bands or other appropriate reflective accessories to improve recognition when vehicle headlights approach from the side.
These accessories matter especially at intersections, where drivers may see the bicycle in profile rather than directly from its front or rear.
How to evaluate the complete setup
Inspect the bicycle from the front, rear and side under safe, stationary conditions. A second person can help assess whether the lights are recognisable and whether their brightest areas point towards approaching eye level.
Check the beam pattern rather than treating a distant visible glow as proof of good illumination. A driver noticing your light and you recognising a road hazard are two separate performance requirements.
Then confirm your battery reserve. A front lamp that meets your needs at the beginning of a ride may not provide the same illumination if thermal regulation or battery depletion reduces its output.
Finally, verify the applicable rules for the country and region where you ride. Lighting colours, reflector requirements and permitted flashing modes are jurisdiction-specific. UK requirements, for example, cannot automatically be applied to the United States, Canada or Australia.
The best setup is not the one that exposes everyone to the highest possible brightness. It is the one that makes your presence recognisable from relevant directions while preserving your own view of the road and avoiding unnecessary glare for other people.
Before buying a new light, compare independent beam tests, check runtime at your intended setting and confirm that its mounting system allows accurate adjustment. Those checks are more useful than choosing solely by the largest lumen figure on a product listing.
Is an 800-lumen bike light enough for riding at 25 km/h?
An 800-lumen light may be sufficient if its beam delivers adequate forward illumination, remains stable throughout the ride and is aimed correctly. Its advertised lumen figure alone cannot establish that suitability. Compare beam reach, optical control and sustained output under conditions similar to your route.
Is a 1,500-lumen bike light automatically better than a 1,000-lumen model?
No. A 1,500-lumen model may distribute more light into the foreground, surrounding area or unwanted spill without improving distant hazard recognition. The 1,000-lumen model could perform better if its optics concentrate more useful illumination where you need it. Independent beam comparisons are more informative than these ratings alone.
Can you convert a bike light’s lumens directly into lux?
No. Lumens describe total luminous output, while lux describes illumination reaching a surface. Calculating illuminance requires information about beam distribution and geometry. Two lights with identical lumen ratings can therefore produce very different lux measurements at the same position on the road.
Should you carry a backup bike light on unlit roads?
A backup is a sensible precaution when losing your main light would leave you unable to ride safely, particularly on longer remote journeys. It should provide enough functionality to let you continue safely or reach a suitable stopping point. A backup does not compensate for inadequate primary-light runtime or poor preparation.
How can you tell whether a budget bike light’s lumen claim is trustworthy?
Look for independent measurements, comparable nighttime beam photographs, documented runtime at different settings and information about output regulation. A specification showing only peak lumens and maximum runtime does not demonstrate how the light performs during sustained riding. When this evidence is unavailable, treat the advertised output as an unverified claim rather than proof of useful road illumination.