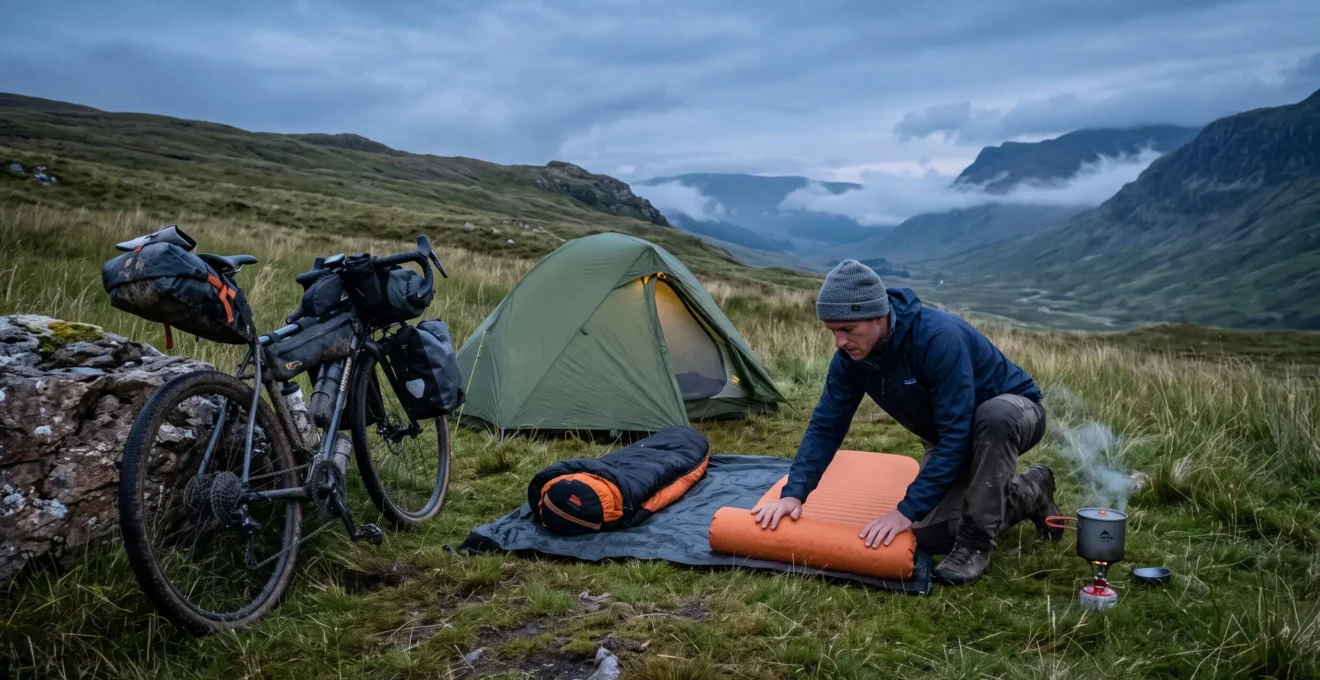
A camping kit weighing less than 6 kg can keep you comfortable through a 5°C night, but only if its components work together. A temperature-rated sleeping bag means little when the sleeping pad loses heat to the ground, rain reaches your insulation, or a poorly pitched shelter exposes you to persistent wind.
For multi-night bikepacking and cycle touring, the practical challenge is balancing warmth, weather protection, packed volume and bicycle stability. A lighter sleeping bag is not necessarily a better choice if it requires a heavier shelter or leaves you shivering before dawn.
Start by defining the weight budget. Here, the sub-6 kg target covers the core camping equipment: shelter, sleep system, cooking equipment, essential camp accessories and the bags used to carry them. Clothing worn while riding, the bicycle and water carried for drinking are excluded. Keep consumables and any additional touring equipment visible in a separate weight tally rather than hiding them from the overall load.
The aim is a kit you can pitch in bad weather, unpack without soaking your bedding and carry without compromising the bike’s handling.
Build a lighter camping kit without sacrificing sleep
- Prioritise a compatible sleeping bag and insulated pad, then test the complete system before leaving.
- Protect bedding with reliable waterproof storage and a wet-weather unpacking routine.
- Choose shelter and luggage for the expected terrain, wind exposure and packed volume—not weight alone.
- Why Do Lightweight Sleeping Setups Still Leave You Shivering at 5°C?
- How to Choose a Tent and Sleep System for Windy Campsites Without Overpacking
- Which Should You Choose: Panniers or a Seatpack for Bulky Camping Gear?
- The One Waterproofing Assumption That Soaks Your Sleeping Bag Overnight
- What Should You Upgrade First for Better Sleep Without Adding More Than 300 g?
- Which Should You Choose: Hydration Backpack or Hip Pack for a 3-Hour Trail Ride?
- How to Choose Base-Layer Thickness for a 5–15°C Ride Without Overheating?
- Which Touring Bicycle Setup Works for 20 kg of Luggage Without Wobble at 35 km/h?
Why Do Lightweight Sleeping Setups Still Leave You Shivering at 5°C?
Lightweight sleeping setups often feel colder than their advertised temperature ratings because the sleeping bag is only one part of the insulation system. An inadequately insulated pad, damp clothing, accumulated condensation or an exposed campsite can reduce comfort. At 5°C, assess the complete setup rather than assuming a warmer bag will solve every problem.
A sleeping bag’s comfort rating describes performance under specified laboratory conditions, not a guaranteed temperature for every sleeper. The distinction matters when buying budget equipment whose temperature labels may refer to different rating conventions.
According to Sea to Summit’s explanation of sleeping-bag ratings, its ISO 23537 testing uses a heated manikin wearing insulating base layers and a cap, lying on a sleeping pad rated above R-5. That describes the manufacturer’s testing conditions, not a universal minimum pad rating for every 5°C campsite.
Ground insulation is an essential part of sleeping warmth. The insulation beneath your body compresses under your weight, reducing the loft that would otherwise trap warm air. Your pad must therefore resist heat loss into the ground. A well-rated bag cannot fully compensate for an unsuitable mat.
The pad’s R-value indicates its thermal resistance. Higher values generally provide more insulation, but choosing an appropriate pad also depends on ground conditions, individual sensitivity to cold and the rest of the sleeping system.
Moisture complicates the calculation. Damp base layers can draw warmth away from your skin, while condensation settling on sleeping-bag fabric may reduce its insulating performance. Down insulation is particularly vulnerable when its loft is compromised by moisture, although synthetic insulation also benefits from being kept dry.
A practical diagnostic is to test the complete system before a tour:
- Sleep outside at home or at a nearby campsite in conditions similar to those expected on tour.
- Use the same pad, sleeping bag, clothing and shelter.
- Record the approximate overnight temperature, ground conditions and any cold spots.
- Note whether discomfort occurs beneath your hips and shoulders, across your upper body or after condensation accumulates.
- Adjust one component at a time and repeat the test where possible.
If your back feels cold while your upper body remains comfortable, investigate the pad before buying another sleeping bag. If you are cold everywhere despite dry equipment and adequate ground insulation, examine the bag’s rating, fit and overall warmth.
Once the sleep system has been tested, the next challenge is keeping it effective on an exposed campsite where wind, poor anchoring and hurried pitching can undermine an otherwise sensible setup.
How to Choose a Tent and Sleep System for Windy Campsites Without Overpacking
Choose a shelter for the wind conditions you realistically expect, its anchoring requirements and how quickly you can pitch it when tired. A low-profile tent with a secure, tensioned structure may be more suitable for exposed touring than a lighter shelter requiring ideal conditions. Shelter design and pitching skill matter more than weight alone.
For a sub-6 kg camping kit, the shelter competes directly with the sleeping bag and pad for weight allowance. Cutting shelter weight is worthwhile only when the result still provides dependable protection from precipitation, wind and ground moisture.
Different shelter styles create different compromises:
| Shelter type | Potential advantages | Important limitations |
|---|---|---|
| Freestanding tent | Dedicated pole structure, convenient positioning and enclosed sleeping space | Still needs appropriate anchoring in wind; pole structure and height influence packed weight and exposure |
| Trekking-pole tent | Potentially lighter when support poles are already carried; compact designs available | Often depends heavily on sound stake placement and guylines; cyclists may need to carry the required poles |
| Bivy shelter | Compact packed volume and potentially low profile | Limited changing and storage space; condensation and prolonged wet weather require particular attention |
| Tarp | Flexible pitching arrangements and potentially low equipment weight | Exposure depends on configuration; requires suitable anchors, site selection and pitching experience |
No shelter category is automatically windproof. A poorly tensioned low-profile tarp may perform worse than a properly secured tent, while a tall structure can be vulnerable when its exposed surfaces catch gusts.
Wind resistance starts before fabric leaves the bag. Look for natural shelter, avoid unnecessarily exposed ground and identify where secure anchors can be placed. Follow the manufacturer’s intended orientation and guyline arrangement for the particular model.
Cascade Designs’ instructions for pitching a tent in wind recommend preparing the poles first, securing the windward side before progressing with the pitch, using heavy gear as temporary ballast and tightening the guylines. Its guidance also describes presenting the narrowest part of the tent toward the wind for the configurations discussed.
Where ordinary pegs cannot hold, suitable rock anchors may be useful if they are sufficiently stable and the shelter design permits them. A loaded bicycle may sometimes serve as a supplementary anchor, but it should not be assumed to replace a properly secured structural anchor. Prevent movement, protect the bicycle and equipment from damage, and avoid any arrangement that could collapse or pull loose under load.
The required number of guylines depends on the shelter. Rather than choosing an arbitrary minimum, identify the structural attachment points specified by its manufacturer and practise tensioning them correctly.
Consider the weight allocation as a complete system. A lighter shelter that lets rain enter may force an expensive or heavier insulation replacement. Conversely, a shelter that provides reliable coverage can make a modest sleeping bag and pad combination more practical.
Practise pitching in daylight, then repeat in a controlled low-light setting. Pack the shelter so essential stakes, poles and guylines are accessible first. A pitch you can complete confidently after a difficult ride is more useful than a theoretical weight saving you cannot deploy reliably.
Once shelter and bedding are selected, their combined packed volume determines whether compact bikepacking bags are realistic or more spacious panniers are the better touring choice.
Which Should You Choose: Panniers or a Seatpack for Bulky Camping Gear?
Choose a seatpack when your camping equipment compresses into a stable, compact load and you want to avoid a supporting rear rack. Choose panniers when bedding is bulky, frequent access matters or you need more forgiving packing space. For a sub-6 kg camping kit, available volume and secure mounting often decide the choice.
Weight alone does not describe how difficult a camping kit will be to carry. Two sleeping bags can have similar mass but very different compressed volumes, particularly when insulation type, shell construction and compression methods differ.
A narrow seatpack may require the sleeping bag and clothing to be compressed into the far end of a tapered compartment. Accessing something packed deeply can mean removing much of the contents. Overfilling also risks poor closure, excessive movement or inadequate clearance above the rear tyre.
Panniers generally make irregular shapes easier to accommodate. They allow the sleep system, cooking equipment and spare clothing to be separated without forcing every item into a narrow roll. Their main trade-offs are the additional luggage hardware, potentially greater width and different aerodynamic characteristics.
Cycling UK’s comparison of bikepacking bags and panniers identifies the narrower profile and reduced supporting hardware of rackless bags, while recognising the access and capacity advantages of panniers. It also highlights the loads imposed by heavy seatpacks on their mounting points.
| Decision factor | Seatpack | Panniers |
|---|---|---|
| Packed volume | Best with compact, compressible items | More accommodating of bulky or awkwardly shaped equipment |
| System weight | Often avoids a rear rack | Requires suitable racks or supporting hardware |
| Weather protection | Depends on fabric, construction, closure and liner | Depends on pannier construction, closure and liner |
| Access | Frequently requires careful packing order | Usually easier to organise and retrieve items |
| Handling | High rearward loads can sway or sag | Low, securely mounted bags may distribute weight more favourably |
| Aerodynamics | Narrow configuration may offer an advantage | Greater width may increase exposure to airflow |
Neither arrangement is universally faster or more stable. Bicycle geometry, speed, bag shape, wind, load distribution and mounting stiffness all influence real-world behaviour. Without a controlled comparison, avoid assuming a particular aerodynamic saving.
A hybrid arrangement often resolves the packing problem. Put lighter, compressible bedding in a waterproof rear seatpack, then distribute denser equipment in secure frame-mounted or suitably rated front and rear luggage. Keep heavy objects low and avoid placing excessive weight far behind the saddle.
Before committing to a tour, pack everything exactly as you intend to carry it. Measure wheel clearance, check attachment straps and ride over representative surfaces. Stop afterwards to inspect bag movement, loose fittings and contact marks.
Whatever luggage layout you choose, its advertised weather resistance does not eliminate the need to protect bedding from water during both the ride and the unpacking process.
The One Waterproofing Assumption That Soaks Your Sleeping Bag Overnight
The dangerous assumption is that putting a sleeping bag inside a dry bag automatically keeps it dry throughout a wet tour. Closures can be improperly sealed, luggage can leak, and water on the outside of protective bags can reach bedding during unpacking. Effective waterproofing requires both a suitable barrier and a controlled setup routine.
Rainwater does not need to pass directly through a bag’s main fabric to cause trouble. It may enter through unsuitable closures, damaged seams or openings exposed while accessing equipment. Wet straps and other materials can also transfer moisture through contact.
Even if the waterproof inner bag performs perfectly during the ride, its outer surface may be soaked when you reach camp. Placing that wet bag beside an unprotected sleeping bag, opening it with wet hands or dragging its contents across damp ground can transfer water onto your bedding.
Keep the dry sleeping system separate until the shelter is ready. Treat the outer luggage as potentially wet and organise unpacking so that clean insulation only touches dry surfaces.
Waterproofing products also have different protection limits. For example, ORTLIEB’s PD350 Dry-Bag specification sheet describes an IP64 splash-protection rating with the closure rolled at least three to four times. It warns that complete submersion can permit water to enter through the closure. These specifications apply to that particular product, not to all roll-top bags.
For a lightweight setup, choose protection according to the consequences of failure. A waterproof pannier or seatpack may be sufficient for some equipment, while a dedicated inner dry bag provides an additional barrier for essential sleep insulation. That redundancy costs weight and packing volume, so it should be deliberate rather than automatic.
For perspective, the ORTLIEB specification lists a 150 g five-litre bag, a 190 g ten-litre bag and a 220 g thirteen-litre bag. These are product-specific documented figures, not representative weights for all waterproof liners. Verify current specifications and make sure the chosen volume accommodates the bedding without overfilling the closure.
Five checks before trusting your waterproof sleep storage
- Place a dry tissue or small towel inside each protective bag, close it according to its instructions and record which bag contains the test material.
- Expose the closed luggage to a controlled spray test suitable for the product, without exceeding its stated water-protection limits; record any visible leakage.
- Dry the outside before opening, then inspect the tissue and closure area; note any dampness and its location.
- Rehearse your wet-weather camp setup using separate wet and dry areas; confirm that bedding can be removed without touching wet luggage or ground.
- Write a final packing order showing where the shelter, wet equipment and protected sleeping system will sit on the bicycle.
A home spray test is a practical screening method, not a certification of waterproofness. It may reveal obvious defects or closure mistakes, but passing does not guarantee performance during prolonged rain, pressure or immersion.
At camp, pitch the shelter first where conditions permit. Keep wet luggage outside or in a designated wet area, dry your hands, and open the protected sleeping bag only once a clean, dry space is available. Allow ventilation without exposing insulation to incoming rain.
Reliable dryness may improve sleeping comfort without buying warmer insulation, making moisture protection an important consideration before spending the remaining weight allowance on upgrades.
What Should You Upgrade First for Better Sleep Without Adding More Than 300 g?
Start with the component responsible for your discomfort, usually investigating the sleeping pad before replacing an otherwise suitable sleeping bag. A better-insulated pad, dry sleeping clothing or improved moisture protection may increase comfort without a large weight penalty. Calculate the net weight change of each upgrade and keep the final addition within 300 g.
A cold-weather upgrade should address a specific weakness rather than simply make the kit heavier. If the pad allows excessive heat loss, buying a bulkier sleeping bag may leave the underlying problem unchanged.
Likewise, if the existing pad is adequate but the sleeping bag is rated for considerably warmer conditions, changing the pad alone may not be enough. Identify the limiting component through testing before committing money.
The priorities below are a practical diagnostic order, not a scientifically established ranking of comfort gained per gram.
| Upgrade | Best reason to choose it | Weight-budget consideration |
|---|---|---|
| Better-insulated sleeping pad | Cold spots beneath the body or inadequate ground insulation | Subtract the old pad’s weight from the replacement’s weight |
| Dry sleeping base layers and hat | Clothing becomes damp during the ride or the sleeper loses warmth at rest | Consider whether suitable clothing is already packed |
| Additional liner or insulating layer | A modest increase in warmth or comfort is required | Account for its full additional weight; benefits depend on the product |
| Improved protective dry bag | Insulation is becoming damp during transport | Compare the new storage weight with the protection it replaces |
| Warmer sleeping bag | The bag itself is insufficient once pad and moisture problems are addressed | Compare replacement and existing bag weights, ratings and packed volumes |
Use net weight rather than the new item’s advertised weight to judge whether an upgrade fits.
For example, in a purely hypothetical equipment comparison, replacing a 400 g pad with a 600 g pad adds 200 g to the kit. If a redundant 80 g accessory can then be removed without compromising safety or function, the resulting net increase is 120 g. The figures illustrate the calculation, not a recommendation for any particular pad.
Apply the same method to waterproofing. If you replace a poorly performing protective bag with a more suitable one, subtract the removed item’s mass. Avoid counting a replacement as an entirely new addition.
Some inexpensive changes add little or no weight: using genuinely dry sleeping clothes, improving ventilation, selecting a more sheltered pitch or avoiding a tight sleeping-bag fit that compresses insulation.
A thin sleeping-bag liner can be useful for cleanliness or comfort, but its actual thermal contribution varies. Do not treat an unspecified temperature increase as guaranteed or assume it will compensate for inadequate insulation underneath you.
If testing confirms that the bag itself is the limiting factor, a properly rated replacement may be preferable to stacking multiple accessories. The lightest successful upgrade is often the one that eliminates an ineffective item rather than adding another layer to the same problem.
Once night-time insulation is dependable, attention shifts to what happens during the day: carrying water, managing perspiration and reaching camp with enough dry clothing to sleep comfortably.
Which Should You Choose: Hydration Backpack or Hip Pack for a 3-Hour Trail Ride?
Choose a hip pack for a three-hour unloaded ride when water, tools and minimal clothing fit comfortably around your waist and back ventilation matters. Choose a hydration backpack when you need more carrying capacity or additional layers. Either can work, provided the load is secure and water is stored separately from critical sleeping equipment.
This decision becomes relevant when you leave your touring luggage at camp for a trail ride or unload the bicycle for a local route. Suddenly, the storage volume available on the loaded touring bike is no longer with you.
A hip pack places its load around the waist and leaves much of the back uncovered. That can improve airflow behind your riding jersey during sustained climbs or warm conditions. However, overloading a hip pack may make it bounce, shift or interfere with movement.
A hydration backpack distributes its load across the shoulders and back. It can carry water, tools, food and a weather layer, but it covers more of the rider’s back and may increase moisture accumulation beneath its contact areas.
Neither option guarantees less sweating. Conditions, clothing, riding intensity, pack design and personal comfort all influence the result.
| Riding situation | Hip pack | Hydration backpack |
|---|---|---|
| Warm, sustained riding with little spare clothing | Attractive when capacity is sufficient and back airflow is a priority | Useful if extra water capacity outweighs the ventilation trade-off |
| Cool or changeable conditions requiring several layers | May become cramped | Typically offers more space and organisation |
| Rough, technical trails | Works when snug and minimally loaded | Works when securely fitted and movement is controlled |
| Short ride away from a fixed campsite | Convenient for essential small items | Useful if carrying additional emergency or weather equipment |
The important connection with overnight camping is moisture management. Clothing soaked with perspiration during a daytime ride should not become the base layer you depend on for sleeping warm at 5°C.
Carry a dry change of clothing when conditions warrant it, and separate wet riding garments from sleeping insulation. A small pack with enough room for a weather layer may be more useful than the absolute lightest option.
Inspect hydration bladders, caps and hose connections before riding. A bladder leak can wet spare clothing or equipment inside a pack. In freezing conditions, hoses and exposed drinking components may also become difficult to use; a 5°C overnight forecast alone does not establish that freezing will occur.
Keep drinking water in a compartment or container that cannot readily leak onto the sleeping bag. Even when riding with the fully loaded bicycle, hydration storage should remain separate from essential dry insulation.
The same principle applies to your riding layers: the more effectively clothing manages heat and perspiration during the day, the easier it becomes to protect the dry clothing reserved for sleeping.
How to Choose Base-Layer Thickness for a 5–15°C Ride Without Overheating?
For riding temperatures between 5°C and 15°C, favour a breathable, relatively thin base layer during sustained effort, then adjust warmth with removable outer layers. A midweight base may suit slower riding or long stops, but it offers less flexibility during hard climbs. Keep a separate dry layer available for sleeping whenever possible.
Cycle touring creates a difficult clothing problem because physical effort changes repeatedly. A rider climbing steadily at 5°C may generate enough heat to become uncomfortable in a thick base layer, then feel chilled minutes later while standing at a campsite.
The solution is not necessarily more clothing. It is choosing layers that can be adjusted independently without requiring a full change whenever the temperature or effort level changes.
Lightweight synthetic materials and suitable merino or blended fabrics can help move moisture away from the skin, although drying performance varies considerably by fabric construction and thickness. Cotton-heavy garments are generally less suitable when prolonged dampness and slow drying become significant concerns.
Use the expected effort and stop pattern to choose your base:
| Conditions and activity | Practical starting point | Adjustment |
|---|---|---|
| Hard climbing near 15°C | Thin, breathable base layer | Open or remove warmer outer layers early |
| Steady touring around 10°C | Thin base with an adjustable outer layer | Add or remove protection according to effort and wind |
| Low-intensity riding near 5°C | Thin or midweight base according to personal comfort | Use additional insulation and wind protection as required |
| Extended stops after exertion | Dry clothing with a suitable insulating layer | Change out of damp garments before cooling significantly |
Think in removable layers rather than one thick garment. A thin base layer, suitable midlayer and weatherproof outer layer can adapt to changing conditions more easily than a single heavy base layer.
Weight comparisons still matter. Two thinner garments are not automatically lighter than one thick garment, and an extra layer only earns its place if it performs a useful function. Weigh the exact clothing combination rather than relying on category labels.
On multi-day trips, establish a clothing rotation. Reserve a dry set for sleeping whenever the weight budget allows, wear the riding set during active hours and dry garments only where ventilation and conditions permit.
Wearing a slightly damp garment during movement can sometimes help it dry, but do not use that approach when it creates excessive chilling, particularly in cold wind. Inside a tent, drying is often slow and moisture released from clothing can increase condensation. Keep wet garments away from bedding and provide safe ventilation.
Wet clothing also adds carried water mass, although the amount depends on the garment and conditions. The more important penalty is often the loss of reliable insulation and the difficulty of obtaining a dry layer at the end of the day.
With the shelter, sleeping equipment, hydration and clothing organised, the final consideration is how the complete load affects bicycle control—especially when the camping kit is only part of a much heavier touring setup.
Key takeaways before loading the bicycle
- A sub-6 kg camping kit does not make the entire touring bicycle light; include food, water, clothing, tools and luggage hardware in the actual loaded-bike assessment.
- Compact bedding creates more mounting options, but heavy equipment still needs secure, appropriately positioned storage.
- Handling stability must be demonstrated on the specific bicycle and load arrangement, not inferred from an equipment weight target.
Which Touring Bicycle Setup Works for 20 kg of Luggage Without Wobble at 35 km/h?
No particular touring bicycle or luggage arrangement can be guaranteed wobble-free with 20 kg of luggage at 35 km/h. A suitable setup uses a frame, fork, wheels, tyres and luggage mounts rated for the intended load, with secure bags and sensible weight distribution. Stability must be assessed on the actual bicycle before touring at speed.
Reducing camping equipment weight helps, but it does not remove the mechanical effects of the remaining luggage. Twenty kilograms placed low in secure bags behaves differently from the same mass concentrated high behind the saddle or far ahead of the steering axis.
High or rearward loads can increase the tendency of flexible luggage to move relative to the frame. A loosely secured seatpack may sway, while a heavy load attached high above the rear wheel may make the bicycle less predictable during steering corrections.
Front luggage has different consequences. Weight attached to the steering assembly affects steering forces and may change how quickly the front end responds. The actual result depends on bicycle geometry, mounting position, load mass and the rigidity of the luggage system.
Neither front-heavy nor rear-heavy loading is universally correct. Seek balanced, secure placement without exceeding the permitted capacity of the frame, fork, racks or other attachments.
The low placement available with some rack-mounted panniers can be useful for heavier equipment, while compact rackless bags may reduce hardware and overall width. What matters is how the arrangement behaves on the particular bicycle.
Before departure, check the manufacturer’s stated limits for the complete bicycle and for individual components. Include rider, bicycle, luggage and other carried loads in the relevant total-weight assessment. A steel frame should not be assumed to tolerate unlimited luggage simply because its material is traditionally associated with touring.
Tyres also need attention. Select compatible widths and inflation pressures appropriate to the manufacturer’s specifications, the loaded weight and the riding surface. Excessively low or high pressures can create handling or equipment problems, and the right setting cannot be inferred from luggage weight alone.
A loaded test ride should begin at a controlled, comfortable speed on a suitable route. Check steering feel, braking response, bag movement and clearance before gradually exploring the speeds you expect on tour. Do not accelerate toward 35 km/h to investigate instability; if wobble occurs, slow down smoothly and stop safely to reassess the setup.
For heavily loaded touring, consider these practical checks:
- Confirm the rated capacities of the bicycle, fork, luggage racks and mounting hardware.
- Place dense objects low and as securely as the available mounts allow.
- Check that rear seatpacks cannot touch the tyre or move into the wheel under compression.
- Check steering clearance, brake and shift cable routing, and the security of any front luggage.
- Ride slowly through starts, stops, turns and representative uneven surfaces before attempting normal touring speeds.
Slow-speed behaviour is just as important as fast descending. Heavy panniers can make a bicycle awkward when starting, stopping, pushing it uphill or parking on uneven ground. A kickstand, where fitted and permitted, must also be rated for the actual load and used only on suitable ground.
Reducing the bulk of your sleeping bag and pad can create more freedom to position other equipment securely. Reducing total mass may also lower demands on the mounting system, but a sub-6 kg camping kit is not itself proof of stable handling.
For your next overnight test, weigh the packed camping kit, load the bicycle with everything you intend to carry and complete a controlled handling check. Then pitch the shelter, protect the bedding and sleep in the full system under safe, representative conditions. Those results provide a much stronger basis for changing equipment than any isolated weight specification.
Does a sub-6 kg camping kit include food, drinking water and the bicycle?
Not under the equipment budget used here. The 6 kg target covers the core camping kit, including shelter, sleep system, cooking equipment, essential camp accessories and its carrying bags. The bicycle, water, food and riding clothing are tracked separately. For a meaningful comparison, state what your total includes and weigh the complete loaded bicycle before departure.
Can a sleeping bag rated for 5°C guarantee a comfortable night at that temperature?
No. Temperature ratings depend on defined testing conditions and do not guarantee individual comfort. Sleeping-pad insulation, clothing, moisture, ground temperature and personal sensitivity to cold all affect the result. Choose the appropriate rating convention and test the full setup before relying on it for a multi-night tour.
Should a sleeping bag be compressed as tightly as possible inside a seatpack?
Compress it only as permitted by the manufacturer and as much as necessary for practical transport. Avoid damaging the bag, overfilling its protective dry bag or preventing a roll-top closure from sealing correctly. Restore the insulation’s loft after unpacking and follow the manufacturer’s storage recommendations between trips.
What should you do if your sleeping bag gets wet during a rainy tour?
Assess how wet the insulation is and whether it can be dried safely and thoroughly before the next cold night. Protect it from further moisture, improve ventilation when conditions permit and follow the manufacturer’s care instructions. Do not assume that a damp bag will provide its usual insulation. If it cannot offer adequate warmth in the expected conditions, seek a reliable alternative sleeping arrangement rather than risking a cold night.
Is a lightweight tent always the best shelter for several rainy nights?
No. A shelter must provide suitable weather protection, manageable condensation, secure anchoring and sufficient space for keeping insulation dry. A small weight saving is of little value if the shelter is difficult to pitch in wind or cannot separate wet equipment from bedding. Choose according to expected conditions and your pitching experience.