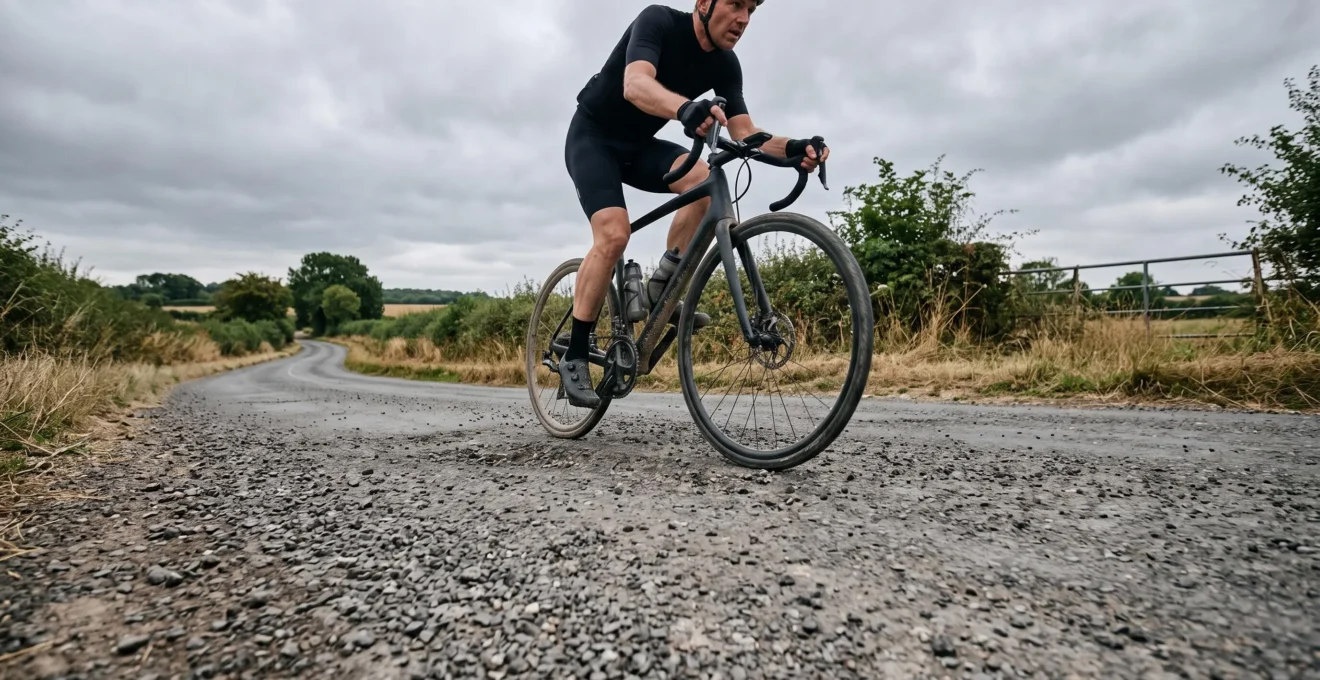
Higher tyre pressure does not always make a road bike faster. On rough tarmac, chipseal and uneven country lanes, a tyre inflated beyond its optimal pressure can transmit enough vibration into the bicycle and rider to waste more energy than the firmer tyre saves through reduced deformation.
The critical distinction is between a tyre that rolls efficiently on a smooth surface and one that maintains efficient contact with an imperfect road. For cyclists still inflating to the maximum PSI printed on the sidewall, that difference can mean unnecessary fatigue, reduced control and potentially slower riding.
Finding the right pressure involves more than lowering PSI until the ride feels comfortable. Rider and equipment weight, measured tyre width, casing construction, rim specifications and road texture all influence the result. Pressure also affects puncture risk, particularly when potholes and debris are part of the route.
The practical aim is to find a repeatable starting pressure, test it on familiar roads and adjust it without exceeding equipment limits or sacrificing impact protection.
Road tyre pressure: the essentials
- On rough tarmac, excessive pressure can increase vibration-related energy losses and make a road bike slower.
- Calculate pressure using total system weight, actual tyre width and road conditions, then adjust the front and rear separately.
- Choose tyre construction, width and inflation pressure together; neither maximum PSI nor the lowest comfortable pressure is automatically optimal.
- Why Can Higher Tyre?
- How to Find Your Starting Tyre Pressure Using Weight and Tyre Width in 2 Steps?
- Which Should You Choose: 25 mm or 28 mm Tyres if You Ride 70% Chipseal?
- The Pro Tyre-Pressure Copying Mistake That Causes Flats on Commutes
- When Should You Drop Tyre Pressure by 5–10 psi as Temperatures Fall?
- Which Should You Choose: Tubeless or Latex Tubes for Long Weekend Rides?
- How to Check Cassette Compatibility Before You Order in 5 Checks?
- How to Reduce Rolling Resistance Enough to Save 10 Minutes Over 100 km
Why Can Higher Tyre?
Higher tyre pressure can make a road bike slower when the surface becomes rough enough that vibration-related energy losses outweigh the reduction in tyre deformation. Instead of absorbing small bumps, an excessively firm tyre transmits more movement to the bicycle and rider. The optimal pressure therefore depends on road texture, total weight and tyre dimensions.
On a smooth laboratory drum or exceptionally even tarmac, increasing pressure can reduce the energy consumed as a tyre casing repeatedly flexes. These are commonly described as casing losses. However, a real road introduces additional resistance as the wheel encounters irregularities.
When a tyre cannot deform sufficiently around those irregularities, more energy is transferred into vertical movement and vibration. This contributes to what tyre-pressure testing literature calls surface impedance losses.
SILCA‘s technical explanation of tyre pressure and rolling resistance describes a breakpoint beyond which increasing pressure can raise total resistance instead of reducing it. The position of that breakpoint changes with surface roughness, tyre dimensions and system weight.
The sensation is familiar on coarse chipseal: the bike feels sharp and lively on smooth patches, then begins buzzing through the handlebars and saddle when the aggregate becomes more pronounced.
This is sometimes called the pogo effect. Rather than allowing the tyre casing to absorb irregularities, the rider and bicycle experience more repeated vertical disturbance. That movement consumes energy. However, claims about additional aerodynamic or cadence penalties should not be treated as independently quantified consequences without corresponding measurements.
A simple field comparison can help determine whether a particular setup has crossed its useful pressure range:
- Select a repeatable stretch of rough road with minimal traffic and relatively consistent conditions.
- Record tyre pressure, riding position, total load and the chosen route.
- Ride at a controlled power output and record speed, elapsed time and perceived vibration.
- Repeat with pressure reduced by 5 psi, keeping the remaining variables as consistent as possible.
- Compare repeated runs rather than relying on a single faster result.
A power meter makes the comparison more informative. GPS timing alone is less conclusive because wind, traffic and minor differences in effort can influence the result. Comfort and vibration observations remain useful supporting evidence.
Heavier loads, narrower tyres and rougher surfaces change the optimal balance, so a pressure that works well on smooth asphalt should not automatically be carried over to broken rural roads.
Once excessive vibration has been identified, the next question is how to choose a sensible starting pressure without relying on guesswork.
How to Find Your Starting Tyre Pressure Using Weight and Tyre Width in 2 Steps?
Find your starting tyre pressure in two steps: calculate the total weight of the rider, bicycle and carried equipment, then enter that weight alongside the tyre and rim specifications into a suitable pressure calculator. Use its separate front and rear recommendations as a baseline, adjusting by small increments for comfort, surface conditions and impact protection.
The key measurement is total system weight, not body weight alone. A rider’s shoes, helmet, clothing, filled bottles, tools and luggage all contribute to the load the tyres must support.
For example, a hypothetical cyclist weighing 75 kg on a 9 kg bicycle and carrying 3 kg of equipment has a total system weight of 87 kg. The example illustrates what to include; it does not establish a recommended PSI for that weight.
Actual inflation pressure also depends on tyre width, casing, rim dimensions and whether the system uses inner tubes or a compatible tubeless arrangement.
Step 1: Establish a pressure range from weight and width.
Identify the tyre’s actual inflated width and the wheel’s internal rim width. A tyre marked 28 mm may measure differently depending on the rim. Use a calculator that accounts for these dimensions and the intended surface rather than a generic chart based only on rider weight.
The following comparison provides a directional starting framework, not numerical inflation recommendations.
| Setup | Pressure tendency | Reason |
|---|---|---|
| Lower total weight, same tyre | Generally lower | Less load to support |
| Higher total weight, same tyre | Generally higher | More load and greater impact-compression risk |
| Wider tyre, same total weight | Generally lower | Greater air volume and support at lower inflation |
| Rougher road, same equipment | Potentially lower | Greater benefit from absorbing surface irregularities |
Step 2: Refine the front and rear pressures.
The rear wheel commonly supports more weight than the front, making identical pressures unnecessary. A lower front pressure can help the front tyre conform to road imperfections, while the rear must retain enough support to avoid excessive casing compression and rim impacts.
SRAM‘s technical guide to calculating bicycle tyre pressure explains how to combine total system weight with tyre and rim details and calculate front and rear recommendations separately.
From that baseline, make small adjustments and record the results. A few psi can change the feel of a road tyre, but the ideal adjustment depends on the initial pressure and equipment.
Never exceed the lowest applicable maximum specified by the tyre, rim or wheel manufacturer. Some tubeless and hookless rim systems have additional restrictions. The pressure printed on a tyre sidewall is a limit, not a target for speed.
Your five-check tyre-pressure setup record
- Weigh the rider with riding equipment and add the bicycle weight; record the total in kilograms or pounds.
- Measure or verify the inflated front and rear tyre widths; write down both measurements in millimetres.
- Record the rim’s internal width, rim type and tube or tubeless configuration; keep these specifications with the setup notes.
- Enter the information into a compatible pressure calculator; save the recommended front and rear values in psi or bar.
- Test a small permitted adjustment on a familiar route; log the final pressures, surface conditions, comfort and any rim impacts.
With a pressure baseline established, tyre width becomes a more meaningful equipment decision, particularly for riders spending most of their time on coarse chipseal.
Which Should You Choose: 25 mm or 28 mm Tyres if You Ride 70% Chipseal?
For a cyclist riding approximately 70% chipseal, a suitable 28 mm tyre is generally the more practical starting choice, provided the frame and wheels are compatible. Its greater volume allows lower pressure at the same load, improving vibration absorption and often comfort. A 25 mm tyre remains reasonable when clearance, aerodynamic priorities or existing equipment favour it.
Chipseal consists of aggregate embedded in a binding layer, creating a coarse road texture. Even when the surface is technically paved, the tyre encounters frequent small irregularities. Over a long ride, the resulting vibration can become tiring.
A wider tyre offers more room to balance casing deformation and impact protection. Lower pressure can help it conform to the road surface while maintaining sufficient support for the rider’s weight.
However, tyre width is not an independent guarantee of speed. Construction, actual inflated size, tread compound and wheel aerodynamics can materially affect the outcome.
| Criterion | 25 mm tyre | 28 mm tyre |
|---|---|---|
| Pressure at equal load | Generally requires higher inflation | Usually supports lower inflation |
| Rough-road comfort | Less air volume for absorbing irregularities | Greater potential for vibration absorption |
| Pinch-flat protection with tubes | Less margin at inadequate pressure | Potentially greater margin at a suitable pressure |
| Aerodynamics | May suit some narrow rim profiles | Depends on rim and tyre combination |
| Weight | May be lighter within the same tyre family | May carry a modest weight penalty |
| Frame compatibility | Often easier to fit older road frames | Requires sufficient measured clearance |
For someone riding predominantly rough roads, perceived comfort and fatigue can matter more than a small, setup-dependent difference in measured speed. That is especially relevant when weekend distances are substantially longer than a short performance test.
Tyre construction can be as important as nominal width. A supple casing may deform more efficiently than a heavily reinforced one, while puncture-protection layers introduce a different balance between durability, weight and rolling resistance. TPI alone does not provide a reliable ranking of overall performance.
Before ordering 28 mm tyres, check the manufacturer’s approved tyre range, actual frame and fork clearance, brake compatibility and any mudguard clearance. Remember that tyres can inflate wider than their printed size on certain rims.
Clearance must remain adequate for wheel flex, road contamination and manufacturer requirements. A tyre that only just fits when the bike is stationary is not necessarily safe for rough roads.
If a wider tyre is appropriate, pressure still needs to match its actual size and loading. Copying someone else’s inflation number can undermine the benefits of the upgrade.
The Pro Tyre-Pressure Copying Mistake That Causes Flats on Commutes
Copying a professional cyclist’s tyre pressure without matching their weight, tyres, rims and road conditions is a poor commuting strategy. A pressure that works for a particular race setup may be unsuitable for potholes and debris. Both excessive and insufficient inflation can contribute to problems, although they produce different handling characteristics and failure risks.
Professional tyre choices are made for specific equipment, surfaces, weather and race requirements. Modern professional setups also vary considerably; assuming that professionals universally run tyres near maximum pressure is inaccurate.
A commuter travelling over drain covers, broken tarmac and debris-strewn road edges encounters different conditions from a rider on a managed race route.
With an inner tube, one important failure mechanism is the pinch flat, commonly called a snakebite. When pressure is too low for the load and impact, the tyre can compress until the tube becomes trapped between the rim and an obstacle. The resulting tube damage may appear as two adjacent openings.
At the opposite extreme, an excessively hard tyre can transmit harsher impacts and provide less compliance over uneven surfaces. Glass, metal fragments and thorns can also penetrate the tread. However, there is no universal rule establishing that higher inflation alone increases every type of debris-related puncture. Tyre construction, object geometry and exposure matter.
A sensible commuter setup starts with a pressure appropriate for the rider and equipment, then accounts for road roughness. A small reduction from a smooth-road performance setting may improve comfort, but only if the tyre remains adequately supported over potholes and kerbs.
For conventional tubes, the lower limit is strongly influenced by the risk of bottoming out the tyre. Tubeless configurations remove the conventional inner-tube snakebite mechanism, but they do not eliminate rim damage, tyre damage or air loss after severe impacts.
Tubeless sealant may close some small tread punctures without an immediate stop. Larger cuts, sidewall damage and failures to seal can still interrupt a commute.
Inspection is an equally important part of puncture prevention. Check tread for embedded debris, inspect sidewalls for cuts or bulges, and examine rim condition after significant impacts. A damaged tyre should not be made to seem safe simply by adjusting inflation.
A reliable commuting pressure should protect the equipment while keeping the bicycle manageable and efficient. Seasonal changes can then require further checks before the same baseline is used outdoors.
When Should You Drop Tyre Pressure by 5–10 psi as Temperatures Fall?
Do not automatically reduce road tyre pressure by 5–10 psi whenever the weather gets colder. Tyre pressure already falls as air temperature decreases, and a fixed reduction may leave the tyre inadequately supported. Check its actual outdoor pressure first, then consider a modest, equipment-appropriate adjustment if wet or rough conditions justify it.
The physics is straightforward: for a fixed quantity of gas at approximately constant volume, absolute pressure changes in proportion to absolute temperature. A tyre inflated in a warm room will therefore register a different pressure after cooling outdoors.
The important detail is that this relationship uses absolute pressure and temperature, not the gauge pressure and Celsius temperature directly.
OpenStax‘s explanation of the ideal gas law provides the physical basis for understanding this pressure change, including an example involving tyre temperature.
There is no universal rule that every decrease of a few degrees Celsius corresponds to exactly 1 psi of pressure loss. The measured change depends on initial absolute pressure and temperature, with real tyre behaviour also influenced by leakage and other factors.
Consider a hypothetical winter commute where a bicycle is stored in a heated apartment overnight and ridden into much colder outdoor conditions. The tyre may register below its indoor pressure even without any puncture. Simply assuming that the original inflation setting remains unchanged can lead to an incorrect assessment of the available impact protection.
Cold and wet roads introduce another issue: grip. A more compliant tyre may improve contact with certain uneven surfaces, but lowering pressure does not automatically increase traction on every wet road. Rubber compound, road contamination, tread design and riding technique remain important.
A practical winter routine is to check pressure using a dependable gauge under conditions reasonably representative of the ride, rather than relying on the thumb-squeeze test. Recheck more frequently when temperatures vary substantially or when using tubes that lose air relatively quickly.
For especially rough or slippery routes, evaluate a small pressure reduction within approved equipment limits. Avoid treating 5–10 psi as a mandatory adjustment or a substitute for proper tyre selection.
Winter inspection should also include the tread, sidewalls and rims. Salt, grit and dirty road spray can make damage harder to see, while embedded debris can remain in a tyre between rides.
The correct winter pressure is measured and reassessed, not inferred from the thermometer alone. Riders covering longer distances should also consider how their chosen tube or tubeless system holds pressure between rides.
Which Should You Choose: Tubeless or Latex Tubes for Long Weekend Rides?
For long weekend rides on rough roads, tubeless is often the more practical option when puncture sealing and lower-pressure capability are priorities. Latex tubes are attractive for riders seeking a supple, efficient setup without maintaining sealant. The better choice depends on wheel compatibility, repair skills, route remoteness and willingness to check pressure frequently.
The key distinction is not simply which system saves more watts. It is how each system behaves before, during and after a puncture.
In a tubeless setup, the tyre and rim form an airtight system, normally supported by sealant. Small tread perforations may seal while riding, reducing the need to stop. Tubeless also removes the conventional inner tube that can be pinched against the rim during an impact.
However, the tyre casing and rim remain vulnerable to damage. An unsuitable pressure can still allow severe tyre compression or rim strikes.
Latex tubes offer a different compromise. Their flexibility can contribute to low rolling resistance when paired with a suitable tyre, but latex is more permeable to air than many conventional tube materials. Frequent pressure checks, often before each ride, are therefore important.
| Criterion | Tubeless | Latex tubes |
|---|---|---|
| Small tread perforations | Sealant may close the hole | Usually requires repair or tube replacement |
| Conventional snakebite risk | No inner tube to pinch | Tube remains vulnerable |
| Pressure retention | Depends on tyre, rim, sealant and installation | Frequent inflation checks required |
| Routine maintenance | Sealant inspection and replenishment | Pressure checks and tube inspection |
| Roadside repairs | May need plug, tube or tyre boot | Tube replacement or suitable patch |
| Rolling efficiency | Depends on complete tyre system | Can be competitive with a suitable tyre |
For a rider regularly travelling far from home, roadside repair options deserve particular attention. A tubeless puncture that will not seal may require an appropriate plug. A larger cut can require a tyre boot and a compatible spare tube, provided the damaged tyre and rim can still be used safely.
Carry a spare tube even when riding tubeless, along with the tools needed for the specific wheel and valve system. Some failures cannot be safely repaired at the roadside, making a planned alternative way home valuable.
Budget and maintenance preferences also matter. Tubeless requires compatible components and careful installation, while latex tubes may suit cyclists who prefer straightforward tyre changes and are comfortable checking pressure regularly.
Neither system automatically produces the fastest setup on every road. Tyre model, casing construction, chosen pressure and surface conditions can be more influential than the tube-versus-tubeless decision itself.
Once the tyre system is suitable, further performance improvements should be considered within the wider bicycle setup rather than treating any single component as the complete solution.
How to Check Cassette Compatibility Before You Order in 5 Checks?
Before ordering a bicycle cassette, check five things: the freehub body standard, drivetrain speed count, required gearing range, rear derailleur capacity and chain compatibility. A cassette that fits the wheel is not necessarily compatible with the shifter and derailleur. Exact component model numbers and manufacturer compatibility information should determine the purchase.
Tyre-pressure optimisation does not ordinarily require a cassette change. However, riders considering gearing modifications alongside wider tyres, new wheels or a broader performance upgrade should confirm drivetrain compatibility before spending money.
Check 1: Identify the freehub body.
The cassette must match the wheel’s freehub spline standard. Shimano, SRAM and other systems use different arrangements, and the manufacturer’s name alone does not establish compatibility.
Shimano documentation distinguishes standards including MICRO SPLINE and several HG spline configurations. Certain combinations require additional spacers, so visual similarity is not sufficient evidence of fit.
Check 2: Confirm the number of speeds.
Record the existing cassette’s sprocket count and the shifter and derailleur model numbers. An apparently similar cassette with a different speed count may not index correctly or may require other drivetrain changes.
Check 3: Choose the required gearing range.
Read the tooth count on the smallest and largest sprockets, such as a range expressed in the form of smallest-to-largest teeth. Select gearing for the gradients, riding load and cadence requirements rather than assuming that a larger cassette is always an upgrade.
Check 4: Verify derailleur limits and total capacity.
The rear derailleur must support the proposed largest sprocket and the overall chain-wrap requirement of the drivetrain. Cage length is a useful identification clue, but it is not a substitute for the manufacturer specifications.
Check 5: Confirm chain and cassette compatibility.
Check the specified chain family and speed compatibility. Some systems use particular chain designs, so a nominal speed match does not guarantee that every chain and cassette combination is approved.
For Shimano combinations, Shimano‘s official freehub and cassette compatibility table identifies supported spline and cassette arrangements, including spacer requirements for certain configurations. Other drivetrain checks still require the appropriate generation-specific documentation.
Before ordering, photograph the existing cassette markings and, when safely accessible, identify the freehub body. Note the shifter, derailleur and chain model numbers. Cross-check the complete proposed combination against official manufacturer information rather than relying on an isolated forum report.
A compatible drivetrain helps avoid unnecessary purchase errors, but improvements in rough-road speed still begin primarily with tyres, pressure and the conditions under which they are tested.
What matters before chasing a faster average speed
- Separate tyre construction and pressure improvements from unrelated drivetrain upgrades, so the effect of each change remains measurable.
- Set a baseline using the same route, controlled effort and recorded equipment conditions before comparing performance.
- Evaluate time savings alongside puncture resilience, comfort and the costs of equipment and maintenance.
How to Reduce Rolling Resistance Enough to Save 10 Minutes Over 100 km
Saving 10 minutes over 100 km through lower rolling resistance is a possible scenario, not a guaranteed result. The outcome depends on starting speed, road surface, system weight, tyre construction, power output and existing inflation pressure. The most effective approach is to improve the tyre system systematically, then measure whether the changes deliver a meaningful reduction in riding time.
Start by separating the potential benefits of each component. A poor-performing tyre inflated perfectly may still produce more resistance than a more efficient model at a suitable pressure. Conversely, installing an efficient tyre and inflating it excessively on chipseal can waste part of its potential advantage.
A practical order of priorities is:
- Tyre model and casing: choose an appropriate tyre construction for the road surface, expected puncture exposure and durability requirements.
- Pressure: use total system weight and real tyre dimensions to establish front and rear baselines, then test small changes.
- Width: select a size that suits the terrain, frame clearance and rim specifications.
- Tube or tubeless system: consider rolling efficiency alongside maintenance, puncture handling and repair requirements.
The headline target of 10 minutes becomes more useful when converted into a measurable performance question.
As an explicitly hypothetical example, a cyclist completing 100 km in 4 hours would need to finish in 3 hours and 50 minutes to save 10 minutes. That means increasing average speed from 25 km/h to approximately 26.1 km/h, assuming the same distance and no change in stopped time.
This is an arithmetic illustration of the target, not evidence that a particular tyre or pressure change will produce that speed increase. Translating a rolling-resistance reduction into ride time requires additional information about aerodynamic drag, gradient, wind, rider power and the original tyre setup.
On relatively flat roads, controlled comparisons at similar power outputs can help reveal whether an equipment change produces repeatable speed improvements. On hilly or windy routes, climbing, descending and aerodynamic conditions can obscure relatively small changes in tyre resistance.
The most reliable personal evaluation therefore compares repeated efforts on the same representative surface, with recorded pressure, temperature, tyre specification and total load.
A faster ride that produces harsh handling, repeated rim strikes or greater puncture exposure may not represent a useful overall improvement. For long-distance road cycling, sustainable speed must be considered alongside control, reliability and fatigue.
For the next ride, record the current front and rear pressures, choose one controlled change and compare the result on a familiar rough section. Keep the setup that consistently balances speed, comfort and impact protection rather than the one with the highest number on the pump.
Should you check road tyre pressure before every ride?
Checking pressure before each ride is a sensible practice, particularly with latex tubes, unfamiliar equipment or changing temperatures. Use an accurate gauge and compare the measurement with the established front and rear targets. Also inspect the tyres for visible damage rather than relying on pressure alone.
Is the maximum PSI printed on a tyre the fastest setting?
No. Maximum PSI is an equipment limit, not a performance recommendation. On rough surfaces, additional pressure can increase vibration-related losses. The correct setting also depends on the rim’s limits, tyre width, total weight and road conditions. Always respect the lowest applicable manufacturer pressure limit.
Does a smoother-feeling tyre always have lower rolling resistance?
No. Reduced vibration can indicate better compliance on rough roads, but comfort alone cannot establish the pressure that minimises energy losses. A tyre can also become too soft, increasing casing deformation or impact risk. Repeatable comparisons at controlled power help distinguish comfort improvements from measurable speed gains.
Should tyre pressure be measured in psi or bar?
Either unit can be used, provided measurements are consistent. PSI is common on many road cycling pumps and pressure recommendations, while bar is also widely used. Check that the pump’s gauge and the manufacturer’s limits use compatible units before adjusting inflation.
What should you do if lowering pressure causes repeated rim strikes?
Stop treating the lower setting as acceptable. Inspect the tyre and rim for damage, then reassess the pressure against the total load, tyre dimensions and manufacturer limits. If adequate impact protection and reasonable comfort cannot be achieved together, a compatible wider tyre or a more suitable tyre construction may be worth considering.