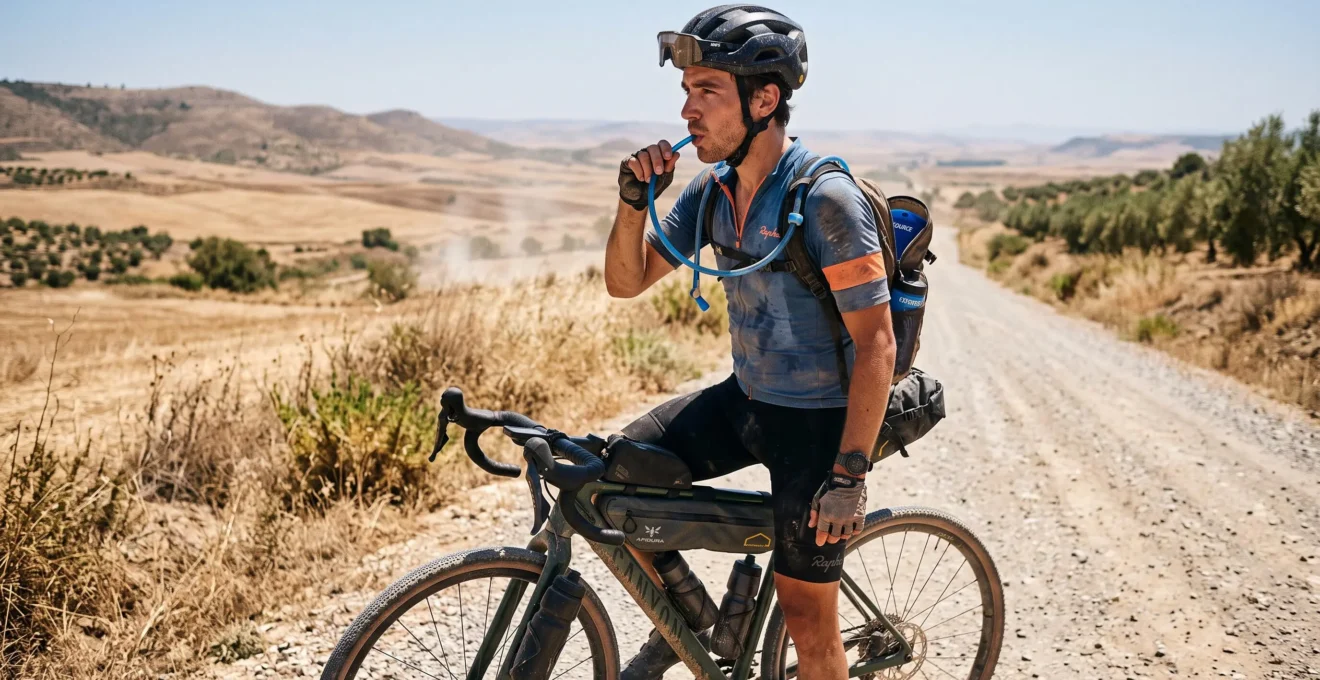
Water that starts pleasantly cool can become unappealing during a three-hour gravel or trail ride in 30°C heat. When every sip feels warm, some riders drink less frequently, even while sweating heavily on exposed climbs. The problem is not simply comfort: reduced fluid intake can contribute to dehydration and make sustained exercise harder.
Keeping water cool for three hours without adding more than 200 g requires a lightweight insulation strategy, a sensible ice-to-water balance and protection for the drinking hose. An insulated sleeve around an existing reservoir may help slow warming, while chilled water and ice provide the initial cooling. However, no universal three-hour temperature guarantee is supported by the available evidence.
The 200 g limit should apply to the additional equipment weight compared with the rider’s existing setup. Ice is not weightless, and a fully insulated hydration system may weigh substantially more than its incremental insulation components. For a useful comparison, weigh the complete loaded configurations and keep fluid capacity consistent.
The practical objective is water that remains appealing enough to drink regularly, with adequate capacity and reliable access throughout the ride.
Keeping hydration practical in 30°C heat
- Start with chilled water, appropriately sized ice and insulation around the reservoir and exposed drinking tube; verify cooling performance during a local test ride.
- Weigh the added insulation rather than assuming a complete insulated system meets the 200 g limit, and preserve enough liquid water for drinking immediately.
- Measure your fluid consumption, plan reliable refills and dry the reservoir, hose and insulation separately after riding.
- Why Does Warm Water Make You Drink Less and Fade Earlier on Climbs?
- How to Prep an Insulated Reservoir With Ice Without Blocking the Hose?
- Insulated Reservoir or Insulated Bottles for Gravel Rides: Which Should You Choose?
- The Cleaning Mistake That Traps Odours Inside Insulated Reservoir Sleeves
- When Should You Refill if the Next Water Stop Is 60 km Away in Heat?
- Hydration Backpack or Hip Pack for a 3-Hour Trail Ride: Which Should You Choose?
- Gels or Carb Drink Mix if It’s Hot and You Sweat a Lot: Which Should You Choose?
- Which Hydration Pack Design Stays Stable on Descents Without Making Your Back Soak?
Why Does Warm Water Make You Drink Less and Fade Earlier on Climbs?
Warm drinking water can become less appealing during exercise in hot weather, encouraging some riders to take fewer or smaller sips. If intake falls below fluid losses, dehydration can accumulate and contribute to reduced endurance and greater cardiovascular strain. Cool water helps primarily by making regular drinking more appealing, not because icy water is essential for absorption.
The National Athletic Trainers’ Association explains in its NATA position statement on fluid replacement that chilled beverages can increase voluntary fluid intake during exercise in the heat. This supports choosing a drink temperature that encourages consistent consumption rather than treating cooling as an isolated performance benefit.
On a climb, working muscles generate heat while the body attempts to dissipate it through sweating and increased skin blood flow. Losing more fluid than is replaced can place additional demands on circulation. Warm water does not directly cause a rider to fade; the concern is whether its temperature discourages enough drinking to worsen the developing fluid deficit.
There is no reliable universal point at which this effect suddenly appears. A rider may finish the first 90 minutes feeling reasonably strong while fluid losses accumulate, but a predictable performance decline at exactly 90 minutes is not established.
Nor does colder automatically mean better absorbed. Fluid delivery depends on several factors, including gastric emptying, beverage composition and the amount consumed. Comfortable, consistently available water is a more useful target than maintaining an ice-cold temperature at all costs.
To understand your own drinking pattern, weigh the reservoir before and after a representative local ride, accounting for any refills. Record how much you actually drank per hour. This measures consumption, not sweat rate. Estimating sweat loss additionally requires body-mass change and adjustments for fluid intake and urine output.
For a useful comparison, repeat the test with similar riding conditions and different starting water temperatures. Record whether you drank regularly, found the fluid appealing and experienced any discomfort. The result is a personal observation, not a controlled clinical experiment.
Thirst remains a valuable signal, but it should not be the only consideration when planning water capacity for a remote route. Equally, forcing excessive fluid beyond individual needs can be dangerous.
Once your typical hourly consumption is known, an insulated reservoir can be prepared around the volume you actually need rather than around an arbitrary quantity of ice.
How to Prep an Insulated Reservoir With Ice Without Blocking the Hose?
Prepare an insulated reservoir by adding small ice pieces, topping up with chilled drinking water and checking that liquid can flow freely through the hose before departure. Keep ice away from the internal outlet and insulate the exposed drinking tube. The aim is to preserve useful cooling without sacrificing immediate access to enough liquid water.
Ice preparation creates two separate challenges: maintaining a cold reservoir and keeping an unobstructed drinking line. More ice can increase the available cooling reserve, but it also occupies space that would otherwise hold drinkable liquid at the start of the ride.
There is no manufacturer-verified ice-to-water ratio in the supplied evidence that guarantees three hours of cooling at 30°C. A practical starting approach is to use less than half the reservoir’s usable volume for loose ice and retain the majority as liquid water. This is a preparation trial, not a proven optimum; adjust it after measuring actual performance.
- Check the reservoir’s stated capacity, opening and manufacturer instructions before adding ice. Do not exceed its fill limit.
- Add small cubes or crushed ice that can pass through the opening without forcing the material. Avoid large rigid blocks that could interfere with the outlet.
- Add chilled potable water, leaving the necessary space to close and seal the reservoir correctly.
- Position the reservoir so ice is not pressed into the internal outlet, then connect the drinking tube securely.
- Draw water through the entire line and confirm uninterrupted flow before placing the reservoir in its insulated sleeve or pack.
- Protect exposed tubing from direct sunlight and test the system again in its normal riding position.
Small ice fragments are easier to distribute around the reservoir than one large frozen mass. However, crushed ice can also collect near an unprotected outlet. Free-flowing water at the bite valve is the essential acceptance test.
Two different restrictions can affect flow. Ice inside the reservoir may obstruct the pickup opening, while water that has partially frozen inside tubing can block a section of the hose. In 30°C ambient heat, partial freezing is principally a risk from pre-freezing the tube or extreme initial preparation rather than from ordinary exposure to hot air.
Keep liquid water in the hose before departure, avoid freezing the complete assembled system unless its manufacturer permits it, and use a properly fitted insulating cover. If flow stops, inspect the connection and outlet instead of forcefully biting or pulling on the tube.
Cooling duration varies with starting temperature, fluid volume, available ice, insulation, sun exposure and the reservoir’s contact with the rider’s back. A sleeve reduces heat transfer but cannot eliminate it.
For the weight target, use a scale to compare the original dry carrying system with the modified dry system. Count the insulation sleeve, tube cover, clips and any replacement components. Keep water and ice quantities consistent when comparing total carried mass.
Five checks before a three-hour heat test
- Weigh the original and insulated dry setups; record the additional equipment mass in grams.
- Measure the water and ice added; record the initial available liquid volume.
- Test the bite valve in the riding position; confirm a continuous, unobstructed stream.
- Check the reservoir and hose after a representative local ride; record water temperature, remaining volume and any flow problems.
- Compare consumption with the planned route requirement; document the changes needed before a longer ride.
If your test shows insufficient liquid availability or unacceptable warming, reduce the ice fraction, change the insulation arrangement or reconsider how the water is carried.
Insulated Reservoir or Insulated Bottles for Gravel Rides: Which Should You Choose?
Choose an insulated reservoir when you need accessible drinking water over an extended section without stopping, particularly if your route has few reliable refills. Choose insulated bottles when frequent refilling, visible fluid levels and flexible weight distribution matter more. For gravel riding, combining both systems can be useful, provided the extra equipment weight remains acceptable.
Neither arrangement is universally lighter or better insulated. The comparison depends on the capacity required, the particular products used and the location of the containers on the bike or body.
A reservoir in a backpack offers drinking through a hose without reaching for a bottle. However, its insulation and cooling performance can be affected by back contact, surrounding pack materials and exposure during stops. Bottles mounted on the frame avoid direct back contact but may receive more sunlight and radiant heat.
Consider the following practical trade-offs before deciding.
| Decision factor | Insulated reservoir | Insulated bottles |
|---|---|---|
| Water capacity | Can provide one larger supply, depending on reservoir size | Distributed across available bottle cages and compatible mounts |
| Drinking access | Hose available while riding | Requires reaching for a bottle or stopping when necessary |
| Refilling | May require removing or opening the pack | Individual bottles are generally quick to remove and refill |
| Weight distribution | Often concentrated on the back or hips | Usually carried on the bicycle frame |
| Remaining fluid visibility | Typically concealed inside the pack | Often easier to assess at a glance, depending on bottle opacity |
| Cooling performance | Depends on insulation, body contact and initial fluid temperature | Depends on bottle insulation, frame position and sun exposure |
| Cleaning | Reservoir, hose, valve and sleeve need attention | Bottles and caps are generally more accessible for cleaning |
Unpredictable water access makes modularity valuable. A café may be closed, a public fountain may be unavailable, and a stream should not be assumed safe to drink without appropriate treatment. Separately refillable bottles can make it easier to adapt when a reliable source becomes available.
Conversely, a reservoir may encourage more frequent sipping simply because its hose is convenient. Its remaining volume is less obvious, so planned checks are important.
A hybrid configuration offers another option: store plain drinking water in the insulated reservoir and carbohydrate drink in a separate bottle. This allows the rider to adjust energy intake independently of water consumption while limiting sugary residue inside the reservoir hose.
One product reference illustrates why equipment weight must be interpreted carefully. The HydraPak HydraSleeve 3L specifications list a 3 L system weighing 308 g and including an insulated drinking tube. That figure describes the listed product, not the additional mass compared with a rider’s existing equipment.
308 g
Listed weight of the HydraPak HydraSleeve 3L system. It is not an independently verified insulation-only weight or evidence of maintaining cool water for three hours at 30°C.
HydraPak manufacturer product specifications.
Before buying, compare complete configurations with the same usable water capacity. Pay particular attention to whether a thicker insulated reservoir will fit its intended compartment.
Whatever configuration you choose, maintenance becomes more important when insulation, drinking tubes and sweetened beverages are involved.
The Cleaning Mistake That Traps Odours Inside Insulated Reservoir Sleeves
One avoidable storage mistake is placing a reservoir back inside its insulated sleeve while either component is still damp. Moisture can remain trapped against surfaces that receive little airflow, creating conditions favourable to microbial growth and unpleasant odours. Clean the drinking components after each ride and dry the reservoir and sleeve completely before reassembly.
Insulation changes how a reservoir is handled after riding. A bare reservoir can be opened and suspended directly, while a close-fitting sleeve conceals its exterior and may retain moisture in seams or fabric lining.
Drying the reservoir alone is not enough if the sleeve remains damp. The exterior of the reservoir, the inside of the sleeve and the drinking tube all require separate inspection.
HydraPak’s reservoir cleaning instructions recommend cleaning after each trip and drying components fully before storage. For compatible models, the manufacturer describes turning the reservoir inside out and washing it with warm water and mild soap. It also recommends disconnecting and cleaning the drinking tube and bite valve.
Follow the instructions for your specific reservoir. Not every bladder can be inverted safely, and some insulated sleeves require different care from the water-contact components.
A reliable two-stage drying routine starts with the reservoir itself:
- Empty the reservoir and wash it according to its manufacturer instructions.
- Disconnect and clean the tube and bite valve, then leave them to dry separately.
- Hang the reservoir open in a clean, ventilated location. Keep the opening unobstructed so air can circulate.
- Remove the insulated sleeve where its design allows, inspect its lining and dry it separately according to its care instructions.
- Reassemble only after every component is fully dry to the touch, including seams, connectors and concealed contact surfaces.
Drying time is not universal. Material thickness, humidity, airflow and the amount of retained water all affect how long components need. A sleeve that feels dry outside may still be damp along its internal seams.
If an odour persists after cleaning, inspect the sleeve lining as well as the bladder, tube and valve. A smell coming from a seemingly clean reservoir does not prove that the sleeve is responsible, but a damp or contaminated sleeve is a reasonable place to investigate.
Insulation slows heat transfer in both directions, but that thermal property alone does not establish faster microbial growth than in an uninsulated reservoir. Moisture, contamination and storage conditions are more defensible factors to address.
Once the system is clean and ready, the more consequential planning question is whether the volume it carries can cover the next exposed stretch of riding.
When Should You Refill if the Next Water Stop Is 60 km Away in Heat?
Refill at the last reliable water source before a 60 km hot-weather section if your remaining supply cannot cover the estimated riding time plus a sensible contingency. Calculate the required volume from your measured hourly consumption, expected travel time and route uncertainty. Distance alone cannot determine how much water you need.
A 60 km stretch may take very different amounts of time depending on gradient, surface conditions, wind, fitness and stops. The same rider may also drink at different rates as temperature and intensity change.
Use a personal planning calculation:
Planned water volume = measured hourly drinking rate × estimated hours to the next reliable source + contingency volume.
For a deliberately hypothetical example, a rider who drinks 0.6 L per hour and expects the section to take three hours would plan for 1.8 L of consumption before adding any contingency. If the rider chooses an additional 0.5 L as a planning reserve, the resulting carrying target is 2.3 L. These values demonstrate the calculation; they are not universal hydration prescriptions.
Illustrative planning scenario: a remote 60 km section
A rider estimates three hours to the next confirmed refill and has measured typical consumption at 0.6 L per hour under comparable conditions. The calculated consumption is 1.8 L. A hypothetical additional 0.5 L contingency produces a 2.3 L carrying target.
If the next source is uncertain, the rider must reassess the route rather than assume the contingency will cover an unavailable refill. Slower progress or greater heat exposure can change the requirement.
The earlier reservoir test provides a starting point, not a fixed prescription. A more complete sweat-loss assessment can help clarify fluid requirements, while medical circumstances and individual tolerance may require a different approach. Avoid both inadequate replacement and excessive drinking.
In remote heat, refill based on source reliability rather than waiting for the reservoir to approach empty. A verified water point encountered sooner than expected may be the best opportunity to replenish supplies.
Review the route before departure, checking water-source locations against expected arrival times. A shop scheduled to be closed when you pass it is not a dependable refill. A mapped fountain should also be treated as uncertain unless its availability is confirmed.
If available water is lukewarm, use it when safe rather than refusing to refill because it lacks the original cooling benefit. Shade the reservoir during the stop, and add clean ice only if a suitable source is available. Insulation may then slow subsequent warming, but cannot independently cool newly added warm water.
When water access fails or signs of heat illness develop, shorten or stop the ride and seek appropriate assistance. Cooling equipment is not a substitute for safe route planning.
Water volume also determines which carrying arrangement is realistic, especially when deciding between a backpack and a smaller hip-mounted system.
Hydration Backpack or Hip Pack for a 3-Hour Trail Ride: Which Should You Choose?
Choose a hydration backpack when your measured fluid requirement and equipment load exceed what a hip pack can comfortably carry. Choose a hip pack when reducing upper-back coverage and keeping the load lower are more important, and its capacity is sufficient. A three-hour ride does not automatically require either design; temperature, water access and personal consumption determine the decision.
The difference becomes especially noticeable in hot weather. A backpack generally covers more of the upper back, potentially limiting local ventilation and maintaining contact between the rider and the water compartment. A hip pack concentrates contact around the waist and lower back.
Reduced contact area may improve comfort, but it does not guarantee lower whole-body heat strain or less sweating. Pack materials, clothing, riding intensity and airflow all contribute.
A backpack’s principal advantage is carrying capacity. Water, tools, food, protective clothing and repair equipment can occupy dedicated compartments. A hip pack may offer easier access and a less covered upper back, but the available space is more limited.
For a concrete example, the Osprey Seral/Savu owner’s manual documents Seral models with a 1.5 L lumbar reservoir, an AirScape back panel and a lumbar wrap design. The Savu range uses bottle storage. These product details illustrate different carrying arrangements without establishing a universal advantage in cooling or stability.
Whether 1.5 L is enough for three hours depends on the rider’s measured needs and refill opportunities. A hip pack with compatible frame bottles may increase total capacity while distributing the load across the body and bicycle. However, additional bottles and mounts must still be included in the complete weight assessment.
Before choosing a pack, verify:
- Whether its usable capacity covers the expected section between refills.
- Whether the hose reaches the rider’s preferred drinking position without pulling or snagging.
- Whether water can be refilled without unpacking unnecessary equipment.
- Whether a thicker insulated reservoir fits the compartment without deforming or obstructing the closure.
- Whether the loaded pack remains comfortable and secure in a seated, standing and descending position.
A smaller hip pack can be a worthwhile comfort compromise on very hot rides, provided the reduction in carrying capacity does not create a hydration risk.
With the carrying system established, decide how much of its drinking capacity should hold plain water and how much, if any, should be reserved for carbohydrate intake.
Gels or Carb Drink Mix if It’s Hot and You Sweat a Lot: Which Should You Choose?
Choose gels with separately available water when you want to adjust carbohydrate intake without tying it to how much fluid you drink. Choose a carbohydrate drink mix when its concentration, taste and required drinking volume fit your established hydration and fuelling needs. Neither option is inherently superior in the heat; digestive tolerance and practical consistency are decisive.
During endurance exercise, fluid and carbohydrate requirements are related but not identical. Heat can increase sweating, while energy demands depend on duration, intensity and the rider’s fuelling strategy.
A carbohydrate drink combines two tasks: delivering energy and supplying fluid. This simplifies equipment and reminders when the rider drinks regularly. However, a fixed drink concentration connects carbohydrate intake to fluid intake.
For example, if a rider needs to drink more than planned because of conditions, consuming additional carbohydrate drink also increases carbohydrate intake unless plain water is available separately. Conversely, drinking less may reduce both fluid and energy intake.
Gels allow carbohydrate intake to be managed more independently. They still need to be consumed according to product instructions, and sufficient water should remain available where required for tolerance and appropriate use.
The NATA fluid-replacement statement also notes that beverage carbohydrate concentration can influence gastric emptying and absorption. Therefore, making a drink increasingly concentrated to save carrying volume is not automatically a better strategy.
Consider the following decision points:
- Low or inconsistent fluid intake: separate plain water from carbohydrate intake so that energy consumption does not depend entirely on drinking a fixed mixture.
- Reliable, comfortable sipping: a drink mix may simplify fuelling if its concentration matches the rider’s needs and gastrointestinal tolerance.
- Limited reservoir-cleaning access: consider storing carbohydrate drinks in a separate bottle to make sweetened equipment easier to inspect and clean.
- High sweat losses: address fluid and electrolyte needs separately from carbohydrate targets, using an individually appropriate plan.
Sweetened liquids require careful cleaning after use. Leaving drink mix in a warm reservoir can create residues and opportunities for microbial growth, although the available source material does not establish a specific fermentation rate or safe holding time in 30°C conditions.
Test your chosen fuelling arrangement during a shorter local ride before relying on it remotely. Record drinking comfort, stomach tolerance, carbohydrate intake and whether the setup encourages or discourages regular consumption.
After choosing fluids and fuel, the remaining equipment question is how to carry the resulting load without sacrificing control or comfort on technical descents.
Key takeaways before choosing a pack design
- Judge pack stability with the water and equipment volume you will actually carry, not with an empty pack.
- Separate ventilation claims from measured comfort: a cooler-feeling back does not necessarily mean the pack stays secure on rough terrain.
- Test hose access, weight movement and contact pressure together before committing to a hot, remote ride.
Which Hydration Pack Design Stays Stable on Descents Without Making Your Back Soak?
A hydration pack that stays secure on descents combines a close-fitting harness, effective load restraint and limited movement of the water reservoir. To reduce the sensation of a soaked back, look for ventilation features and manageable contact coverage without compromising stability. The best choice depends on riding position, terrain, carried water volume and individual fit.
Descending places particular demands on a hydration pack. Repeated impacts, braking and changes in body position can make poorly secured equipment shift relative to the rider.
Three design characteristics deserve attention: harness adjustment, weight placement and reservoir restraint.
A well-fitted shoulder harness and sternum strap can help prevent unwanted movement. A waist or hip support may assist with controlling load movement, depending on pack design. The water compartment should also restrict lateral sloshing and shifting rather than allowing a partly filled reservoir to move freely.
Reservoir position introduces a trade-off. A high-mounted load changes how weight is distributed across the back, while a lower lumbar design concentrates more load around the hips. Neither configuration guarantees superior handling for every rider.
Back ventilation also needs careful interpretation. The dampness felt beneath a pack often comes from sweat retained against clothing and contact surfaces. Condensation on a cold reservoir, or leakage from a valve or connection, can produce additional moisture but should be investigated separately.
A wet back does not automatically mean the hydration reservoir is leaking. Check whether moisture is concentrated around a connection or spread across the pack’s main contact area.
Ventilated mesh panels can separate portions of the pack from the back. Channelled padding creates airflow paths while retaining contact elsewhere. Hip-mounted systems leave much of the upper back uncovered. Each arrangement has different implications for fit and load control, and the available sources do not establish one universally superior design.
Before buying or committing to a longer ride, perform a loaded-fit test:
- Fill the reservoir to the volume planned for the actual ride and add the usual equipment.
- Adjust the harness, sternum strap and any waist support while wearing your riding clothing.
- Adopt a descending posture and move through the positions you normally use on rough terrain.
- Check the shoulders, sternum and lower-back or hip contact points for excessive pressure, shifting or rubbing.
- Confirm that the hose remains accessible, the reservoir is restrained and the pack does not interfere with riding movements.
Start on safe, familiar terrain before testing the equipment on more technical ground. A pack that appears stable while standing may behave differently when partially emptied or repeatedly loaded by trail impacts.
Under the 200 g additional-weight constraint, prioritize improving the existing system before replacing it with a larger insulated pack. Verify component weights, reservoir compatibility and comfort rather than relying on ventilation or insulation marketing alone.
For your next hot-weather ride, start with a local three-hour equipment test under representative conditions: measure added weight, fluid consumption, water temperature, hose flow and pack stability. Use those observations to choose the lightest practical arrangement that preserves safe water access and comfortable, regular drinking.
Can an insulated reservoir guarantee cool water for three hours at 30°C?
No. Cooling duration depends on starting fluid temperature, ice volume, reservoir insulation, exposed tubing, sun exposure and contact with the rider’s body. The available manufacturer specifications do not demonstrate a universal three-hour cooling result at 30°C. Test the actual configuration before relying on it for a long ride.
Does the 200 g limit include the water and ice?
The distinction depends on the chosen weight target. For an equipment-upgrade limit, compare the added dry components against the existing system. For a strict total-carried-weight limit, include changes in water, ice, containers and mounts. Ice contributes to carried mass just as liquid water does, so consistent fluid quantities are essential for fair comparisons.
Should the drinking tube be insulated separately from the reservoir?
Insulating exposed tubing is sensible when the hose sits in direct sun and the first mouthful becomes noticeably warmer than the water inside the reservoir. A tube cover may help limit heat gain, but its effectiveness depends on material and exposure. Check that it does not interfere with the bite valve, connector or hose routing.
Is colder water always safer or better for endurance performance?
No. Chilled beverages may encourage drinking during exercise in the heat, but there is no universal requirement to consume ice-cold water. The important outcomes are adequate fluid availability, tolerable drinking temperature and individual hydration needs. Neither forcing excessive drinking nor neglecting fluid replacement is appropriate.
What should you do if reservoir water becomes warm before the next refill?
Continue using safe drinking water if it remains palatable rather than allowing its temperature alone to prevent hydration. Seek shade during stops, protect the reservoir from direct sun and refill at a reliable potable-water source. If water availability is inadequate for the remaining route, change the plan instead of relying on insulation to solve a supply shortage.