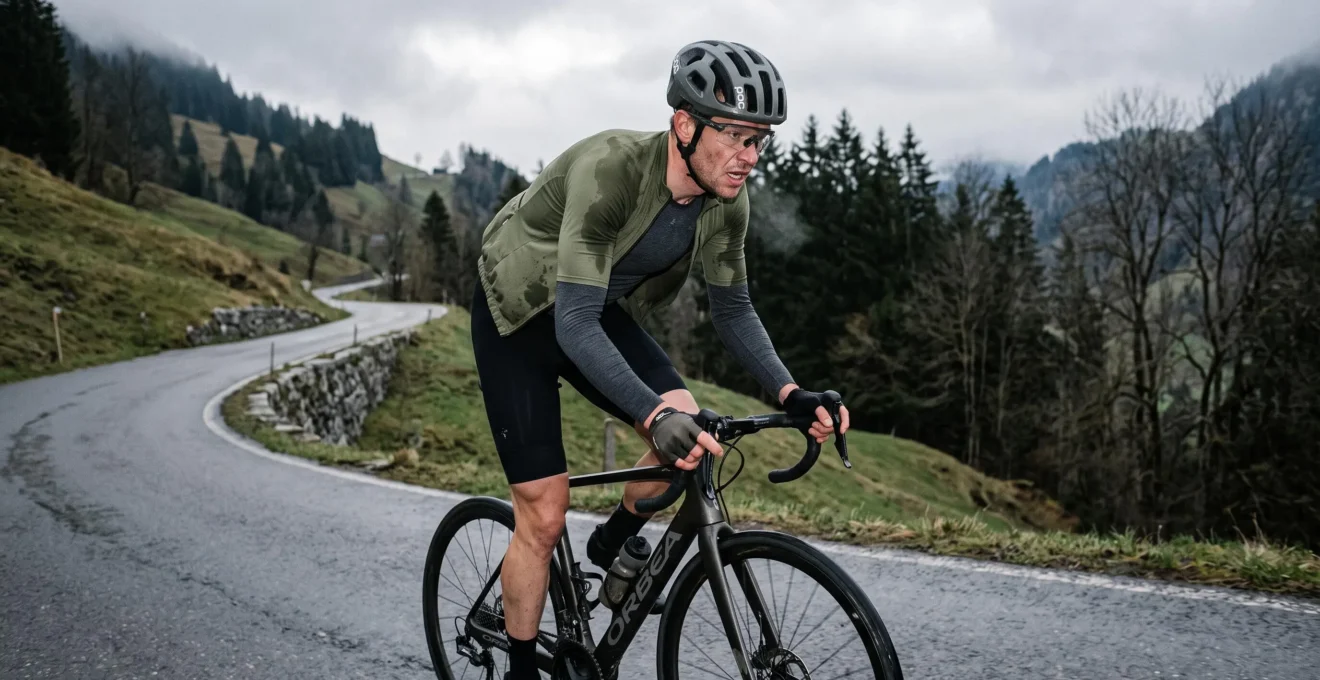
For cyclists who sweat heavily on climbs, a thin, close-fitting synthetic or merino-synthetic base layer is usually the most practical starting point. It should move moisture away from the skin without holding so much liquid that you become chilled when your effort drops. But fabric alone cannot solve the problem: ventilation, wind protection and the layers worn over it are just as important.
The familiar pattern is frustrating. You climb in cool weather, feel warm despite the temperature, and arrive at the summit with a damp chest and back. Minutes later, the descent feels uncomfortably cold, even though you are wearing technically advanced cycling clothing.
The solution is to match your base layer to your sweat output, riding intensity, climate and opportunities to change or dry clothing. A synthetic mesh vest may suit a climb-heavy ride, while a merino blend may be more useful for commuting or touring. The right choice is the garment that works throughout the ride, not simply the one that feels driest in the shop.
Quick answers for cyclists who sweat heavily
- Choose thin, breathable construction: lightweight synthetic or open-knit fabrics are sensible first options for demanding climbs, provided the outer layers allow moisture to escape.
- Match material to your routine: synthetics are practical for frequent washing and drying; merino can help with odor management; blends offer a useful compromise.
- Protect the descent: carry an accessible wind-blocking layer and ventilate before your base layer becomes heavily saturated.
- Why Can a « Moisture-Wicking » Layer Still Leave You Feeling Wet and Cold?
- How to Choose Base-Layer Thickness for a 5–15°C Ride Without Overheating?
- Merino or Synthetic for a 4-Day-a-Week Commuter?
- The Seam Placement Mistake That Causes Nipple and Underarm Chafing on Long Rides
- When Should You Swap Base Layers Mid-Day on a Multi-Day Tour to Stay Comfortable?
- How to Choose Base, Mid, and Shell Layers for Windy Rides Without Overheating?
- Gilet, Softshell, or Rain Jacket for Changeable Weather?
- How to Layer for a 5°C Morning Ride That Warms to 15°C Without a Bulky Bag
Why Can a « Moisture-Wicking » Layer Still Leave You Feeling Wet and Cold?
A moisture-wicking base layer can leave you wet because moving sweat through fabric is not the same as removing it from your clothing system. When sweat production exceeds evaporation, moisture accumulates despite effective wicking. The discomfort becomes particularly noticeable when climbing stops and wind or lower exertion makes the damp fabric feel cold.
Wicking describes liquid movement; absorption describes liquid retention. A fabric can distribute sweat efficiently across a larger surface while still holding enough moisture to feel saturated. Some fibers absorb moisture internally, while others primarily move liquid through spaces between fibers and yarns.
These are distinct textile properties. The AATCC TM217-2025 textile moisture-management test evaluates liquid movement through and across textile samples using image analysis. Its scope includes moisture-spreading and transport characteristics, but it does not establish how comfortable a particular garment will feel during a mountain climb.
Evaporation provides the crucial next step. Sweat can spread across the base layer but cannot disappear faster than surrounding conditions allow. As humidity builds between the skin, jersey and outer layers, the driving force for evaporation decreases. High ambient humidity, weak airflow and poorly ventilated outerwear all make this more difficult.
In relatively dry air, the same base layer may release moisture more readily than in humid conditions. Even a breathable fabric can remain wet if a closed shell prevents sufficient vapor and heat exchange.
The most uncomfortable moment may come after the climb. During hard pedaling, metabolic heat can mask the wetness. On the descent, heat production falls while moving air increases convective cooling and, where evaporation continues, evaporative heat loss. Damp clothing also loses some of its insulating effectiveness. Wind exposure can therefore turn accumulated sweat into a major source of discomfort.
A simple home screening test is to place a small, equal-sized drop of water on the inside of two clean garments and observe how it spreads. Then compare how the fabrics feel as they dry under similar conditions. Repeat on the outside if necessary. This can reveal obvious differences in liquid spreading, but it is not a standardized laboratory measurement or a reliable simulation of cycling sweat production.
For heavy sweaters, the real performance target is not maximum liquid spreading in isolation. It is a combination of suitable fabric, controlled insulation, effective ventilation and wind protection when effort decreases.
How to Choose Base-Layer Thickness for a 5–15°C Ride Without Overheating?
For a ride between 5°C and 15°C, heavy sweaters should generally start with a thin, breathable base layer rather than a thick thermal one. Choose enough coverage for comfort at the start, then adjust warmth using removable outer layers. Climbing intensity, wind exposure and your personal sweat rate matter more than temperature alone.
A thicker base layer may initially feel reassuring in cold air. But if it holds more moisture than the rider can evaporate, that additional fabric can become an unwanted reservoir of sweat. The apparent warmth advantage can disappear when riding intensity falls.
The aim is to find the lightest construction that remains comfortable across the entire ride, not merely during the first few minutes. A fine synthetic knit, lightweight merino blend or open mesh construction may all work, depending on airflow and the garments above them.
The following grid provides practical starting points, not experimentally validated temperature thresholds.
| Sweat output | Riding conditions | Suggested starting setup |
|---|---|---|
| Light | Steady riding, limited wind | Lightweight knit base layer; adjust insulation to personal comfort. |
| Light | Steady riding, exposed roads | Lightweight base layer with a wind-resistant outer option. |
| Heavy | Climb-heavy ride, limited wind | Very light or open-knit base layer with readily adjustable ventilation. |
| Heavy | Climb-heavy ride, strong wind | Thin base layer plus an accessible wind-blocking garment for exposed sections and descents. |
Mesh and open-knit fabrics change the trade-off between coverage and moisture transport. Their open structure can reduce the amount of fabric holding liquid and support airflow when the outer clothing allows it. However, mesh is not automatically cooler beneath a closed, poorly ventilated shell.
Fit also matters. A base layer that sits comfortably against the torso can help maintain contact for moisture transfer. It should not restrict breathing, pull at the shoulders or become loose enough to bunch under a jersey.
A frequent mistake is dressing for a 15°C climb while forgetting the 5°C descent. The answer is not necessarily a thicker base layer: that could increase overheating on the ascent. Instead, let the mid layer and wind barrier handle the change in thermal demand.
Once thickness and construction are appropriate, the next question is which fiber composition fits your weekly riding and laundry routine.
Merino or Synthetic for a 4-Day-a-Week Commuter?
For someone commuting by bike four days a week, synthetic base layers are often more practical when rides are sweaty and garments must dry quickly after washing. Merino may be preferable when odor management and moderate daily use are priorities. Merino-synthetic blends offer a middle option, but their performance depends on the actual construction and fiber proportions.
Commuting creates different demands from an occasional weekend ride. A garment may need to survive frequent washing, fit comfortably beneath workday clothing arrangements and be ready again the following morning.
Rather than choosing by the vague labels of natural comfort versus technical performance, compare the fabric against four practical needs.
| Criterion | Merino | Synthetic | Merino-synthetic blend |
|---|---|---|---|
| Odor management | Often advantageous for repeated moderate use. | Odor retention varies with fiber treatment, construction and washing. | Can improve odor performance compared with polyester alone. |
| Overnight drying | May require more drying time, particularly in heavier constructions. | Often practical for quick washing and drying. | Varies by composition and fabric structure. |
| Frequent washing | Requires attention to care instructions and garment durability. | Often convenient for regular laundering. | Depends on blend design and construction. |
| Cost per wear | Depends on purchase price and lifespan. | Depends on purchase price, durability and replacement frequency. | Must be assessed garment by garment. |
Merino’s odor advantage has relevant experimental support. A study published in Textile Research Journal, examining polyester-wool odor retention, found substantially lower odor intensity in fabrics containing 20% wool compared with 100% polyester under the studied conditions. The research also found that pure wool had greater odor-sorption capacity under higher odor loads.
20% wool
In the cited textile study, fabrics with this wool content showed substantially reduced odor intensity compared with pure polyester. This does not establish an ideal blend ratio for cycling comfort, drying speed or durability.
Wang and colleagues, Textile Research Journal, published in the July 2019 volume.
Blends deserve consideration because polyester or nylon can contribute to a garment’s strength, recovery and maintenance characteristics while wool contributes its own moisture-sorption and odor-management properties. Some garments use core-spun yarns with synthetic reinforcement. However, a blend label alone does not prove greater durability or faster drying.
A useful commuting decision rule is to prioritize merino when rides are moderate, odor matters and two or three garments can rotate through drying and washing. Prioritize synthetics or suitable blends when every commute involves heavy sweating and dependable next-morning drying is essential.
Frequent laundering changes the economics. A cyclist riding four days weekly should consider wash frequency, visible pilling, seam condition and loss of fit over time. Cost per wear can be calculated as the garment’s purchase price divided by the number of times it is actually worn, although future lifespan cannot be known in advance.
Whichever material you select, comfort can still fail if the garment’s seams rub against damp skin during repeated movements.
The Seam Placement Mistake That Causes Nipple and Underarm Chafing on Long Rides
The main seam-placement mistake is choosing a base layer that puts raised stitching directly across areas of repeated contact, especially beneath the arms or across the chest. A seam may feel harmless when dry and standing upright, yet cause irritation after prolonged riding. Check seam construction and placement in your actual cycling position.
Flatlock seams join fabric panels with relatively low-profile stitching, making them worth considering for close-fitting cycling apparel. Conventional overlocked seams can create raised edges or allowances that are more noticeable against the skin, depending on their construction.
Neither label guarantees a friction-free garment. A well-positioned conventional seam can be more comfortable than a flat seam repeatedly pulled across a sensitive area.
Moisture amplifies the problem. Royal Society research on skin hydration and textile friction demonstrated that skin hydration affects friction against textile materials. In the experimental conditions, friction against completely wet fabric exceeded twice the reference value measured with naturally hydrated skin and dry fabric.
The experiment examined forearm skin and textile contact rather than cycling-specific garments. It supports the physical mechanism, not a precise prediction of nipple or underarm chafing during a particular ride.
Fit determines whether a seam stays out of a friction zone. A narrow chest panel can pull seams inward; a restrictive armhole may create repeated rubbing beneath the armpit; an inadequate torso length can cause fabric to ride up when bending forward.
Check these features while leaning onto the hoods and then into the drops, rather than evaluating the garment only while standing upright.
Before keeping a new base layer, inspect it inside out. Look for raised stitching, rough thread ends, labels and areas where multiple fabric panels converge. Then put it on beneath your usual jersey and repeat your normal riding posture.
For occasional localized rubbing, a suitable anti-chafe product or skin-safe protective tape may help. Test any product on a small area and avoid applying adhesive directly to already damaged skin. If rubbing persists because the cut is wrong, exchanging the garment is generally a better solution than relying on repeated applications.
Five checks before your next long ride
- Turn the base layer inside out and identify raised stitches or rough junctions; make a short list of potential contact points.
- Wear it with your usual jersey on the hoods and in the drops; record any seam that crosses the nipples or underarms.
- Move your arms through your normal riding range; identify pulling, bunching or seam migration.
- After a short test ride, inspect your skin for redness or repeated rubbing and note the exact location.
- Decide whether the garment passes, needs a minor protective measure or should be exchanged; record that decision before a longer outing.
A base layer that fits correctly is easier to use across consecutive riding days, but touring introduces another challenge: knowing when a garment is too wet to keep wearing.
When Should You Swap Base Layers Mid-Day on a Multi-Day Tour to Stay Comfortable?
Change your base layer during a multi-day cycling tour when it remains heavily damp, makes you cold during stops, causes irritation or is unlikely to dry before your next riding session. There is no universal changeover time. Your sweat rate, weather, available drying conditions and the temperature of the next riding segment should guide the decision.
A midday stop offers a useful opportunity to assess garment condition. Check whether your base layer feels cool and wet against the chest and back, whether discomfort appears as soon as you stop pedaling, and whether the remaining route includes exposed descents.
The decision should follow observable conditions rather than the clock. A short, moderate morning ride may leave a layer comfortable enough to continue wearing. Several hours of hard climbing in humid air may justify changing much earlier.
Touring also creates a drying problem that ordinary day rides do not. A garment rinsed in a hotel sink, campsite washroom or humid guesthouse may still contain moisture the next morning, even if it is made from synthetic fibers.
A practical packing approach is to rotate two base layers:
- Riding layer: the garment worn during the current stage.
- Dry reserve: a clean, dry option protected from rain and packed separately from wet clothing.
When the riding layer becomes uncomfortable, the dry reserve can replace it. The removed garment can be rinsed when suitable water and drying facilities are available, then hung with as much airflow as conditions permit.
This approach is particularly useful on routes where laundry facilities are unpredictable. A garment that dries well in a ventilated bedroom may dry much more slowly in cold, humid accommodation.
Merino can reduce odor-related pressure to wash after every moderate outing, but odor tolerance is not proof that wearing a garment repeatedly is hygienically appropriate under every condition. Heavy sweat accumulation, dirt and skin irritation may still make washing necessary.
Before changing into a reserve garment, check the underarms, chest panels and thicker seam areas. These can remain damp when other sections feel dry. A cool, damp replacement may offer little improvement over the garment being removed, particularly before windy riding.
Consider your route’s water availability as well. If reliable washing and overnight drying are possible, a lightweight synthetic rotation may be convenient. Where washing is infrequent, odor-resistant fabrics may help, provided each garment remains clean and comfortable enough to wear.
Changing garments can reset comfort, but it does not solve a clothing system that continually traps sweat. Managing the outer layers is the next priority.
How to Choose Base, Mid, and Shell Layers for Windy Rides Without Overheating?
For windy cycling, choose layers as a coordinated system: a moisture-managing base layer, only as much mid-layer insulation as conditions require, and an outer layer that blocks wind while allowing heat to escape. Heavy sweaters should prioritize adjustable ventilation because even an excellent base layer cannot prevent dampness beneath overly restrictive outer clothing.
The moisture-management capacity of the entire outfit matters more than the advertised breathability of any single garment. When the outer layer provides insufficient vapor transport or ventilation, sweat can accumulate beneath it regardless of how efficiently the base layer spreads liquid.
Think in terms of a ventilation budget. Every garment changes airflow, insulation and the rate at which moisture can leave the clothing system. Adding an outer shell may improve protection from wind while reducing the capacity to release heat during hard climbing.
The American College of Sports Medicine describes the separate functions of cold-weather clothing layers in ACSM’s cold-weather exercise clothing recommendations. The inner layer manages moisture, the middle layer provides insulation and the outer layer protects against environmental exposure. The guidance also identifies ventilation openings as a way to release heat during exercise.
For a climb-heavy route, choose the system in this order:
- Assess outer-layer requirements: determine expected wind exposure and whether meaningful rain protection is necessary.
- Select insulation: add a light mid layer only if the conditions and expected effort justify it.
- Tune the base layer: choose lightweight fabric and construction appropriate to the heat and sweat likely to build beneath those outer garments.
Starting with the shell may seem counterintuitive, but it prevents the common mistake of choosing an extremely breathable base layer and then sealing it beneath clothing that restricts moisture escape.
Wind adds another complication. It can accelerate convective heat loss and increase evaporation where moisture and airflow permit. This may be helpful while overheating but uncomfortable when exertion drops, especially with damp clothing.
Use adjustable openings early. Partially opening a front zipper, loosening cuffs where appropriate or using purpose-built ventilation can release heat before sweat accumulation becomes severe. Make adjustments when safe and appropriate for riding conditions.
These changes may avoid a stop to remove a mid layer. However, when ventilation alone cannot control overheating, removing unnecessary insulation remains the more effective choice.
The system becomes easier to manage when the outer garment is selected for the actual weather rather than simply for maximum protection.
Gilet, Softshell, or Rain Jacket for Changeable Weather?
A lightweight windproof gilet is often the most versatile outer garment for cyclists who sweat heavily on climbs in predominantly dry, changeable weather. A softshell suits cooler, windier conditions with relatively steady effort, while a rain jacket is more appropriate when substantial rainfall is expected. The right choice depends on precipitation, temperature variation and climbing frequency.
The central trade-off is straightforward: more weather protection can reduce the ease with which excess heat and moisture escape. A garment that feels ideal on an exposed flat road may become uncomfortable halfway up a sustained climb.
Compare the options using three criteria: the likelihood and duration of rain, the expected temperature range, and how frequently your ride alternates between hard ascents and lower-effort sections.
| Garment | Most suitable conditions | Main limitation |
|---|---|---|
| Windproof gilet | Mostly dry conditions, variable wind and frequent climbing. | Limited protection for arms and, depending on construction, rain. |
| Softshell | Cool, mainly dry, windy weather with manageable intensity. | May retain excessive heat during demanding climbs. |
| Packable rain jacket | Expected rain or a clear need for broader weather protection. | Can increase internal moisture accumulation, especially when ventilation is limited. |
The gilet is particularly useful for climb-and-descent riding. It protects the chest and core against moving air while leaving more opportunities for heat release through the arms and, depending on its back-panel design, the rear of the garment.
A softshell provides a more substantial barrier against cool wind. Its value is greatest when the rider needs continuing protection and is unlikely to generate enough heat to overwhelm the garment’s ventilation capacity.
A rain jacket addresses a different risk. When extended rainfall is likely, protection from external water may outweigh the disadvantage of reduced breathability. Features such as adjustable openings and a usable front zipper are particularly valuable for riders with high sweat output.
For packing, distinguish between what belongs on your body and what must remain available. On a dry, climb-heavy departure, a light base layer and jersey may be enough while a gilet stays in a rear pocket. If meaningful rain is expected, carrying a packable waterproof jacket may be more sensible than wearing a warm softshell throughout.
Do not judge packability by compressed size alone. The more useful question is whether the extra garment provides a substantial change in comfort or protection when deployed.
With the correct outer layer chosen, a large morning-to-afternoon temperature change becomes manageable without carrying a bulky collection of clothes.
Key takeaways before building your riding kit
- Use the base layer primarily for moisture management; make large warmth adjustments with removable outer garments.
- Plan for the highest-risk transition, especially an exposed descent after sustained climbing.
- Choose compact pieces that change wind protection or insulation meaningfully, rather than carrying several overlapping layers.
How to Layer for a 5°C Morning Ride That Warms to 15°C Without a Bulky Bag
For a ride starting at 5°C and warming to 15°C, a practical lightweight setup is a thin moisture-wicking base layer, a cycling jersey or light insulating layer, and a packable windproof gilet. Adjust ventilation or remove insulation as you warm up, but keep wind protection accessible for exposed descents. Add rain protection when the forecast requires it.
This is a reference setup, not a universal prescription. Riding speed, wind, rain, personal cold tolerance and sweat rate can all change what feels comfortable.
For a hypothetical ride with a cool morning start, a substantial climb and a windy descent, the following sequence offers a practical way to organize clothing decisions.
| Ride phase | Clothing setup | Practical adjustment |
|---|---|---|
| 5°C departure | Thin base layer, appropriate jersey or light mid layer, gilet. | Start comfortably protected without excessive insulation. |
| Climbing and warming up | Base layer and jersey, with outer protection adjusted as needed. | Open the front zipper or stow the gilet before overheating. |
| Summit stop | Restore wind protection over the existing layers. | Avoid prolonged exposure while damp and cooling down. |
| Windy descent | Base layer, suitable insulation and wind-blocking outer layer. | Prioritize protection from moving air and reduced heat production. |
| 15°C return | Light base layer and jersey, adjusted to conditions. | Reduce unnecessary insulation and maintain ventilation. |
The most useful clothing changes should make a noticeable difference. Removing a gilet can increase ventilation and reduce wind protection in one movement. Removing a light mid layer can reduce insulation considerably. Both adjustments are more meaningful than carrying several garments with almost identical functions.
A compact kit also makes the descent easier to prepare for. Rather than relying on a thick base layer to provide all-day warmth, keep a wind-blocking garment readily accessible at the summit.
Before committing to the kit on a long outing, calibrate it through a short local ride under similar conditions. Note when you first become noticeably sweaty, whether opening a zipper controls the heat, and how comfortable you feel after a brief reduction in effort.
Record what you wore and the approximate conditions. Repeating this exercise with one clothing adjustment at a time can reveal whether excessive base-layer thickness, unnecessary insulation or inadequate ventilation causes the problem.
Cold weather still requires appropriate caution. Persistent shivering, numbness, impaired coordination or unusual confusion are reasons to stop, seek shelter and address possible cold exposure rather than continuing to adjust clothing experimentally.
For your next cool-weather ride, start with one lightweight base layer, one adaptable insulating option if needed, and accessible wind protection. Test the combination on a familiar route, note where you overheat or become chilled, and change one variable for the following ride. Your own sweat response will ultimately be more useful than a generic clothing chart.
Should a cycling base layer feel tight against the skin?
A cycling base layer should usually fit close enough to maintain comfortable fabric contact without bunching beneath the jersey. It should not restrict breathing or movement. Check the fit while leaning forward in your normal riding position, paying particular attention to the chest, shoulders and underarms.
Is a sleeveless mesh base layer suitable for cold-weather cycling?
It can be suitable when paired with adequate insulation and wind protection. A mesh layer may help reduce fabric moisture retention during hard efforts, but its open structure provides limited insulation on its own. Comfort depends on the full clothing system, particularly during stops and descents.
Does a moisture-wicking base layer need to be replaced when it stays wet?
Not necessarily. A garment can remain wet because sweat production exceeds evaporation or because outer clothing traps moisture. Before replacing it, test the same base layer with better ventilation or less insulation. Consider a different fabric or construction if persistent saturation continues under suitable layering conditions.
Can merino and synthetic base layers be worn together?
They can, but adding a second base layer is not automatically beneficial. Two close-fitting layers increase the amount of fabric in the clothing system and may reduce ventilation or create new friction points. For heavy sweating, one suitable base layer combined with adjustable insulation is often a more practical starting point.
How can you tell whether your cycling base layer has dried enough for another ride?
Check several areas, especially the chest, underarms, seams and thicker panels. The garment should feel consistently dry rather than merely dry on its outer surface. If moisture remains in these areas, continue airing it or use a dry reserve. Overnight drying performance depends on fabric construction, room humidity and airflow.