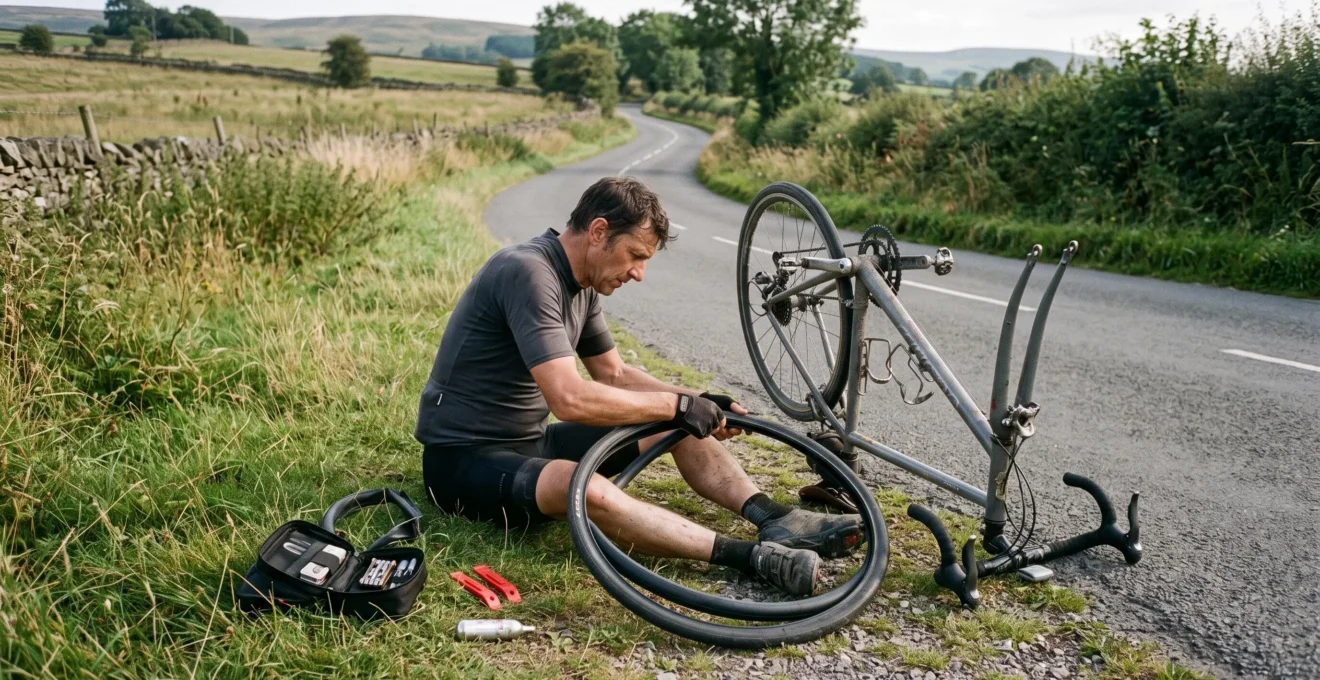
A puncture twenty kilometres from home exposes the difference between carrying tools and carrying the right tools. A multi-tool can tighten a loose saddle or adjust a component, but it cannot inflate a flat tire. A spare tube is equally useless when its valve cannot reach through the rim.
For a typical two-to-four-hour road or gravel ride, a practical bike repair kit starts with a compatible spare tube, tire levers, a reliable inflation method, a suitable multi-tool and basic chain-repair equipment. Tubeless riders should add a plug tool. A small tire boot can also make certain casing cuts temporarily manageable.
The aim is not to prepare for every mechanical failure. It is to cover common repairable problems and selected ride-ending failures without filling a saddle bag with workshop equipment. That means checking the actual bicycle, understanding what each item fixes and practising the essential repairs before leaving home.
The lightweight weekend bike repair kit
- Carry a compatible tube, tire levers, inflation equipment, a bike-specific multi-tool and a tire boot; add a tubeless plug tool where appropriate.
- Check tire dimensions, valve type and length, axle tools, chain speed and repair-tool compatibility before riding.
- Use a mini pump for repeatable inflation, add CO2 when speed matters, and reserve cassette replacement for the workshop.
- Why Do You Still Get Stranded Even With a Multi-Tool in Your Pocket?
- How to Build a Repair Kit for Your Exact Bike in 10 Minutes Using a Failure Checklist
- Which Should You Choose: CO2 or a Mini Pump for 2–4 Hour Rides?
- The One Spare-Tube Detail That Makes Your Whole Kit Useless
- When Should You Add a Quick Link and Spoke Key to Your Kit?
- How to Diagnose Bad Shifting Without Touching Limit Screws by Mistake
- How to Check Cassette Compatibility Before You Order in 5 Checks
- How to Replace a Cassette Without Buying the Wrong Freehub or Cog Range
Why Do You Still Get Stranded Even With a Multi-Tool in Your Pocket?
A multi-tool cannot fix every mechanical problem because adjustments are only one part of roadside repair. Flat tires need inflation and possibly a replacement tube. Torn casings may need a tire boot. Broken chains require compatible joining parts and a chain breaker. Wheel damage may be impossible to repair safely without additional equipment.
The useful distinction is between a problem that requires adjustment, one that requires a replacement part and one that cannot reasonably be repaired at the roadside.
| Failure category | What may happen | Useful equipment |
|---|---|---|
| Inflation | Pressure loss or a flat tire | Mini pump or CO2 inflator |
| Tire damage | Puncture or casing tear | Tube, levers, tire boot or tubeless plug |
| Drivetrain | Broken chain or shifting problem | Chain breaker, compatible quick link, multi-tool |
| Wheel | Broken spoke or severe lateral wobble | Correct spoke key when a safe temporary correction is possible |
| Loose components | Rotated handlebar, saddle or accessory | Correct hex or Torx bits |
A multi-tool-only kit is especially vulnerable to tire damage. Even a new tube may protrude through a torn casing and puncture again. Park Tool‘s tire and inner-tube repair instructions describe how a tire boot can provide a temporary repair for certain casing tears. The damaged tire still requires replacement rather than being treated as permanently repaired.
The opposite mistake is taking a workshop’s worth of tools on every weekend ride. A cassette lockring tool, chain whip and large spares collection add bulk while doing little for the problems a rider can practically resolve beside a country road.
Consider where a repair will happen. A quiet roadside offers limited visibility, space and stability. A repair requiring extensive drivetrain disassembly may be unreasonable even when the correct tools are available.
Once the likely failures are grouped by repair type, choosing equipment becomes a compatibility exercise rather than a shopping exercise.
How to Build a Repair Kit for Your Exact Bike in 10 Minutes Using a Failure Checklist
Build your repair kit by auditing five failure categories against the actual bike: punctures, casing tears, chain breaks, spoke damage and loose components. Check the compatibility of every tool and spare, then remove items that address unlikely problems but cannot be used effectively on the roadside. The resulting kit should be compact and independently usable.
Start with the bicycle rather than a generic online packing list. Read its tire markings, inspect the valve, count the rear cassette sprockets and identify the fasteners needed to remove the wheels. Test whether your multi-tool actually fits those fasteners.
For a conventional tubed road bike, a compact baseline includes one matching spare tube, two dependable tire levers, a mini pump, a compact tire boot, a multi-tool and a compatible quick link with a chain breaker. A tubeless gravel bike also benefits from a plug tool because many punctures can be sealed without removing the tire.
The probability-versus-consequence test helps decide which extras deserve space. A second tube is more attractive on longer or remote rides than on short loops close to transport. A patch kit offers additional repair opportunities after the spare tube has been used, although it may be optional for a short ride with an easy escape route.
REI‘s Bike Repair Kit Checklist identifies tubes or patches, tire levers, a pump and a multi-tool as basic essentials, while suggesting more specialized chain and wheel equipment for longer or more demanding rides. It also emphasizes carrying equipment the rider knows how to use.
Your five-step, ten-minute bike repair kit audit
- Record tire and valve details. Read the wheel and tire markings, identify the valve and measure the required stem length. Deliverable: a verified tube specification.
- Test tire-repair equipment. Check levers, inflation-head compatibility, tire boot and any tubeless plug tool. Deliverable: a complete tire-repair set.
- Identify drivetrain requirements. Count cassette sprockets and confirm the correct chain quick link and chain-breaker compatibility. Deliverable: a labeled chain-repair set.
- Check wheel and fastener access. Identify the axle interface, brake type and essential bolt sizes. Deliverable: a multi-tool that fits the bicycle.
- Pack and practise. Fit everything into the chosen bag and rehearse a tube change and basic chain repair in a safe setting. Deliverable: a usable, bike-specific kit.
Repeat a shorter inspection after changing wheels, tires or drivetrains. A quarterly check is a practical personal reminder, not a manufacturer-prescribed maintenance interval. Previous-bike spares should never be assumed compatible.
With the physical contents settled, the next choice is how reliably the rider can restore tire pressure after the first puncture.
Which Should You Choose: CO2 or a Mini Pump for 2–4 Hour Rides?
Choose a mini pump as the default for two-to-four-hour rides when avoiding a long walk matters more than the fastest repair. It can inflate multiple tires without consumable cartridges. CO2 is useful for quick inflation and some tubeless bead-seating situations, but the number of attempts is limited by the cartridges carried and their compatibility with the inflator.
Neither inflation method is perfect. The relevant questions are how many repairs you might need, how much air your tires require and how far you could be from assistance.
| Decision factor | Mini pump | CO2 inflator |
|---|---|---|
| Repeat inflation | Repeated use without cartridges | Limited by available cartridges |
| Inflation speed | Requires pumping effort | Generally faster |
| Pack weight | Varies by pump size | Varies by inflator and cartridge count |
| Large gravel tires | Possible, but small pumps require more strokes | Cartridge volume must suit the tire |
| Cold or wet conditions | Requires a functional pump and secure valve connection | Rapid gas discharge makes components very cold; handling needs care |
| After the first puncture | Can reinflate another tire | Needs another usable cartridge |
CO2 convenience has several dependencies. The cartridge must fit the inflator, the head must seal on the valve and the rider must operate the release correctly. A premature discharge can exhaust the supply before the tire is inflated. A second cartridge provides redundancy, but it is still a finite supply.
CO2 can also leave the tire losing pressure sooner than expected, depending on the tube or tire system. Check pressure after use and replace the gas with ordinary air when practical.
For tubeless setups, a rapid burst of gas may help reseat a bead that has come away from the rim. It is not guaranteed: tire and rim compatibility, bead position and leakage also matter. A tubeless plug often resolves a small puncture without bead removal, and a pump remains useful for topping up.
Apply three questions before packing: Is the route remote? Are the tires tubeless? Is rapid inflation worth carrying cartridges in addition to a pump? For remote rides, inflation redundancy can outweigh a modest weight saving.
Whichever inflation method you choose, it cannot compensate for a spare tube that does not fit the wheel.
The One Spare-Tube Detail That Makes Your Whole Kit Useless
The easily overlooked spare-tube detail is valve compatibility, especially stem length on deep-section rims. A tube can match the tire diameter yet still be unusable if its valve does not suit the rim hole or extend far enough for the pump head to connect securely. Check valve type, usable length and tube dimensions together before packing.
Presta valves are narrower than Schrader valves. A Schrader stem generally will not pass through a rim drilled only for Presta. Using a narrow Presta valve in a larger Schrader hole may require an appropriate adapter or support component rather than simply assuming the combination is safe.
Deep-section rims create a second problem. A short Presta stem may not project sufficiently to attach the pump. Where a compatible removable valve core is fitted, an appropriate valve extender may be an option. Otherwise, select a tube with a sufficiently long stem.
The next check is dimensional. A tube marked 700 × 25–32 is intended for a different width range than one marked 700 × 35–43. Always verify the actual manufacturer’s approved tire dimensions rather than treating a printed width as a loose suggestion.
For example, Schwalbe‘s technical information on bicycle tubes states that its tube number 17 accommodates tire widths from 28 mm to 47 mm. That is a specification for that particular model, not a universal range for all tubes. The manufacturer also explains how its valve-length measurement includes the valve foot.
Wheel diameter matters independently of tire width. A spare for a 700c wheel should not automatically be treated as interchangeable with one for a 650b or 26-inch wheel. Riders with several bicycles should keep spare tubes clearly labeled by intended bike or wheel.
Finally, inspect the surrounding repair system. Damaged tire levers can fail on a tight bead, sharp debris left inside the casing can puncture the replacement tube, and damaged rim tape can repeatedly expose the tube to spoke holes or sharp edges. Carrying a second tube will not solve an unresolved cause.
Once tires and inflation are covered, the remaining small items should address failures that can stop the drivetrain or prevent the wheel from turning freely.
When Should You Add a Quick Link and Spoke Key to Your Kit?
Add a compatible chain quick link and an appropriate chain breaker when riding beyond easy walking distance from home or transport. A quick link is compact and can enable a roadside repair after certain chain failures. Carry a spoke key when remote riding, wheel design or previous spoke trouble makes temporary wheel correction useful, provided you know how to use it.
A chain failure can abruptly end a ride because pedaling no longer drives the rear wheel. A correctly selected quick link can join suitable chain ends, but a chain breaker may be necessary to remove damaged links first.
Chain compatibility is not determined by speed count alone. Ten-, eleven- and twelve-speed chains use different dimensions, and some drivetrain manufacturers specify particular quick links for their chain designs. A label saying « 12-speed » does not guarantee compatibility with every twelve-speed chain.
Do not assume all quick links can be repeatedly opened and reused. Some are designated single-use, and manufacturer fitting instructions should take priority. The purpose of carrying one is to make an appropriate repair possible, not to bypass those requirements.
Chain mileage can inform inspection priorities, but a fixed distance such as 1,500 km is not a reliable universal replacement threshold. Chain wear depends on riding conditions, cleaning, lubrication and drivetrain design. Measure wear with a suitable method and follow the manufacturer’s limits.
A spoke key is a more conditional addition. A broken spoke may cause a wheel to move sideways enough to rub a brake or frame. Riders using low-spoke-count or specialized wheels may have less tolerance for losing one spoke, although the actual consequence depends on the wheel design.
Where a wheel remains structurally sound, careful spoke adjustment may reduce minor rubbing sufficiently for a cautious return. An incorrectly sized key can damage nipples, and indiscriminate adjustment can worsen wheel alignment. A visibly unstable wheel, severe damage or contact with the frame that cannot be safely eliminated calls for stopping rather than improvising.
For many weekend road rides, the chain quick link belongs in the core kit, while the spoke key is an informed extra rather than an automatic purchase.
A functional drivetrain also depends on correct derailleur adjustment, and some apparent mechanical emergencies need diagnosis rather than replacement parts.
How to Diagnose Bad Shifting Without Touching Limit Screws by Mistake
Diagnose poor shifting by identifying whether the problem is cable indexing, derailleur alignment or a mechanical obstruction before touching any limit screw. On a conventional cable-operated derailleur, small barrel-adjuster changes may correct indexing. A bent hanger, damaged cable or electronic-shifting fault requires different treatment. Limit screws are not routine fixes for sluggish gear changes.
Start with a visual inspection. Check that the rear wheel is seated correctly, the derailleur has not been struck and the chain is running through its intended path. Look for obvious cable damage or debris before attempting adjustments.
For a conventional mechanical rear derailleur, the barrel adjuster alters effective cable tension. If the chain hesitates when shifting from a smaller rear sprocket to a larger one, insufficient tension may be involved. Increasing tension commonly means turning the barrel adjuster anticlockwise when viewed toward its threaded housing.
Conversely, hesitation when returning toward smaller rear sprockets may indicate excessive tension. A small clockwise correction may help. These directional rules depend on the adjuster design and the underlying fault, so confirm the response rather than making repeated blind turns.
Use quarter-turn adjustments, then test shifting carefully. If the behavior improves, continue only as needed. If it becomes worse, reverse the adjustment and investigate another cause.
A bent derailleur hanger can produce inconsistent shifting across the cassette. From behind the bike, the derailleur may appear tilted relative to the sprockets. Visual inspection is only a preliminary clue; accurate diagnosis and correction require proper alignment equipment.
Do not use limit screws to compensate for a bent hanger. Incorrect limit settings can permit the chain to move beyond the intended sprockets, potentially toward the spokes or off the smallest sprocket.
If derailleur alignment is doubtful, avoid gears that bring the derailleur close to the spokes. Where safe, a restricted middle gear range may allow a cautious return. Stop if the chain or derailleur risks contacting the wheel, or if the drivetrain cannot be operated securely.
The repair kit should therefore contain the hex or Torx bits actually used on the bike, without assuming every shifting problem is solvable by turning a screw. Electronic drivetrains also require checks of battery state, connections and manufacturer-specific adjustment procedures.
Persistent shifting problems may also involve wear or component incompatibility, which is why cassette specifications matter before parts are ordered.
How to Check Cassette Compatibility Before You Order in 5 Checks
Check five things before buying a cassette: drivetrain brand and speed count, rear freehub interface, cassette tooth range, chain and derailleur compatibility, and the required installation tools. A cassette with the right number of sprockets may still be incompatible with the wheel. Matching the freehub interface is especially important because incompatible mounting standards cannot simply be forced together.
Start by photographing the current cassette and identifying the drivetrain model. Count the rear sprockets rather than assuming that the number printed on an old spare part reflects the bike’s present configuration.
Next, identify the freehub. Common interfaces include Shimano-style HG, SRAM XD or XDR, Shimano Micro Spline and different Campagnolo standards. These are distinct mounting systems, and their compatibility varies by cassette model.
Some freehub types can be distinguished by their spline or threaded mounting design, but reliable identification may require removing the cassette and checking the wheel or hub manufacturer’s specification. A photograph alone is not always enough.
The remaining checks address the entire drivetrain:
- Drivetrain identification: record the cassette speed count and exact chain and derailleur models.
- Freehub identification: confirm the wheel’s mounting standard and any required spacer arrangement.
- Cog range: compare the smallest and largest sprockets with the derailleur’s permitted range and drivetrain capacity.
- Chain compatibility: verify the chain specification and whether changing cassette range affects required chain length.
- Installation interface: identify the proper lockring, tool engagement design and tightening specification.
Moving from an 11–28 cassette to an 11–34 cassette illustrates why tooth count matters. The easier lowest gear may be appealing for climbing, but the rear derailleur must support the larger sprocket and total chain-wrap requirements. Chain length also needs reassessment.
Some modern road and gravel groupsets have additional limitations involving drivetrain generation, proprietary cassette construction or wheel interfaces. In particular, compatibility cannot be inferred simply because two products are described as twelve-speed.
The safest ordering method is to match the exact cassette model or verify a proposed alternative in the drivetrain and hub manufacturers’ compatibility information. If the freehub is unknown, identify it before committing to a different cassette standard.
Once compatibility is established, cassette replacement becomes a controlled workshop procedure rather than a roadside experiment.
What matters before working on the drivetrain
- Confirm the existing freehub standard before choosing a replacement cassette; changing standards may require more than a cassette purchase.
- Check the derailleur’s approved sprocket range and chain capacity before selecting lower climbing gears.
- Keep the workshop equipment separate from the roadside kit, while recording chain and fastener specifications for future repairs.
How to Replace a Cassette Without Buying the Wrong Freehub or Cog Range
Replace a cassette only after verifying its freehub interface, sprocket range, chain compatibility and installation requirements. In the workshop, remove the rear wheel, secure the cassette with the appropriate holding tool, undo its retaining mechanism and install the correct replacement. Use the specified torque and check derailleur operation before riding.
For a conventional cassette secured by a lockring, remove the rear wheel and any quick-release skewer or axle component that obstructs tool access. Select a lockring tool matching the cassette, and use a chain whip or compatible sprocket-holding tool to prevent the cassette rotating during removal.
Support the wheel securely. Apply controlled force, remove the lockring and lift the sprockets from the freehub. Record the position and orientation of any spacers, because incorrect spacer installation can affect cassette retention and alignment.
Inspect the exposed freehub for damage and confirm the replacement cassette uses the correct mounting interface. On suitable conventional splined systems, align the cassette’s indexing features, including the wider spline where applicable. Reinstall spacers in their required positions.
The cassette’s retaining mechanism must be installed according to its manufacturer’s instructions. Park Tool’s cassette removal and installation procedure explains spline alignment, spacer positioning, thread lubrication and lockring tightening for the design it illustrates. Its quoted torque guidance must not be assumed applicable to every cassette system.
Use a torque wrench and the applicable manufacturer’s specification rather than relying on a vague impression of tightness. Refit the rear wheel, secure the axle correctly and verify that the drivetrain shifts throughout its permitted range without interference.
When choosing gearing, an 11–28 cassette generally offers closer sprocket spacing than a much wider-range cassette with the same sprocket count. An 11–32 or 11–34 range may be attractive for mixed terrain, while wide-range configurations can suit steep or loaded riding. Actual suitability depends on the crankset, derailleur, chain and approved component combinations.
Changing from one freehub standard to another is a separate decision. Some hubs accept an alternative manufacturer-approved freehub body; others do not. Where conversion is unavailable, a different compatible wheel may be required. There is no universal low-cost conversion method.
For the original weekend repair-kit question, these details matter because knowing the drivetrain prevents incorrect quick-link purchases and helps identify which multi-tool functions are genuinely useful. The cassette itself and its specialized removal tools can stay at home.
Before the next weekend ride, lay out the compact kit, verify the inflation and chain-repair equipment, and practise the repairs in a safe setting. A small collection of compatible parts and familiar tools offers more practical protection against a long walk than a heavy bag of equipment you cannot use.
Can a repair kit guarantee that you will never walk home?
No. A compact repair kit improves the chances of resolving specific roadside failures, but major wheel damage, frame damage, severe tire failure or certain drivetrain faults may still make riding unsafe. Plan an alternative route home when travelling in remote areas.
Should a tubeless rider still carry a spare inner tube?
Carrying a compatible emergency tube is sensible when a tubeless puncture cannot be sealed with a plug or sealant. Tubeless installation details vary: the rider must know how to remove the tubeless valve and confirm that fitting a tube is permitted and practical with the wheel and tire system.
Is a patch kit worth carrying with a spare tube?
A patch kit adds an option when the spare tube is already used or another puncture occurs. Whether it belongs in a minimalist kit depends on ride remoteness, the available repair time and the rider’s ability to use the patches correctly. A tire boot addresses a different problem: damage to the tire casing rather than the tube.
How should you store a spare tube in a saddle bag?
Keep it protected from abrasion, sharp tools and exposed metal edges. A small protective wrap or pouch helps separate the rubber from the multi-tool and chain-repair equipment. Check for damage periodically and verify compatibility after replacing wheels or tires.
What is the most useful repair skill to practise before a remote ride?
Start with removing a wheel, finding the cause of a puncture, replacing a tube and reinflating the tire with the equipment you actually carry. Then practise an appropriate chain quick-link repair and basic drivetrain inspection. Familiarity with the repair process matters as much as having the necessary tools.