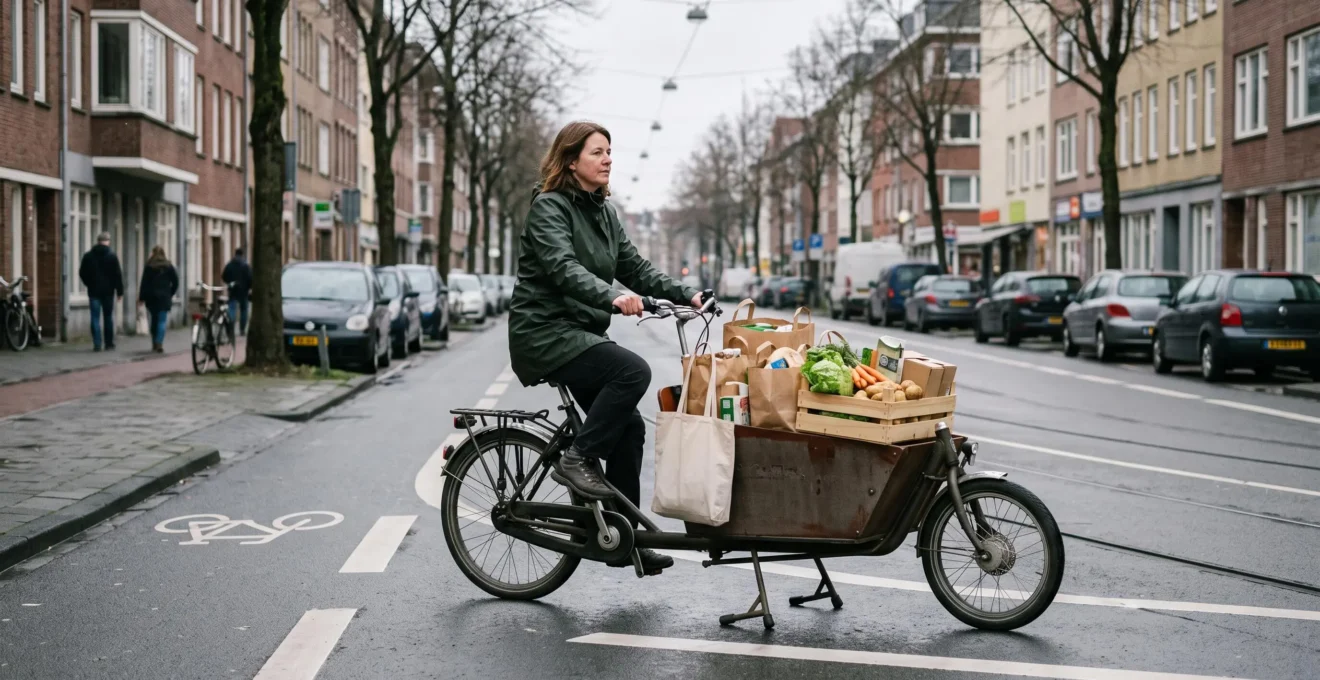
The best cargo bicycle for a weekly grocery haul is not necessarily the one with the biggest box or strongest motor. It is the one that remains predictable when loaded, fits through your everyday entrances, and can be parked securely without turning every shopping trip into a logistical project.
For many urban households, a compact electric longtail offers a manageable transition from an ordinary bicycle. Its familiar steering and relatively narrow profile make it practical for grocery bags, school runs and crowded streets. A two-wheeled front-loader is often more attractive when transporting bulky shopping or children who benefit from sitting ahead of the rider.
But neither design is automatically stable. Cargo placement, steering geometry, tyre condition, braking performance and rider experience all matter. The differences become particularly noticeable when starting, turning slowly, stopping at junctions or moving a loaded bicycle by hand.
Before committing to a cargo bike, consider what happens during the least convenient part of your journey: a tight turn with a full grocery load, two tired children, and nowhere easy to park.
Choosing a cargo bike that feels stable and practical
- Prioritise load placement: Keep heavy groceries low, centred and securely restrained. Test handling with a realistic load before buying.
- Match the frame to your storage: A longtail often suits narrow entrances; a front-loader offers accessible cargo space but needs more room.
- Budget for everyday reliability: Secure parking, suitable locks, brake servicing and a repeatable loading routine matter as much as the purchase price.
- Why Does a Loaded Cargo Bike Feel Harder to Control Below 10 km/h?
- How to Load a Cargo Bike So It Doesn’t Pull to One Side on Turns?
- Which Should You Choose: Longtail or Front-Loader if You Have 2 Kids and No Garage?
- The Locking Mistake That Makes Cargo Bikes Disappear Even in ‘Safe’ Areas
- When Should You Service Brakes on a Cargo Bike if You Carry Heavy Loads Daily?
- How to Build a « Grab-and-Go » Commute Setup in 30 Minutes at Home?
- How to Handle Cargo Bike Limitations You Only Discover After Buying?
- How to Make Daily Urban Cycling Stick When You Have 2 Busy Commutes a Day?
Why Does a Loaded Cargo Bike Feel Harder to Control Below 10 km/h?
A loaded cargo bike often feels less stable below 10 km/h because the rider has less room and time to make effective balance corrections while steering through tight spaces. The load’s position and the bicycle’s geometry can amplify that sensation. A high or unevenly positioned grocery load makes low-speed manoeuvres more demanding, although the exact effect differs between bicycles.
A moving bicycle stays balanced through an interaction of steering, rider input, geometry and other dynamic effects. Wheel rotation contributes to these dynamics, but gyroscopic effects alone do not explain bicycle stability. As speed decreases, the rider must make more deliberate steering and body-position corrections.
That is why the most awkward moments are often the first pedal strokes after turning out of a driveway or the final approach to a crowded junction.
Where the weight sits matters more than how impressive the load looks. Heavy groceries placed high raise the combined centre of mass. Weight positioned far forward or attached to moving steering components may also make steering responses feel slower or heavier.
A front-loader with a low box is not inherently top-heavy. In fact, Cycling UK‘s guide to cargo bikes identifies the low cargo position of front-box designs as one of their useful characteristics.
However, a tall stack of groceries inside that box can undermine the benefit. A separate rack attached directly to the steering assembly may create additional steering inertia, depending on its design and load.
When approaching a low-speed obstacle, use a predictable sequence:
- Identify the turn, crossing or dismount point early.
- Shift into an easier gear while still moving comfortably.
- Reduce speed smoothly, using both brakes appropriately rather than relying exclusively on the rear brake.
- Keep the handlebars relaxed and avoid sudden steering corrections.
- Dismount when the manoeuvre feels too tight or the bicycle begins leaning beyond comfortable control.
Electric assistance can help with starting, but sudden motor engagement may make a loaded bicycle harder to manage. Test the different assistance settings in a traffic-free space before carrying children.
If a bike feels unexpectedly difficult to steer even with groceries positioned low and evenly, investigate tyre pressure, steering condition and load attachment rather than assuming that all cargo bikes behave the same way.
How to Load a Cargo Bike So It Doesn’t Pull to One Side on Turns?
To prevent a cargo bike from pulling sideways, place the heaviest groceries low and close to the bicycle’s centreline, distribute weight evenly between left and right, and secure everything against movement. A balanced load will not remove every handling difference, but it makes steering more predictable and reduces the risk of groceries shifting during a corner.
Consider a typical weekly haul containing bottled drinks, vegetables, tins, bread and chilled food. Rather than filling one pannier completely before touching the other, distribute the heavier items between both sides as you pack.
With a front-loader, use the lowest practical part of the cargo box and avoid placing everything at one end. With a longtail, distribute substantial weight between approved carrying positions instead of hanging one heavy shopping bag far out from the rear rack.
The following method works as a practical starting point:
- Start with dense items. Put bottles, cans and other heavy purchases at the bottom in positions permitted by the manufacturer’s loading instructions.
- Pack in pairs. Divide similar weights between left and right panniers or between balanced positions inside the box.
- Protect delicate groceries. Place eggs, bread and soft produce above dense items without exceeding the container’s capacity.
- Restrict movement. Use properly fitted straps, dividers or closed cargo bags.
- Test before entering traffic. Gently move the parked bicycle upright, check whether it wants to lean, then make a short controlled test ride.
An imbalance can feel different depending on the bicycle. On a front-loader, uneven cargo may produce noticeable steering effort or an inclination to lean. On a longtail, rear pannier imbalance can become especially apparent during starts, turns and slow manoeuvres.
Neither sensation is an infallible diagnosis: tyre pressure, alignment and steering condition can also cause directional handling problems.
A gentle manual balance check can reveal an obvious difference between sides, but avoid lifting a heavily loaded bicycle by one side of the rack. That can create unnecessary strain and may not safely represent its behaviour when moving. Use the kickstand as instructed, verify that every bag is secure, and assess handling at walking speed.
Irregular objects deserve special attention. A watermelon on one side and a carton of eggs on the other do not create a balanced load simply because the bags look equally full. Position objects according to their actual weight, and use restraints to stop bulky items rolling or swinging.
In Cycling UK’s loaded e-cargo bike test, the rider carried substantial loads, encountered hills and emphasised the need for low, even cargo placement and additional space for manoeuvring and stopping. Those observations come from the tested bicycles rather than a universal experiment on cargo-bike balance.
The objective is not perfect mathematical symmetry. It is a secured load that remains within the bicycle’s stated limits and does not move unexpectedly as the rider brakes, turns or crosses uneven ground.
Which Should You Choose: Longtail or Front-Loader if You Have 2 Kids and No Garage?
For two children and no garage, a compact longtail is often the more practical choice if it fits your children’s approved seating arrangements and available storage space. A front-loader may be better for keeping children in view and accommodating bulky groceries, but its width and parking footprint can create serious problems in an apartment building. Measure storage access before deciding.
Many buyers begin with the question, “Which bicycle carries two kids better?” The harder question is where the bike will go when everyone gets home.
A front-box bicycle lets children sit ahead of the rider, making conversation and visual supervision easier. Some designs also provide weather protection and convenient access to bags and other everyday items.
A longtail keeps a more conventional bicycle layout, with children seated behind the rider in compatible seats or passenger systems. It is typically narrower than a large front-box bicycle, although its extended rear end still affects parking and manoeuvring.
Use the following comparison to make the trade-offs concrete.
| Decision factor | Longtail cargo bike | Front-loader cargo bike |
|---|---|---|
| Two-child transport | Possible with compatible seating, passenger equipment and sufficient capacity | Possible with an approved child-carrying box and suitable restraints |
| Grocery access | Usually panniers, rear baskets or racks | Large accessible box, useful for bulky items |
| Narrow entrances | Often easier because of its narrower profile | Box width can prevent access |
| Parking footprint | Longer than a conventional bicycle, though some models offer compact storage features | Long and potentially wide, often requiring dedicated parking space |
| Children’s visibility | Passengers sit behind the rider | Passengers ahead are easier to see and talk to |
| Stairs and indoor relocation | Weight and attached equipment can make lifting difficult | Size and weight often make lifting equally difficult or harder |
| Best deciding test | Door clearance, passenger fit and rear-load handling | Box clearance, parking access and loaded slow-speed handling |
Two children do not automatically require a front-loader. A properly equipped longtail may carry two small passengers within its approved limits. The number and configuration of passengers depend on the particular bicycle, the children’s sizes, seating equipment and applicable local rules.
Likewise, a front-loader is not automatically better for older children. Passenger dimensions, restraint options and the manufacturer’s load limits may become the deciding factors.
Before buying, measure the narrowest doorway, entrance corridor, lift and storage access. Confirm whether the bicycle can be parked without blocking emergency routes or shared access. In an apartment building, check the building’s actual parking arrangements rather than assuming that an ordinary bicycle space is suitable.
Be cautious about relying on disassembly. Some front-box systems have removable components, but removing a box does not necessarily make the remaining bicycle manageable on stairs. Likewise, some longtails allow accessories to be removed or their storage footprint reduced.
Most importantly, check the whole loaded bicycle’s weight before considering regular lifting. Removing passengers and luggage does not make a heavy electric cargo bike equivalent to an ordinary bicycle.
If neither configuration fits the available space, a conventional bicycle with an appropriately rated trailer may deserve consideration. The best family transport solution is one that can actually be stored and used every day.
The Locking Mistake That Makes Cargo Bikes Disappear Even in ‘Safe’ Areas
The critical cargo-bike locking mistake is securing only part of the bicycle while leaving the wheels and valuable removable components unprotected. A lock around the frame does not necessarily secure the front wheel, battery or accessories. Use two suitable locks, attach the frame and wheels to a genuinely fixed structure, and verify your insurance conditions before relying on overnight parking.
A cargo bike often carries several attractive removable components: an electric battery, passenger accessories, bags and sometimes specialist seats or box equipment. Even when the frame remains secured, these items may be vulnerable.
That makes a layered approach more practical than simply buying one substantial lock.
Start by choosing a fixed anchor that cannot be easily lifted, dismantled or cut. Use a high-quality D-lock or other suitable lock to connect the frame to that anchor, then use a second lock to secure the remaining wheel or another vulnerable part.
Ideally, the locking arrangement should capture the frame and both wheels as recommended for the particular bicycle. On unusually long bicycles, this may require different lock lengths or a purpose-designed parking point.
Police.uk bicycle theft prevention advice recommends two quality locks, preferably of different types, securing the bicycle to a suitable fixed stand, protecting removable components and recording the frame number.
Where practical, remove the battery and unsecured accessories when leaving the bike for extended periods. If the battery is integrated or not intended for routine removal, follow the manufacturer’s security recommendations.
Insurance deserves equal attention. Policies vary by insurer, location and bicycle value. A contract may specify approved lock ratings, secure anchor requirements or different rules for overnight storage. These requirements cannot be assumed from the type of neighbourhood.
Registration adds another layer of protection. Record the frame number, maintain purchase documentation and register the bicycle with an appropriate service available in your country. This can assist identification if a stolen bicycle is recovered, but it does not guarantee recovery.
Five actions to secure a cargo bike before relying on it daily
- Choose the actual parking point. Produce a photograph showing a fixed, suitable anchor with enough space for the full bicycle.
- Test the two-lock arrangement. Record a photo showing how the frame and both wheels are protected.
- Identify removable valuables. Make a short written list of batteries, seats and accessories that need securing or removal.
- Check the insurance policy. Save the exact wording covering locks, approved parking locations and overnight storage.
- Record ownership information. Store the frame number, purchase receipt and registration confirmation together.
A photograph of the correctly locked bicycle can be useful documentation, but it is not proof that an insurer will approve a claim. Keep the policy wording and ownership records as well.
Once secure parking is solved, the next ownership risk is less visible: mechanical wear from transporting a substantial load repeatedly.
When Should You Service Brakes on a Cargo Bike if You Carry Heavy Loads Daily?
A cargo bike carrying heavy loads every day needs brake inspections based on use, wear and manufacturer instructions rather than a fixed monthly check alone. Inspect braking performance before riding, monitor pad thickness and respond immediately to unusual noises, reduced stopping power or changes in lever feel. Heavy loads and repeated descents can increase braking demands significantly.
More combined mass means more kinetic energy must be managed when slowing from the same speed. On long descents, brakes must also dissipate the energy associated with losing elevation.
This makes brake capacity, rotor condition, pad material and heat management especially important on a family cargo bicycle.
There is no universal servicing interval that applies equally to every cargo bike. A rider travelling on flat streets with light shopping and a rider descending hills daily with heavy cargo will subject their brakes to very different conditions.
Condition is the essential trigger for inspection. Look for increasing lever travel, a spongy hydraulic lever, reduced stopping performance, visible contamination or metallic scraping.
Metal-on-metal noises may indicate dangerously worn pads or another fault. Stop using the bike and have the brakes inspected rather than attempting to complete another loaded journey.
For disc brakes, Park Tool‘s disc brake pad replacement instructions give a general minimum of approximately 1 mm of remaining friction material, while directing users to follow the component manufacturer’s exact specification.
That general reference is not permission to continue riding until every brake pad reaches the same thickness. Some systems specify different limits or measure wear differently.
| Brake system | Potential concerns | What to inspect |
|---|---|---|
| Rim brakes | Wet-weather performance, rim wear and overheating on extended descents | Pads, rim condition, cable operation and stopping consistency |
| Mechanical disc brakes | Pad wear, cable condition and adjustment | Friction material, cable movement, rotor condition and lever travel |
| Hydraulic disc brakes | Pad wear, fluid problems, overheating and possible braking fade | Pad thickness, leaks, lever feel, rotor condition and manufacturer servicing requirements |
Heat-related braking fade can develop when the braking system becomes too hot. The symptoms and causes vary: pads may lose effectiveness, and hydraulic systems may suffer additional problems under excessive heat.
On long descents, reduce speed before steep sections, use both brakes in a controlled manner and follow the bicycle manufacturer’s downhill braking guidance. If the system shows signs of overheating, stop somewhere safe and allow it to cool before proceeding.
Do not rely on selecting a lower gear or back-pedalling to slow an ordinary freewheel cargo bike. Those actions do not provide engine braking, and they cannot replace functioning brakes.
Reliable stopping performance is part of choosing the right bicycle, not merely an ongoing repair expense. A cargo bike intended for heavy everyday hauling should have a braking system specifically approved for its maximum permitted load.
How to Build a « Grab-and-Go » Commute Setup in 30 Minutes at Home?
A 30-minute cargo-bike setup works by creating one permanent departure station near the bicycle’s storage area. Keep locks, helmet, bags, straps, lights and weather protection in predictable locations. The objective is to complete the organisation once, so subsequent grocery trips and school commutes require a short equipment check instead of a fresh search for missing items.
The most effective setup is designed around what regularly gets forgotten. For a grocery-carrying household, that might be cargo straps, insulated bags or the battery key rather than the bicycle itself.
Start with the place where the cargo bike is parked. If the bike stays in a shared storage room, use a secure, permitted location for personal equipment. If it is kept indoors, position frequently used items near the exit without obstructing access.
Here is a practical half-hour organisation plan:
- Minutes 0–5: Select a consistent parking and equipment location. Confirm that departure access remains clear.
- Minutes 5–10: Group the helmet, gloves, keys and locks together.
- Minutes 10–15: Prepare reusable grocery containers, with separate bags for produce, dry goods and temperature-sensitive purchases.
- Minutes 15–20: Put approved cargo straps, a rain cover and suitable child-weather accessories in their designated places.
- Minutes 20–25: Check lights and battery charging arrangements, following battery safety guidance and avoiding unattended charging where prohibited or unsafe.
- Minutes 25–30: Walk through a simulated departure, identify missing equipment and create a brief reminder card.
The bags should be easy to remove for shopping, and refrigerated items should travel in suitable containers without being left in an unattended bicycle.
For families, keep children’s weather protection ready without leaving helmets, child restraints or other safety equipment exposed to unnecessary moisture, dirt or theft.
The behavioural advantage is straightforward: repeat the same sequence at the end of each trip. Return the locks to their storage point, replace used bags and check charging requirements while unpacking the groceries.
This creates a dependable environmental cue. Rather than requiring enthusiasm each morning, the household has a familiar routine with fewer decisions.
Make the arrangement seasonal. A light rain layer, dry gloves and compatible cargo cover may be enough to keep a mildly wet commute manageable. Severe weather, poor visibility or unsafe road conditions can still justify choosing another form of transport.
Once equipment preparation becomes automatic, the remaining challenges tend to concern the bicycle’s physical limitations, which are easier to address when recognised early.
How to Handle Cargo Bike Limitations You Only Discover After Buying?
The best response to unexpected cargo-bike limitations is to identify whether the problem involves range, load capacity, access, servicing or unsuitable accessories before spending money on upgrades. Some problems can be improved with compatible equipment or route changes. Others, such as an excessively wide box or an impractical storage location, may require changing the bicycle itself.
One common surprise is how much motor assistance and battery range vary with load, terrain, wind and temperature. A range estimate obtained during a flat, lightly loaded test may not represent a journey with groceries and children.
Instead of relying on a fixed percentage reduction, build a personal range estimate from real journeys. Record the route distance, battery charge used, approximate cargo load, assistance setting, weather and relevant hills.
Repeat the route under representative conditions before treating the result as dependable. Include a suitable battery reserve rather than planning to arrive with almost no remaining charge.
For example, a rider can compare the energy used during a lightly loaded school route with the same journey carrying the family’s usual shopping. This is a hypothetical testing method, not a guaranteed relationship between additional kilograms and battery consumption.
The second surprise is physical access. A bicycle that looks manageable in a showroom may not negotiate an apartment entrance, tight cycle-path barrier or crowded parking space.
Measure the bicycle at its widest and longest relevant points, including handlebars, footrests, cargo box and accessories. Compare those dimensions with actual clearances instead of relying solely on the manufacturer’s nominal frame measurements.
Test the full route, not just the bicycle. Narrow passages, uneven surfaces and awkward turns can matter more than its performance on a wide demonstration track.
Accessories offer another potential solution, but compatibility must be checked carefully. Child seats, passenger rails, rain covers, batteries and additional cargo carriers should be approved for the particular model and intended use.
Do not assume that a larger battery is electrically compatible or that an aftermarket passenger seat preserves the original manufacturer’s load approval. Ask the manufacturer or authorised dealer before buying the component, including about warranty implications.
Servicing can also become inconvenient. Some repair shops lack the necessary workspace, tools or expertise for large cargo bikes. Check whether a local provider can service the frame, motor and brakes before the first breakdown.
Finally, keep purchase documentation, servicing records and accessory information. These help establish the bicycle’s condition and configuration when seeking repairs or eventually selling it. They may also support buyer confidence, although they do not guarantee a particular resale value.
The most sustainable solution is not to keep modifying an unsuitable bike indefinitely, but to make the whole transport arrangement dependable enough for repeated daily use.
Key takeaways before making cargo cycling a daily habit
- Choose the bicycle around your actual household journeys, including access, passenger requirements and secure overnight storage.
- Treat loading, locking and brake checks as repeatable parts of the journey rather than occasional extra tasks.
- Evaluate transport reliability through completed trips and recurring obstacles, not only distance covered or maximum battery range.
How to Make Daily Urban Cycling Stick When You Have 2 Busy Commutes a Day?
Daily cargo-bike commuting becomes sustainable when the entire journey is convenient, not merely the riding portion. Plan for parking, locking, weather, passenger changes and carrying groceries before setting off. For households with two busy commutes, a slightly longer but predictable route and a shared transport routine can be more practical than pursuing the fastest cycling time.
A cargo bike can replace many short car journeys, but only when the tasks surrounding the ride are manageable. The bicycle must be ready when needed, securely parked at both ends and capable of handling the day’s actual passenger and cargo requirements.
Start by calculating realistic door-to-door time rather than comparing map distances.
Include taking the bike out of storage, fastening children’s restraints where applicable, loading cargo, reaching the destination, finding secure parking, locking the bicycle and completing the final walk.
A quieter route may be preferable to a shorter but demanding route with repeated difficult junctions. It can also make riding with children or groceries less stressful.
Households with two adult commuters can divide transport responsibilities according to schedules and practical needs. One person might use the cargo bike for school drop-off and shopping while the other travels by public transport. Responsibilities can alternate when weather, work commitments or fatigue make that sensible.
However, sharing a single cargo bicycle requires a clear plan for where it will be parked and which adult will need it next. Do not build the routine around an impractical mid-day handover.
Unexpected friction is worth tracking because it identifies problems that can actually be fixed.
| Recurring obstacle | Possible adjustment |
|---|---|
| Forgetting shopping straps | Keep a dedicated set with the cargo equipment |
| Battery running low | Review charging habits and record real-world range |
| Slow or insecure parking | Identify suitable anchors and test the locking routine |
| Uncomfortable wet-weather trips | Prepare weather equipment and keep an alternative travel plan |
| Groceries shifting in corners | Use consistent low, balanced packing and appropriate restraints |
| Repeated difficulty at junctions | Practise loaded manoeuvres and assess a calmer route |
Once a month, review completed cargo-bike journeys and the reasons for trips that required another transport option. This is a personal planning exercise, not a scientifically validated cycling-performance measure.
The useful question is whether the same problem keeps returning. One forgotten lock is inconvenient; repeated forgotten locks suggest the storage routine needs redesigning. A single difficult grocery load may be unusual; consistently unstable turns suggest a loading or bicycle-fit problem that deserves attention.
Keep the cost comparison realistic as well. Consider maintenance, electricity where relevant, insurance, security equipment, accessories and replacement parts alongside the purchase price. Compare those expenses with the actual car or public transport journeys being replaced, without assuming that every cycling trip produces equivalent savings.
For the next grocery trip, use the bicycle with a safely secured, representative load, follow the route you would actually take and record the inconveniences you encounter. That single realistic journey will provide more useful buying and ownership information than an unloaded demonstration ride.
Is a two-wheeled cargo bike more stable than a three-wheeled cargo bike?
They behave differently. A three-wheeled cargo bike can stand without the rider balancing it, which may make loading and stopping convenient. However, cornering dynamics vary by design, and a tricycle is not automatically safer or more stable during moving turns. A two-wheeled cargo bike requires active balance but can feel more natural when leaning through corners. Compare both with realistic loads in a safe testing area.
Can a cargo bike carry a full week’s groceries without electric assistance?
Yes, provided the groceries fit within the bicycle’s approved cargo and total weight limits. Electric assistance is not essential for carrying capacity, although it can make repeated starts and climbs more manageable. Terrain, rider capability, gearing and journey distance should guide the decision.
How do you know whether a cargo bike is overloaded?
Check the manufacturer’s maximum permissible total weight and the separate limits for the box, racks, seats and other carrying components. Include the rider, passengers, luggage and relevant accessories in the calculation according to the manufacturer’s instructions. A bicycle may be overloaded even when its bags or cargo box are not completely full.
Should you buy a cargo bike before finding secure parking?
It is better to establish a practical parking arrangement first. Confirm that the bicycle fits the location, that a suitable fixed anchor is available and that parking complies with building arrangements and any insurance conditions. Without convenient security, the cargo bike may become too troublesome to use regularly.
Is renting a cargo bike useful before buying one?
Yes. Where a suitable rental or extended demonstration is available, it can help you evaluate storage access, slow-speed handling, range and everyday route practicality. Use only the loads and passenger arrangements explicitly permitted by the rental provider. An appropriately equipped test with your actual transport requirements is more informative than a short unloaded ride.