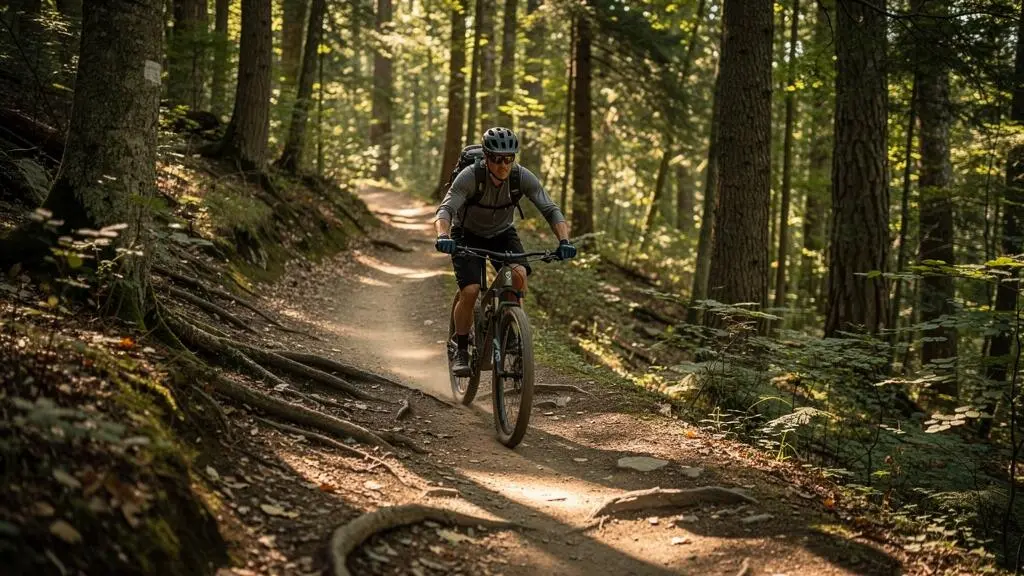
You’re riding along a narrow forest trail, feeling comfortable, when a cluster of roots appears. You grab the brakes, nearly stop, wobble through, then pedal hard to recover. Thirty seconds later, another obstacle catches you by surprise. Meanwhile, you can hear someone approaching from behind.
That stop-start pattern is familiar to riders transitioning from roads or wide gravel paths to mountain-bike singletrack. The problem often isn’t a lack of fitness or courage. It’s that narrow, technical trails demand earlier decisions about where to look, when to brake, which line to follow and how to share the space.
Steady singletrack riding means maintaining a controlled, adaptable pace, not riding fast without stopping. The goal is to recognize hazards early enough to respond smoothly, yield when appropriate and avoid turning every ordinary feature into an emergency. Walking an unfamiliar obstacle, stopping for another trail user or inspecting a difficult section remains a sensible choice whenever conditions warrant it.
Singletrack flow: the essentials
- Scan ahead for a usable line, then check the nearby surface and surrounding trail users. Look where you intend to ride rather than fixing your eyes on obstacles.
- Brake progressively before corners and technical features, choose a realistic entry speed and keep your hands relaxed while supporting your weight through your feet.
- Respect local trail rules, communicate before passing and choose safe places to yield. A controlled stop is better than forcing momentum through a dangerous situation.
- Why Does Singletrack Feel Exhausting Even When the Climb Numbers Look Small?
- How to Scan 10 Metres Ahead on Singletrack Without Overthinking It?
- Which Should You Choose: Let Riders Pass Immediately or Wait for a Wider Spot?
- The Blind-Corner Mistake That Causes Most Singletrack Near-Misses
- In What Order Should You Practise Roots, Berms, and Small Drops to Progress Faster?
- How to Pick a Line Through a Rock Garden Without Staring at Every Rock?
- How to Ride Rocky Descents With More Control Without Death-Gripping the Bars
- Building the Habits That Keep Your Pace Steady Ride After Ride
Why Does Singletrack Feel Exhausting Even When the Climb Numbers Look Small?
Singletrack can feel exhausting despite modest elevation gain because technical terrain demands repeated braking, acceleration, balance adjustments and changes in body position. Riders also have to interpret obstacles and make decisions continuously. Climbing distance alone therefore gives an incomplete picture of trail difficulty, although fitness, surface conditions and riding experience all influence how demanding a particular ride feels.
On a smooth climb, you can often settle into a consistent cadence. On singletrack, that rhythm gets interrupted. You accelerate out of a corner, stand to absorb a rocky patch, slow for roots and then pedal again. Even when the average speed is low, the effort can be uneven.
A 2018 Frontiers in Physiology study of cross-country mountain-bike demands examined 16 competitive male junior and under-23 riders. It documented substantial intermittent high-intensity work and noted that technical downhill riding can require muscular effort even without pedalling.
37.0 ± 17.9%
The proportion of race time spent above the second ventilatory threshold in the competitive cross-country format studied. This is a measure of racing demands, not an expected intensity for recreational singletrack riders.
Frontiers in Physiology, 2018; original research involving 16 young male competitors.
There’s another form of effort that’s less visible on a ride summary: attention. Narrow trails require frequent decisions about traction, obstacles, corner exits and other users. This attentional workload may contribute to perceived fatigue, although the study did not isolate or quantify that contribution.
When concentration slips, riders may notice hazards later and respond with sudden braking. The resulting acceleration and deceleration can make a ride feel increasingly demanding.
To understand your own fatigue, compare sections rather than relying on total elevation gain. Ask whether the hardest moments happened on sustained climbs, technical flats or descents requiring constant control.
A heart-rate spike on a flat technical section is a useful observation, but heart rate alone cannot diagnose poor line choice. Acceleration, anxiety, terrain and other factors may also affect it. Combine what your device shows with what you remember doing on the bike.
On your next ride, notice whether you repeatedly brake immediately after spotting a feature. If so, practise anticipating the feature earlier before assuming that more endurance training is the complete answer.
Once you recognise these different demands, the next improvement is giving yourself enough time to make decisions without rushing them.
How to Scan 10 Metres Ahead on Singletrack Without Overthinking It?
To scan approximately 10 metres ahead on singletrack, use that distance as a flexible reference rather than a fixed target. Look toward the line you want to follow, briefly check the ground approaching your front wheel, then scan for people, corners and exits. Repeat the cycle while adjusting your lookahead to your speed, visibility and trail difficulty.
The purpose of looking ahead is to create decision time. At a gentle pace, a nearby root may leave enough time to choose a line. At higher speeds, the same lookahead distance can become inadequate. Tight vegetation or a blind bend may also prevent you from seeing as far as you would like.
REI’s basic mountain-biking techniques recommends scanning approximately 15–20 feet ahead and shifting visual attention between the approaching terrain and the trail farther forward. That is a practical introductory cue, not a universal distance for every trail or speed.
Develop the habit as a repeating three-part loop:
- Surface: Briefly identify immediate traction changes, such as wet roots, loose stones or ruts.
- Line ahead: Look toward the path and exit you intend to use. Decide early whether the line is manageable.
- Surroundings: Check for approaching riders, hikers, intersections and places where your available sight line ends.
Rather than mentally announcing each step, let your eyes move naturally through the sequence. Your gaze should spend enough time ahead to guide the bike, without ignoring hazards close enough to require immediate attention.
One common mistake is target fixation. You see a prominent rock, stare directly at it and continue steering your attention toward the very object you want to avoid.
Practise on an easy, open section with a clearly visible obstacle and a safe alternative path. Identify the obstacle briefly, then shift your gaze toward the open space you want your tyres to follow. Keep your speed low enough to stop comfortably and repeat the exercise until selecting the exit feels natural.
The same principle applies to corners. Your eyes should identify where the trail leads before your front wheel reaches the turn, while your speed remains appropriate for what is actually visible.
For a simple self-check, choose a familiar, easy section and notice how often you make an abrupt stop because a routine feature appeared unexpectedly. Revisit it at a similar controlled speed after practising your scanning pattern.
Early scanning also makes shared-trail encounters easier to manage, particularly when another rider approaches from behind.
Which Should You Choose: Let Riders Pass Immediately or Wait for a Wider Spot?
Let a faster rider pass immediately when there is enough visibility, width and stable ground to do so safely. On narrow singletrack, waiting for a clear, wider location is often more considerate than stopping abruptly in a dangerous position. Always follow posted trail rules and applicable yielding requirements, communicate your intentions and never accelerate beyond your comfortable pace simply to avoid inconveniencing someone.
The presence of a faster rider can make beginners feel obligated to leave the trail at once. But a poorly chosen pull-over can obstruct a blind corner, place someone on unstable ground or create an unpredictable passing manoeuvre.
Instead, assess the trail before deciding. The appropriate response depends on how far both riders can see, whether there is safe room alongside the track and whether either cyclist would have to stop in an exposed position.
| Trail situation | Pull over now | Wait for a better spot |
|---|---|---|
| Wide, straight section with clear visibility | Usually practical if you can stop securely and signal your intention. | Generally unnecessary unless the surface or passing space is unsafe. |
| Narrow blind corner or crest | Avoid an abrupt stop that obstructs the trail or creates a hazardous overtake. | Continue cautiously to a safe visible location if permitted and appropriate. |
| Steep, loose or unstable edge | Only if there is genuinely secure standing and passing space. | Prefer stable ground where both riders can maintain control. |
| Uphill rider meeting a downhill rider | Follow applicable right-of-way rules and stop when necessary. | Do not override yielding obligations merely to preserve momentum. |
REI’s mountain-bike trail etiquette guidance recommends communicating politely and allowing a leading rider time to find a suitable passing place. It also describes common shared-trail conventions, including cyclists yielding to hikers and horses and downhill cyclists yielding to uphill cyclists.
These are general conventions, not a substitute for local access signs or land-manager instructions. Some routes are one-way, bike-specific or governed by different arrangements.
Communication should be calm and predictable. A following cyclist might call, « Rider back » or « When you find a safe spot, please. » The leading rider could reply, « I’ll pull over at the next clearing, » provided they can communicate without losing control.
Keep a predictable line until the manoeuvre is agreed upon. Once safely stopped, leave sufficient space for the other rider, and resume only when the trail is clear.
When you’re the faster rider, the same courtesy applies in reverse. Announce your presence without demanding an immediate pass, leave adequate following distance and reduce speed during the overtake. Passing close at full speed through dust, loose corners or narrow vegetation is neither necessary nor courteous.
Good passing etiquette depends on recognising hazards early. That becomes especially important where a corner hides the next trail user entirely.
The Blind-Corner Mistake That Causes Most Singletrack Near-Misses
A particularly dangerous blind-corner mistake is entering too fast and drifting wide into space that may be needed by an oncoming rider. The wider line can feel smoother or faster, but it reduces room for an unexpected encounter. There is no reliable evidence here establishing that this mistake causes most singletrack near-misses; it is nevertheless an important avoidable hazard.
Imagine approaching a left-hand bend bordered by dense trees. You can see the entrance but not the exit. Taking a wide racing line might make the corner feel easier, yet it could carry your bike toward approaching traffic on a two-way trail.
The safer approach is to treat the bend like an intersection with limited visibility. Enter at a speed that allows you to stop within the trail you can see is clear. Do not assume that the unseen section is empty.
Listen for voices, tyre noise, braking or chain movement, but remember that other trail users may be quiet. Sound is an additional cue, not a replacement for visibility and speed control.
A practical corner-entry sequence is:
- Identify where visibility ends and select a speed that allows a controlled stop before that point.
- Complete most of your braking before leaning into the bend, while remaining ready to brake if needed.
- Stay on your designated side or within the appropriate trail corridor rather than cutting across the path of potential oncoming users.
- Look toward the visible portion of the exit and reassess the line as new terrain comes into view.
An inside line can be useful when it remains safe, predictable and appropriate for the trail layout. It should not become an excuse to clip vegetation, damage the trail edge or take a line that prevents effective braking.
Group riding adds another complication. Following a friend can create a false sense that the line ahead has already been checked. But the leading rider may have passed through the bend before another user arrived, or may be able to see something hidden from those behind.
Each group member must independently choose a safe entry speed and maintain enough distance to react. This applies to the final rider just as much as the first; no reliable statistic establishes that the last person is uniquely most likely to encounter an unexpected hazard.
When the corner is completely blind, slowing significantly or stopping to reassess may be necessary. A flowing ride is never worth crossing into unseen traffic.
Once corner entry becomes calmer, practising basic trail features can help prevent the same hesitation from returning on roots, berms and small drops.
In What Order Should You Practise Roots, Berms, and Small Drops to Progress Faster?
A useful beginner progression is to practise easy berms first, manageable roots second and small rollable drops last. Berms build confidence in cornering and looking toward an exit, roots develop balance and relaxed handling, and drops require careful entry-speed and body-position control. This is a coaching progression rather than a scientifically established universal order, so adjust it to the available terrain and your current abilities.
Many new riders gravitate toward the obstacle they find most exciting or intimidating. That can lead to practising a demanding feature before they have developed the braking, vision or balance skills needed to approach it comfortably.
Working on one manageable challenge at a time makes it easier to recognise what actually needs improvement.
First: build cornering confidence on easy berms
A berm is a banked turn that can provide additional support compared with a flat corner. On a smooth, open, beginner-friendly berm, practise reducing speed before entering, looking through the turn and maintaining a balanced position.
The challenge is learning to trust the bike’s available grip without making sudden steering or braking inputs. Avoid assuming that every banked turn offers unlimited traction: loose surfaces, moisture and the shape of the berm still matter.
Choose a line that keeps you comfortably within the maintained trail and allows room for unexpected changes.
Next: learn to stay relaxed over roots
Roots teach a different skill. Instead of guiding the bike through a supported arc, you’re allowing its wheels and suspension, if fitted, to move over an irregular surface while your arms and legs remain responsive.
Start with small, dry, visible roots on an easy trail. Approach at a controlled speed with level pedals and bent joints. Let the bike move beneath you without clamping the handlebars.
Wet roots can be extremely slippery, especially when crossed at an angle. If traction is uncertain, select a safer line, reduce speed appropriately or dismount rather than forcing the exercise.
Finally: approach small drops with appropriate instruction
Drops combine speed assessment, body position and commitment. They also introduce consequences that may be disproportionate to their apparent size.
Begin with a rollable feature that your bike and skills can handle, ideally under qualified coaching supervision. Inspect the approach, landing, run-out and any permitted bypass before attempting it.
A feature that requires an airborne technique should not be treated as equivalent to a simple roll-down. Do not attempt it until you’ve learned the relevant technique in a suitable environment.
Across all three skills, the practice speed should remain comfortably within your control. Repetition while frightened and rigid is less useful than repeating a manageable movement with deliberate attention.
A five-step technical-skills practice session
- Choose one permitted beginner-friendly feature and identify its entrance, exit and safe stopping area. Your result: a clearly defined practice location.
- Inspect the surface, visibility and escape options before riding. Your result: a line you can describe and comfortably attempt.
- Complete one controlled practice pass without increasing speed for appearance’s sake. Your result: one attempt you can evaluate.
- Repeat at a similar pace, focusing on a single cue such as looking through the exit or relaxing your elbows. Your result: an observable change or a confirmed difficulty.
- Record what felt predictable, what created hesitation and whether to repeat, simplify or postpone the feature. Your result: one specific goal for the next session.
Progress does not require eliminating every pause. It means making routine, manageable features more predictable while continuing to stop when inspection or safety requires it.
Those same vision and balance skills become especially valuable when several obstacles appear together, as they often do in a rock garden.
How to Pick a Line Through a Rock Garden Without Staring at Every Rock?
To pick a line through a rock garden, look for a continuous, manageable route rather than trying to avoid every individual stone. Identify the few obstacles that determine whether the line is safe, choose an appropriate entry speed and look toward your exit. Keep adapting when necessary, but avoid unnecessary last-second direction changes that disrupt your balance and momentum.
Rock gardens overload beginners because every stone seems to demand a separate decision. One rock looks sharp, another seems loose and a third sits directly in the middle of the trail.
Experienced line selection is often more selective. The important questions concern the route as a whole: where the wheels can roll, which rocks create unavoidable impacts and whether enough room exists to maintain balance.
Before entering, look for several features that may determine the safest route:
- Available gaps: Is there sufficient width and clearance for your bike and intended line?
- Square-edged rocks: Would a direct impact be difficult to absorb or risk damaging a wheel?
- Off-camber surfaces: Could a sloping rock redirect a tyre sideways?
- Loose material: Could rolling stones or gravel reduce braking and steering traction?
The goal is to choose a route through manageable terrain, not necessarily the straightest or fastest path.
On unfamiliar technical ground, stop somewhere safe before the feature and inspect it if needed. Walking through a rock garden to identify an appropriate route is a legitimate riding decision.
Once your route is selected, shift attention toward where the bike should go next. Maintain a relaxed, balanced position, allowing your knees and elbows to move as the wheels encounter uneven ground.
Controlled momentum can make some obstacles easier to roll over. However, more speed is not automatically safer. A narrow gap, awkward rock edge or poor landing may require a slower approach, a different route or walking the section.
Pick an entry speed that matches the line you actually intend to ride. Arriving too quickly for a precise, slow-speed manoeuvre can create panic braking. Entering too slowly for a particular roll-over may cause a stall. Neither problem is solved by blindly adding speed.
Once inside the feature, avoid constantly switching between equally viable lines. If a genuine hazard appears or the original route becomes unsafe, however, adapting your line or stopping remains more important than preserving a previous commitment.
A useful exercise is to revisit the same easy rock garden several times under comparable conditions. Make the first pass at a comfortable speed, then assess where your gaze dropped, where you braked and whether the chosen path remained clear.
Only consider a modest increase in pace if the section remains fully within your ability. Repeatability and control matter more than speed.
Over time, you’ll begin recognising familiar patterns—stable gaps, awkward edges and surfaces that require caution—instead of feeling compelled to inspect every stone individually.
The next challenge is maintaining that control on sustained rocky descents, where tension in your hands can undermine an otherwise sensible line.
How to Ride Rocky Descents With More Control Without Death-Gripping the Bars
A more controlled rocky descent starts with supporting your body through your pedals rather than hanging on the handlebars. Keep your knees and elbows flexible, maintain a secure but not excessively tight grip, and brake progressively according to available traction. Your hands still need to control the bike, but your legs and body position should absorb much of the terrain’s movement.
When the trail becomes rough, the instinct is often to squeeze harder. Riders lock their elbows, push weight into their palms and hold the bike rigidly in an attempt to prevent unexpected movement.
That response can make the bike harder to manage. A rigid upper body reduces the rider’s ability to absorb impacts and may increase arm fatigue. It can also interfere with precise braking and steering.
Instead, begin with the basic ready position:
- Stand on level pedals when the terrain calls for an active descending position.
- Keep your knees and elbows comfortably bent so the bike can move beneath you.
- Support your weight primarily through your feet, with balanced pressure rather than forcing an exaggerated backward position.
- Keep your heels level or gently lowered when appropriate, without adopting an inflexible stance.
- Maintain enough hand pressure for secure steering and braking, but avoid unnecessary squeezing.
Think of your arms as responsive guides rather than rigid supports. A relaxed grip does not mean letting the handlebars move uncontrolled; it means retaining steering authority without excessive muscular tension.
Braking technique is equally important. The front brake generally provides most of a mountain bike’s braking potential when traction and weight distribution permit it. The rear brake helps manage speed, but relying exclusively on it can increase skidding and reduce control.
Use both brakes smoothly and proportionately, adapting pressure to the slope, surface and available grip. Sudden or excessive braking on loose rocks can lock a wheel or reduce traction.
Whenever possible, adjust most of your speed before entering the roughest section. If braking remains necessary inside it, use controlled lever inputs appropriate to the available traction. Do not assume braking must stop entirely on technical ground.
The relationship between grip tension and attention is also worth noticing. When riders are concentrating entirely on holding the handlebars, they may stop looking far enough ahead to choose an effective line.
On an easy rocky slope, deliberately check whether your elbows can still move and whether your gaze remains on the next usable section of trail. If your hands become painfully tense or you cannot brake reliably, stop in a safe place and reassess.
Tyre traction, bike setup, surface conditions and personal skill all affect what feels manageable. Relaxation is a useful technique, not a guarantee that difficult terrain is safe.
Once those movements become more familiar, consistent riding comes from reinforcing them together rather than treating each obstacle as a completely new problem.
Key takeaways before your next ride
- Choose a pace that leaves sufficient time to see, decide and stop; a smooth ride is not necessarily a fast one.
- Make your entry speed, line choice and body position work together instead of trying to correct mistakes through sudden braking.
- Measure progress through predictable decisions and respectful trail sharing, not simply fewer stops or higher average speed.
Building the Habits That Keep Your Pace Steady Ride After Ride
Steady singletrack riding develops through repeated habits: scanning ahead, braking before features, choosing manageable lines, keeping your body responsive and communicating with other trail users. Practise one habit at a time on familiar terrain, then evaluate whether your decisions are becoming earlier and calmer. The aim is reliable control, not eliminating necessary stops or continually increasing speed.
One of the most valuable habits is reviewing where you brake. Beginners often focus on whether they stopped, without noticing what happened immediately beforehand.
For example, imagine repeatedly braking hard just before a small root crossing. The problem might not be the root itself. Perhaps you looked up too late, selected a line too close to the obstacle or approached faster than your available reaction time allowed.
On a familiar, easy section, experiment with identifying your braking point sooner. Reduce speed progressively while the bike is stable, then approach the feature at a pace that feels manageable.
Afterward, ask whether the approach felt predictable. The target is not a perfect run without touching the brakes. It is making each braking decision purposeful.
The simplest way to develop these habits is to give each ride one primary technical objective:
- Scanning ride: Pay attention to how early you identify corners, obstacles and shared-trail users.
- Line-choice ride: Identify an appropriate path before easy technical features and observe whether you follow it calmly.
- Braking ride: Notice which sections trigger abrupt braking and whether a smoother approach is possible.
Before riding, decide which habit you will practise and what would count as an improvement. Afterward, record one specific observation. For example, you might note that you identified the next corner before reaching the previous one’s exit, or that you no longer needed a sudden brake input before a familiar root crossing.
These observations provide more actionable feedback than judging the entire ride as good or bad.
Group rides add another layer. A faster group can encourage riders to exceed their abilities, while a slower group can tempt impatient overtakes. Neither situation justifies unsafe decisions.
Agree on regrouping points and passing expectations before setting off. Let others know if you prefer to inspect unfamiliar features, and establish that everyone can ride at a pace they can control. On shared-use trails, remain ready to slow or yield regardless of the group’s preferred speed.
If a trail feature repeatedly forces an emergency stop, treat that as information rather than failure. Revisit it on a quiet day, inspect the line and practise a simpler movement. When a feature exceeds your abilities, walking around it where permitted—or choosing an easier trail—is appropriate.
Steady pacing comes from combining these skills. Early vision supports line choice. Suitable entry speed makes braking calmer. Flexible body position helps the bike negotiate irregular ground. Clear communication prevents other trail users from becoming unexpected obstacles.
For your next singletrack ride, choose an easy, familiar trail and focus on one improvement: look ahead early enough to recognise the next decision before it becomes urgent. Keep your speed comfortable, make room for other users and finish with one observation you can apply the following time. A steadier pace follows from better decisions, not from refusing to stop.
Should beginners ride singletrack with flat pedals or clipless pedals?
Either system can be used for mountain biking, depending on experience, footwear and preference. Flat pedals allow riders to put a foot down without disengaging from a retention mechanism, which some beginners find reassuring. Clipless pedals require practice engaging and releasing. Whichever setup you use, reliable foot placement, suitable shoes and familiarity with the pedals matter more than trying to solve hesitation through equipment alone.
Is it acceptable to stop and walk a difficult singletrack obstacle?
Yes. Stopping to inspect or walk an obstacle is a valid safety decision. Choose a location with clear visibility, avoid blocking other trail users and use an established permitted route where one exists. Do not create shortcuts or damage surrounding vegetation. The aim of steady riding is to reduce unnecessary emergency stops, not to avoid sensible ones.
How can I tell whether a singletrack trail is appropriate for my skill level?
Check the local trail network’s official difficulty information, intended direction, access rules and current conditions. Ratings can vary between regions and trail systems, so a familiar colour or grade does not guarantee identical difficulty elsewhere. Look for beginner-friendly terrain with manageable obstacles, sufficient visibility and options to stop safely. If the trail repeatedly demands techniques you cannot control, choose an easier route.
Does a more aggressive mountain-bike tyre eliminate the need to slow down?
No. Tyre tread, compound, casing and pressure influence grip and handling, but no tyre guarantees traction on wet roots, loose rocks or blind corners. A suitable front and rear tyre combination depends on the terrain, bicycle and riding priorities. Equipment can support your technique, but available visibility and control must still determine your speed.
What should I do if a faster rider is following closely and I feel pressured?
Keep a controllable speed and a predictable line rather than accelerating to match the following rider. When communication is practical, let them know you’ll make room at a safe location. Follow applicable yielding rules, avoid stopping abruptly in a blind or unstable spot, and allow the overtake once both riders have enough space and visibility. Someone else’s preferred pace should not determine your safety margin.