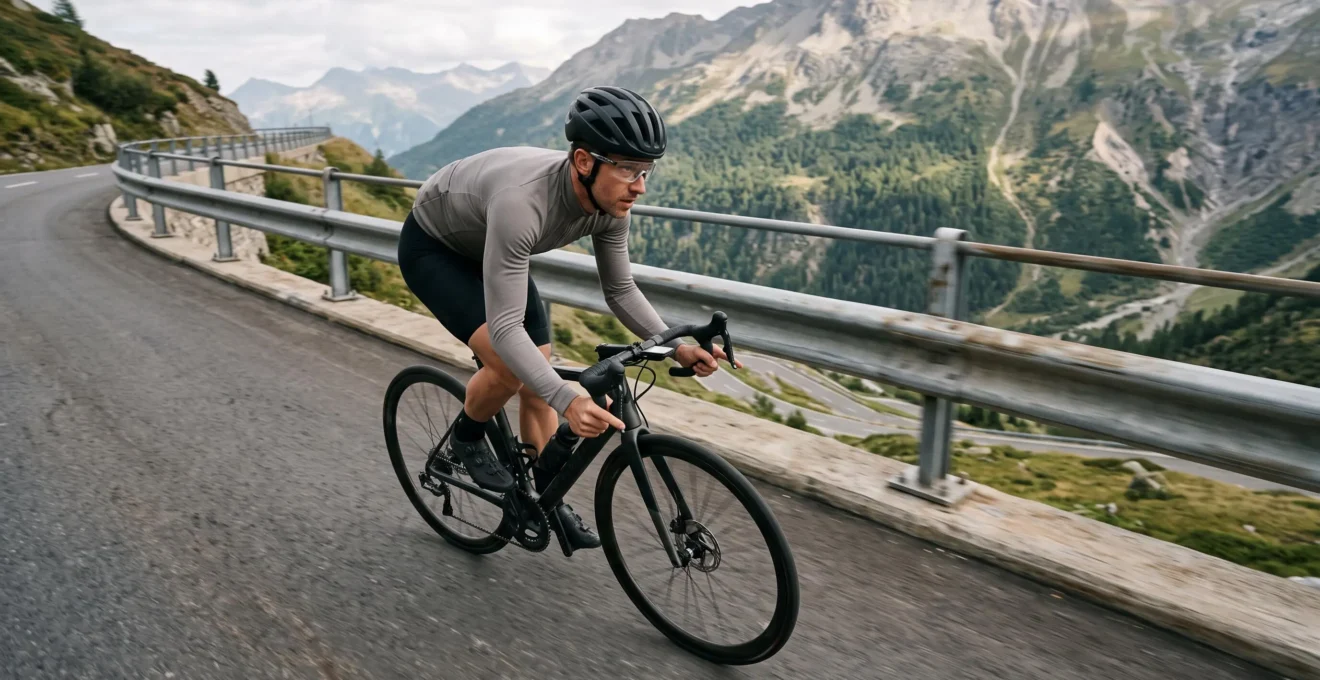
A 12% descent does not require you to ride fast, squeeze both brake levers continuously or fight the bike all the way down. It requires a repeatable strategy: control your entry speed, keep your body relaxed, distribute braking according to available grip and give your brakes opportunities to recover during longer descents. The steeper the road, the more important it becomes to make decisions before the next corner rather than reacting halfway through it.
For nervous cyclists, the biggest improvement often comes from separating three problems that feel like one: unstable handling, insufficient braking confidence and uncertainty about the riding line. Each has a different solution. Tyre pressure cannot compensate for poor braking technique, and stronger brakes cannot compensate for entering a corner too fast.
The objective is **controlled speed rather than maximum speed**. With a suitable riding position, properly maintained brakes and progressive practice, a steep descent becomes a sequence of manageable decisions instead of one long emergency.
The essentials of descending a steep 12% grade
- Set your speed before corners, use both brakes progressively and avoid dragging the brakes continuously over long sections.
- Keep your arms and knees relaxed, lower your centre of gravity and adjust your weight to maintain traction without unloading either wheel unnecessarily.
- Inspect your tyres, pads and rotors before descending, then practise on short, predictable slopes before attempting longer or steeper routes.
- Why Do Steep Descents Make Your Bike Feel Unstable Even When It’s Straight?
- How to Brake on a Steep Descent Without Skidding or Overheating Rotors?
- Which Should You Change First on Steep Descents: Tyre Pressure or Braking Technique?
- The Corner-Entry Mistake That Sends You Wide on Steep Descents
- Where Should You Practise Descending Skills if You’re Nervous About Speed?
- The Braking Habit That Causes Front-Wheel Washouts on Wet Rock
- How to Bed In Disc Brake Pads Properly in 10 Minutes Without Glazing Them?
- How to Ride Rocky Descents With More Control Without Death-Gripping the Bars
Why Do Steep Descents Make Your Bike Feel Unstable Even When It’s Straight?
A bicycle can feel unstable on a straight 12% descent because gravity increases speed, braking changes the distribution of weight between the wheels, and small steering movements become more noticeable at higher speeds. However, not every twitch is a mechanical problem. A tense upper body can amplify ordinary road feedback, making the bike feel less predictable than it actually is.
The first factor is **weight transfer**. When you brake downhill, the deceleration creates a forward load transfer. The front tyre carries more of the braking load, while the rear tyre becomes easier to unload or lock. This changes the available traction at each contact patch and makes abrupt braking inputs particularly difficult to manage.
The geometry of the bicycle also matters. Head angle, wheelbase, fork characteristics and tyre behaviour influence how the bike responds to steering inputs. A bicycle that feels composed on flat ground can feel more demanding when speed builds quickly on a steep gradient.
The second factor is rider tension. British Cycling recommends relaxed arms, soft elbows and knees, looking ahead and avoiding a death grip on the handlebars. Its guidance explains that tension can be transmitted to the bicycle and contribute to twitchy handling.
This is important because stiff arms cannot absorb road feedback naturally. Every small surface irregularity can become an exaggerated movement through the hands and shoulders. The result is more frequent steering corrections, which can make a straight descent feel unstable.
**A useful distinction is whether the instability follows the bicycle or follows your posture.** If the bike repeatedly pulls to one side, vibrates abnormally or develops a persistent wobble, inspect its mechanical condition rather than assuming the problem is anxiety.
For a simple diagnostic, choose a short, familiar and low-risk slope. Repeat it at a controlled speed, first with your normal posture and then with relaxed elbows, loose shoulders and a stable stance. On a suitable bicycle, a lowered dropper post can also help on technical terrain, although it is not a universal diagnostic test for road-bike instability.
Avoid deliberately increasing speed to test stability. If the sensation persists, check tyre condition, wheel security, headset adjustment and brake alignment with a qualified mechanic.
A 12% gradient also makes steering corrections more consequential because the bicycle continues accelerating whenever gravity exceeds the resistance from rolling, aerodynamic drag and braking. A small late correction can therefore have a larger effect on the chosen line than it would on flat ground.
Once the bicycle feels predictable, the next priority is managing speed without exhausting the braking system. That requires understanding how braking force and heat behave together.
How to Brake on a Steep Descent Without Skidding or Overheating Rotors?
The safest general approach to a long, steep descent is to apply progressive braking when the bicycle is upright and the road ahead is clear, reduce speed before corners, and release unnecessary brake pressure when conditions allow. Use both brakes, adjusting their contribution to the gradient, surface and available traction. Avoid holding the levers continuously throughout the descent.
On a 12% grade, braking is not simply about slowing down. It is about controlling the conversion of the bicycle’s downhill motion into heat at the braking surfaces.
The front brake generally contributes substantial stopping power because braking transfers load towards the front wheel. However, this increased loading does not make the front tyre immune to skidding. Excessive or abrupt pressure can exceed the available grip, especially on wet, loose or uneven surfaces.
The rear wheel presents the opposite challenge. As braking transfers load forwards, the rear tyre has less normal force available and can lock more easily. If it begins to skid, reduce rear brake pressure briefly to help it regain traction, provided the situation allows.
British Cycling recommends using both brakes, slightly favouring the front in ordinary descending conditions, with adjustments for extremely steep or slippery terrain. Its guidance also recommends positive braking rather than continuously dragging the levers.
**A practical braking sequence** has three stages:
1. **Approach:** Assess the next straight section, corner, junction or surface change. Choose a speed that leaves room for unexpected hazards.
2. **Brake:** Apply controlled pressure while the bicycle is upright and travelling on a predictable line. Increase pressure progressively rather than grabbing the levers.
3. **Release:** Reduce unnecessary pressure when the required speed has been reached. Enter the corner with enough control to steer smoothly.
This is sometimes described as braking in distinct phases. It allows the braking surfaces to receive airflow during periods of reduced brake application and avoids the unnecessary heat generated by continuous dragging.
Brake temperature deserves particular attention on long descents. Every braking event converts kinetic energy into heat. A heavy rider, high entry speed, repeated braking and a long gradient can increase the thermal demands placed on the system.
Signs of possible brake overheating or deterioration include:
- A noticeable reduction in braking power despite similar lever pressure.
- Unusual brake noise, burning smells or visible signs of excessive heat.
- A change in lever feel, including excessive travel or a spongy sensation on hydraulic systems.
- Inconsistent braking response after repeated heavy applications.
A spongy lever is not proof of overheating alone. Air in the hydraulic system, fluid problems and mechanical faults can produce similar symptoms.
Shimano warns that continuous brake application can contribute to vapor lock in hydraulic systems. Heated fluid and expanding bubbles can increase lever travel and compromise braking performance. If braking becomes unreliable, stop in a safe location and arrange an inspection. **Never touch a hot rotor or caliper to check its temperature.** Allow the components to cool and inspect them without direct contact.
For additional technical context, Shimano’s disc brake safety instructions explain the risks associated with heat, hydraulic braking and contaminated components.
The important distinction is that alternating braking and rolling can reduce unnecessary continuous heat input, but it does not guarantee that the brakes will remain within a safe operating temperature. The correct approach is to manage speed early, use appropriate equipment and avoid relying on a cooling strategy to compensate for inadequate braking capacity.
Once braking becomes more predictable, tyre setup is easier to evaluate. The next decision is whether the bicycle lacks grip because of its pressure settings or because braking and body positioning need adjustment.
Which Should You Change First on Steep Descents: Tyre Pressure or Braking Technique?
On steep descents, check braking technique and tyre condition before making large pressure adjustments. If a tyre feels harsh, loses contact over small irregularities or deforms excessively in corners, pressure may need attention. If skidding happens mainly during abrupt braking or at higher speeds, rider input and weight distribution are more likely to be the first areas to improve.
Tyre pressure affects how the contact patch interacts with the ground. Pressure that is too high for the tyre, rider weight and terrain can reduce comfort and make it harder for the tyre to follow irregular surfaces. Pressure that is too low can cause excessive casing deformation, unstable cornering and rim strikes.
However, **lower pressure is not an automatic solution to poor braking grip**.
On a 12% slope, traction depends on several interacting factors:
- Tyre construction, tread and compound.
- Surface material, contamination and moisture.
- Actual wheel loading during braking.
- Rider position and braking smoothness.
- Tyre width, rim compatibility and total system weight.
A rider who abruptly applies the front brake can overwhelm the available grip even with a well-chosen tyre pressure. Similarly, an excessively low rear tyre pressure can create instability when cornering under load.
The decision becomes clearer when the symptoms are separated.
| Observed behaviour | Likely area to investigate | First action |
|---|---|---|
| Harsh ride and poor tracking over small bumps | Tyre pressure or tyre construction | Check pressure against tyre and rim limits. |
| Tyre feels unstable during hard cornering | Pressure, casing support and technique | Check for excessive deformation and reduce cornering load. |
| Rear wheel skids during abrupt braking | Braking input and rear-wheel loading | Apply rear braking progressively. |
| Front wheel loses grip during sudden braking | Front brake modulation and surface traction | Reduce speed earlier and avoid abrupt lever inputs. |
| Grip problems appear only on wet or loose surfaces | Surface conditions and tyre suitability | Adjust speed and line before reaching the hazard. |
A useful test involves choosing a short, familiar descent with a predictable surface and a safe run-out. Record the existing pressure, tyre type and observed handling. If pressure needs adjustment, make a small change within the tyre and rim manufacturers’ limits, then repeat the same section under comparable conditions.
Keep the braking technique consistent between runs. Otherwise, changing pressure and braking behaviour together makes it difficult to identify which variable influenced the result.
For tubeless tyres, also consider the minimum pressure needed to maintain reliable rim protection and prevent the casing from rolling excessively. For tubed tyres, pinch-flat risk must be considered.
A pressure gauge is more reliable than squeezing the tyre by hand. Record actual readings rather than relying on vague descriptions such as soft or firm.
With a predictable tyre setup and smoother braking, the remaining challenge is often cornering. A rider who enters a bend too quickly can lose the intended line even when the bicycle and brakes are working correctly.
The Corner-Entry Mistake That Sends You Wide on Steep Descents
The most common corner-entry mistake on a steep descent is carrying too much speed into the turn and then braking abruptly while trying to steer. Braking during a corner is not inherently dangerous, but excessive or sudden braking can consume the grip needed for turning and make the bicycle run wider than intended. The solution is to establish a manageable entry speed before changing direction.
On a downhill bend, gravity continues accelerating the bicycle as it approaches and passes the apex. A rider who waits too long to slow down may feel increasingly rushed, especially when the corner tightens or the exit becomes visible.
This often creates a predictable sequence:
1. The rider approaches faster than the available visibility and grip justify.
2. Fear of entering too quickly triggers sudden braking.
3. The bicycle becomes more upright under braking, reducing the available turning angle.
4. The rider looks towards the outside edge rather than the intended exit.
5. The line widens, increasing the risk of crossing the road boundary.
The problem is not simply that the rider touched the brakes while cornering. It is that speed, braking and steering were not planned together.
British Cycling recommends completing most braking before corner entry, allowing the wheels to roll more freely during the turn. This supports smoother cornering and reduces unnecessary competition between braking and lateral grip.
A useful sequence is **slow before the turn, look through the turn, then progressively release the brakes as conditions permit**.
For a steep descent, approach with a conservative entry speed. Use the straight section before the bend to reduce speed while the bicycle is relatively upright. Choose a line that offers a clear view of the exit and enough room to respond to unexpected obstacles.
An outside-to-inside-to-outside line can be appropriate on a wide, empty and predictable road, but it is not a universal rule. On public roads, remain within your lane and account for oncoming traffic, parked vehicles, debris and poor visibility. Never cut across the centre line to improve a cornering line.
A wider entry can sometimes improve visibility and reduce the sharpness of the turn, but the safest line is the one that preserves your available road space and allows you to stop within the distance you can see to be clear.
Fear also changes visual behaviour. Nervous cyclists often look at the road edge or the obstacle they want to avoid. This can reinforce the movement towards that hazard. Instead, look towards the intended path through the bend while remaining aware of the entire road environment.
Anticipation matters more than trying to recover a poor line halfway through a corner. If the bend is tighter than expected, prioritise staying within the safe road boundary rather than forcing an ideal racing line.
Once cornering decisions become deliberate, confidence can develop through repetition. The most useful practice environment is one where the rider can make mistakes without being exposed to unnecessary traffic or steep drop-offs.
Where Should You Practise Descending Skills if You’re Nervous About Speed?
The best place to practise descending is a short, predictable slope with good visibility, a safe run-out and minimal traffic. Start with moderate gradients and controlled speed, then increase the difficulty gradually. A familiar environment allows you to practise braking, body position and visual anticipation without having to manage unfamiliar road hazards at the same time.
Avoid making your first training session on a long mountain road with blind corners. That environment combines speed, commitment, surface uncertainty and traffic, making it difficult to identify which skill needs improvement.
A progressive approach is more effective.
**Stage 1: Build basic control on a gentle slope.**
Practise maintaining a relaxed upper body, keeping your fingers positioned on the brake levers and applying both brakes smoothly. Focus on consistent speed rather than acceleration.
**Stage 2: Introduce steeper gradients.**
Choose a short descent with a predictable surface and a clear stopping area. Practise controlling speed before the slope becomes steeper. Do not increase speed simply because the gradient is more challenging.
**Stage 3: Add corners and changes in surface.**
Once braking feels consistent, practise reading the road ahead, choosing a safe line and reducing speed before turns. Introduce more technical conditions only when the basic movements are reliable.
**Stage 4: Increase the length of the descent.**
Longer descents add fatigue and thermal demands to the braking system. Make sure your brakes, pads and rotors are in good condition before progressing.
Suitable practice environments include:
- Quiet, gently sloping paved areas with permission to ride.
- Closed cycling facilities or supervised skills areas.
- Suitable forest roads with low traffic and predictable surfaces.
- Organised group rides with an experienced descending coach.
A more experienced cyclist can provide a useful reference for posture, braking points and cornering lines. British Cycling specifically recommends following an experienced rider as a learning method.
However, following another cyclist should never mean copying their speed blindly. Leave sufficient space, maintain your own sightlines and stop if the rider ahead is travelling beyond your comfort level.
The goal of each session should be measurable. For example, maintain a relaxed grip throughout the descent, identify braking points before reaching them, or reduce unnecessary repeated brake applications.
Your five-step descending practice checklist
- Inspect the bicycle: Check tyre condition, pressure, wheel security and brake operation. Deliverable: a completed pre-ride inspection.
- Choose a suitable slope: Identify the gradient, surface, visibility and safe stopping area. Deliverable: one approved practice location.
- Define your braking points: Identify where you can safely slow down before any turn or hazard. Deliverable: a simple sequence of braking zones.
- Practise relaxed positioning: Repeat the descent while keeping your shoulders relaxed, elbows bent and weight appropriately distributed. Deliverable: one controlled run without unnecessary steering corrections.
- Review the session: Record where braking felt consistent, where confidence dropped and what needs adjustment. Deliverable: one specific objective for the next session.
The most useful training partner is someone who rides predictably, communicates clearly and respects your chosen pace. A calm reference can help you understand what a controlled descent looks like without creating pressure to match someone else’s speed.
Once the basic technique feels familiar, the next step is learning how to adapt it to wet surfaces. Wet rock requires a different level of caution because the available grip can change dramatically within a few metres.
Key points to remember before tackling wet and technical descents
- Reduce speed before reaching slippery rock rather than waiting until the tyres are already on the hazard.
- Keep braking inputs smooth and adapt them to the traction available at each wheel.
- Prioritise a clear, predictable line and avoid unnecessary steering or braking movements on unstable surfaces.
The Braking Habit That Causes Front-Wheel Washouts on Wet Rock
The dangerous habit on wet rock is grabbing the front brake suddenly when the front tyre is already struggling for traction. Smooth braking before reaching the slippery section is safer than relying on a last-second lever input. Wet rock does not always have negligible grip, but polished stone, algae, mud and water can make available traction extremely unpredictable.
A front-wheel washout happens when the front tyre loses sufficient lateral grip to maintain the intended direction. On a descent, that can happen when braking force and cornering demand exceed the traction available at the contact patch.
The front brake remains an important source of stopping power, even on technical terrain. Automatically avoiding it or transferring nearly all braking to the rear wheel is not a universal solution. The correct distribution depends on the surface, gradient, rider position and available grip.
On wet rock, abrupt lever movements are especially problematic. A sudden increase in braking force can cause the tyre to lose traction before the rider has time to respond.
The safer strategy is to anticipate the surface.
Look for:
- Polished rock slabs with visible water.
- Dark patches that may indicate algae or accumulated moisture.
- Wet roots crossing the riding line.
- Loose stones resting on hard, slippery ground.
- Transitions between gravel, rock and paved surfaces.
If possible, identify these hazards before entering the descent. Reduce speed on predictable ground, then approach the slippery section with smooth inputs and a stable position.
Shimano’s safety guidance recommends reducing speed and braking early and gently in wet conditions because tyres can skid more easily and stopping distances increase.
On a particularly slippery section, avoid sudden steering changes and unnecessary braking. If you need to make a substantial speed reduction, look for a suitable grippier section where the bicycle can remain more upright.
The idea that the rear brake should always provide most of the braking force on wet rock is too simplistic. The rear wheel can lock easily when its load is reduced, and the front wheel still contributes significantly to stopping. Both brakes should be managed according to the actual traction available.
If the bicycle begins to slide, avoid a panicked increase in braking force. Smoothly reduce the input that is exceeding available grip and allow the tyre to regain traction when possible. Do not make abrupt countersteering movements.
Wet-rock riding also demands realistic expectations. Some surfaces are too slippery to ride safely at the current speed or with the available equipment. Walking a particularly hazardous section is a sensible decision, not a failure of technique.
Wet conditions expose the limitations of even good riding technique. Reliable equipment is therefore essential, particularly when the descent depends on disc brakes delivering consistent power under repeated use.
How to Bed In Disc Brake Pads Properly in 10 Minutes Without Glazing Them?
Bedding in new disc brake pads and rotors establishes a consistent transfer layer of pad material on the rotor, helping the braking system deliver predictable performance. The correct procedure depends on the brake manufacturer and model. For SRAM‘s documented mineral-oil MTB brake systems, the specified procedure includes approximately twenty moderate-speed braking repetitions followed by approximately ten faster-speed repetitions, with cooling afterward.
The process matters because new braking surfaces do not necessarily deliver their intended performance immediately. Bedding in gradually heats the pads and rotor, transferring a thin, even layer of friction material to the braking surface.
This transfer layer supports consistent contact between the pad and rotor. An uneven or poorly established surface can contribute to inconsistent braking, noise and reduced performance.
Glazing is a different problem. Excessive heat can alter the friction surface of a pad, producing a smoother and less effective contact surface. This may reduce braking performance precisely when a long, steep descent demands reliable stopping power.
For the documented SRAM procedure, the manufacturer’s instructions describe the following sequence:
- Find a suitable, controlled area with enough space to brake safely.
- Remain seated and perform approximately twenty controlled braking repetitions from moderate speed, avoiding wheel lock-up.
- Perform approximately ten additional braking repetitions from a faster speed, following the manufacturer’s instructions.
- Allow the brakes to cool before continuing to ride.
The repetition counts belong to the specified SRAM procedure, not to every bicycle disc brake. Follow the exact manual for the brake model installed on the bicycle. The procedure involves substantial braking force and should be carried out by someone familiar with the system; SRAM advises inexperienced users to have a qualified mechanic perform it.
For the complete procedure and technical context, SRAM’s mineral-oil MTB disc brake service manual explains the bed-in process and the purpose of the transfer layer.
Before attempting a 12% descent, inspect the brake pads for sufficient friction material and look for signs of uneven wear, contamination or damage.
A pad should be replaced when it reaches the manufacturer’s minimum thickness, has structural damage or shows contamination that cannot be safely resolved. Do not rely on appearance alone when assessing whether a pad is serviceable.
Oil contamination is particularly serious. Shimano warns that oil or grease on brake pads can impair braking performance and specifies replacing contaminated pads while cleaning contaminated rotors according to its instructions.
Cleaning the rotor does not make an oil-contaminated pad safe to reuse. Friction material can absorb contaminants, making the braking response unreliable even after surface cleaning.
Other checks before a demanding descent include:
- Confirm that the brake lever feels consistent and does not pull excessively towards the handlebar.
- Check for uneven pad wear or insufficient remaining material.
- Look for damage, contamination or abnormal scoring on the rotor.
- Confirm that the wheel is correctly installed and the brake caliper is secure.
A properly bedded-in brake is not automatically protected against overheating. Pad condition, rotor size, rider mass, descent length and braking habits still determine how much thermal stress the system experiences.
Good brakes provide the foundation for controlled riding, but technical descents also require the rider to absorb terrain changes without allowing every impact to become a steering correction. That is where relaxed hands and stable foot pressure become essential.
How to Ride Rocky Descents With More Control Without Death-Gripping the Bars
Riding rocky descents with more control starts with looking ahead, choosing a predictable line and allowing the bicycle to move beneath you. Keep your arms relaxed, apply steady pressure through your feet and reduce speed before entering the roughest section. Gripping the handlebars harder does not create more traction; it often makes it harder to absorb impacts and maintain smooth steering.
Rock gardens and rocky paths introduce rapid changes in wheel loading. A front tyre can move over a rock, drop into a gap or deflect sideways after hitting an exposed edge.
The first priority is line selection. Look beyond the nearest obstacle rather than concentrating on the rock directly in front of the wheel. Identify a sequence of connected surfaces that allows the tyres to maintain contact with the ground.
Whenever possible, avoid sharp edges that can deflect the front wheel or damage the tyre. A rounded face or a more predictable approach angle may be easier to ride than a sharp, exposed edge.
The ideal line depends on the terrain. A route that is smooth from one direction may become unstable when approached from another. Check the surface, available clearance and exit before committing.
**Feet heavy, hands light** is a useful principle for technical riding. Pressure through the pedals helps maintain a stable lower-body connection with the bicycle, while relaxed arms allow the front wheel to move over obstacles without transferring every impact directly into the shoulders.
This does not mean removing pressure from the handlebars entirely. Your hands still control steering and braking. The objective is to avoid using a rigid upper body to support all the forces generated by the terrain.
Body position also matters. A lower, balanced stance with bent elbows and knees gives the body room to absorb impacts. On steeper technical sections, moving the hips rearward as appropriate can help maintain control, but moving too far behind the bicycle can unload the front tyre and compromise steering.
British Cycling recommends shifting weight backwards as gradients increase and lowering the heels for a more secure position. The appropriate amount of rearward movement depends on the bicycle, terrain and braking demands.
Speed management should happen before the rock garden whenever possible. Entering too quickly creates pressure to brake while the tyres are already negotiating obstacles.
Once inside the rough section, aim for a steady, manageable pace. Avoid abrupt braking or sudden steering movements. However, do not treat coasting as an absolute rule: if an unexpected hazard appears or speed becomes unsafe, use the available braking carefully.
The distinction is between planned speed reduction and uncontrolled reactions. A rider who enters at a manageable speed has more capacity to respond to unexpected changes.
For nervous riders, the death grip often comes from trying to prevent every movement of the bicycle. In practice, the bicycle needs some freedom to move beneath the rider. Allowing that movement, while maintaining stable foot pressure and deliberate steering, usually produces more predictable handling.
A final consideration is suspension setup on mountain bikes. Suspension that is poorly adjusted or inadequately maintained can reduce control over repeated impacts. Check the manufacturer’s setup recommendations rather than assuming that softer suspension always improves traction.
The most reliable descending skill is the ability to combine anticipation, traction management and progressive braking without rushing. Start with a manageable slope, check the bicycle, and increase the challenge only when each part of the technique feels repeatable. A steep 12% descent should be approached as a sequence of controlled decisions, not as a test of how much speed or fear you can tolerate.
Is a 12% gradient considered steep for a bicycle?
Yes. A 12% gradient is a demanding descent because gravity can increase bicycle speed quickly, especially over longer sections. The difficulty depends on road surface, visibility, cornering, bicycle type and rider experience. It does not mean that every 12% descent is unsafe, but it requires appropriate speed management and reliable brakes.
Should you use the front or rear brake more on a steep descent?
Both brakes should be used, with their contribution adjusted to gradient and traction. The front brake generally provides substantial stopping power because braking transfers load towards the front wheel. However, abrupt front braking can cause a loss of traction, while the rear wheel can lock when it becomes unloaded. Avoid applying a fixed front-to-rear braking ratio in every situation.
How can you tell if bicycle disc brakes are overheating?
Possible warning signs include reduced braking power, unusual noises, burning smells and changes in lever feel. A spongy lever can also indicate air or another hydraulic problem, so it should not automatically be attributed to overheating. Stop in a safe place if braking becomes unreliable, allow the components to cool and arrange a mechanical inspection. Never touch a hot rotor or caliper.
Is it safer to lower tyre pressure before a steep descent?
Not necessarily. Lower pressure can improve tyre conformity on uneven surfaces, but excessive reduction increases the risk of rim strikes, pinch flats and unstable cornering. Use a pressure suitable for tyre width, rider weight, terrain and rim compatibility. Correct braking technique and body positioning remain essential even with an appropriate tyre setup.
What should you do if you become frightened halfway down a steep hill?
Look ahead, avoid sudden steering inputs and progressively reduce speed where the surface and available traction allow. Identify a safe stopping area rather than trying to reach the bottom as quickly as possible. Once stopped, reassess the route and consider walking the remaining section if it is beyond your current ability or the conditions are unsafe. Building confidence through shorter, controlled practice descents is more effective than forcing yourself to continue at an uncomfortable speed.