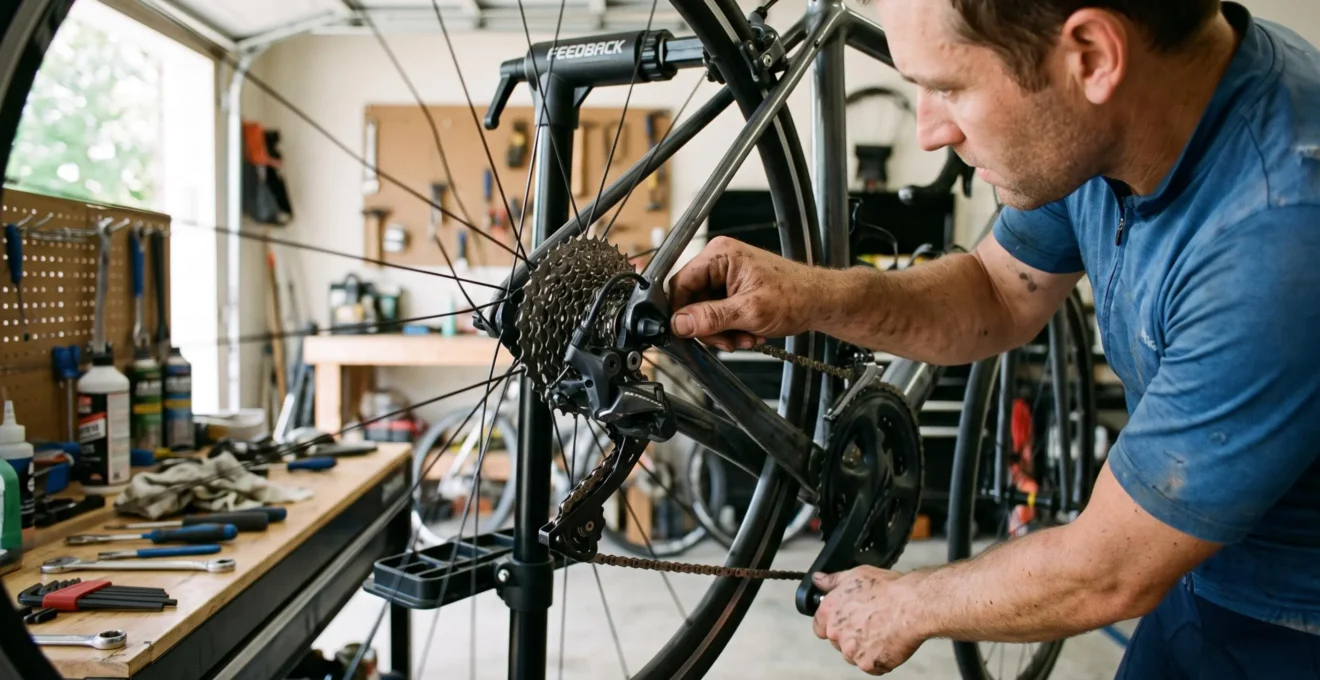
When your rear gears hesitate before changing, rattle between sprockets or require a second click to complete a shift, the solution may be a small adjustment to cable tension. On a conventional cable-operated rear derailleur, the barrel adjuster changes that tension without requiring you to loosen the cable anchor bolt or disturb the limit screws.
The direction matters. If the chain struggles to climb onto a larger rear cog, turning the barrel adjuster counterclockwise generally increases cable tension. If it hesitates when moving down to a smaller cog, a clockwise turn generally reduces tension. Work in quarter-turn increments and test each change while pedalling lightly.
For an otherwise healthy drivetrain, this can be a five-minute job. But if shifting remains inconsistent, the problem may be cable friction, a damaged hanger, incorrect component compatibility or drivetrain wear. The useful skill is knowing when a barrel adjustment is enough—and when another repair is necessary.
Rear shifting: the essential adjustments
- Slow shifts toward larger rear cogs usually call for a small counterclockwise barrel adjustment; slow shifts toward smaller cogs may call for a clockwise adjustment.
- Test one indexed shift at a time, beginning at the smallest rear cog. Leave the high- and low-limit screws untouched when correcting ordinary indexing.
- If shifting remains unreliable after careful adjustments, inspect cable condition, housing, hanger alignment and drivetrain wear before turning the adjuster further.
- Why Does Shifting Get Worse After 3 Weeks Even If You Never Crash?
- How to Diagnose Bad Shifting Without Touching Limit Screws by Mistake
- Which Is It: Cable Tension or Worn Drivetrain if It Skips Only on One Cog?
- The Small Frayed-Cable Problem That Makes Indexing Impossible to Fix
- When Should You Replace Gear Cables Instead of Re-Indexing Again?
- How to Check Cassette Compatibility Before You Order in 5 Checks
- Which Should You Replace: Chain, Cassette, or Both if It Skips Under Load?
- How to Replace a Cassette Without Buying the Wrong Freehub or Cog Range
Why Does Shifting Get Worse After 3 Weeks Even If You Never Crash?
Shifting can deteriorate during the first few weeks after a cable installation because cable ends and housing ferrules settle into position. This settling can reduce effective cable tension and move the derailleur slightly out of alignment with the cassette sprockets. It is a normal break-in possibility, not evidence that a crash or component defect has occurred.
Although mechanics commonly describe this process as cable stretch, the inner cable is not necessarily stretching substantially. The outer housing, its end caps and the places where they meet the frame and shifter all contribute to how much cable movement reaches the derailleur.
As ferrules seat more firmly into their stops, the system can develop additional slack. Housing compression and changes at bends may contribute. The result is often gradual: the bike shifts correctly after installation, becomes slightly noisy over several rides and eventually hesitates on certain shifts.
SRAM discusses cable-end settling and other causes of indexing problems in SRAM’s rear gear troubleshooting article.
The direction of the hesitation provides an important diagnostic clue. With a conventional rear derailleur, reduced cable tension tends to make shifts toward larger rear cogs slower or incomplete. The derailleur may move partway toward the selected cog before the chain finally climbs onto it.
Conversely, when the chain hesitates while returning toward smaller rear cogs, excessive cable tension or friction may be involved. Adding tension would not be the correct initial response.
Three weeks is not a service deadline. Bedding-in depends on installation quality, component condition, cable routing and how frequently the bike is ridden. Some systems require little or no subsequent correction.
Before adjusting anything, identify whether the problem affects shifts in a consistent direction. That observation makes the next test more reliable than turning the adjuster at random.
How to Diagnose Bad Shifting Without Touching Limit Screws by Mistake
Diagnose rear shifting by first identifying the barrel adjuster, then observing which direction produces hesitation. The barrel adjuster changes cable tension and indexing position; the limit screws restrict derailleur travel at the ends of the cassette. For ordinary indexing problems, use small barrel adjustments and leave the limit screws at their existing settings.
The barrel adjuster is typically a knurled cylindrical fitting where the gear cable housing enters the rear derailleur, or at another point specified by the component design. Some bicycles have an inline adjuster or an adjuster near the shifter.
The high- and low-limit screws are separate adjustment points on the derailleur body. Changing them unnecessarily can restrict access to a gear or allow excessive derailleur movement, potentially sending the chain beyond the cassette.
Park Tool explains this distinction and the indexing procedure in Park Tool’s rear derailleur adjustment instructions.
For a conventional cable-operated rear derailleur, the following diagnostic pattern provides a useful starting point.
| Observed symptom | Likely indexing issue | Initial test |
|---|---|---|
| Slow movement toward a larger rear cog | Insufficient cable tension | Turn counterclockwise approximately one-quarter turn. |
| Slow movement toward a smaller rear cog | Excessive tension may be contributing | Turn clockwise approximately one-quarter turn. |
| Persistent hesitation in both directions | Friction, alignment or another mechanical problem | Inspect the system rather than continuing to add tension. |
| Chain jumping under heavy pedalling on one cog | Possible chain or sprocket wear | Check wear and confirm indexing before replacing parts. |
Use a stable repair stand if available. A properly supported bicycle with the rear wheel raised can also work, provided it cannot tip or interfere with the rotating wheel. Keep fingers away from the chain, cassette and derailleur pulleys while turning the pedals.
Five checks for a controlled barrel adjustment
- Identify the adjuster. Locate the knurled barrel and confirm that neither limit screw will be touched. Result: the correct control is identified.
- Establish a starting position. Shift to the smallest rear cog while turning the pedals lightly. Result: the chain rests on the expected sprocket.
- Test one larger-cog shift. Command a single indexed click and observe whether the chain climbs cleanly. Result: the direction and severity of hesitation are known.
- Correct in small increments. If the chain struggles to climb, turn the barrel counterclockwise by approximately one-quarter turn and repeat the shift. Result: an observable improvement or a reason to investigate further.
- Verify both directions. Shift between adjacent cogs, then check the remaining cassette positions without heavy pedal load. Result: consistently indexed shifts, or a clearly identified unresolved symptom.
One adjustment should produce an observable result. If repeated turns do not improve the shift, return toward the known starting setting and investigate other causes. Do not compensate for a bent hanger or damaged cable by continually changing tension.
Once the gears index correctly while unloaded, perform a cautious test ride in a safe area. Smooth workshop shifts are necessary, but they do not always reveal problems that appear under pedalling torque.
Which Is It: Cable Tension or Worn Drivetrain if It Skips Only on One Cog?
If the chain skips on only one cassette cog, first distinguish an indexing error from mechanical slipping under load. Indexing problems often change when cable tension is adjusted. A worn chain or sprocket may continue to slip in the same gear despite correct alignment, particularly when pedalling force increases.
These two failures can feel similar, but their behaviour differs.
Poor indexing commonly produces clicking, hesitation or repeated attempts to move between neighbouring cogs. The chain may run noisily because the derailleur is not positioning it precisely beneath the selected sprocket.
Drivetrain skipping under load can feel more abrupt: the pedals suddenly move forward as the chain fails to remain engaged with the selected sprocket. This can interrupt balance and control, especially during acceleration or climbing.
A practical diagnostic example is a bicycle that shifts smoothly across most of the cassette but slips whenever the rider accelerates in one frequently used middle gear. If a small barrel adjustment does not eliminate the slip, inspect that sprocket and the chain rather than continuing to change cable tension.
Uneven wear matters because riders do not use every cog equally. Sprockets that receive the most riding time may wear sooner than others. Sheldon Brown and John Allen explain the relationship in their explanation of chain and sprocket wear.
Inspect the chain with an appropriate chain-wear gauge, following the gauge and drivetrain manufacturer’s instructions. A ruler can also be used to compare chain pin spacing over a measured length, although modern chain-specific replacement limits must not be inferred from a generic measurement alone.
Check cassette teeth for visible damage and uneven wear. Be cautious about judging wear solely by pointed, sloped or unusually shaped teeth: modern cassette teeth are intentionally profiled to help shifting, and their original shapes may resemble damage.
A visibly damaged single sprocket does not automatically mean every drivetrain component requires replacement. However, many cassettes are serviced as complete assemblies, so the practical repair depends on the cassette design and the condition of the chain.
If skipping is abrupt or repeatable under high force, avoid further hard pedalling until its cause is identified. The next inspection should include the cable itself, because unreliable cable movement can also make indexing results difficult to reproduce.
The Small Frayed-Cable Problem That Makes Indexing Impossible to Fix
A frayed gear cable can prevent stable indexing because broken strands, damaged cable surfaces or loose fibres may interfere with smooth cable movement. A barrel adjuster cannot repair this damage. If gear settings repeatedly change or the shifting action feels inconsistent, inspect the inner cable before attempting more tension corrections.
Start at the rear derailleur cable anchor bolt. Look for separated strands, kinks, damaged sections or a cable end that has begun to unravel. Inspect the visible cable runs and accessible points where the inner cable enters or leaves its housing.
Next, examine the shifter end where the cable head is retained. This is an important inspection point because damage can develop inside the shifter mechanism, hidden from a quick glance at the derailleur.
Depending on the shifter design, inspection may require moving the lever to a specified gear position or removing an access cover. Follow the manufacturer’s procedure rather than forcing the mechanism open.
A simple inspection requires good lighting and careful observation, not a complicated tool kit. Look for fine strands protruding near the cable clamp, damage at housing exits and an accumulation of broken strands near the cable head. Do not deliberately flex or pull a badly frayed section to test its remaining strength.
Fraying can also coexist with contaminated housing. If the cable binds during shifting, the derailleur may respond inconsistently despite apparently correct barrel positioning.
One warning sign is a repair that initially works but becomes unreliable again within the same ride. This behaviour is not conclusive proof of fraying, but it justifies checking the cable, housing and their seating points.
Visible cable damage ends the five-minute adjustment attempt. Replace the damaged inner cable and inspect the housing before setting cable tension again. A cable already losing strands may fail completely during use.
If the cable is undamaged but the shifting still feels sticky, examine the housing and its routing. The problem may lie in the pathway the cable travels through rather than in the cable tension setting itself.
When Should You Replace Gear Cables Instead of Re-Indexing Again?
Replace a gear cable when it is visibly frayed, kinked, corroded or otherwise mechanically compromised. Also investigate replacement when indexing repeatedly deteriorates despite correct adjustments, particularly if shifting feels gritty or the cable does not move freely. The housing must be assessed alongside the inner cable because friction or damage in either component can prevent reliable shifting.
A barrel adjustment compensates for small changes in effective cable tension. It cannot eliminate damaged strands, corrosion inside housing, an obstructed liner or persistent mechanical friction.
Signs that justify cable and housing inspection include:
- Broken or separated cable strands at the shifter or derailleur.
- Visible corrosion, kinks or damaged housing ends.
- Heavy, sticky or inconsistent shift-lever operation.
- Frequent loss of indexing after apparently successful adjustments.
- A previously broken cable that has only received a temporary repair.
Replacing the inner cable alone may be sufficient when the housing is clean, correctly routed and in good condition. But installing a fresh cable through contaminated, crushed or damaged housing can leave the original shifting problem largely unchanged.
For that reason, examine the housing end caps, bends and exposed sections. Check that each ferrule sits securely in its stop and that the routing follows the component manufacturer’s requirements.
Replacing worn control components before they fail has another advantage: it reduces the temptation to keep riding with noisy, hesitant gear engagement. Persistent poor shifting can contribute to unnecessary drivetrain wear, although cable replacement cannot reverse existing sprocket or chain damage.
After installation, set the indexing correctly and test the full cassette. New cable assemblies may settle during the first rides as their ends seat into position. A small follow-up barrel adjustment may then be appropriate, but repeated substantial corrections warrant further investigation.
Once the cable system is functioning correctly, any persistent skipping deserves a drivetrain inspection. If the cassette is being considered for replacement, compatibility must be confirmed before ordering.
How to Check Cassette Compatibility Before You Order in 5 Checks
Before ordering a replacement cassette, verify five things: freehub body type, drivetrain speed count, smallest sprocket requirements, compatibility with the existing shifting components and the required installation tool. Matching only the number of sprockets is insufficient. A cassette may be incompatible with the wheel or may not work correctly with the current drivetrain.
The safest starting point is identifying the cassette already installed on the bicycle. Count its sprockets, look for model markings and record the smallest and largest sprocket sizes where they are marked.
Then work through the following checks.
- Identify the freehub body. Determine whether the wheel uses a Shimano HG-type body, SRAM XD/XDR, Shimano Micro Spline, Campagnolo-compatible design or another system. These interfaces are not universally interchangeable.
- Confirm the speed count. Count the rear sprockets and compare the cassette specification with the shifter, derailleur and chain requirements. Matching the count alone does not guarantee complete compatibility.
- Check the smallest sprocket. Very small sprockets can require a specific driver design. Confirm that the proposed cassette fits the actual freehub rather than assuming the existing wheel accepts it.
- Verify the component ecosystem. Check the cassette’s compatibility guidance against the drivetrain’s shifting standard, chain requirements and supported sprocket range. Different brands or product generations may use different dimensional standards.
- Identify the removal and installation tools. Confirm the required lockring fitting or driver-specific procedure before buying tools. Tool compatibility varies between cassette families.
A cassette marked 11–32, for example, indicates an 11-tooth smallest sprocket and a 32-tooth largest sprocket. The marking describes the gearing range, not the freehub interface or the derailleur’s compatibility.
Some compatibility clues are visible without removing the cassette. Others require taking the rear wheel off and inspecting the driver. If its type remains uncertain, use the wheel or hub manufacturer’s technical documentation before purchasing parts.
A wider-range cassette can also exceed the derailleur’s supported maximum sprocket size or total capacity. Even when it physically mounts, a new cable adjustment cannot correct an unsuitable component combination.
Compatibility only establishes which parts can work together. Whether replacement is actually needed depends on the condition of the current chain and cassette.
Which Should You Replace: Chain, Cassette, or Both if It Skips Under Load?
Replace the chain alone when it exceeds its recommended wear limit but the cassette remains serviceable and works correctly with a new chain. Replace the cassette as well when its sprockets are excessively worn, damaged or unable to engage the replacement chain reliably. If chain wear is within specification and the drivetrain is sound, neither part necessarily needs replacing.
Chain and sprocket wear are connected. As the chain wears, its effective pin-to-pin pitch increases, changing how its rollers engage with sprocket teeth. Continued use can wear cassette teeth into a profile that matches the elongated chain.
This explains an apparently contradictory repair result: a worn drivetrain may operate tolerably with its old chain, yet begin skipping when a correctly pitched new chain is installed. The fresh chain exposes the incompatibility between its pitch and the worn sprocket teeth.
The decision should follow measured condition and observable behaviour rather than mileage alone.
| Inspection result | Recommended action | Reason |
|---|---|---|
| Chain within wear specification; cassette sound | Keep both and diagnose indexing or other faults. | No confirmed wear-based replacement need. |
| Chain exceeds its specified wear limit; cassette serviceable | Replace the chain and verify engagement. | Early chain replacement can preserve cassette life. |
| Chain substantially worn; cassette visibly or functionally worn | Replace both compatible components. | Worn sprockets may not engage a new chain correctly. |
| New chain skips persistently on one or more old sprockets | Confirm chain specification and indexing, then assess cassette replacement. | Persistent skipping may indicate sprocket wear or a compatibility problem. |
A short, controlled test ride can help confirm the diagnosis once the bicycle is safely assembled. Begin with light pedalling on level ground and check shifts through the available gears. Increase effort only modestly if engagement remains consistent.
If the chain suddenly slips, stop applying force. Do not repeatedly accelerate hard to see whether a new chain will eventually conform to worn sprockets. Persistent slipping is not an acceptable bedding-in method.
Budget considerations favour measuring chain wear regularly and replacing chains before they cause excessive cassette wear. Replacing both unnecessarily costs more; replacing only the chain when the cassette is already worn can lead to a second repair and additional labour.
Once replacement is justified, the remaining challenge is installing the correct cassette without disturbing the wheel interface or creating a new shifting problem.
Before replacing the cassette
- Confirm the existing freehub interface and cassette specification before committing to a replacement part.
- Check that the new sprocket range is supported by the derailleur and compatible with the chain and shifting system.
- Prepare the correct holding and removal tools, preserve spacer arrangements and follow the component manufacturer’s installation torque instructions.
How to Replace a Cassette Without Buying the Wrong Freehub or Cog Range
Replace a cassette by first confirming its freehub interface, gear range and tool requirements. Remove the rear wheel, release the cassette using the correct tool and holding method, preserve any required spacers, then install the compatible replacement to the manufacturer’s specification. Finally, check chain engagement and rear derailleur indexing before riding.
Do not assume that every cassette with the same number of speeds fits the same wheel. Physically inspect the freehub body when compatibility is uncertain, using the wheel and cassette manufacturers’ instructions to identify the appropriate interface.
Park Tool details conventional lockring removal, chain-whip use and cassette installation in Park Tool’s cassette removal and installation instructions.
For a conventional cassette retained by an external lockring, the basic procedure is as follows.
- Remove the rear wheel. Follow the bicycle manufacturer’s instructions for the axle or quick-release system and avoid damaging the derailleur or brake components.
- Secure the cassette. Engage a compatible cassette-holding tool or chain whip to prevent the cassette from rotating during lockring removal.
- Remove the lockring. Insert the correct lockring tool fully and turn counterclockwise while holding the cassette. Driver-specific systems may require a different procedure.
- Remove and inspect the cassette. Slide off the sprockets and preserve the order and orientation of any separate spacers. Inspect the freehub body and confirm compatibility with the replacement.
- Install the replacement cassette. Align the sprockets with the freehub splines, fit required spacers in the specified arrangement and apply appropriate grease where instructed, including conventional lockring threads.
- Tighten to specification. Engage the retaining mechanism correctly and use a torque wrench where the manufacturer specifies a torque. Do not apply a generic lockring figure to every cassette system.
- Reinstall and inspect. Refit the wheel securely, confirm proper chain engagement and check derailleur adjustment across the cassette.
Conventional splined cassettes and driver-mounted systems such as SRAM XD/XDR can differ in their installation methods. Use the instructions for the actual cassette and hub rather than transferring a procedure from one interface to another.
Choosing the sprocket range deserves similar care. A cassette with a larger largest sprocket may offer lower climbing gears, but it can also require a compatible derailleur, adequate chain length and an appropriate drivetrain configuration. A wider range does not inherently require a different freehub; that depends on the particular cassette and driver design.
Consider where the existing cassette shows wear, which gears are most useful on local routes and whether the current gearing already covers the intended riding conditions. Replacing an 11–32 cassette with another compatible 11–32 model is often more straightforward than changing to an unverified range, but exact compatibility must still be checked.
After assembly, test the drivetrain with the rear wheel turning freely. Shift through the cassette using light pedal pressure and observe whether the chain reaches each sprocket cleanly. A new cassette does not automatically require a barrel adjustment, but indexing must be checked.
If the shifting system is mechanically sound and only a small indexing correction is needed, return to the same quarter-turn barrel adjustment method used earlier. There is no reason to change limit screws that are already correctly set.
Finish with a cautious test ride in a safe area. If shifting is quiet, accurate and stable under normal pedalling, no further adjustment is needed. If hesitation or skipping persists, stop forcing the gear change and investigate the remaining mechanical fault rather than repeatedly turning the barrel adjuster.
Can I adjust my rear derailleur without a repair stand?
Yes, if the bicycle can be safely supported with the rear wheel off the ground and the pedals turned freely. A stable repair stand makes the process easier, but another secure support arrangement may work. Do not place fingers near moving drivetrain components, and avoid making a beginner adjustment while riding.
Does turning the barrel adjuster clockwise tighten the gear cable?
On most conventional cable-operated rear derailleur systems, clockwise rotation reduces cable tension and counterclockwise rotation increases it. Turning counterclockwise generally helps a hesitant shift toward a larger rear cog. Check the component manufacturer’s instructions if the adjustment design differs.
Why does my bike shift correctly on a stand but skip when I pedal hard?
Unloaded shifting does not always expose problems that occur under pedalling force. Chain or cassette wear, chain engagement problems and drivetrain alignment faults may become more noticeable under load. Check wear, compatibility and indexing before replacing components, and avoid repeated hard pedalling if the chain slips abruptly.
Can a bent derailleur hanger be fixed with the barrel adjuster?
No. The barrel adjuster changes cable tension, not derailleur hanger alignment. A bent hanger can prevent accurate indexing across the cassette even if individual gears can be made to shift correctly. Hanger alignment should be checked and corrected using appropriate tools and procedures before final cable tension adjustment.
Should I adjust cable tension after installing a new cassette?
Check the indexing after installation, but do not assume adjustment is necessary. If the drivetrain is compatible, properly assembled and already shifts cleanly, leave the tension setting unchanged. If the chain hesitates consistently in one direction, make a small barrel correction and verify the result across the cassette.