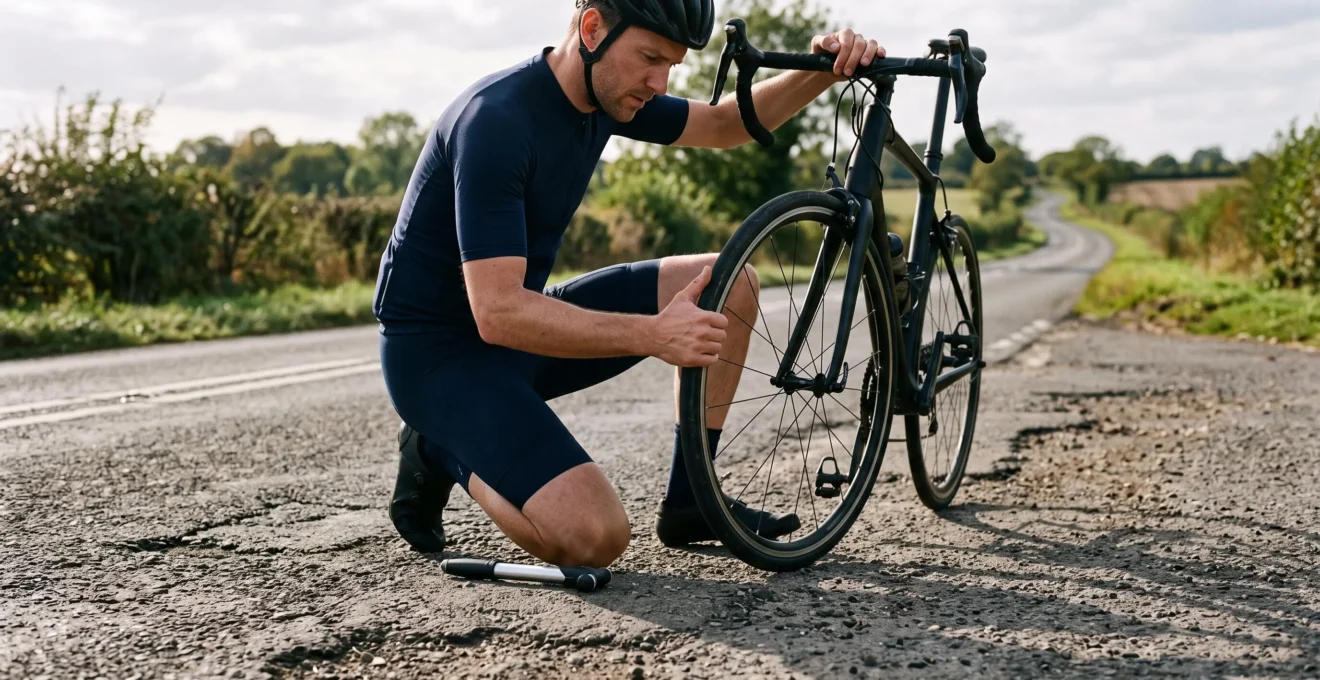
Saving 10 minutes over a 100 km ride does not necessarily require stronger legs or a harder training programme. It may be possible to recover meaningful time by reducing the energy your bike wastes through its tyres, drivetrain and unwanted mechanical friction.
The priority is to address the biggest avoidable losses first: tyres suited to your actual roads, inflation pressure that balances tyre deformation against vibration, freely rotating wheels and a clean, properly lubricated chain. Aerodynamic improvements can then contribute additional speed without increasing your training load.
The 10-minute target is ambitious, however. It is not a guaranteed benefit of changing tyres or cleaning a chain. The outcome depends on your starting equipment, road conditions, speed, wind and the power you can sustain. A well-maintained bike may offer much less recoverable time than a poorly maintained one.
The most reliable approach is therefore to establish a baseline, change one variable at a time and compare results under similar conditions. That turns marginal-gain claims into improvements you can actually evaluate.
The fastest route to lower resistance
- Choose tyres and pressures for your real road surfaces, not simply the lowest laboratory rolling-resistance figure or highest permitted pressure.
- Check for brake rub, rough bearings and drivetrain contamination before spending money on upgrades.
- Measure changes with repeatable tests, then consider body position and clothing if your goal requires more speed than rolling-resistance improvements alone can deliver.
- Why Do Fast-Rated Tyres Still Feel Slow on Your Local Roads?
- How to Diagnose Rolling Drag at Home Without a Power Meter?
- Which Should You Choose: Tubeless or Latex Tubes for Long Weekend Rides?
- The Hidden Brake-Rub Problem That Steals Speed Without Making Noise
- When Should You Deep-Clean Your Drivetrain to Get the Biggest Speed Gain?
- Which Should You Choose: Wet Lube, Dry Lube, or Wax if You Ride in Mixed Weather?
- Which Should You Choose First: Skinsuit, Aero Helmet, or Deep Wheels for a 40 km Ride?
- How to Gain 1–2 km/h Average Speed With Aerodynamics Without Buying Deep Wheels
Why Do Fast-Rated Tyres Still Feel Slow on Your Local Roads?
Fast-rated road tyres can feel slow because laboratory rolling-resistance tests do not capture every energy loss encountered outdoors. Rough asphalt introduces vibration and movement through the bike and rider, while tyre width, casing flexibility and inflation pressure change how efficiently the system absorbs irregularities. The fastest tyre on a test drum is not automatically the fastest on your favourite route.
Conventional rolling-resistance testing isolates energy lost as a tyre deforms while rotating against a controlled surface. That is useful for comparing tyres under standardised conditions, but real roads introduce a second problem: energy dissipated through vibration.
Scientific research on cycling resistance and vibration on rough roads models how surface irregularities introduce resistance beyond conventional tyre rolling losses. Its findings indicate that roughness-related resistance can become substantial, although the predicted magnitude depends on road characteristics and bicycle stiffness.
A narrow tyre inflated very firmly may deform less internally but transmit more vibration on coarse tarmac. A wider, supple tyre at a suitable lower pressure can absorb more of those irregularities. This does not mean wider is universally faster: tyre construction, surface condition, speed and pressure all matter.
Research from Delft University of Technology also distinguishes drum-measured rolling resistance from total rolling losses that include vibration. It reports that optimal tyre parameters depend on riding conditions rather than one universal setup.
Before selecting a tyre, examine the actual construction rather than trusting its model name alone. Similar-looking products may differ in casing threads per inch (TPI), compound, puncture protection and measured width. These differences can affect rolling performance, resilience and comfort.
- Smooth, consistent asphalt: prioritise a supple, efficient tyre and test pressure without assuming maximum inflation is best.
- Coarse or patched roads: assess whether additional tyre volume and lower pressure reduce vibration.
- Mixed surfaces: prioritise predictable handling, puncture resistance and efficient performance across the entire route.
Use a reliable pressure gauge rather than a thumb test for final adjustments. Respect the tyre and rim manufacturers’ pressure and compatibility limits, and change pressure gradually while monitoring handling, bottoming out and stability.
Once you have a plausible tyre-pressure combination, the next challenge is determining whether the bicycle actually rolls more efficiently instead of merely feeling more comfortable.
How to Diagnose Rolling Drag at Home Without a Power Meter?
You can investigate rolling drag without a power meter by combining repeatable coast-down tests, GPS-based route comparisons and basic mechanical inspections. The key is consistency: use the same road, starting speed, riding position and similar weather conditions. Multiple runs help distinguish a genuine improvement from wind, traffic or measurement noise.
A coast-down test provides a practical starting point. Select a quiet, safe road with a consistent surface, a clearly identifiable start point and enough space to slow down without entering traffic. A gentle, consistent gradient can make the test easier to perform than perfectly flat ground.
- Record your tyre setup, pressure, approximate total riding load and weather conditions.
- Ride towards the start point at a repeatable speed shown on your cycling computer.
- Stop pedalling at the same point while maintaining the same body position.
- Allow the bicycle to coast without braking until a predetermined low speed is reached.
- Record the distance travelled and repeat the procedure in both directions when safe.
Compare repeated results rather than a single run. Distance can change because of small differences in wind, starting speed, posture or slope. Coast-down performance also combines aerodynamic and mechanical resistance, so it cannot isolate tyre losses on its own.
For a second comparison, use a free GPS tracking app or cycling computer on a familiar loop. Ride at a similar perceived effort, avoid traffic-heavy sections and repeat the test on different occasions with comparable weather. GPS speed alone cannot demonstrate an exact watt saving because rider output is not controlled.
At home, lift the bicycle securely and inspect both wheels. Check for intermittent brake contact, roughness when turning an axle, unusual bearing play and damaged or distorted tyre sidewalls. Wheel spin duration is only a screening tool because freewheel, seal and bearing behaviour vary between components.
Your five-step rolling-drag baseline
- Record the tyre model, measured width and pressure; produce a written setup reference.
- Check both wheels for rubbing, roughness and visible tyre damage; record the result for each wheel.
- Complete several safe coast-down runs in comparable conditions; save the individual distances.
- Ride the same GPS-recorded loop on repeated occasions; save the route files and conditions.
- Change one setup variable and repeat the comparison; produce a before-and-after log showing the change and observed result.
A useful log contains the date, route, equipment, pressure, temperature, approximate wind, test direction and measured outcome. For differences that are small or inconsistent, collect more runs before deciding that an upgrade works.
With a reproducible baseline in place, decisions about inner tubes or tubeless systems become easier to judge on actual riding benefits and maintenance requirements.
Which Should You Choose: Tubeless or Latex Tubes for Long Weekend Rides?
Choose tubeless if you value automatic sealing of many small punctures, lower-pressure flexibility and are willing to maintain sealant and compatible components. Choose latex tubes if you want an efficient, relatively straightforward tyre system without sealant maintenance. Neither solution is automatically faster in every tyre, wheel or road combination.
Both systems can offer low rolling losses when paired with suitable tyres. The difference for weekend riders often lies in puncture management, pressure retention, installation and the practical consequences of a failure far from home.
Tubeless systems use an airtight tyre-rim interface and liquid sealant. Many small tread punctures can seal while riding, potentially avoiding an immediate stop. Larger cuts, sidewall damage or poor installation can still leave a rider needing a repair plug, an emergency tube or assistance.
Latex tubes are supple and can provide low rolling resistance, but generally lose air faster than typical butyl tubes. Pressure should therefore be checked before long rides. Latex is also sensitive to installation errors, pinching and incompatible applications, so the tyre and rim manufacturers’ guidance remains important.
| Decision factor | Tubeless | Latex tubes |
|---|---|---|
| Rolling efficiency | Potentially very low losses with suitable tyres and pressure | Potentially similarly low losses with suitable tyres |
| Small punctures | Sealant may close many tread punctures | A puncture generally needs a patch or tube replacement |
| Routine maintenance | Sealant checks, replenishment and valve care | Pressure checks and ordinary tube inspection |
| Lower-pressure use | Can reduce conventional pinch-flat risk | Must retain sufficient pressure to avoid pinching and rim impacts |
| Roadside repairs | Can involve plugs, a spare tube or difficult bead removal | Familiar tube replacement, subject to correct installation |
The hidden cost of tubeless is ongoing attention. Sealant gradually dries or changes consistency, especially with heat and repeated air exposure. If too little effective sealant remains, the tyre may no longer seal a puncture reliably. This does not necessarily raise rolling resistance directly, but it removes an important practical advantage.
Before switching, verify that the rim, tyre, tape, valve and inflation requirements are compatible. A marginal tyre-rim fit or leaking tape can undermine reliability, regardless of the rolling-resistance potential.
Rider profile matters more than a universal winner. Remote-road riders who tolerate periodic maintenance may appreciate tubeless puncture protection. Riders prioritising simple servicing and predictable tube replacement may prefer latex, provided they accept frequent pressure checks.
Whatever inflation system you choose, neither will compensate for mechanical resistance elsewhere on the bicycle. A lightly dragging brake can undermine the benefit of an otherwise efficient wheel setup.
The Hidden Brake-Rub Problem That Steals Speed Without Making Noise
Light, continuous brake contact can waste energy without producing an obvious scraping sound. A slightly misaligned disc rotor, poorly retracting pad or incorrectly seated wheel may introduce resistance on every rotation. The practical solution is to inspect both wheels for unwanted contact before a long ride, especially after transport, maintenance or a wheel change.
Disc brakes are particularly susceptible to small clearance problems because the gap between rotor and pads is narrow. A rotor can be slightly out of true, a caliper may be misaligned or a piston may retract unevenly. Rim brakes can also drag if the wheel is not centred or a pad remains too close to the braking surface.
Begin with the bicycle securely supported and the wheels clear of the ground. Spin each wheel separately while observing the rotor-to-pad or rim-to-pad clearance. Listen carefully, but do not assume silence means there is no contact.
Look for a repeating hesitation, localised rub marks, uneven pad wear or a visible change in clearance during rotation. A wheel that stops quickly is not conclusive proof of brake drag because hub seals, bearing preload and wheel characteristics also affect spin-down behaviour.
Next, confirm that the wheel is correctly seated and the axle or quick release is secured according to the manufacturer’s instructions. Incorrect seating can shift the braking surface relative to the pads. Do not loosen a wheel-retention system or adjust brake parts without understanding the correct procedure.
For disc brakes, minor caliper alignment may resolve a clearance issue. A visibly bent rotor can require careful truing, but this is best left to a competent mechanic if you lack the appropriate tools or experience. Sticky hydraulic pistons, persistent rubbing, fluid leaks or inconsistent braking warrant professional inspection.
For rim brakes, check pad positioning, wheel centring and whether the mechanism releases fully. Ensure adjustments preserve safe braking performance. Never use lubricant on a brake rotor, braking track or pad to silence rubbing.
A brief wheel-spin check before a long ride is a sensible preventive habit. After correcting any issue, verify normal braking function in a safe area before returning to traffic.
Once the wheels rotate without unwanted brake contact, the drivetrain becomes the next place to investigate avoidable mechanical friction.
When Should You Deep-Clean Your Drivetrain to Get the Biggest Speed Gain?
Deep-clean your drivetrain when visible contamination, gritty operation or persistent residue indicates that ordinary lubrication is no longer enough. Do not wait for poor shifting before inspecting the chain, cassette and jockey wheels. Cleaning is most valuable when accumulated dirt is contributing to friction or wear, although the resulting time saving depends on the drivetrain’s initial condition.
A contaminated chain does not always make an obvious noise. Lubricant can mix with road grit, dust and waterborne particles, leaving abrasive residue around chain rollers and drivetrain components. The change happens gradually, making deterioration difficult to recognise by feel alone.
Look for dark paste on the cassette, embedded debris around jockey wheels, a chain that remains visibly dirty after wiping or a gritty sensation during inspection. Check chain wear using a suitable gauge and the drivetrain manufacturer’s replacement criteria. A worn chain generally requires replacement rather than simply deeper cleaning.
For a conventional oil-lubricated drivetrain, a practical cleaning routine begins with removing surface grime and applying a chain-compatible degreaser. Clean the cassette and jockey wheels without directing solvent into bearings, freehub seals or brake components. Follow the cleaner’s instructions, remove residue and allow the drivetrain to dry before applying fresh lubricant.
Do not assume one quick wipe removes contamination from inside the chain. Clean sufficiently for the lubrication system you intend to use, and avoid transferring dirty residue straight back onto freshly cleaned components. A wax-conversion process can require more thorough preparation than routine oil-based lubrication.
Applying fresh lubricant over a dirty chain may temporarily reduce noise without eliminating abrasive material. Excess lubricant can also retain more dirt on exposed surfaces. Apply the chosen product according to its instructions and remove surplus where appropriate.
A 2026 experimental study of bicycle roller-chain lubricant performance demonstrates why lubricant selection and application conditions matter. Researchers tested selected products using a complete drivetrain rig and found that performance differed between formulations.
More than 60 hours
Selected immersion-style wax lubricants maintained consistent drivetrain efficiency for more than 60 hours under controlled laboratory conditions. This does not establish an equivalent outdoor service interval or a guaranteed speed saving.
Dowd, Cavanaugh and Mansson, Sports Engineering, 2026.
Use the condition of the chain after wet, dusty or gritty rides to decide when extra cleaning is needed. A fixed calendar interval cannot account for every climate, surface and lubricant.
After cleaning, the choice of lubricant determines how well the drivetrain tolerates your next combination of dry roads, rain and contamination.
Which Should You Choose: Wet Lube, Dry Lube, or Wax if You Ride in Mixed Weather?
Wet lube is generally useful when rain and persistent moisture dominate, dry lube can be convenient in predominantly dry conditions, and wax-based systems can provide efficient, clean operation when correctly prepared and maintained. For mixed-weather riding, choose according to the conditions your chain encounters most often, not simply the product category promising the lowest friction.
Wet lubricants tend to remain on the chain through damp conditions, but their exposed residue can attract dust and road grit. Dry lubricants are often cleaner in dry weather, yet some lose effectiveness after heavy rain or repeated washing. Wax-based lubricants can limit dirt adhesion, although their preparation, curing and reapplication requirements vary substantially.
The important distinction is that a product family’s general characteristics do not determine every product’s performance. Laboratory results for particular wax formulations should not be generalised to all wax products, nor do they establish that every wax treatment is faster than every oil-based lubricant.
For riders splitting their kilometres between changing conditions, the choice should follow the likely exposure:
| Riding conditions | Practical choice | Main trade-off |
|---|---|---|
| Frequent rain and wet roads | Suitable wet-condition lubricant | More attention to accumulated grit and cleaning |
| Mostly dry rides with occasional showers | Suitable dry lubricant or compatible wax-based treatment | Inspect and renew lubrication after significant wet exposure |
| Variable weather with disciplined maintenance | Prepared wax-based system | More demanding cleaning and product-specific application |
| Unpredictable weather and limited maintenance time | Versatile manufacturer-approved lubricant | A practical compromise rather than a universally optimal friction result |
Reapplication should be driven by condition rather than an unsupported mileage rule. Listen for unusual chain noise, inspect for dryness or gritty residue and consider whether a wet ride has displaced the lubricant. A squeaking chain is a warning to investigate, not a precise measurement of lubrication failure.
Do not casually mix lubrication systems. Changing from oil to a wax treatment commonly requires removal of residual oil, while adding an incompatible oil product can compromise a prepared wax system. Follow the specific lubricant manufacturer’s instructions rather than combining products experimentally.
For long rides, dependable lubrication and resistance to contamination matter alongside initial friction. A formulation that performs well when freshly applied but deteriorates rapidly in your conditions may be less practical than one with stable performance.
Once tyres, brakes and drivetrain are operating efficiently, aerodynamic resistance becomes an increasingly important consideration for riders trying to recover more time over a long route.
Which Should You Choose First: Skinsuit, Aero Helmet, or Deep Wheels for a 40 km Ride?
For a 40 km effort, consider well-fitting aerodynamic clothing and a suitable helmet before investing in deep-section wheels, particularly when your budget is limited. Clothing and helmet changes can address drag around the rider directly, while deep wheels are often a more expensive incremental upgrade. Actual gains depend on fit, position, wind conditions and the specific equipment.
Rolling resistance and aerodynamic drag behave differently as speed changes. Once obvious mechanical inefficiencies are addressed, the air moving around the rider and bicycle becomes an important opportunity for further improvement.
Published wind-tunnel and computational research on cyclist positions helps explain the priority. At high speeds around 50 km/h, aerodynamic drag can represent approximately 90% or more of total resistance, with the rider’s body contributing around 60–70% of aerodynamic resistance.
Those figures describe particular high-speed conditions; they should not be applied unchanged to every recreational 40 km ride. Nevertheless, they establish why changes to the rider’s exposed shape deserve attention.
A skinsuit or close-fitting cycling outfit can reduce fabric movement and unnecessary exposed material. An aero helmet may improve airflow for certain head positions, but performance depends on the interaction between helmet shape, posture and the rider.
Deep wheels can offer aerodynamic benefits, particularly at relevant speeds and wind angles. Their higher cost, additional weight in some configurations and crosswind-handling characteristics make them a less obvious first purchase for many fitness-focused cyclists.
| Budget level | First priority | Later priority |
|---|---|---|
| Minimal | Improve existing clothing fit and sustainable riding position | Remove unnecessary exposed accessories |
| Moderate | Well-fitting aerodynamic clothing | Test an aero helmet suited to your posture |
| Higher | Optimise clothing, helmet and fit | Evaluate deep wheels for your speed, handling needs and courses |
Fit matters more than an isolated product claim. A helmet that forces an awkward head position or clothing that becomes uncomfortable over the planned distance may undermine the expected benefit. The equipment must allow you to sustain your power and posture.
Before purchasing anything, however, test the changes that cost little or nothing. A sustainable body position and reduced clothing drag may provide more useful improvements than an equipment upgrade chosen without measurements.
Key takeaways before your next ride
- Establish that the bicycle is mechanically efficient before attributing every lost minute to aerodynamics.
- Focus first on changes that alter the rider’s shape without compromising comfort, steering or sustainable power.
- Evaluate speed improvements over repeated comparable rides rather than accepting a universal kilometre-per-hour claim.
How to Gain 1–2 km/h Average Speed With Aerodynamics Without Buying Deep Wheels
To pursue a 1–2 km/h average-speed improvement without deep wheels, start by reducing unnecessary frontal area through a sustainable riding position, close-fitting clothing and cleaner accessory placement. These changes can lower aerodynamic drag, but a 1–2 km/h gain is a testing target rather than a guaranteed result. Wind, terrain, baseline position and maintained power determine the outcome.
Begin with your torso and arms. A somewhat lower torso, narrower elbow position and reduced shoulder exposure may improve aerodynamic efficiency when the position remains stable and comfortable. The objective is not to adopt the lowest possible posture at any cost.
A rider who develops neck strain, restricted breathing or reduced power may become slower despite a smaller frontal area. Make changes progressively, maintaining control of the bicycle and a clear view of the road. The ideal position balances drag reduction against sustainable output.
Research indexed in PubMed on cyclist positioning and aerodynamic drag combines computational fluid dynamics with full-scale wind-tunnel testing. It supports the importance of rider position, while not establishing that any particular recreational cyclist will gain exactly 1–2 km/h.
Next, address clothing. A close-fitting jersey, secured jacket and stable race number avoid unnecessary material moving in the airflow. An aero helmet can be worth testing later, but its effectiveness depends on how it performs with your natural head position.
Small accessories also deserve attention. A phone mounted high above the handlebar, a loose bag or exposed equipment can disturb airflow. Remove items you do not need, or place them more neatly without restricting steering, braking or access to essential supplies.
Bottle placement and storage choices should be assessed as part of the whole bicycle-rider system. Do not assume that removing every bottle or bag is faster: the aerodynamic effect depends on equipment and position, and hydration and safety must take priority on long rides.
To evaluate the change, repeat your established GPS loop in reasonably similar conditions. Use the same equipment, clothing, approximate effort and route wherever possible. If wind conditions vary, paired out-and-back comparisons can help, although they cannot remove every source of error.
For a more disciplined comparison, alternate between the original and revised configurations across repeated runs rather than testing only one before-and-after pair. Retain individual results and note whether the improvement persists without causing fatigue, discomfort or loss of control.
Coast-down testing can also support aerodynamic comparisons if starting speed, posture and conditions are closely controlled. It remains an indirect test of combined resistance, not a direct measurement of aerodynamic drag or sustained riding power.
The best result is not necessarily the fastest isolated run. It is the setup that allows you to maintain a higher speed consistently across the distance you actually intend to ride.
For your next 100 km ride, record your current setup, resolve obvious tyre and mechanical inefficiencies, then test one sustainable aerodynamic change at a time. Keep the changes that produce repeatable improvements under comparable conditions, and treat the 10-minute goal as an outcome to measure rather than a promise attached to any single upgrade.
Can reducing rolling resistance alone save 10 minutes over 100 km?
It is possible for a substantially inefficient starting setup to offer meaningful time savings, but there is no universal evidence that tyre and drivetrain changes alone save 10 minutes over 100 km. The outcome depends on starting resistance, rider power, speed, route conditions and the magnitude of each improvement. Testing is essential before assigning a specific time saving.
Should tyre pressure be the same for the front and rear wheels?
Not necessarily. Front and rear wheels often carry different loads, so the most appropriate pressures may differ. Tyre width, rim dimensions, total riding weight and road roughness also influence the choice. Follow manufacturer pressure limits and use a reliable gauge, adjusting gradually while monitoring handling and tyre stability.
How can you tell whether a small speed gain is real?
Repeat the same test several times under comparable conditions and examine the consistency of the results. Similar wind, temperature, route, tyre pressure and riding position improve the comparison. Without direct power measurement, GPS-based speed differences are useful indicators but cannot prove an exact reduction in mechanical resistance.
Is it worth changing tyres if your current ones are still in good condition?
Only if the expected performance improvement justifies the cost and practical trade-offs. A different tyre may offer lower rolling losses, but puncture protection, handling, compatibility and the surfaces you ride remain important. Testing pressure and checking for unwanted mechanical drag are sensible first steps before replacing functional tyres.
Do rolling-resistance improvements matter more than aerodynamics on hilly routes?
The balance changes throughout the route. Aerodynamic resistance becomes more influential at higher speeds, while rolling losses remain relevant across a range of speeds and surfaces. On steep climbs, gravity and total system mass also become important. A hilly route therefore requires a balanced approach rather than assuming either rolling resistance or aerodynamics always dominates.