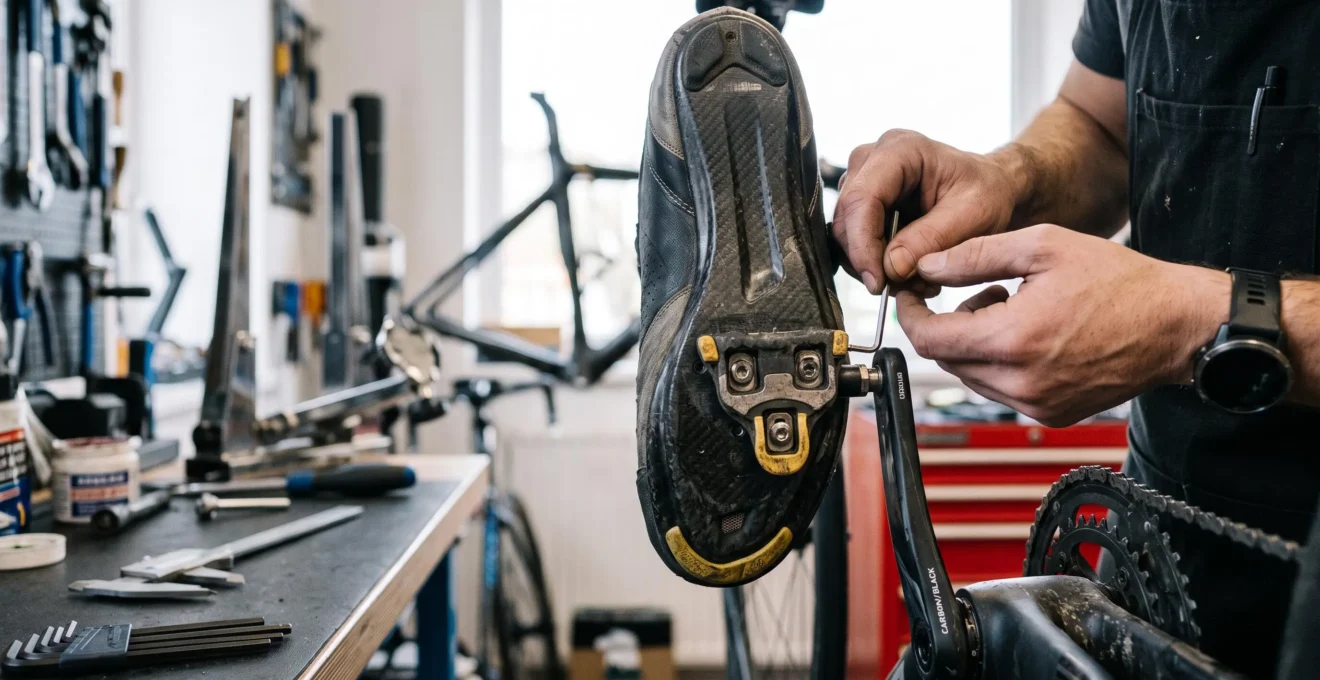
Inner-knee pain while cycling can make cleat adjustment feel like a choice between two uncomfortable extremes: restrict foot movement to create a stable platform, or increase float to let the knee move naturally. Neither approach guarantees relief. The more useful goal is to position the foot so it can follow a comfortable pedalling path without repeatedly pushing against the limits of the cleat mechanism.
Start by assessing saddle position, then check cleat fore-aft placement, stance width and rotational alignment. Use enough float to accommodate your natural foot movement, but avoid assuming that the largest available range is automatically better. A repeatable test ride can help identify whether a particular change improves comfort without introducing unwanted heel movement.
Research supports the biomechanical importance of the foot–shoe–pedal interface, but evidence that specific adjustments reliably prevent or treat knee injuries remains limited. Persistent medial knee pain deserves assessment rather than endless equipment experimentation, especially when symptoms include swelling, locking, instability or pain during everyday activities.
Cleat Float and Knee Comfort: The Essentials
- Use float to accommodate natural foot rotation, not to compensate indefinitely for poor cleat alignment or an unsuitable saddle position.
- Check saddle height and setback, cleat fore-aft position and stance width before fine-tuning rotational float.
- Change one setting at a time, record the adjustment and use controlled test rides to compare comfort and pedal stability.
- Why Can Too Much Cleat Float Make Your Knees Feel Less Stable?
- How to Set Cleats Using a Marker Pen and a 15-Minute Test Ride?
- Which Should You Choose: Fixed Cleats or High-Float Cleats if You Have Knee Pain?
- The “Cleats First” Mistake That Leaves the Real Pain Cause Untouched
- In What Order Should You Adjust Saddle Height, Cleats, and Stance Width for Knee Comfort?
- Fix Hand Numbness After 3 Hours Without Changing Your Handlebar
- Which Is More Likely: Bike Fit or Training Load if Your Knee Hurts After 40 Minutes?
- How to Switch to Clipless Pedals Without Falling Over in the First 7 Stops
Why Can Too Much Cleat Float Make Your Knees Feel Less Stable?
Too much cleat float can make pedalling feel less stable when the foot moves through a wider rotational range than the rider comfortably controls. Float permits natural foot rotation, but it does not automatically guide the shoe into a consistent position. The important distinction is between having freedom available and actually needing that freedom during each pedal stroke.
Cleat float is the movement allowed while a shoe remains engaged with the pedal. Angular float permits rotation around a vertical axis; certain systems also allow lateral movement. This freedom can help accommodate individual differences in foot orientation and lower-limb movement.
The mechanical trade-off appears when a rider repeatedly rotates through a large portion of the available range. Instead of maintaining a comfortable, repeatable foot orientation, the heel may wander between positions. The rider may respond with additional ankle, hip or lower-limb adjustments. Whether this increases muscular demand or causes pain in a particular rider cannot be determined from float range alone.
Watch for three practical signs:
- Visible heel wandering: the heel repeatedly swings inward and outward at higher cadence rather than settling into a consistent path.
- Inconsistent pedal feel: one stroke feels centred while the next feels as though the shoe is searching for a stable position.
- Fatigue-related changes: foot tracking becomes less consistent toward the end of a long ride, potentially alongside emerging discomfort.
These observations justify checking alignment, shoe fit and movement control. They do not independently establish that excessive float causes the symptoms.
Float range and pedal release tension must also be distinguished. A cleat can allow substantial rotation while the pedal requires considerable force to disengage. The TIME Sport guide to pedal terminology and cleat float describes these as separate mechanical characteristics. Its documented configurations include 5 degrees of angular float, 1.25 mm of lateral float and a fixed option, depending on the system.
Increasing release tension is not a proven method of improving knee tracking. On many pedals, it primarily changes how easily the shoe releases. Never tighten release tension simply to suppress unwanted foot movement without first checking cleat compatibility, wear and alignment.
The next step is to establish a measurable starting position so any change can be tested rather than guessed.
How to Set Cleats Using a Marker Pen and a 15-Minute Test Ride?
Use a marker pen to locate your forefoot landmarks, transfer their positions onto your cycling shoes and establish an initial cleat position. Then complete a controlled 15-minute ride at comfortable effort, noting knee discomfort and foot behaviour. The first setting is a baseline, not a guaranteed biomechanical optimum; small, documented adjustments may be needed over subsequent rides.
The marker method helps locate the relationship between the ball of the foot and the pedal axle. It is particularly useful when replacing cleats or establishing a position on new shoes, but it does not determine the ideal rotational angle, stance width or need for forefoot support.
- Sit with your bare foot resting naturally on a flat surface, without forcing the toes or ankle into a particular position.
- Locate the first metatarsal head, the bony prominence near the base of the big toe. A helper can identify it by touch and place a small reference mark on the skin.
- Put on your cycling shoe and identify the same landmark through the upper. Mark the corresponding position on the outside of the shoe with removable tape or a suitable marker.
- Use that reference to establish an initial fore-aft cleat position relative to the pedal axle. Check the cleat manufacturer’s alignment instructions; the metatarsal mark is a landmark, not a universal instruction to place the axle directly beneath it.
- Set cleat rotation so the shoe can follow your natural foot orientation without being forced against a float limit. Tighten the bolts according to the manufacturer’s specified torque.
For the test ride, choose a flat, quiet route without technical corners or heavy traffic. Maintain a comfortable, moderate cadence and avoid sprinting, standing climbs or unusually hard efforts. The 15-minute duration is a practical comparison window, not a clinically validated diagnostic test.
Record discomfort by location—inner knee, outer knee or front of knee—and note when it begins. Also observe whether the heel approaches either rotational limit, whether one foot feels different from the other and whether the shoe stays firmly engaged. Pain location alone cannot identify a specific incorrect cleat setting.
Five Checks for a Repeatable Cleat Test
- Photograph both cleats before adjustment; save a clear baseline image showing their original positions.
- Mark the first metatarsal reference on each shoe; retain a visible alignment mark.
- Document the adjustment made, including its direction; create one dated setup note.
- Complete a comfortable 15-minute test ride; record symptom location, onset and perceived stability.
- Inspect bolt security, cleat wear and shoe behaviour after riding; write a keep, reverse or reassess decision for the next test.
After the ride, inspect the pedal-contact surfaces for unusual wear and check whether the shoe shows a consistent tendency to roll inward or outward. Such observations may suggest contact or support issues, but they cannot diagnose forefoot tilt on their own. Persistent one-sided pressure or apparent tilting may require a professional assessment rather than an improvised wedge adjustment.
Do not continue a test ride through increasing pain merely to complete the full 15 minutes. Stop, record what happened and reassess before making another change.
Once the cleat position is reasonably consistent, the next decision is whether the amount of available float suits your movement pattern.
Which Should You Choose: Fixed Cleats or High-Float Cleats if You Have Knee Pain?
For a rider experiencing knee pain, moderate rotational float with carefully checked alignment is generally a more cautious starting point than immediately switching to fixed cleats. Fixed cleats restrict rotation and demand accurate positioning, while high-float cleats permit greater movement. Neither option has been conclusively shown to prevent or treat knee pain in every cyclist.
A fixed cleat can feel predictable to someone with a consistent pedalling pattern, but that does not make it inherently safer for the knee. If its position conflicts with the rider’s preferred foot angle, the constrained interface may transmit unwanted rotational forces rather than accommodate them.
High float offers more rotational freedom, which can be useful when a rider’s comfortable foot orientation varies during pedalling. Yet extra movement is not equivalent to improved alignment. A rider who consistently uses only a small part of a large float range may gain little from further increasing it.
The following comparison is a practical selection framework, not an evidence-based prescription for treating knee pain.
| Criterion | Fixed or low float | Moderate or high float |
|---|---|---|
| Foot rotation | Little movement permitted; precise alignment is important. | More freedom to accommodate preferred rotation. |
| Pedal sensation | May feel more rotationally constrained and repeatable. | May feel freer; perceived stability depends on the rider and system. |
| Existing knee discomfort | Requires caution because misalignment cannot be absorbed through rotation. | May reduce rotational constraint but is not a guaranteed pain treatment. |
| Individual asymmetry | Separate precise settings are essential if used. | Can accommodate some movement differences between feet. |
| Main limitation | Potentially restrictive if poorly positioned. | Additional freedom may not resolve the underlying fit problem. |
Scientific evidence warrants restraint. A scientific review of foot-shoe-pedal interventions in competitive cyclists examined 11 studies and found insufficient agreement on which interventions prevent or treat cycling-related knee injuries. It identified biomechanical effects without establishing a universally optimal cleat configuration.
When replacing a pedal system, avoid attributing every change in comfort to float. Different pedals and cleats may also alter lateral foot position, shoe-to-axle distance, engagement characteristics and stack height. These factors can interact with saddle position and knee movement.
Where possible, preserve the existing fit coordinates during the changeover. Document what cannot be kept identical, then evaluate comfort across several comparable rides rather than drawing conclusions from a single outing.
If neither option produces a comfortable, repeatable pedalling pattern, the next question is whether the cleats are actually the source of the problem.
The “Cleats First” Mistake That Leaves the Real Pain Cause Untouched
Cleats are a tempting first adjustment because their position is visible and easy to change. However, inner-knee pain may also relate to saddle geometry, training load, previous injury or individual movement patterns. Changing cleats without checking these factors can complicate the fit and leave the actual contributor unaddressed.
Saddle height affects knee flexion throughout the pedal stroke. Saddle setback changes the relationship between the rider, crank and contact points. Foot position and stance width influence the alignment and movement options available to the lower limb. A change at one contact point therefore needs to be considered within the complete rider–bike system.
For example, a hypothetical rider notices that the right knee moves inward and assumes the right cleat needs more rotational float. Yet their saddle is unusually low, and their pelvis or hip movement changes under load. Increasing float might alter what the foot can do without resolving the upstream movement pattern.
The same visible symptom can also occur under very different circumstances. A recent increase in climbing volume, a return from injury or a worn shoe–pedal interface should all be considered before treating cleat rotation as the primary variable.
A useful preliminary triage asks:
- Did symptoms begin after a change in training volume, intensity, cadence or hill exposure?
- Have saddle position, shoes, pedals, cleats or crank components changed?
- Are the cleats worn, the bolts loose or the shoes damaged?
- Does discomfort occur on both knees or predominantly on one side?
- Is pain present during walking, stair climbing or other activities off the bike?
Symptom timing provides additional context, but it is not a definitive diagnostic rule. Pain appearing repeatedly after a similar riding duration may reflect accumulated exposure to a fit-related stress. Pain appearing earlier during harder sessions may reflect increased tissue loading. Both mechanisms can coexist, and an existing injury may behave similarly.
A sudden change in symptoms without an obvious equipment change does not prove that a cleat has drifted. It is a reason to inspect component wear, review recent training and consider clinical assessment when appropriate.
Acute injury, significant swelling, locking, giving way or difficulty bearing weight should prompt medical evaluation rather than further self-adjustment. For persistent or recurring cycling-related pain, a qualified healthcare professional can help distinguish possible injury from equipment-related contributors.
When fit remains a reasonable factor to investigate, the sequence of adjustments matters as much as the adjustments themselves.
In What Order Should You Adjust Saddle Height, Cleats, and Stance Width for Knee Comfort?
A practical adjustment sequence is to establish saddle height and setback, review cleat fore-aft placement, assess stance width, then fine-tune cleat rotation and float. This order helps isolate variables and prevents later changes from repeatedly invalidating earlier settings. It is a structured fitting workflow, not a scientifically established universal hierarchy for every rider or knee condition.
Saddle position provides the starting reference because it affects how the pelvis, hip and knee move during pedalling. A poorly matched saddle height may alter knee flexion or encourage compensatory movement, while inappropriate setback can change how the rider distributes effort through the pedal stroke.
Begin by observing pedalling at a comfortable intensity. Look for obvious hip rocking, reaching for the bottom of the stroke, excessive knee flexion or sliding on the saddle. These signs are prompts for investigation rather than standalone measurements that establish a precise correct height.
Once saddle position is reasonably stable, assess cleat fore-aft placement. The aim is a comfortable, repeatable shoe–pedal relationship rather than forcing every rider into the same pedal-axle location.
Stance width comes next. This is the lateral distance between the feet during pedalling and is influenced by the pedal system, crank geometry, cleat lateral position and any compatible spacing components. Some riders may need more or less separation to maintain a comfortable movement path.
Changing stance width can alter the apparent inward or outward direction of the knee. However, a knee moving slightly inward does not automatically mean that the stance is too narrow, and visual alignment alone cannot determine the best setting.
Finally, assess rotational cleat position and float. The shoe should remain comfortably engaged while allowing the rider’s natural foot rotation without repeatedly meeting a hard rotational stop. Check both feet independently rather than assuming that symmetrical-looking cleats produce symmetrical movement.
A systematic review of factors influencing knee biomechanics during cycling included 14 papers, with only four studies involving cyclists with knee pain. The evidence indicated that equipment and riding variables can affect biomechanics, but it did not establish a reliable adjustment hierarchy or a direct link between individual position settings and injury prevention.
Use a minimal-change discipline: select one adjustment, identify the symptom or movement you intend to observe, and complete a comparable test. If a later modification changes the way you sit or pedal substantially, revisit earlier settings before making further fine adjustments.
For instance, if changing saddle height produces new hip rocking or an altered foot orientation, reassess saddle position and basic cleat alignment rather than immediately compensating with more float. Keep previous measurements so an unsuccessful change can be reversed.
This whole-bike approach is also useful when discomfort appears somewhere unexpected, such as the hands rather than the knees.
Fix Hand Numbness After 3 Hours Without Changing Your Handlebar
Hand numbness on long rides can result from sustained pressure, vibration or prolonged wrist and hand positions. Before replacing the handlebar, assess how your saddle supports your body and how much weight you carry through your hands. Changes in saddle tilt, support and posture may help, although persistent numbness requires assessment for possible nerve involvement.
The connection with knee discomfort is methodological: the place where a symptom appears is not necessarily where the contributing problem originates. Just as adjusting cleats cannot correct every knee issue, changing handlebars cannot resolve every cause of hand pressure.
A saddle tilted excessively nose-down may encourage the rider to slide forward. The arms and hands then help resist that movement. Over several hours, sustained pressure can contribute to discomfort, particularly when combined with vibration or limited changes in hand position.
Check saddle tilt against a documented baseline, and assess whether the rider is sliding forward or continually pushing backward with their arms. Also consider saddle width and the distribution of contact pressure. A saddle that poorly supports the pelvis may encourage repeated posture changes or unwanted loading through the upper body.
Posture matters as well. A rigid upper body, locked elbows or continuous gripping may increase sustained hand loading. On safe sections of a long ride, changing hand positions and relaxing the grip can help distribute pressure. Do not compromise steering or braking control to reduce contact pressure.
For a simple comparison, ride briefly in a safely controlled, more upright position and observe whether symptoms change. If hand pressure decreases, weight distribution may be contributing. If numbness remains, possibilities include local nerve compression, glove pressure, grip technique or other neurological causes.
Another bike with a noticeably more upright riding position can provide additional context, although differences in saddle, geometry and equipment prevent the comparison from isolating one variable.
Bar tape and gloves may influence comfort, but they should not be treated as substitutes for addressing excessive contact pressure or persistent sensory changes. Numbness that continues after riding, worsens or is associated with weakness merits professional medical assessment.
The broader lesson applies directly to knee pain: symptoms need to be considered alongside duration, workload and the complete riding position.
Which Is More Likely: Bike Fit or Training Load if Your Knee Hurts After 40 Minutes?
Knee pain that repeatedly begins after 40 minutes may involve accumulated mechanical stress, training load or both. A similar onset during comparable steady rides makes a repeatable bike-fit issue worth investigating. Pain appearing earlier after harder sessions or rapid training increases raises concern about tissue overload. Timing alone cannot reliably distinguish these explanations.
The 40-minute threshold is useful as an observation, not a diagnosis. Repeated pedal strokes expose the knee to ongoing forces, and discomfort may emerge only after enough repetitions or fatigue. However, pain can also reflect an existing condition whose symptoms develop with sustained activity, even when bike position is acceptable.
Start with two questions:
- Has training changed? Review recent riding duration, intensity, climbing, recovery and the frequency of difficult sessions.
- Has the bike interface changed? Check shoes, pedal system, saddle settings, cleat wear, fastening security and any recent component replacement.
Consider a hypothetical rider who previously completed comfortable, steady rides but begins experiencing inner-knee discomfort after introducing repeated hard climbing sessions. If the bike is unchanged, increased loading becomes a plausible contributor. That does not exclude a pre-existing fit issue that was previously tolerated.
Now consider a rider whose discomfort begins at a similar point on otherwise comparable rides after replacing worn cleats. The equipment change provides a specific reason to inspect rotational alignment, shoe engagement and lateral foot position before assuming a training problem.
The most important interaction is that physical tolerance is not fixed. A position that causes no obvious symptoms during easy riding may become uncomfortable when effort, duration or fatigue increases. Conversely, reducing training load may relieve symptoms without establishing that the bike fit was correct.
A practical approach is to maintain a brief riding log with symptom onset, duration, intensity, terrain and recent equipment changes. Compare rides only when their demands are reasonably similar. Avoid repeatedly provoking pain to test competing theories.
When pain is persistent, progressive or limiting, reducing aggravating activity and arranging appropriate clinical assessment is more useful than making repeated unsupervised equipment changes. A professional bike fit can complement, but not replace, medical evaluation.
Once comfort and bike setup are reasonably controlled, a separate safety priority remains for riders who are still learning to use clipless pedals.
Key Takeaways Before Your Next Ride
- A comfortable cleat setup is useful only when you can release your foot reliably and predictably.
- Release tension and rotational float are separate settings; learning to unclip safely does not determine the best configuration for knee comfort.
- New clipless users should establish reliable stopping habits before evaluating cleat performance under demanding riding conditions.
How to Switch to Clipless Pedals Without Falling Over in the First 7 Stops
To reduce the risk of falling during your first clipless-pedal stops, practise releasing your foot before riding in traffic. Begin while supported and stationary, progress to a controlled practice area, and unclip your chosen landing foot before slowing to a stop. Repetition builds an automatic stopping habit, but no procedure can guarantee a fall-free first seven stops.
Clipless pedals connect the shoe to the pedal through a retention mechanism. The unfamiliar part is not continuous pedalling but remembering to release the shoe before stopping. Riders can become comfortable while moving and still forget that one foot remains attached when the bike slows.
Start by checking that shoes, cleats and pedals are compatible and correctly installed. If the system provides adjustable release tension, the manufacturer’s permitted lower setting can make disengagement easier during early practice. Confirm that the shoe remains securely engaged during normal pedalling and that release works consistently on both sides.
Follow a progressive learning sequence:
- With the bike securely supported and no risk of uncontrolled rolling, practise clipping in and rotating the heel outward to release. Repeat with both feet.
- Move to a quiet, flat practice area where a loss of balance is less likely to cause injury. Suitable grass can reduce the consequences of a low-speed fall, although soft or uneven ground can make balancing more difficult.
- Practise slow approaches to a planned stop. Release the landing foot while still moving, before reaching walking pace.
- Choose the foot that will contact the ground and keep the other foot controlled on the pedal. Repeat until the sequence becomes familiar.
- Progress to normal roads only when you can release reliably without looking down or interrupting steering and braking.
The Cycling UK guide to clipless pedals and cleats recommends supported practice, progression onto soft grass, reduced initial release tension and unclipping before coming to a complete stop.
For the first seven planned stops, keep the exercise deliberately simple. Approach at a controlled speed, identify where the bike will stop and release the landing foot early. Do not introduce traffic pressure, steep gradients or complicated junctions merely to make the exercise realistic.
Road conditions and traffic orientation may influence which foot is preferable at a particular stop. Choose according to balance, surface conditions and safety rather than assuming that every rider should always unclip the same side.
Low release tension can support learning, but excessively weak retention may allow unintended disengagement under some conditions. Check the specific pedal manufacturer’s guidance and increase tension only when appropriate for reliable engagement and release.
Once clipping and unclipping are automatic, reassess cleat alignment, available float, foot movement and comfort during normal rides. Do not assume that increasing spring tension improves rotational stability or reduces knee strain; the effect depends on the pedal mechanism.
For your next ride, prioritise reliable foot release and a comfortable, documented cleat position. If inner-knee pain continues despite sensible adjustments, stop chasing increasingly small changes and seek an appropriate bike-fit and clinical assessment.
Can cleat float eliminate inner-knee pain completely?
Cleat float can accommodate natural foot rotation and may improve comfort when rotational restriction contributes to symptoms. However, scientific evidence does not establish that any particular float setting reliably eliminates medial knee pain. Saddle position, workload, previous injury and other factors may also contribute. Persistent pain warrants appropriate assessment.
How can you tell if your heel is reaching the limit of cleat float?
You may notice the shoe encountering a distinct rotational stop when the heel turns inward or outward while engaged. A controlled observation on a stationary trainer can help identify the available movement, provided the bike is securely supported. Do not force the foot against the stop. Repeated contact during normal pedalling suggests that cleat orientation and available float deserve review.
Should left and right cleats be positioned symmetrically?
Not necessarily. Foot orientation, movement patterns and anatomical characteristics can differ between sides. Each cleat should be checked against its corresponding foot and the rider’s comfortable pedalling pattern. Visually symmetrical cleat positions are not proof of biomechanical symmetry, while substantial asymmetry or ongoing discomfort may justify professional assessment.
Does tightening pedal release tension reduce cleat float?
Not generally. Release tension primarily describes the force needed to disengage the shoe, whereas float describes movement permitted while engaged. Their mechanical relationship varies between pedal designs. Follow the manufacturer’s instructions rather than assuming that increasing release tension reduces rotational freedom or improves knee comfort.
When should worn cleats be replaced instead of adjusted?
Replace cleats when wear or damage exceeds the manufacturer’s limits, engagement or release becomes unreliable, or the retention surfaces are visibly compromised. Replacement intervals depend on the system and usage. Record the existing position before removal, install compatible replacements according to the manufacturer’s instructions and verify engagement and release before returning to normal riding.