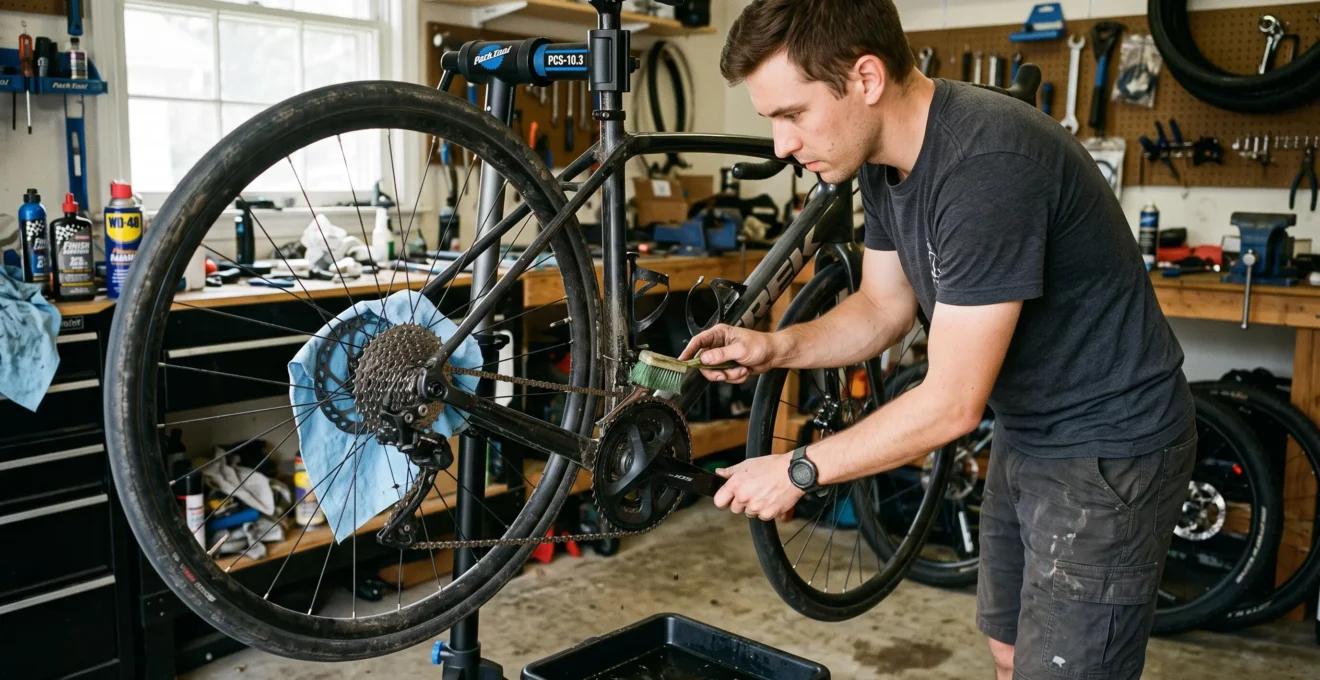
A dirty bicycle chain needs cleaning, but flooding the entire drivetrain with degreaser can create problems far more expensive than a little chain noise. Cleaner reaching disc brake pads can compromise stopping power, while aggressive washing around bearing seals risks removing the grease those components need to survive.
The safer approach is controlled application: protect the brakes, remove accumulated grime from the surrounding drivetrain, clean the chain without soaking nearby components, then rinse or wipe according to the product instructions. Allow the chain to dry before applying fresh lubricant, and remove the excess rather than leaving the outside visibly oily.
Biodegradable degreasers can work well in this routine, provided their compatibility, rinsing requirements and disposal instructions are respected. Whether the bike lives in a flat, tackles wet commuting roads or accumulates dust on dry rides, the goal is the same: remove abrasive contamination without unnecessarily stripping lubricant from protected parts.
Safe chain degreasing: the essentials
- Shield disc rotors and calipers before cleaning. Apply degreaser to the chain or cleaning brush, not indiscriminately across the drivetrain.
- Clean cassette cogs, chainrings and derailleur pulleys before the chain so old grime cannot immediately transfer back onto freshly cleaned links.
- Follow the degreaser’s rinsing instructions, dry the chain, lubricate its internal contact points and wipe away surface excess before riding.
- Why Can Biodegradable Degreasers Still Leave Your Drivetrain Noisy?
- How to Degrease Your Drivetrain in the Right Order to Avoid Re-Contamination?
- Which Should You Choose: Spray Degreaser or a Chain Cleaner Tool if You Live in a Flat?
- The Degreasing Habit That Washes Grease Out of Bearings Over Time
- When Should You Degrease if You Ride in Wet Grit vs Dry Dust?
- The Small Contamination Mistake That Can Cut Braking Power by Half
- How to Apply Chain Lube So It Lasts Longer Without Flinging Onto Your Legs?
- Which Chain Lubricant Stops Grit Paste Build-Up on Commuter Bikes in Rain
Why Can Biodegradable Degreasers Still Leave Your Drivetrain Noisy?
Biodegradable degreasers can leave a drivetrain noisy when cleaner residue, loosened dirt or old lubricant remains inside the chain after washing. Noise can also occur because cleaning has removed the protective lubricant film. The remedy depends on the symptom: contaminated links may need further rinsing, while a clean, dry chain needs fresh lubrication.
Biodegradable does not mean residue-free. Biodegradability describes how a substance breaks down under particular environmental conditions, not whether it evaporates completely or leaves a spotless metal surface.
Degreaser formulations differ considerably. Some use surfactants to suspend oily deposits in water; others rely on solvents or combinations of cleaning agents. A water-rinsable product may leave contamination behind if insufficient water is used, while certain fast-evaporating products are specifically designed without a rinsing step.
It would therefore be misleading to assume that every biodegradable cleaner is plant-based, unusually viscous or more difficult to rinse than a conventional solvent. The formulation and manufacturer’s directions determine the correct method.
According to Finish Line‘s cleaning and lubrication FAQ, cleaning products have different rinsing requirements, and the chain should be dry before fresh lubricant is applied.
If a water-rinsable degreaser remains mixed with loosened grease, the resulting dirty film may be carried around the rollers and sprocket teeth. This can create a gritty sensation, particularly when the drivetrain is turned under light load.
After washing and drying, inspect the chain before lubricating it:
- Gritty scratching: inspect the rollers, side plates and sprocket teeth for remaining particles or cleaner-laden deposits.
- High-pitched squeaking: consider whether the chain is simply clean and insufficiently lubricated.
- Persistent clicking: inspect individual links, drivetrain adjustment and component wear rather than repeatedly adding degreaser.
One practical check is to shift the rear derailleur onto the smallest rear sprocket and slowly turn the cranks by hand. Listen for irregular scratching and inspect the links as they travel through the derailleur pulleys. This is only an initial diagnostic: it cannot reliably identify whether a contaminant is on the plates or inside the rollers, and a smooth-running unloaded chain can still develop noise while riding.
For a cleaner that requires rinsing, use the prescribed amount of water and avoid directing it into bearings or braking components. If the manufacturer permits warmer water, it may help remove certain residues, but do not assume hot water is suitable for every product or component.
Dry the chain thoroughly before evaluating the result. If it is visibly clean but squeaks because it is unlubricated, further degreasing is counterproductive.
Once the chain is genuinely clean, the next risk is transferring old grime straight back onto it from surrounding drivetrain components.
How to Degrease Your Drivetrain in the Right Order to Avoid Re-Contamination?
Clean the cassette, chainrings and derailleur pulleys before giving the chain its final clean. This keeps accumulated grease and grit from immediately transferring onto clean links. Protect the disc brakes first, use controlled amounts of cleaner, and dry the chain before lubrication. Treat the chain as the final drivetrain cleaning stage.
One common mistake is concentrating entirely on the chain while ignoring the parts that contact it. A spotless chain passing through dirty derailleur pulleys picks up contamination almost immediately.
The lower pulley is particularly easy to overlook. Its teeth can accumulate compacted deposits of old lubricant and road grit, while the upper pulley may retain dirt in the spaces between teeth and around its edges.
Cleaning order matters because the components share the same moving contact surfaces. A practical sequence is:
- Protect the brakes. Fit an appropriate protective cover over the rotor and caliper, ensuring no contaminated fabric touches the braking surfaces. Removing the wheel is another option if the brake manufacturer permits the necessary handling precautions.
- Remove heavy deposits. Use a brush or plastic scraper to lift compacted grime from cassette teeth and derailleur pulleys. Avoid pushing debris into pulley bearings or the freehub.
- Clean the chainrings. Brush the tooth profiles and exposed faces, taking particular care around the crank and bottom bracket.
- Clean the chain last. Apply compatible degreaser through a brush, cloth or enclosed chain-cleaning tool. Work it through the links without saturating surrounding assemblies.
- Rinse or remove cleaner as directed. Collect runoff, dry the chain thoroughly and apply fresh lubricant only when the cleaning process is complete.
Park Tool’s chain-cleaning procedure describes using a dedicated chain scrubber or stiff brush, cleaning the surrounding drivetrain components, protecting the workspace and drying the chain before relubrication. The exact cassette-first sequence above is a practical workflow to reduce re-contamination, rather than a mandatory manufacturer-specified order.
A protective rag must remain clean and positioned so that dirty liquid cannot soak through onto the rotor. A purpose-made rotor cover can provide more predictable protection, but it still needs to fit correctly and remain in place.
After cleaning, remove pooled water from accessible drivetrain surfaces with a clean cloth. Cassette and chainring surfaces can finish air-drying, but do not leave water trapped inside the chain before lubricating it. A dry cloth, adequate ventilation and sufficient drying time reduce the chance of sealing moisture beneath new lubricant.
Five checks before calling the drivetrain clean
- Cover the disc rotor and caliper with clean protection; confirm that the braking surface is completely shielded from cleaning runoff.
- Brush deposits from cassette teeth, chainrings and derailleur pulleys; confirm that no thick black buildup remains on accessible teeth.
- Clean the chain with a controlled application of degreaser; check that visible grit has been removed from the links.
- Complete the product-specific rinsing procedure and dry the chain; verify that no standing liquid or cleaner residue remains.
- Lubricate the dry chain and wipe away excess; confirm that the outside of the links is not visibly dripping or heavily coated.
This process is equally applicable to bikes cleaned outdoors or indoors, although the amount of liquid and the equipment used become especially important in a flat.
Which Should You Choose: Spray Degreaser or a Chain Cleaner Tool if You Live in a Flat?
A clip-on chain cleaner is usually the more manageable choice in a flat because it contains much of the cleaning fluid within a small device. Spray degreaser can be faster and useful for targeted cleaning, but overspray, runoff and ventilation become greater concerns. Neither option eliminates the need for floor protection, waste collection or brake shielding.
The practical difference is less about absolute cleaning power and more about controlling where the product goes.
A spray bottle can deliver cleaner directly to exposed chain sections or a brush. However, droplets can travel beyond the intended contact area, and excess fluid may drip onto the floor, rotor, tyre or nearby furniture.
An enclosed chain-cleaning device surrounds a short section of chain with brushes and a reservoir. Backpedalling moves the links through the cleaner while much of the contaminated fluid stays inside the tool. The device itself then needs emptying, washing and drying.
The most useful comparison for someone without a dedicated workshop is therefore operational rather than purely mechanical.
| Practical factor | Spray degreaser | Clip-on chain cleaner |
|---|---|---|
| Liquid containment | Greater potential for overspray and drips | Much of the liquid stays in the reservoir |
| Cleaning access | Useful for specific external surfaces and brushes | Designed primarily for the chain |
| Indoor workspace | Needs particularly careful application and ventilation | Generally easier to contain with a tray underneath |
| Post-cleaning work | Clean the nozzle, cloths and any affected surfaces | Empty, wash and dry the device |
| Storage | Store the container according to its label | Store both cleaner and thoroughly dried tool |
| Main drawback | Uncontrolled droplets or runoff | Dirty reservoir and brush maintenance |
For a small indoor workspace, place a reusable drip mat beneath the bike and a shallow collection tray directly below the chain. Prepare nitrile gloves, cleaning brushes, separate drivetrain and brake cloths, and a sealable container suitable for collected waste.
Keep the space ventilated according to the cleaner’s safety instructions. Water-based does not automatically mean odourless, harmless to inhale or suitable for use in every enclosed room. Where adequate ventilation and spill containment cannot be provided, choose another cleaning location.
Biodegradable is not the same as drain-safe. Once a cleaner has removed petroleum-derived lubricant, metal particles and road grime, the used liquid contains substances beyond the original formulation.
Collect dirty solvent or cleaning solution and follow the product’s disposal directions and applicable local waste rules. Park Tool specifically advises collecting used cleaning solvent and consulting local authorities about disposal rather than assuming it can go down household plumbing.
For residents in flats, a clip-on cleaner paired with a drip tray is a sensible default. A brush with a small, controlled amount of compatible degreaser may be just as practical for occasional maintenance.
Once the mess is contained, the next priority is making sure cleaner cannot reach the lubricant protected by bearing seals.
The Degreasing Habit That Washes Grease Out of Bearings Over Time
Repeatedly flooding the drivetrain with degreaser is a risky habit, especially near bearing seals, the freehub and the bottom bracket. Cleaner directed into these areas can compromise protective grease if it penetrates their sealing systems. The issue is not ordinary chain cleaning; it is unnecessary exposure of components that are not meant to be solvent-washed internally.
Wheel hubs, freehubs, bottom brackets and some derailleur pulleys depend on grease or another specified lubricant around their internal moving parts. Bearings and seals vary by design, so resistance to water and cleaning products is not universal.
When a degreaser reaches protected grease, it may soften, dissolve or displace some of that lubricant, depending on the chemical formulation and bearing construction. If enough protective lubricant is lost, moisture and contaminants have a greater opportunity to contribute to wear or corrosion.
This does not establish that degreaser routinely travels along the bicycle chain into the hub bearings. The more defensible concern is direct exposure from sprays, soaking, runoff and pressure washing around vulnerable seals and openings.
SRAM‘s AXS bike care and maintenance instructions recommend soap and water for relevant electronic components, warn that harsh degreasers can damage seals and advise against directing pressure washing at seals and bearings.
“Harsh degreasers will lead to damaged seals.”
Those instructions concern the components covered by SRAM’s documentation. They should not be interpreted as proof that every degreaser damages every seal or that all bearing types have identical cleaning requirements.
For targeted cleaning, apply the product to a brush, cloth or chain-cleaning device. Keep solvent application away from hub seals, bottom bracket interfaces, derailleur pivots and freehub openings. Avoid spraying upward beneath the chainring toward the crank assembly or flushing liquid toward the rear hub.
Position the bike and collection tray so runoff falls away from bearings rather than pooling against them. If a component needs deeper cleaning, follow its own service procedure rather than flooding the surrounding area.
Afterward, turn the crank gently and inspect the wheels and freehub for unfamiliar behaviour. New roughness, abnormal resistance, unexpected lateral movement or changes in freehub engagement warrant investigation.
A change in freehub clicking sound alone does not prove that grease has washed out; sound varies with design and lubricant. Similarly, crank play may have causes unrelated to cleaning. Do not attempt to inject grease into an unfamiliar sealed assembly without consulting its service instructions.
Once cleaner is restricted to the surfaces that actually need attention, it becomes easier to decide when a complete degrease is necessary at all.
When Should You Degrease if You Ride in Wet Grit vs Dry Dust?
Wet, gritty riding usually calls for more frequent drivetrain cleaning than riding on relatively clean, dry roads. Moisture can help road grit adhere to lubricated surfaces, creating a persistent abrasive mixture. In dry conditions, a light dusty coating may only need brushing and wiping. Base the decision on contamination, not a universal mileage interval.
After a wet commute, inspect the chain around its rollers, side plates and contact points with the sprockets. Dirty water, road particles and lubricant can combine into a grey or black paste that remains on the drivetrain after the surface water evaporates.
Under continued movement, hard particles trapped between contacting surfaces can contribute to mechanical wear. The risk depends on the type and amount of contamination, the lubricant, and whether dirt has reached loaded internal contact points.
Dry dust is not automatically harmless or non-abrasive. Fine mineral particles can still cause wear, particularly if they enter lubricated joints. However, a light powdery deposit sitting on exposed surfaces does not necessarily justify stripping the entire chain.
A simple inspection helps distinguish the two situations:
- Sticky black paste: wipe the chain and examine the rollers and teeth. If contamination persists, a more thorough cleaning or degrease may be appropriate.
- Dry powdery film: brush away loose particles and wipe the chain. Relubricate according to its condition and the product instructions.
- Visible gritty particles: remove them before applying more lubricant, even if the weather has been dry.
- Rust, persistent squeaking or stiff links: inspect for inadequate lubrication, corrosion or mechanical problems instead of assuming that more degreaser is the answer.
Use a clean cloth rather than running bare fingers along a potentially sharp, dirty chain. With the drivetrain stationary, pinch a section of chain lightly through the cloth and inspect the residue it picks up.
Full degreasing removes existing chain lubricant as well as contamination. Repeatedly stripping a chain that only needs an external wipe creates extra work and increases the importance of restoring lubricant to the internal contact points.
After a muddy or heavily contaminated ride, cleaning before deposits harden can make removal easier. The priority is to remove grit and moisture promptly, not necessarily to perform a chemical degrease after every rainy journey.
For a lightly wet chain, wiping, drying and replenishing lubricant as required may be sufficient. Heavy embedded contamination may justify a more complete cleaning procedure.
Outdoor storage also matters. A bike left in continuing rain can develop corrosion even if it was cleaned after the previous ride. Its maintenance schedule should reflect exposure between rides as well as conditions during them.
Whatever the riding conditions, take extra care with the disc brakes: the cleaning stage can create a safety problem if contaminated liquid reaches the pads or rotors.
The Small Contamination Mistake That Can Cut Braking Power by Half
A small amount of lubricant or degreaser reaching a disc brake rotor or pad can significantly impair braking. Reusing an oily drivetrain rag on a rotor is a particularly avoidable mistake. The loss is not predictably 50%: actual effects depend on the contaminant, pad material, brake condition and operating circumstances.
Disc brakes rely on controlled friction between the rotating rotor and stationary pads. Oil or grease on those contact surfaces can interfere with the friction needed to slow the wheel.
A contaminant may transfer from a rotor to the pad during braking. Depending on the pad material, the substance and the degree of exposure, contamination may be difficult to remove completely from the pad.
The risky moment often comes after the main cleaning job. A rider carefully avoids spraying the brakes, then uses the same cloth that wiped the oily chain to polish the rotor. Handling the braking track with greasy fingers creates a similar avoidable risk.
Skin contact does not guarantee a measurable loss of braking performance, but avoiding unnecessary contact with the braking track remains good maintenance practice.
Prevention is straightforward:
- Keep drivetrain cloths and brake-cleaning cloths separate.
- Protect rotors and calipers before degreaser is applied.
- Handle rotors by the wheel or other suitable non-braking surfaces where possible.
- Wear clean gloves when working close to the braking track.
- Keep chain lubricant bottles, brushes and applicators away from exposed pads.
Shimano’s hydraulic disc brake dealer’s manual warns that oil or grease on pads and rotors can impair braking. For the models covered by that manual, Shimano instructs replacement when oil adheres to the brake pads and specifies approved cleaning approaches for brake-system maintenance.
These instructions are model-specific. Cleaning agents allowed for one brake system may be unsuitable for another, particularly around seals or other sensitive components.
If contamination occurs, stop riding until braking performance has been restored and verified. Inspect the rotor and pads separately. Where the brake manufacturer’s instructions allow it, clean the rotor with suitable isopropyl alcohol and a clean, lint-free cloth.
Oil-contaminated pads may need replacement even when the rotor has been thoroughly cleaned. Sanding is sometimes proposed as a remedy for surface contamination, but it is not a dependable substitute for manufacturer-directed pad replacement, particularly when oil has penetrated the friction material.
Do not assume that an apparently clean rotor means the entire brake is safe. Pads, caliper condition and braking behaviour must also be considered. If braking remains weak, noisy or inconsistent, seek qualified service before riding.
Once braking surfaces are protected and the chain is dry, lubricant application becomes the final maintenance step—and excessive lubricant can undo much of the cleaning effort.
How to Apply Chain Lube So It Lasts Longer Without Flinging Onto Your Legs?
Apply a small amount of suitable lubricant to the chain’s internal contact points, allow it to penetrate or dry according to the product instructions, and thoroughly wipe away external excess. Applying lubricant to the inner run of the chain while slowly backpedalling helps control placement. A heavily coated outer surface is unnecessary and encourages dirt accumulation and splatter.
Chain lubrication is primarily about the moving interfaces within each link, not creating a glossy coating over the exterior plates.
On a conventional roller chain, lubricant must reach the internal contact surfaces involved in articulation. Applying a controlled drop at each roller area can help deliver lubricant to these locations, although the exact quantity depends on the product and applicator.
A practical method is to position the dispenser above the lower chain run and slowly rotate the cranks backwards by hand while applying lubricant. Keep the nozzle close enough to control placement without catching it in moving components.
Work around the entire chain, then allow the lubricant the dwell or drying time specified by its manufacturer. Some oil-based wet lubricants remain liquid during use; others contain carriers that need to evaporate, while certain wax emulsions require a longer drying period.
Wiping is part of lubricating. After the appropriate application period, draw the chain through a clean, dry cloth to remove excess product from the external plates and exposed roller surfaces.
This does not mean removing the lubricant from inside the chain. The intention is to leave protected internal interfaces while avoiding an unnecessary outer film that attracts contamination.
Excess chain oil can transfer to clothing through direct contact, and droplets can be displaced as the drivetrain rotates. A visibly wet chain exterior is therefore a useful warning that too much product may have been applied.
Applying lube immediately before departure may also be unsuitable for products requiring drying time. For those formulations, completing lubrication the previous evening can be more convenient. Do not assume every lubricant needs the same waiting period.
If departure is unavoidable, wipe external excess carefully, but do not treat wiping as a replacement for the manufacturer’s required curing or drying process.
After application, turn the crank slowly and inspect the chain. It should move freely without large droplets collecting at the lower run, pulley teeth or chainring. Ensure no lubricant has reached the disc rotor or pads.
The application method matters, but the lubricant formulation also needs to suit the bike’s weather exposure and the time available for maintenance.
Key takeaways before choosing a lubricant
- Water resistance is valuable for wet commuting, but persistent oily films can retain road grit unless the chain is regularly wiped.
- Lubricants that leave a drier coating may keep exposed surfaces cleaner, although their performance depends on rain exposure and reapplication requirements.
- The best practical choice also depends on whether the bike is stored outdoors and how consistently the rider can inspect, clean and relubricate it.
Which Chain Lubricant Stops Grit Paste Build-Up on Commuter Bikes in Rain
No chain lubricant completely prevents gritty buildup during wet commuting. A water-resistant wet lubricant is often a practical option for frequently ridden bikes exposed to rain, provided the chain is wiped regularly. Dry-film and wax-based treatments can reduce persistent oily residue, but may require more careful preparation or reapplication after severe wet conditions.
Wet roads introduce more than water. Tyres and passing traffic can distribute fine road particles, and the drivetrain can collect moisture mixed with existing grease, lubricant and dirt.
With repeated exposure, the mixture can develop into a persistent grey or black paste. Its exact composition varies, and it should not automatically be described as a chemical emulsion: some deposits are simply suspended particles and water mixed with lubricant.
What matters mechanically is whether contamination remains around the chain’s loaded contact surfaces.
Wet lubricants are generally formulated to remain effective in damp conditions. Their oily character can help resist wash-off, but the exposed film may also retain particles. Regular external wiping reduces the amount of material available to build up.
Dry lubricants commonly leave a less oily surface after application. Some use wax or other film-forming materials, and their resistance to prolonged rain varies by formulation. Not every product labelled dry lubricant behaves identically.
Wax-based systems offer another approach. Properly prepared wax-treated chains can have comparatively clean exposed surfaces because they do not depend on a persistent external oil film in the same way as conventional wet lubricants.
However, preparation requirements can be substantial. Hot-wax treatment commonly involves removing incompatible oils before treatment, while drip-applied wax products have their own chain-preparation and drying requirements.
Rain exposure, treatment durability and reapplication intervals should be assessed according to the specific product rather than assuming wax always outperforms wet lubricants under every commuting condition.
The following grid is a practical selection guide, not an independent comparative product test.
| Riding situation | Practical starting point | Maintenance priority |
|---|---|---|
| Frequent rain, bike stored outdoors | Water-resistant wet lubricant compatible with the chain | Remove road grime and moisture regularly; monitor corrosion |
| Occasional rain, bike stored indoors | Wet or suitable dry-film lubricant according to exposure | Inspect after wet rides and replenish when required |
| High-mileage commuting with time for preparation | Consider a compatible wax-based treatment | Follow preparation, drying and renewal requirements carefully |
| Mixed dusty and rainy conditions | Choose by actual exposure and product performance requirements | Prevent dirt buildup rather than repeatedly adding lubricant |
Before selecting a lubricant, consider how many journeys each week involve rain, where the bike remains between rides, and how much maintenance time is realistically available.
A bike kept outdoors faces additional exposure even when stationary. A commuter who brings the bike into a dry storage area can usually manage moisture more directly, although the chain still needs inspection after contaminated rides.
Maintenance consistency matters more than a perfect label. A suitable water-resistant lubricant combined with frequent wiping may be more practical than a sophisticated treatment that cannot be renewed when needed.
For a chain accumulating gritty paste, remove the contamination before applying more product. Adding lubricant over a heavily contaminated surface does not reliably restore clean internal contact points.
For the next maintenance session, start with a protected rotor, a contained cleaning area and an inspection of the chain’s actual condition. Clean only as much as needed, allow the chain to dry, then apply a weather-appropriate lubricant and wipe the exterior before the next ride.
Can biodegradable chain degreaser be used on any bicycle drivetrain?
Not automatically. Compatibility depends on the formulation and the materials or components it contacts. Follow the cleaner manufacturer’s instructions and the bicycle component manufacturer’s restrictions. Avoid harsh degreasers around sensitive seals, electronic components and brake assemblies where their use is not approved.
Should the chain be removed for a thorough degrease?
Chain removal is not essential for routine cleaning. A chain-cleaning tool or suitable brush can clean an installed chain. More intensive off-bike cleaning may be useful in some circumstances, but removal and reinstallation must follow the chain manufacturer’s requirements for connecting pins, quick links and reuse.
Is it safe to rinse a bicycle chain with water after degreasing?
Yes, when the degreaser is designed to be rinsed with water and the bicycle is cleaned without forcing water into bearings, seals or other sensitive components. Some degreasers have different removal requirements. Follow the product label, protect the brakes and dry the chain before lubrication.
Can contaminated disc brake pads recover after the rotor is cleaned?
Cleaning the rotor does not necessarily restore contaminated pads. Oil may remain within the pad material. Shimano requires replacement of oil-contaminated pads for models covered by its cited hydraulic brake manual. Follow the instructions for your specific brake system and do not ride until safe braking performance has been confirmed.
Does a chain need a full degrease every time it gets wet?
No. A lightly wet chain may only require wiping, drying and lubricant replenishment according to its condition. Heavy grit, sticky deposits or persistent contamination justify more thorough cleaning. Judge the amount of embedded dirt and the state of lubrication rather than automatically degreasing after every rainy ride.