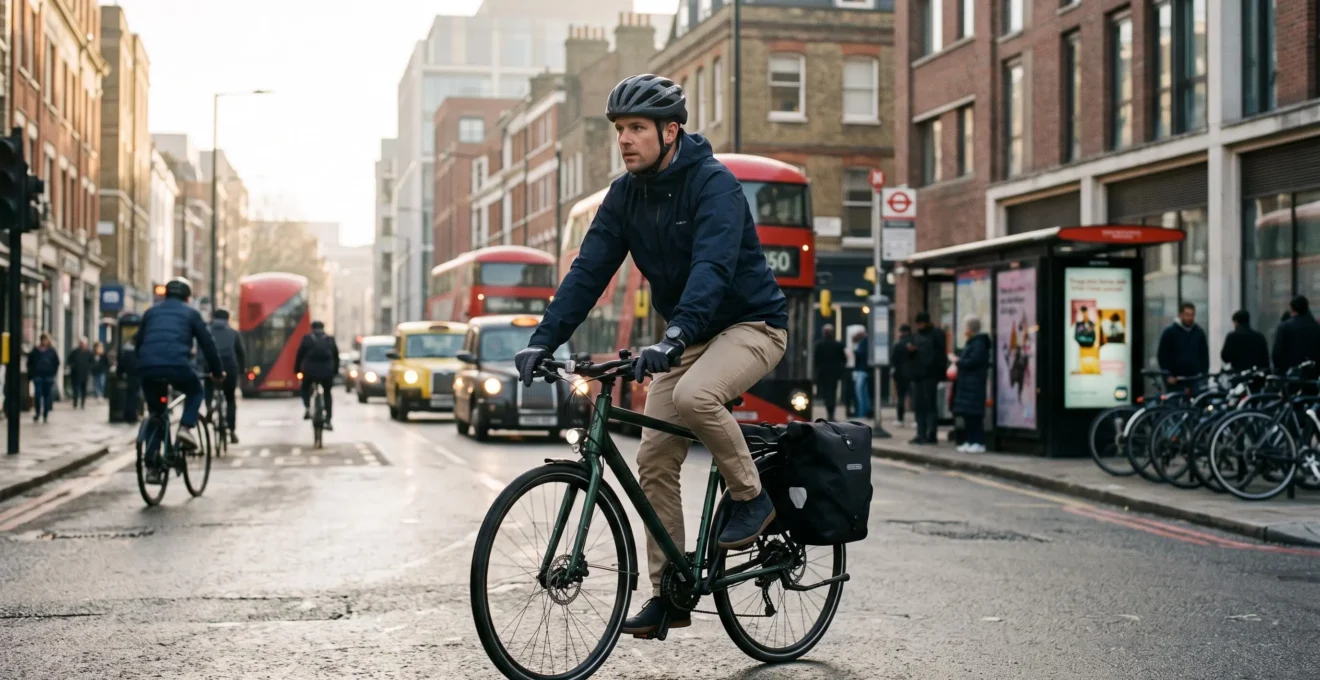
Daily urban cycling becomes difficult when the ride is only one part of an already crowded working day. Finding clean clothes, checking the weather, securing a bicycle outside the office and getting home after dark can turn an enjoyable journey into a complicated daily commitment.
The solution is not to become more disciplined. It is to make cycling the easiest reasonable choice on ordinary days, including mornings when time is short and evenings when energy is low. That means designing a routine around both journeys, preparing for predictable disruptions and keeping an alternative available when conditions genuinely make cycling impractical.
A sustainable bike commute also needs to fit the rider’s actual environment. Secure parking, public transport access, changing daylight and carrying requirements differ between cities and across English-speaking countries. Instead of pursuing a perfect commuting streak, build a repeatable system that makes cycling convenient, secure and comfortable often enough to last.
Daily cycling habits that survive busy schedules
- Reduce preparation friction with a fixed equipment station and a short evening reset routine.
- Choose full cycling or mixed-mode commuting based on measured journey times, fatigue and reliability.
- Make secure parking, changing weather and visibility part of your normal routine rather than last-minute decisions.
- Why Do People Quit Daily Cycling After 3 Weeks Even When They Enjoy It?
- How to Build a « Grab-and-Go » Commute Setup in 30 Minutes at Home?
- Which Should You Choose: Full Bike Commute or Mixed-Mode if You’re Short on Time?
- The Commuter Parking Habit That Makes Your Bike an Easy Target
- When Should You Switch Your Commute Kit for Darker Evenings to Stay Comfortable?
- The Locking Mistake That Makes Cargo Bikes Disappear Even in « Safe » Areas
- Which Should You Choose: Reflective Ankle Bands or Reflective Tyres for Night Commutes?
- Which Cargo Bicycle Works Best for a Weekly Grocery Haul Without Feeling Tippy?
Why Do People Quit Daily Cycling After 3 Weeks Even When They Enjoy It?
People can abandon daily cycling despite enjoying the ride because the surrounding logistics become harder to manage than the journey itself. Unpredictable weather, morning delays, parking worries and evening fatigue create repeated friction. Three weeks is not a universal quitting point: cycling consistency depends on personal circumstances, and habit formation varies considerably between individuals.
The distinction is between enjoying an activity and making it automatic. A pleasant ride provides immediate satisfaction, but that feeling does not automatically solve the preparations required before leaving home or the responsibilities waiting after arrival.
Research supports caution around fixed habit-formation deadlines. In Lally et al.’s habit formation study in the European Journal of Social Psychology, participants developing everyday behaviours showed substantial variation in how quickly their actions approached automaticity. The research was not specifically about bicycle commuting, so it cannot establish a typical cycling dropout date.
18–254 days
The range of times observed to reach 95% of modelled habit automaticity in a real-world study of daily behaviours. This is not a universal cycling habit-formation period.
Lally et al., European Journal of Social Psychology.
For commuters, three recurring problems deserve separate attention:
- Time collapse: searching for equipment, changing clothes or dealing with a late departure makes cycling feel too slow. A prepared launch station and realistic departure buffer address this problem.
- Theft anxiety: uncertainty about leaving a bicycle unattended creates stress throughout the working day. Verified parking and a consistent locking method matter more than motivational reminders.
- Weather discomfort: arriving wet, cold or overheated makes the next ride less appealing. Appropriate clothing, a dry change and an alternative journey plan reduce the impact.
To identify the actual obstacle, conduct a friction audit over several commuting days. Write down every action from deciding to cycle until sitting on the saddle: checking tyres, finding keys, packing clothes, moving the bike and leaving home. Repeat the process for workplace arrival and the evening journey.
Flag any repeated step that creates more than a minute of avoidable hassle. This one-minute threshold is a practical self-audit rule, not a research-established predictor of quitting. Look for clusters of small delays rather than assuming a single dramatic problem is responsible.
Evaluate the complete door-to-door experience, including storage, changing, parking and the trip home. A commute that feels wonderful while riding can still be unsustainable if everything around it requires constant effort.
Once the recurring obstacle is visible, preparation becomes a more useful strategy than trying to summon enthusiasm every morning.
How to Build a « Grab-and-Go » Commute Setup in 30 Minutes at Home?
Create a fixed launch station near your door where the helmet, charged lights, lock, keys and packed work bag always belong. Spend 30 minutes assigning each item a place, establishing a charging routine and organising clothing. The objective is not zero preparation, but fewer decisions before both daily journeys.
A launch station works because it turns several independent tasks into one familiar sequence. Instead of remembering where everything is, a commuter can check a single location before leaving.
Choose a space that fits your home: a wall hook, a small shelf or a basket near the bicycle storage area. Keep frequently used items together without obstructing exits, walkways or safe battery charging.
Start with a minimal viable commuting kit: an appropriate helmet, lights, reliable lock, keys, a bag suited to the bike, weather-appropriate layers and the work essentials actually needed that day. Add equipment only when experience shows a recurring gap.
The following setup divides the initial 30 minutes into manageable actions. The timing is a suggested planning exercise rather than a measured standard.
Your 30-minute commuter launch-station checklist
- Minutes 0–6: Choose the permanent equipment location and clear it. Deliverable: one accessible station with designated spaces for helmet, lock and keys.
- Minutes 6–12: Check the front and rear lights, identify their charging requirements and place charging accessories safely. Deliverable: a working lighting setup and a defined charging location.
- Minutes 12–19: Pack the bag with essential work items and the next change of clothes. Deliverable: one ready-to-carry commuter bag.
- Minutes 19–25: Organise a simple rotation for clean clothes, wet equipment and laundry. Deliverable: separate places for ready-to-wear and used items.
- Minutes 25–30: Rehearse leaving and returning, then write down anything that still causes hesitation. Deliverable: a short morning departure sequence and evening reset routine.
The evening reset matters as much as the morning departure. When arriving home, return the lock and helmet to their places, inspect the lights’ battery status, unpack used clothing and check whether anything needs replacing before the next ride.
If the bicycle or equipment is wet, allow suitable items to dry in a safe location rather than sealing everything into a damp bag. Follow the manufacturer’s instructions when charging batteries or electronic accessories.
Avoid turning this station into a storage project. Multiple spare outfits, elaborate organising systems and equipment for unlikely situations can introduce new work instead of eliminating it.
With equipment organised, the next important decision is whether cycling the entire distance actually fits the time and energy available.
Which Should You Choose: Full Bike Commute or Mixed-Mode if You’re Short on Time?
Choose a full bike commute when its measured door-to-door time is predictable and the effort remains manageable in both directions. Choose mixed-mode travel when combining cycling with public transport reduces a draining section without creating unreliable connections. The best option is the one you can repeat, not necessarily the one with the most cycling.
A full cycling journey removes transfers and gives the rider control over departure time. However, distance, hills, weather and the physical demands of a second journey can make an otherwise straightforward commute exhausting.
Mixed-mode commuting introduces flexibility. Cycling to a station, taking a train or bus and completing the remaining distance on foot or by bike can make a longer commute more manageable.
That convenience depends on the transport network. Bicycle carriage rules, peak-hour restrictions, folding-bike allowances and available bicycle spaces vary by operator and jurisdiction. Check the applicable rules before building a routine around carrying a bicycle aboard.
The following comparison focuses on the practical costs that matter during two busy daily journeys.
| Decision factor | Full bike commute | Mixed-mode commute |
|---|---|---|
| Door-to-door time | Continuous journey, but includes changing, parking and locking. | May reduce riding distance but adds transfers and waiting. |
| Energy at day’s end | Requires enough capacity for both cycling legs. | Can reduce exertion if the most demanding section uses transit. |
| Disruption exposure | Weather, route closures and mechanical problems. | Weather plus delays, cancellations and missed connections. |
| Bicycle security | Requires secure parking at the destination. | May shift parking to a station or eliminate it with an accepted folding bike. |
| Daily preparation | One continuous transport routine. | Requires coordinating transport schedules and bicycle arrangements. |
Consider a hypothetical rider who enjoys cycling to work but struggles with the return journey after a demanding shift. Cycling the easier direction and using public transport for the other may be attractive, provided there is a workable arrangement for the bicycle. This might involve a folding bike accepted aboard transit, or leaving a conventional bicycle securely at an appropriate location and returning for it later.
One cycling leg still counts as a sustainable routine. The goal is dependable transport rather than proving that every kilometre must be ridden.
Before settling on either arrangement, run a one-week comparison. Log departure and arrival times, including transfers, changing and locking. Record evening fatigue using a consistent personal scale, and note missed connections, weather disruptions or parking difficulties.
Compare actual outcomes rather than perceived speed. A route that feels faster while moving may lose its advantage through waiting, parking or extra preparation.
Whichever travel pattern wins, the convenience disappears quickly if arriving at the destination brings a new worry: whether the bicycle will still be there afterward.
The Commuter Parking Habit That Makes Your Bike an Easy Target
Leaving a bicycle in the same highly visible location at predictable times can make its presence and security arrangements easy to observe. This does not establish that routine parking independently causes theft, but it is a reason to examine the whole parking setup. Lock quality, attachment points, removable components and storage conditions matter more than familiarity with a location.
Regular commuters naturally develop a favourite parking spot. It may be close to the office entrance, convenient for coffee or directly beside a transit stop. Over time, convenience can discourage checking whether a more secure option is available.
A predictable parking pattern creates a plausible opportunity for someone to observe the bike, lock arrangement and how long it remains unattended. However, the available evidence does not quantify the added theft risk of parking in the same place every day.
The more actionable issue is consistent locking quality. Even a substantial lock offers limited protection if it secures an easily removable part, leaves a quick-release wheel exposed or attaches the bicycle to an object that can be lifted, dismantled or moved.
According to Police.uk’s official bicycle theft prevention advice, riders should use two quality locks, secure the frame and both wheels to a suitable cycle stand, remove easily detachable components and favour appropriate secure parking in well-lit locations.
Build a small selection of acceptable parking locations rather than depending blindly on one rack. Where practical, identify two or three suitable alternatives, prioritising properly anchored racks, controlled-access facilities and locations with good natural surveillance.
Changing locations should never mean selecting a weaker attachment point merely for variety. A secure, access-controlled workplace facility may be preferable to rotating between exposed street racks. Cameras and lighting are useful considerations, not guarantees against theft.
Short errands deserve a consistent rule. The thought that a stop will take only five minutes can encourage improvised locking, but the bicycle remains unattended regardless of the intended duration.
Before stopping, ask whether the frame and wheels can be secured appropriately to an immovable object. If reliable locking is unavailable, consider a different stopping point, a facility that permits the bike inside or an alternative journey arrangement.
Make the sequence automatic: assess the stand, secure the frame and wheels, check the locks, remove detachable valuables and confirm that nothing can simply be lifted away.
Once parking is dependable, the next seasonal challenge is keeping both journeys comfortable and visible as daylight changes.
When Should You Switch Your Commute Kit for Darker Evenings to Stay Comfortable?
Switch to your darker-evening commuting kit when your usual return journey approaches or extends beyond local civil twilight. Check the sunset and twilight times for your location against your actual finishing time, rather than relying on a fixed calendar date. Prepare lighting, clothing and tyres before the first unexpectedly dark commute.
The relevant moment differs between cities, working schedules and seasons. A rider finishing work in daylight may need a different setup from someone on the same route leaving after sunset.
Civil twilight is a useful planning signal because the remaining natural light is fading. It is not necessarily the legal threshold for bicycle lighting. Local regulations may define lighting obligations by sunset, darkness or other conditions, and poor visibility can require lights earlier.
Begin with lighting runtime and charging reliability. For a twice-daily commute, estimate the duration of both journeys and select lights whose usable battery life comfortably covers the expected conditions. Check charge status regularly rather than assuming that the morning journey leaves enough power for the evening.
Use a suitable white front light and red rear light, together with any legally required reflectors. Make sure bags and clothing do not obstruct them. Reflective accessories are supplementary; they cannot replace active lighting.
Next, consider tyre condition. Inspect tread, inflation and visible damage according to the tyre and bicycle manufacturers’ guidance. Wet roads, debris and reduced visibility make an unfamiliar handling problem particularly unwelcome on a tired evening return.
Comfort also changes as daylight fades. Colder air and wind may justify gloves, a wind-resistant outer layer or an additional breathable garment. Clothing should keep the rider comfortable without trapping so much heat that the final part of the journey becomes unpleasant.
Keep a dry layer available when practical. A rider who arrives sweaty in the morning may need different clothing choices from someone cycling home through a cool evening, even when the distance is identical.
Changes in visibility should influence route choice too. A direct route with confusing junction markings or poorly lit intersections may be less appealing after dark than a slightly longer, more predictable alternative.
Before the first routine dark return, make a preparation ride in similar conditions when you are not under time pressure. Check light positioning, visibility at junctions, clothing comfort and how clearly you can identify the route ahead.
Evening visibility is not simply about being seen by drivers. It also means having enough light to recognise road conditions and being able to ride without rushing through unfamiliar hazards.
Seasonal preparation removes a major source of commuting friction, but riders carrying higher-value bicycles or larger loads also need security routines suited to their equipment.
The Locking Mistake That Makes Cargo Bikes Disappear Even in « Safe » Areas
Cargo-bike security becomes inadequate when a rider relies on a single locking point while leaving valuable components or the bicycle’s unusual frame geometry unprotected. A familiar or apparently safe neighbourhood does not remove the risk. Cargo bikes often require a deliberate combination of secure frame attachment, wheel protection, component security and suitable storage.
A cargo bicycle may be longer, heavier and more difficult to position against conventional racks than a standard commuter bike. Its wheels, battery, cargo box and accessories may not all be protected by the lock arrangement a rider normally uses.
The first priority is securing the main frame to a genuinely fixed anchor with suitable hardware. A wheel lock that prevents rolling is not equivalent to attaching the bicycle to an immovable object. Protect at least one wheel as part of the arrangement, and ideally secure both wheels using appropriate locks or additional security measures.
Check that the frame geometry permits proper lock engagement and that the anchor cannot simply be lifted over or detached. Do not assume a lock is effective because it appears heavy or expensive.
Removable components require separate attention. Depending on the bicycle’s design, these may include:
- Detachable batteries and displays.
- Removable lights or electronic accessories.
- Loose items stored inside a cargo box.
- Child seats or attachments that can be removed without substantial tools.
Remove valuables where practical, following manufacturer instructions for electrical components and attachments. Items that remain fitted should be secured using methods compatible with the bicycle.
Parking duration changes the strategy. During a short shopping stop, an accessible, correctly anchored rack may be the practical option. For all-day workplace storage, a controlled-access bicycle facility can reduce exposure. Overnight, suitable indoor storage or a properly installed ground anchor with appropriate locks may be preferable to leaving the bike outside.
The earlier Police.uk guidance provides general bicycle-security principles, but it is not a cargo-bike-specific security standard. Cargo-bike owners should also consider manufacturer guidance for their frame and accessories.
Insurance creates another reason to inspect the details. Requirements differ between policies and countries, and some policies may specify acceptable locks, storage conditions, registration or exclusions. Read the actual policy terms rather than assuming that any lock or parking location qualifies.
A cargo-bike security routine must remain practical enough to perform every day. If the arrangement is so complicated that the rider regularly skips it, the system needs simplifying without sacrificing essential protection.
Security makes the bicycle easier to rely on, while a complementary visibility routine helps riders feel prepared for the increasingly common journey home in low light.
Which Should You Choose: Reflective Ankle Bands or Reflective Tyres for Night Commutes?
Reflective ankle bands are a flexible, inexpensive visibility accessory for riders who want something they can add to their existing kit. Reflective tyres provide a permanent reflective feature at wheel height without a separate dressing step. Neither replaces lights, and using both can make sense because they highlight different aspects of a moving bicycle.
Ankle bands move with the pedalling action, producing a changing reflective pattern near the rider’s feet. That movement can help communicate that the object on the road is a cyclist, particularly when illuminated by a suitable external light source.
Reflective tyre sidewalls work differently. Their reflective material moves with the wheels and can outline circular shapes when illuminated from an appropriate angle. They require less daily attention than detachable bands, but their effectiveness depends on material condition, illumination and the direction from which the bicycle is viewed.
Neither feature should be treated as universally superior without comparative evidence. The supplied sources do not establish a measured performance advantage for one over the other.
The practical differences are clearer when considered as a commuting decision.
| Commuting factor | Reflective ankle bands | Reflective tyres |
|---|---|---|
| Daily preparation | Must be put on and removed. | Remain fitted to the bicycle. |
| Reflective movement | Follow the pedalling motion. | Follow wheel rotation. |
| Flexibility | Can be transferred between outfits or bicycles. | Specific to the tyres installed. |
| Maintenance consideration | Check that bands remain secure, clean and visible. | Check sidewall condition and the integrity of reflective material. |
| Best practical fit | Riders seeking an easy, low-commitment accessory. | Regular commuters wanting a permanent additional reflective feature. |
For a flexible commuting setup, ankle bands are an accessible starting point. Riders frequently travelling in dark, wet conditions may value reflective tyres as an additional layer, especially when replacing worn tyres with an otherwise suitable model.
Reflectivity depends on illumination. Reflective material returns incident light towards its source, so the benefit changes with the direction of headlights, the material’s placement and the observer’s position. It should not create confidence that every approaching road user will notice the bicycle.
The Department for Transport’s Highway Code rules for cyclists recommend reflective clothing and accessories, including ankle bands. For cycling at night in Great Britain, the Code also specifies lit white front and red rear lights and required reflectors. The exact legal requirements elsewhere must be checked locally.
At side-street junctions, do not assume reflective equipment makes you conspicuous to every approaching vehicle. Adjust speed and road position for the conditions, make yourself observable with appropriate lights and allow for drivers who may not have seen you.
The easiest long-term system combines dependable active lighting, correctly positioned passive reflectors and accessories the rider will actually use consistently.
With a repeatable routine for commuting, visibility and parking, the bicycle may also become useful for regular errands, provided its carrying capacity and handling suit the load.
Key takeaways before choosing a grocery-carrying setup
- Choose a bicycle you can store, park and secure on ordinary commuting days, not just one that accommodates the largest possible shopping trip.
- Test stability with a representative load and learn how its position changes low-speed steering and braking.
- Plan the weekly shopping volume before selecting a cargo format, allowing practical room for awkward or fragile items.
Which Cargo Bicycle Works Best for a Weekly Grocery Haul Without Feeling Tippy?
For weekly groceries, choose a cargo bicycle that carries your typical load low and securely while remaining manageable to steer, park and lock. A front-loader can suit bulky shopping, a longtail can offer a more familiar bicycle format, and a trailer can add capacity to an existing bike. Stability depends on design, loading and rider experience, not simply cargo-bike type.
The feeling that a bicycle is about to tip often emerges when the load shifts, its centre of gravity is high or steering becomes difficult at low speed. Poorly balanced shopping can exaggerate these effects, particularly when starting, stopping or negotiating tight corners.
Frame geometry matters as well. In Paudel and Yap’s cargo-bike handling and loading study in Heliyon, researchers examined eight cargo-bike models across retrofitted, Long-john and Long-tail categories. Their analytical findings show that bicycle design, cargo weight and loading position influence rideability and stability.
The investigation does not establish that every front-loader is more stable than every longtail. Its modelling also did not reproduce all the active rider corrections and real-world shopping conditions that affect everyday handling.
For grocery carrying, the main formats involve different practical compromises.
| Consideration | Longtail | Front-loader (bakfiets) | Bicycle trailer |
|---|---|---|---|
| Typical carrying arrangement | Extended rear rack with bags, baskets or compatible cargo fittings. | Dedicated front cargo platform or box, commonly positioned between the rider and front wheel. | Separate cargo compartment towed behind a compatible bicycle. |
| Bulky groceries | Depends on rack width, bag dimensions and rated capacity. | Can accommodate bulky loads within its box or platform limits. | Depends on trailer dimensions, permitted load and hitch compatibility. |
| Parking footprint | Longer than many conventional bicycles. | Often requires substantial manoeuvring and storage space. | Requires space for both bicycle and trailer when attached. |
| Locking requirements | Secure the frame, wheels and removable cargo accessories. | Account for long-frame geometry and cargo-box components. | Secure the bicycle and trailer against removal or separation. |
| Commute integration | Can work as a regular commuting bicycle if the route and storage allow. | Useful when carrying volume justifies its size and storage requirements. | Can leave the everyday bicycle largely unchanged when the trailer is detached. |
A longtail may suit someone who rides to work every day and occasionally carries substantial groceries. Its riding position can feel more familiar than that of a front-loader, although load height and rear weight distribution require attention.
A front-loader places cargo in a dedicated carrying area and can make packing large shopping bags more straightforward. However, its steering characteristics and overall length can take practice. No single configuration can be assumed to feel equally stable for every rider.
A trailer offers another possibility for commuters who already own a suitable bicycle. It can be detached when shopping capacity is unnecessary, but it adds length, requires a compatible connection and changes how the combination handles during turns, braking and reversing.
Before deciding, estimate a realistic weekly shopping load. Count the usual bags or crates, include bulky goods and consider the heaviest items normally purchased. Compare that requirement with the manufacturer’s stated load limits, including any restrictions for racks, baskets, trailers or the complete bicycle.
For packing, place heavy items low and securely supported, keeping weight centred as far as the bicycle’s design permits. Avoid exceeding individual carrying points or creating an unbalanced load. Distribute groceries according to the manufacturer’s loading instructions rather than assuming the same arrangement works for every cargo design.
Keep fragile items above heavier goods and secure loose contents so they cannot shift into a wheel or interfere with steering. Pack items needed first at home where they can be removed without unloading everything else.
A useful test is to ride an appropriate model with a realistic, securely restrained load in a safe environment before committing to a purchase. Practice starts, stops, slow turns and controlled braking. Check how the bike feels when walking it, using its stand and positioning it at the places where it will actually be parked.
Carrying capacity alone should never determine the choice. A bicycle that handles groceries comfortably but is difficult to store securely or manoeuvre on a daily commute can create the same logistical friction that causes cycling routines to fail.
For the next shopping trip, write down the actual grocery volume, shortlist a format that fits your commute and arrange a practical loaded test where possible. The right setup should make both everyday travel and weekly errands easier to repeat.
How many days a week should a beginner cycle to work?
Start with a frequency that fits your route, fitness, schedule and recovery needs. Choosing a manageable number of commuting days can make preparation easier to practise without forcing every journey onto the bike. Gradually adjust the frequency based on comfort, reliability and your ability to manage both daily legs. There is no universal minimum number of commuting days required to create a lasting habit.
What should you do if the weather changes during the working day?
Keep a compact weather-appropriate layer and a workable alternative journey plan available. Check the forecast before departure and reassess conditions before riding home. Heavy rain, strong wind, poor visibility or other hazardous conditions may justify using another transport mode. The aim is to make a sensible decision without treating a missed cycling leg as a failure.
How can you keep work clothes presentable after cycling?
Carry work clothes separately from damp riding equipment, ideally in a protected compartment or packing pouch. Allow sufficient time to cool down, change and attend to personal hygiene at the destination. On shorter or less demanding journeys, adjusting pace and clothing may reduce the need for a complete change. The most effective approach depends on facilities at work and how much exertion the route requires.
Is it worth cycling to a station if you cannot take your bicycle on the train?
It can be worthwhile when secure bicycle parking is available at the station and the remaining public transport journey is reliable. Compare the combined journey time with other available routes, including the time required to park and retrieve the bicycle. Check station storage arrangements and avoid depending on unattended parking that does not meet your security needs.
How do you restart bike commuting after missing several days?
Identify what interrupted the routine, whether it was weather, equipment, scheduling or fatigue, and solve that specific problem before returning. Check the bicycle and lights, prepare the next journey’s clothing and choose a manageable commuting day. Missing several rides does not establish that a habit has failed; a repeatable reset procedure is more useful than trying to compensate with an unnecessarily demanding ride.